Beginner’s Guide to Drying Oils for Wood Furniture Finish
So, you’ve found a beautiful piece of furniture that’s begging for a little love and a brand-new finish—but where do you even begin? If you’re looking for something natural, easy to work with, and incredibly forgiving (even if it’s your first rodeo), then drying oils might just be your new best friend.
In this guide, I’ll walk you through everything you need to know about this classic finish: from chemistry and history to modern-day application techniques and trusted products. You’ll even learn how to refresh and maintain your finish so your piece stays beautiful for years to come. Let’s dive in!
THIS POST CONTAINS AFFILIATE LINKS TO PRODUCTS. IF YOU PURCHASE PRODUCTS THROUGH THESE LINKS, THEN I MAY RECEIVE A SMALL COMMISSION AT NO COST TO YOU.
I ONLY RECOMMEND PRODUCTS THAT I USE AND/OR HAVE RESEARCHED AND WOULD USE.
What Is a Drying Oil Finish?
In the world of wood finishes, drying oils are the quiet protectors. These finishes soak into the wood grain, filling the pores and hardening through a chemical process called oxidative polymerization. That’s a sciencey of saying that when the oil is exposed to oxygen, it starts to create a cross-linking bond (react) and eventually forms a solid film without the need for synthetic additives (although some modern products may include them). This magical cross-linking film seals out moisture and prevents the wood from molding.
Chemical Composition
Drying oils are triglycerides composed mainly of unsaturated fatty acids. The key players? Linolenic acid, eleostearic acid, and iodine. The more unsaturated these fatty acids are, and the higher the iodine content, the faster and harder the finish cures.
What Chemically Defines a Drying Oil:
| Chemical Feature | Drying Oil Range | Explanation |
|---|---|---|
| Iodine Value (g I₂ / 100g oil) | Greater than 130 | Indicates high unsaturation (double bonds) in fatty acids; necessary for oxidative curing. |
| Polyunsaturated Fatty Acid (PUFA) Content | ≥ 50% total PUFAs | High levels of linolenic (C18:3), eleostearic, or similar acids promote rapid cross-linking. |
| Number of Reactive Sites (Double Bonds) | Typically 2 or more per fatty acid | More double bonds increase polymerization speed and hardness of the dry film. |
| Dominant Fatty Acids | α-Linolenic acid (C18:3), Eleostearic acid | These acids’ multiple double bonds make the oil highly reactive with oxygen in air. |
| Oxidative Polymerization Ability | Strong; forms cross-linked solid film | The oil chemically reacts with oxygen, forming a durable, hard finish upon drying and curing. |
Here’s a quick chemistry comparison of the most popular drying oils:
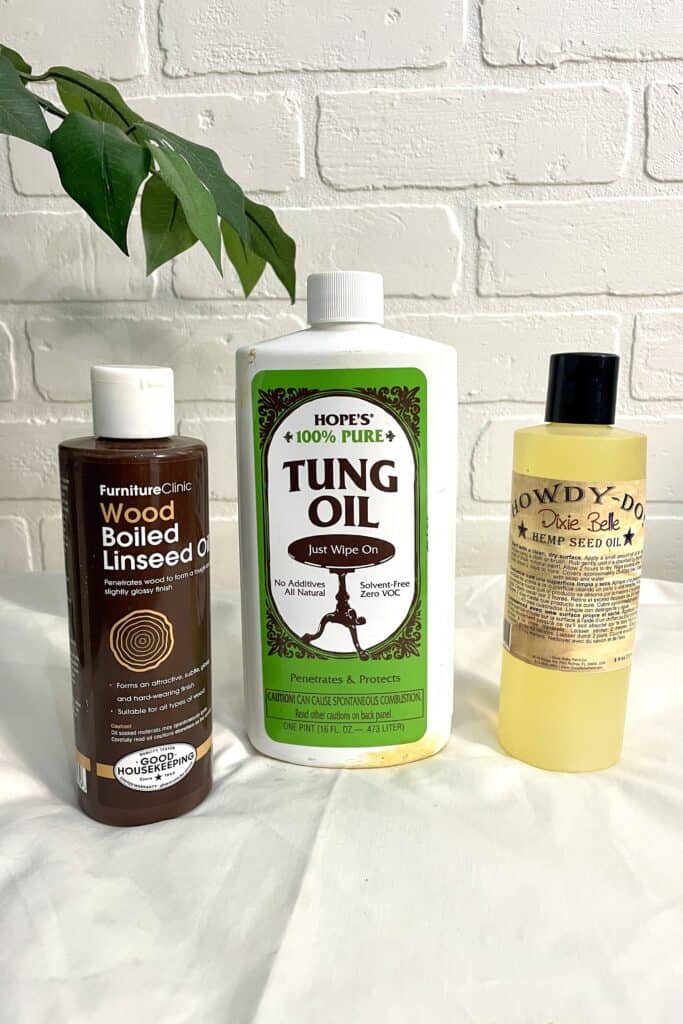
Common Drying Oils Include:
| Oil | Source | Main Drying Fatty Acids | Est. Reactive Sites per Molecule | Iodine Value (g I₂/100g oil) | Total PUFA | Drying Mechanism | Typical Cure Time | Film Hardness |
|---|---|---|---|---|---|---|---|---|
| Tung Oil | Seeds of the tung tree (Vernicia fordii) | Eleostearic (~80%), α-Linolenic (~10%) | 2.7–3.0 | 160–190 | ~90% | Rapid oxidative polymerization | 5–14 days | Hard and durable |
| Perilla Oil | Seeds of the perilla plant (Perilla frutescens) | α-Linolenic (~60%) | ~2.1–2.4 | 190–206 | ~75% | Rapid oxidative polymerization | 5–10 days | Hard |
| Boiled Linseed Oil | Flax seeds (Linum usitatissimum) | α-Linolenic (~50%), Linoleic (~20%) | ~2.0–2.3 | 170–190 | ~70% | Accelerated by metal driers | 3–10 days | Medium-hard |
| Raw Linseed Oil | Flax seeds (Linum usitatissimum) | α-Linolenic (~50%), Linoleic (~20%) | ~2.0–2.3 | 175–204 | ~70% | Slower oxidative polymerization | 2–4 weeks | Medium-hard |
| Hemp Seed Oil | Seeds of the hemp plant (Cannabis sativa) | Linoleic (~55%), α-Linolenic (~20%) | ~2.0–2.2 | 140–175 | ~75% | Slow oxidative polymerization | 2–4 weeks | Soft to medium |
| Poppyseed Oil | Seeds of the opium poppy (Papaver somniferum) | Linoleic (~62%), α-Linolenic (~18%) | ~2.0–2.2 | 130–155 | ~80% | Slow oxidative polymerization | 2–4 weeks | Soft |
| Walnut Oil | Walnut kernels (Juglans regia) | Linoleic (~55%), α-Linolenic (~15%) | ~1.8–2.1 | 140–150 | ~70% | Moderate oxidative polymerization | 1–3 weeks | Medium-soft |
Fun Fact: Some oils are “boiled” or modified with metal salts (such as cobalt or manganese) to speed up curing—boiled linseed oil being the most common example. These additives make a huge difference in drying time!
What Are “Modified” Drying Oils?
“Modified” drying oils are natural oils—like linseed or tung—that have been chemically altered or blended with other substances to change how they behave. The goal? Usually to speed up drying time, increase hardness, or make them more durable or water-resistant.
Modifications often include:
- Polymerization (heating the oil to pre-react it with oxygen for faster cure)
- Metallic driers (like cobalt, manganese, or zirconium salts)
- Solvents (like mineral spirits or naphtha for better penetration)
- Resins or waxes (to increase film build or sheen)
Why It’s Crucial to Know What’s In Your Oil
Many drying oils are sold under trade names with proprietary blends that don’t list their full ingredients. That’s where the trouble begins—especially for new refinishers!
Understanding the chemistry helps you understand:
| Consideration | Why It Matters |
|---|---|
| Application | Oils with driers or resins may dry faster—but also skin over quickly, leading to uneven finishes if not wiped properly. |
| Maintenance | Modified oils with wax or resins may not absorb new oil during refreshes. |
| Refinishing | Non-penetrating or film-forming oils can gum up abrasives, resist other finishes, or require full stripping. |
| Health & Safety | Some contain VOCs, solvents, or questionable additives that may affect indoor air quality or food safety. |
Are Modified Oils a Good Finish Choice?
Sometimes—but not always. Here’s a breakdown based on reliable woodworking sources like Fine Woodworking, Wood Magazine, Real Milk Paint Co., Tried & True, and Waterlox:
| Product Type | Benefits | Drawbacks | Recommended? |
|---|---|---|---|
| Boiled Linseed Oil (BLO) | Inexpensive, dries faster than raw oil | Contains heavy metal driers (not food-safe), darkens wood significantly | Yes, with caution (not for cutting boards) |
| Polymerized Linseed/Tung | Cures faster, harder finish | May still require multiple coats and long cure times | Yes, often preferred over raw oil |
| Solvent-Based Oils | Penetrate better, build faster | Strong odor, high VOCs, flammable | Yes, if used in well-ventilated spaces |
| Resin-Blended Oils | Excellent protection, water resistance | Harder to refresh or recoat, film-forming | Yes, for advanced users or low-maintenance projects |
| Waxes + Oil (e.g., Odie’s) | Easy to apply, beautiful soft sheen | Can prevent future coats from bonding, difficult to repair | Not recommended for long-term maintainability |
Why Odie’s Oil Isn’t Ideal for DIY Furniture Projects
While Odie’s is often marketed as the ultimate “all-in-one,” trusted refinishers and woodworkers—including professionals from Real Milk Paint Co., Fine Woodworking forums, and The Wood Whisperer—frequently highlight major limitations:
- Opaque formula: Proprietary blend with no full ingredient list.
- Waxy film: Prevents future coats of any product—including itself—from penetrating.
- Poor long-term refresh: You often have to sand off the entire surface to reapply.
- Application confusion: Many DIYers apply too thickly, leading to gummy, tacky finishes.
- Misleading claims: Marketed as “no drying time,” but curing still takes days.
Bottom Line: Odie’s and other wax-heavy blends may look great short term but are not ideal if you want an easily maintained and refreshable finish.
Pro Tip for Beginners
Always check the SDS (Safety Data Sheet) for any finish you plan to use. Even if the product is marketed as “natural,” look for:
- VOC content
- Solvents or driers
- Skin or inhalation warnings
If it’s hard to find out what’s in it—or how to fix it if something goes wrong—it’s probably not a great choice for beginner-friendly, long-term results.
A Peek Into the History of Drying Oils
Did you know drying oils have been protecting wood for thousands of years? Ancient Chinese craftsmen were using tung oil to waterproof ships as early as 500 BC. By the 1700s, linseed oil had become a staple in European furniture finishing and fine art.
It’s furniture trivia time!
- Renaissance painters used linseed oil as a base for their oil paints.
- Thomas Jefferson used tung oil on his iconic Monticello home woodwork.
- Early American settlers relied on boiled linseed oil to protect tool handles and wooden floors.
Talk about a finish that’s stood the test of time!
Where and Why to Use It
Drying oils are versatile, beginner-friendly, and offer a subtle, natural look that enhances the grain instead of covering it up. But no finish is perfect—so let’s look at the big picture:
| Where It Shines | What’s to Love | What’s Not to Love |
|---|---|---|
| Light-duty indoor wood finishes, food-safe items, children’s toys | Natural, food-safe options | Long drying and curing time |
| Carved or detailed pieces | Easy to apply with a cloth—no brush strokes! | Requires regular maintenance |
| Rustic, vintage, or antique styles | Deepens and enriches wood grain | Less durable than film finishes |
| Small beginner projects | Super beginner-friendly | Not ideal for high-abuse surfaces (like tables) |
Pro Tip: Only “polymerizing” or drying oils should be used on furniture. Non-drying oils like mineral or coconut oil never harden and should be avoided for pieces requiring lasting protection.
Which Product is Right for You?
Ready to choose your perfect match? Here are three great drying oil options for every experience level:
Beginner: Tried & True Original Wood Finish
- Base: Polymerized linseed oil and beeswax
- Pros: All-natural, low odor, no solvents, food-safe
- Cons: Slow drying time, low water resistance
Creatively Confident: Waterlox Original Sealer/Finish
- Base: Tung oil and phenolic resin blend
- Pros: Tougher than pure oil, water-resistant, lovely amber hue
- Cons: Strong odor, contains solvents, longer cure time
Pro Level: Real Milk Paint Co. Pure Tung Oil
- Base: 100% pure tung oil
- Pros: Excellent water resistance, no additives, rich color depth
- Cons: Requires multiple coats, higher price point
What’s in the Finishing Toolkit?
Tools
- Nitrile gloves
- A flat, dust-free workspace
Materials
- Drying oil of your choice
- Lint-free rags (t-shirt material is perfect!)
- Fine-grit sandpaper (220–320 grit)
- Mineral spirits (for thinning or cleaning tools, if needed)
Pro Tips: Before You Begin
Here are a few things to keep in mind before you crack open that bottle of finish:
- Plan ahead. Drying and curing take time, especially in humid areas.
- Test your finish on a scrap or hidden area first.
- Don’t flood the surface. A little goes a long way.
- Avoid water-based stains under oil finishes—they may not bond well.
How to Apply Drying Oils to Wood Furniture: Step-by-Step
Whether you’re restoring a cherished heirloom or sprucing up a flea market find, here’s how to apply drying oils like a pro:
1. Prep the Surface
- Clean thoroughly with a soft cloth and distilled water and mild soap solution.
- Remove the old finish using the appropriate method. (Not sure what your finish is or how to remove it? This post will show you how!)
- Sand the piece to 150–220 grit, depending on how silky you want the final texture.
2. Apply the Oil
- Pour a small amount onto a lint-free cloth or soft brush.
- Rub in with the grain, ensuring even coverage.
- Let it soak for 15–30 minutes.
3. Wipe Off the Excess
- Don’t skip this step! Use a clean cloth to remove any oil that hasn’t soaked in.
- Leaving excess oil can lead to tacky surfaces or uneven curing.
4. Cure Time
- Let the piece sit in a dust-free, well-ventilated space.
- Wait at least 24 hours between coats (longer if humid).
- Apply 2–4 coats depending on the desired depth and protection.
5. Final Buff
- After the last coat has fully cured (usually 3–5 days), give it a gentle buff with a clean cloth or #0000 steel wool for a satin glow.
Application Best Practices
| Oil Type | Optimal Coats | Dry Time (per coat) | Full Cure Time | Ideal Temp/Humidity |
|---|---|---|---|---|
| Boiled Linseed | 2–3 | 12–24 hours | 7–10 days | 60–75°F, <60% RH |
| Pure Tung Oil | 3–5 | 24–48 hours | 15–30 days | 65–80°F, <50% RH |
| Polymerized Oils | 2–4 | 8–12 hours | 5–10 days | 60–75°F, <50% RH |
Note: Always allow plenty of ventilation while oils cure!
When and How to Refresh Your Drying Oil Finish
Drying oils naturally wear over time. That’s part of their charm! But when do you refresh?
Signs It’s Time for a Refresh:
- Dull or faded appearance
- Feels dry or rough to the touch
- Stains or water marks start to appear
How to Refresh:
- Clean the surface with mild soap and water
- Apply a thin coat of oil
- Let soak, wipe off excess, and dry completely
Pro Tip: No need to sand unless there’s buildup or damage.
When and How to Refinish Your Drying Oil Finish
If the finish is peeling or cracked then it’s past the stage of a simple refresh. You’ll need to pull out the elbow grease and completely remove the original finish.
Removing a Drying Oil Finish
Drying oils can be a little stubborn to remove completely. If you need to strip the surface:
- Use a solvent like mineral spirits or paint thinner
- Apply liberally with an old paintbrush
- Gently scrape or scrub with a non-abrasive pad
- Sand thoroughly before applying the new finish
Common Drying Oil Finish Mistakes (And How to Fix Them)
| Mistake | What Went Wrong | How to Fix It |
|---|---|---|
| Sticky surface | Didn’t wipe off excess oil | Scrape lightly and buff with mineral spirits |
| Uneven sheen | Inconsistent wiping or surface prep | Apply a fresh coat and wipe evenly |
| Cloudy or blotchy appearance | Oil applied over moisture or wax | Sand back and reapply |
| Finish never fully cures | Wrong temperature or old product | Strip and start fresh |
Care and Maintenance Tips
Drying oil finishes are low-maintenance, but they do need a little TLC:
- If scratches appear, lightly sand the area and reapply oil—easy-peasy!
- Dust regularly with a microfiber cloth.
- Avoid harsh cleaners—use distilled water with a bit of distilled vinegar if needed.
- Reapply oil every 6–12 months, especially for high-traffic surfaces like tabletops.
Storage & Safety Tips
Properly dispose of oil-soaked rags—they can spontaneously combust! Lay rags flat to dry outdoors, then discard them in a sealed metal container.
Store drying oils in a cool, dark place, tightly sealed
Keep out of reach of children and pets
FAQs
Q: Can I use drying oils on kitchen surfaces or cutting boards?
A: Yes, but make sure you use a food-safe, pure drying oil like tung or walnut oil—not boiled linseed oil with metallic driers!
Q: How do I dispose of oily rags safely?
A: Lay them flat to dry outdoors, then store in a sealed metal container. Never toss oily rags into the trash when wet—they can ignite on their own.
Q: Can I put polyurethane or wax over a drying oil?
A: Yes, but only after the oil has fully cured—wait at least 30 days for tung oil and 10–14 days for linseed-based oils.
Q: What if my oil smells bad?
A: If your oil has gone rancid (common with walnut oil), discard it and buy fresh. Store opened oils in a cool, dark cabinet.
Final Wrap: Why Choose Drying Oils?
Drying oils are like the comfy jeans of the finishing world: natural, timeless, and oh-so-easy to wear in. They are:
- Natural and non-toxic (when pure)
- Eco-friendly
- Easy to apply and maintain
- Absolutely gorgeous on grain-rich woods like walnut, cherry, and oak
Whether you’re tackling your first refinishing project or adding a touch of heritage to a treasured piece, you’ll love the silky, subtle finish these oils provide. With a little patience and know-how, your wood furniture will thank you for years to come.
Now go grab that old side table or antique jewelry box and give it a glow-up—it’s time to turn your vision into a treasure!
Thank you so much for stopping by! I hope this information helps you with your next project. Drop a comment below and let me know if you have any questions or tips from your adventures with drying oils!
Until next time, have a beautiful and blessed day!

Don’t forget to sign up so you hear all about the next misadventure!