Water-based Acrylic Finishes: A Beginner’s Best Friend for Clear, Easy Furniture Protection
When you’ve poured your heart into painting or staining a beautiful furniture piece, the last thing you want is scratches, smudges, or water rings ruining the look. Enter the water-based acrylic finish, a lightweight, crystal-clear protective coating that’s perfect for beginners who want reliable results without the stress of tricky applications.
Let’s explore what makes water-based acrylic finishes such a favorite for DIY furniture refinishers and how you can get the best results with them!
THIS POST CONTAINS AFFILIATE LINKS TO PRODUCTS THAT I HAVE OR WOULD USE.
AS AN AMAZON ASSOCIATE, I EARN FROM QUALIFYING PURCHASES AT NO COST TO YOU.
YOU CAN SEE MY FULL DISCLOSURE HERE.
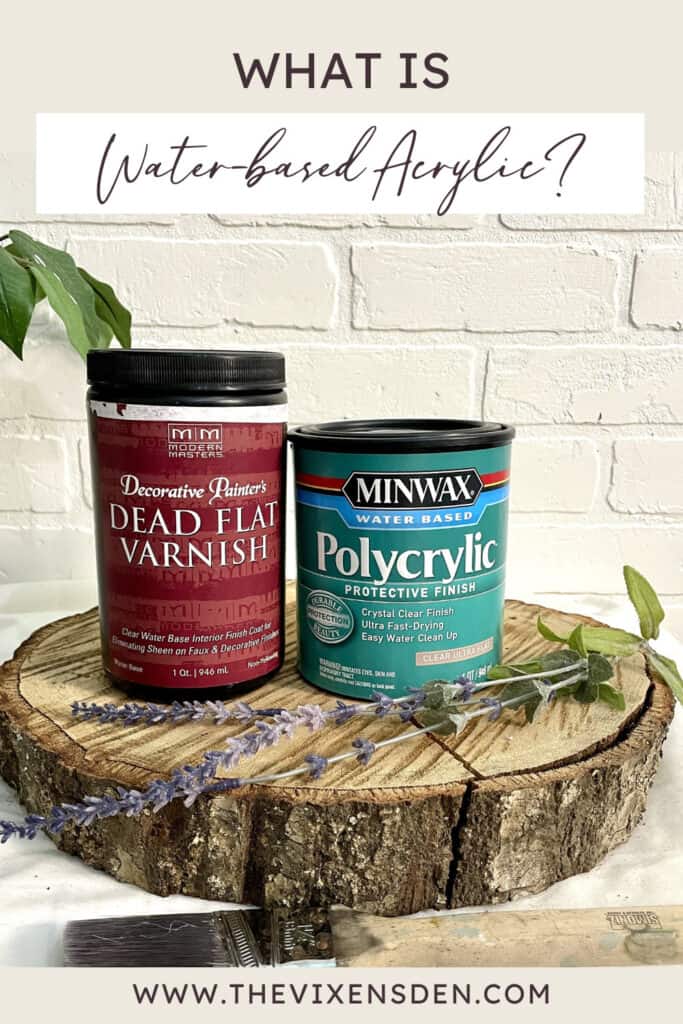
What is a Water-Based Acrylic Finish?
A water-based acrylic finish is a protective topcoat made from acrylic resins. Think of it as the easier, less fussy cousin of polyurethane. It dries clear (no yellowing!), has a low odor, and cleans up with just soap and water.
A water-based acrylic finish is essentially a suspension of acrylic polymers in water, often with additives that improve flow, leveling, durability, and shelf life. Here’s what goes into most formulations:
1. Acrylic Polymers (The Film-Formers)
- These are long-chain molecules (polymers) that bond together as the finish dries, creating the protective clear layer.
- They give the finish clarity, flexibility, and resistance to cracking or yellowing.
- Pure acrylic resins are what make this finish so ideal over white or pastel paints—it stays clear rather than ambering like oil-based finishes.
2. Water (The Carrier)
- Water acts as the main solvent or carrier for the acrylic polymers.
- When applied, water evaporates, leaving the acrylic resin behind to form a solid, protective layer.
- Low odor and easy soap-and-water cleanup come from water being the primary solvent.
3. Co-Solvents and Plasticizers
- Small amounts of alcohols or glycols may be added to improve flow, leveling, and adhesion.
- Plasticizers help the finish remain flexible as it cures, reducing cracking or crazing over time.
4. Additives
- Thickeners – control viscosity so the finish spreads evenly.
- Anti-foaming agents – prevent bubbles during brushing or rolling.
- UV stabilizers – reduce yellowing or degradation from sunlight exposure (important even for indoor pieces near windows).
- Biocides – prevent mold or bacterial growth in the liquid finish before use.
5. Optional Modifications
- Some water-based acrylic finishes are blended with urethane or other resins to improve hardness, scratch resistance, or chemical resistance.
- These blends are often called acrylic-urethane or water-based polyurethane-acrylic hybrids, but pure acrylic finishes like Minwax Polycrylic remain mostly acrylic resin.
✨ Friendly Reminder: The popular product name “Polycrylic” is actually Minwax’s trademark for their version of this finish. The “poly” in polycrylic refers to polymerized acrylic resins, which makes this finish different from polyurethane (a mix of urethane resins).
A Quick History of Water-Based Acrylic Finishes
Water-based acrylic finishes are a modern invention, born from the development of acrylic resins in the mid-20th century. Acrylics became popular in the 1930s–40s for paints and coatings because they offered clear, flexible, and durable protection.
For decades, the gold standard in furniture finishing was oil-based polyurethane, incredibly tough, but also smelly, slow-drying, and prone to yellowing. As more DIYers and professionals wanted products that were easier to use indoors, manufacturers developed water-based alternatives.
By the 1990s, acrylic-based finishes (like Polycrylic) were widely available, marketed as user-friendly, low-odor, and crystal clear options. Unlike traditional finishes, water-based acrylics don’t have centuries of heritage. They’re very much a “next-generation” protective finish designed with beginners and home refinishers in mind.
Where and Why to Use Water-Based Acrylic Furniture Finish
Why Choose a Water-Based Acrylic Finish?
Here’s why so many DIYers reach for these finishes:
- Crystal Clear Finish – Won’t amber or yellow over time (perfect over white and light colors).
- Beginner-Friendly – Easy to apply with fewer streaking or bubbling issues.
- Fast Drying – Dries to the touch in about 30 minutes and ready for recoat in 2 hours.
- Low Odor & Easy Cleanup – Soap, water, and you’re done!
- Versatile Sheens – Comes in matte, satin, semi-gloss, and gloss.
💡 Pro Tip: Water-based acrylic finishes shine when used over painted furniture (especially whites, pastels, and bold colors) because they preserve vibrancy.
When to Skip a Water-Based Acrylic Finish
Even though these finishes are wonderful, they’re not always the right choice. Avoid using them on:
- Outdoor furniture – They’re not weatherproof.
- High-traffic tabletops – Scratch-resistant, but not as durable as polyurethane.
- Dark-stained wood – Can sometimes appear slightly cloudy over very dark colors.
💡 Pro Tip: Pure water-based acrylic finishes are softer than oil-based polyurethane, which is why they’re better suited for light to moderate-use indoor furniture and decorative projects.
Pros & Cons Summary
Water-based acrylic finishes are the perfect beginner-friendly clear coat:durable, easy to maintain, and quick-drying, all without harsh fumes. However, these benefits do come with some limitations. Here’s a handy table to help you weigh the pros and cons:
| Where It Shines | What’s to Love | What’s Not to Love |
|---|---|---|
| Painted furniture (especially white, pastels, or bold colors) | Dries crystal clear – no yellowing | Can look cloudy on very dark stains |
| Lightly used indoor furniture (side tables, bookshelves, accent pieces) | Beginner-friendly and forgiving to apply | Not as tough as polyurethane on high-traffic surfaces |
| Projects where quick turnaround is important | Fast drying (recoat in about 2 hours) | Requires multiple thin coats for durability |
| Indoor spaces where smell is a concern | Low odor and easy soap-and-water cleanup | Not weatherproof – no outdoor use |
| Decorative pieces or craft projects | Available in multiple sheens (matte to gloss) | Less scratch-resistant than oil-based finishes |
Compatibility Check: What Doesn’t Play Nicely with Water-Based Acrylic Finishes
- Oil-Based Stains and Paints That Aren’t Fully Cured
- Acrylics won’t bond well if the surface underneath is still “off-gassing” oils.
- Result: cloudy finish, peeling, or poor adhesion.
- 💡 Pro Solution: If you’re coating over an oil-based product, wait at least 30 days or seal with a dewaxed shellac barrier coat first.
- Waxes or Oily Finishes (Danish oil, tung oil, linseed oil, paste wax, furniture polish)
- Oils and waxes repel water-based finishes.
- Result: beading, streaking, or complete failure to stick.
- 💡 Pro Solution: If it feels slick or waxy, acrylic won’t bond—strip it first!
- High-Sheen Surfaces (Gloss Paints, Laminates, Factory Finishes)
- Water-based acrylic needs a surface with a bit of “tooth.”
- Result: chipping or peeling off smooth surfaces.
- 💡 Pro Solution: Light sanding or a bonding primer makes a huge difference.
- Unsealed Dark Stains
- Acrylics can sometimes look cloudy over deep, dark wood stains.
- Result: milky or hazy appearance.
- 💡 Pro Solution: Test first on a hidden spot or choose a water-based polyurethane-acrylic blend instead.
- Silicone-Contaminated Surfaces (from polishes or sprays)
- Silicone makes it nearly impossible for anything to stick.
- Result: fisheyes (tiny craters in the finish).
- 💡 Pro Solution: Clean with Krud Kutter Original and a green Scotch-Brite pad then sand thoroughly before applying.
Pro Tips for Success:
- When in doubt, test! Always do a small sample patch on an inconspicuous area before committing.
- Sand first. A light scuff sand before applying water-based acrylic over another finish gives the new layer “tooth” to grab onto.
- Barrier coat trick. If you’re unsure about adhesion, a thin layer of dewaxed shellac often acts as a universal bonding coat before applying the new finish.
Now that you know where water-based acrylic plays nicely and where it goes boneless on you, you’re ready for the fun part: picking the product that’s going to make your project shine! Let’s look at the best options for beginners, the creatively confident, and the pros.
Which Water-Based Acrylic Finish is Right for You?
Now that you’ve worked through where water-based acrylics shine, and might leave you hanging, let’s see which product is the right fit for you and your project:
| Experience Level | Recommended Product | Pros | Cons |
|---|---|---|---|
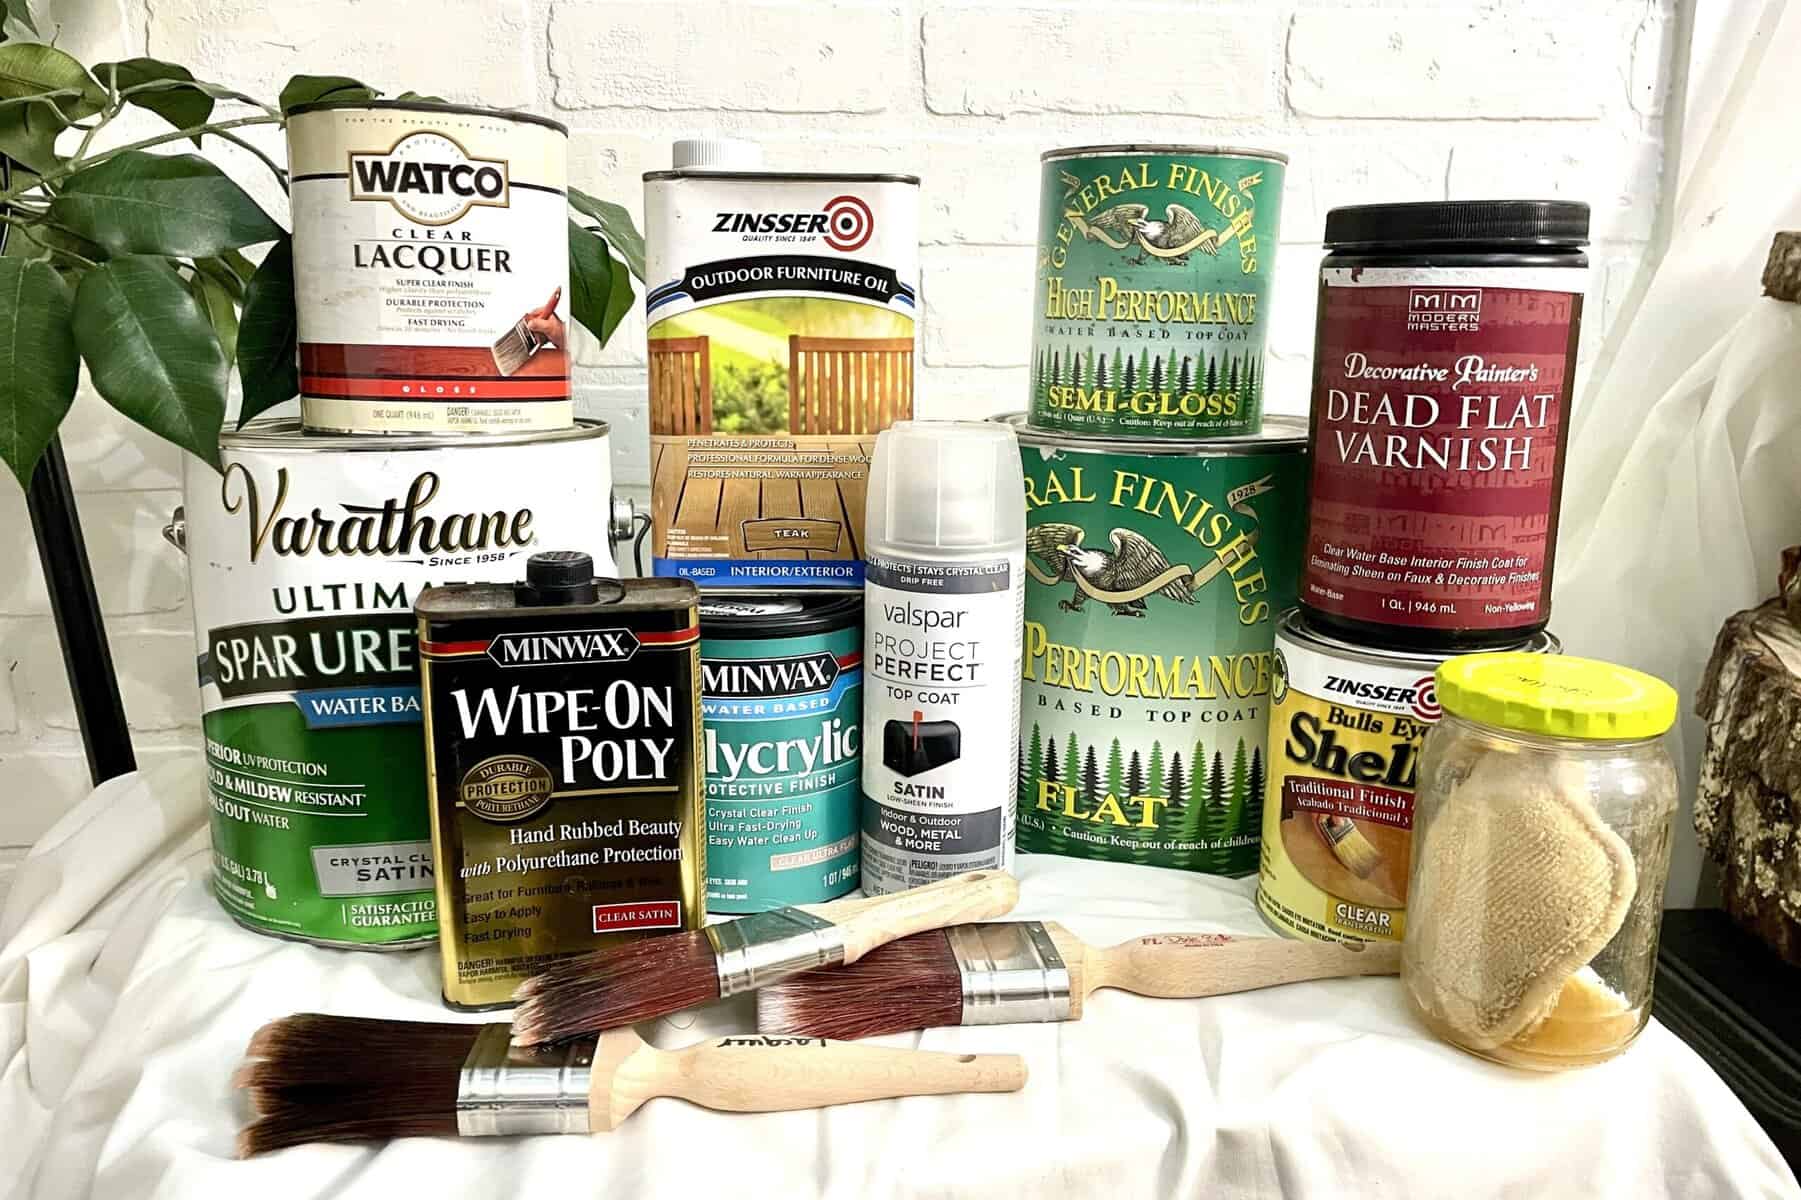
| Beginner | Minwax Polycrylic Protective Finish | Easy to apply, low odor, dries crystal clear, forgiving, widely available | Softer than polyurethane, less durable on high-traffic surfaces, may require multiple coats |
| Creatively Confident | Varathane Crystal Clear Water-Based Polyurethane | Tougher than standard acrylic, fast drying, multiple sheens, good for moderate-use furniture | Can be less forgiving with brush marks, slightly higher odor than Polycrylic |
| Pro / Advanced Finisher | General Finishes High-Performance Water-Based Topcoat | Very durable, smooth leveling, excellent clarity, professional-grade results | Requires careful application, more expensive, may be overkill for small or decorative projects |
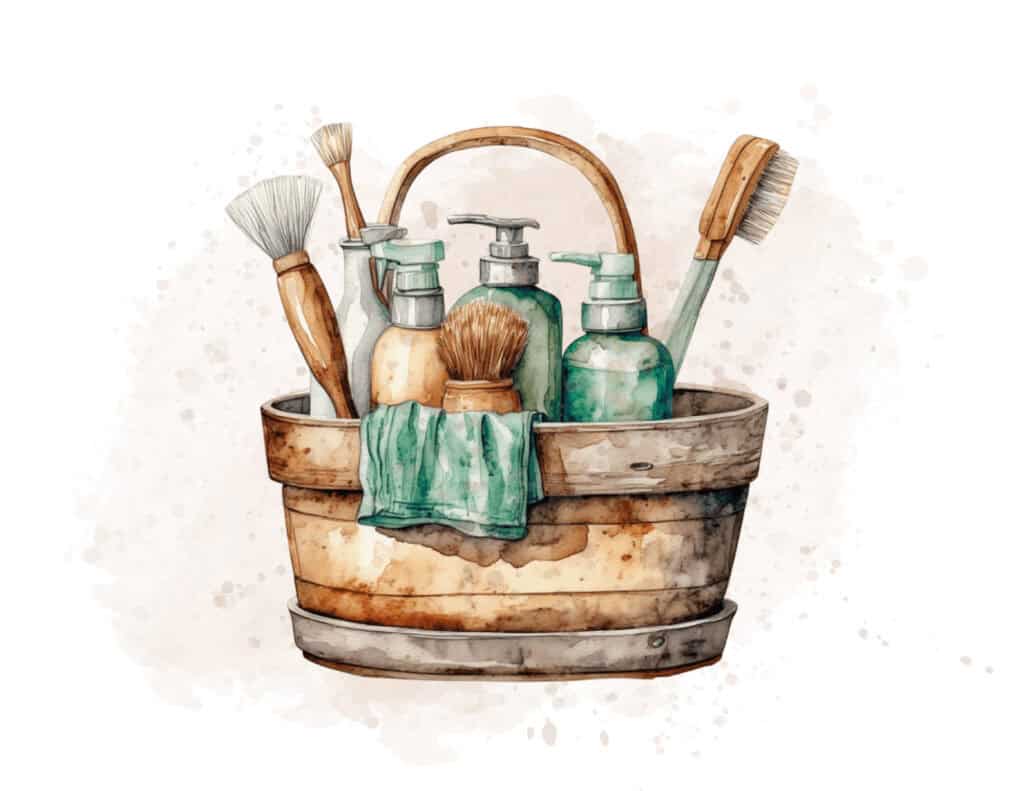
What’s in the Finishing Toolkit
Tools
- Applicator:
- High-quality synthetic bristle brush (angled sash brushes work great)
- Foam brush for small surfaces
- Foam roller for large flat areas
- Vacuum with soft bristle brush attachment
- Tack cloth or microfiber cloth (lint-free!)
- Stir stick (never shake the can—causes bubbles)
- Drop cloth or protective covering for your work area
- PPE:
- Gloves
- Safety glasses
- Ventilation (even though water-based acrylics are low VOC, they can still cause dizziness and nausea without good air flow)
Materials
- Sandpaper: 220-grit and 320-grit (or a sanding sponge)
- Finish: Water-based acrylic (like Minwax Polycrylic, Varathane Crystal Clear, or General Finishes High Performance)
💡 Pro Tip: Keep a dedicated set of synthetic brushes just for water-based finishes. Using the same ones for oil-based products can cause streaking.
Pro Tips: Before You Begin
Before you dip your brush into that can, let’s pause for a few quick but powerful reminders. These are the things I’ve learned over decades of brushing, wiping, and sanding, and the exact things that trip up most beginners.
- Always work in the same direction as the wood grain for a natural, even look.
- Don’t apply in humid, dusty, or very hot environments. Aim for 65–75°F (18–24°C) and low humidity.
- Stir gently, don’t shake, to avoid bubbles.
- Decant a little water-based acrylic into a clean container instead of dipping straight from the can.
- Test your finish on a scrap or hidden area first, especially over dark stains.
- Plan for multiple thin coats (3–4 is common) instead of trying to achieve coverage in one heavy coat.
Step-by-Step Water-based Acrylic Application Guide
1. Prep the Surface
- Sand your surface smooth with 220-grit sandpaper.
- Wipe away all dust with a tack cloth or microfiber cloth.
- Make sure your paint or stain is fully cured before applying the finish.
💡 Pro Tip: If applying over an oil-based stain, seal first with dewaxed shellac or let the stain cure for 30 days.
2. Stir the Finish
- Gently stir with a stir stick until the liquid looks consistent.
- Avoid whipping air into the product. Bubbles are the enemy!
3. Load Your Brush or Roller
- Dip just the tip of your brush into the finish.
- Tap off excess. Overloading the brush = sneaky drips and sags.
- For rollers, pour the finish into a paint tray and roll off excess before applying.
4. Apply Thin, Even Coats
- Start in one corner and brush or roll with the wood grain.
- Overlap strokes slightly to avoid missed spots.
- Don’t over-brush—water-based acrylics dry quickly and can drag if overworked.
✨ Helpful Hint: Watch for drips along edges. Wipe immediately with a lightly dampened brush.
5. Let It Dry
- Wait about 2 hours before recoating.
- The surface will feel dry to the touch in 30 minutes, but don’t rush—it’s still soft inside.
6. Sand Between Coats
- Lightly sand with 320-grit sandpaper or a sanding sponge.
- Wipe off all dust with a tack cloth.
- This helps each coat stick and smooths out any brush marks or bubbles.
7. Apply Additional Coats
- Repeat steps 4–6 until you’ve applied 3–4 coats for most furniture.
- For tabletops or surfaces with heavier use, 5 coats may be better.
8. Final Cure
- Let your piece dry 24 hours before light handling.
- Full cure takes 21–30 days, depending on temperature and humidity.
- During this time, treat it gently—avoid heavy use, cleaning products, or setting heavy objects on it.
✨ Friendly Reminder: A project that feels dry isn’t necessarily cured. Patience is your best friend for a strong, long-lasting finish!
Refreshing a Water-Based Acrylic Finish: Signs & Steps
Even the best water-based acrylic finishes won’t last forever. With everyday use, your furniture may start to show a little wear. The good news? A refresh is simple, quick, and will make your piece look brand new again!
How to Know When It’s Time for a Refresh
- Dullness – The once-bright finish now looks cloudy or flat, even after cleaning.
- Light scratches or scuffs – Surface-level marks that haven’t cut into the wood or base paint/stain.
- Patchiness – Areas where the finish has worn unevenly, often on tabletops or chair arms.
- Water rings – White, cloudy spots from moisture that the finish couldn’t fully resist.
- Sticky feel – If the surface never seems to feel completely dry after cleaning, the finish is breaking down.
💡 Pro Tip: If you see deep gouges, peeling, or flaking, you’ll need a full refinish, not just a refresh.
Tools & Materials for Refreshing
- Water-based acrylic finish (same brand as before, if possible)
- High-quality synthetic brush, foam brush, or mini foam roller
- 320–400 grit sandpaper or fine sanding sponge
- Tack cloth or microfiber cloth
- Stir stick
- Gentle cleaner (distilled vinegar + distilled water mix works great!)
Step-by-Step: How to Refresh Your Water-based Acrylic Finish
1. Clean the Surface
- Wipe down your furniture with a gentle cleaner to remove dust, oils, and fingerprints.
- Let dry completely.
✨ Friendly Reminder: Never apply finish over grease or wax. It’ll just peel right off!
2. Lightly Sand
- Use 320–400 grit sandpaper to gently scuff the surface.
- Your goal is to smooth scratches and give the new coat something to grip—don’t sand through the finish.
- Wipe clean with a tack cloth.
💡 Pro Tip: Wrap sandpaper around a sanding block for flat areas and use a sponge for curves.
3. Stir the Finish
- Stir gently with a stick. Avoid shaking to prevent bubbles.
4. Apply a Thin Coat
- Use a synthetic brush or roller to apply one even coat along the grain.
- Work quickly! Water-based finishes dry fast.
- Avoid over-brushing.
. 5. Dry & Assess
- Let dry for 2–3 hours.
- Check the surface—if scratches or dull areas are still visible, repeat the sanding and apply a second coat
6. Cure the Surface
- Allow at least 24 hours before light use.
- For full durability, let it cure for 3–4 weeks before heavy use.
✨ Helpful Hint: During curing, avoid setting plants, drinks, or heavy décor on the surface.
Complete Refinishing Guide for Water-Based Acrylic Finishes
Water-based acrylic finishes are tough little protectors, but even they have a limit. Over years of love and use, the finish can wear down past the point of a simple refresh. Don’t worry, refinishing isn’t scary! With the right steps, you can strip away the old and give your piece a brand-new life.
How to Know It’s Time for a Full Refinish
✨ Key Signs Your Finish Needs More Than a Refresh
- Peeling or flaking – The finish lifts off in sheets or flakes when scratched.
- Deep scratches, gouges, or chips – Damage that cuts into the wood or base paint/stain.
- Persistent water damage – Dark or swollen wood beneath the finish.
- Sticky or soft finish – Even after cleaning, the surface feels tacky or gummy.
- Uneven layers – Patchy buildup of old finish, sometimes yellowed or cloudy.
💡 Pro Tip: If you see raw wood exposed in high-traffic areas, that’s your furniture begging for a full refinishing.
Tools & Materials You’ll Need
- Gentle paint/finish stripper (citrus-based for beginners, stronger if needed)
- Plastic or metal scraper (depending on stripper used)
- Sandpaper (grits: 120, 180, 220)
- Sanding block or orbital sander
- Clean rags and tack cloths
- Denatured alcohol or distilled water + vinegar solution (for cleanup)
- New water-based acrylic finish
- High-quality synthetic brush, foam brush, or mini mohair roller
- Safety gear: gloves, goggles, mask
Step-by-Step: Full Refinishing Process
1. Prep Your Workspace
- Work in a well-ventilated area.
- Lay down drop cloths to protect floors.
- Remove hardware or tape off anything you don’t want coated.
✨ Friendly Reminder: Always protect yourself—gloves, goggles, and a mask are your best friends here.
2. Strip the Old Finish
- Apply the stripper according to the product’s directions.
- Let it sit until the finish bubbles or softens.
- Scrape gently with the grain to remove layers.
- Repeat as needed until most of the finish is gone.
💡 Pro Tip: Work in small sections for more control and less mess.
3. Sand Smooth
- Start with 120 grit to remove leftover finish.
- Move to 180 grit to smooth out scratches.
- Finish with 220 grit for a silky, even surface ready for finishing.
- Wipe clean with a tack cloth.
4. Optional: Restain or Paint
- If you want to change the color, now’s the time!
- Apply wood stain or paint, following product directions.
- Let dry fully before moving to the next step.
5. Apply the New Finish
- Stir your water-based acrylic finish (never shake).
- Using a synthetic brush or roller, apply a thin, even coat along the grain.
- Let dry 2–3 hours.
- Lightly sand with 220 grit between coats for a smooth build.
- Apply 2–3 coats total for durability.
✨ Helpful Hint: Work quickly. Water-based finishes dry fast, so don’t over-brush!
6. Cure and Enjoy
- Allow 24 hours before light use.
- For maximum protection, let cure for 3–4 weeks.
- Reattach hardware and style your refreshed piece!
Troubleshooting Full Refinishing
- Finish looks streaky → Apply another coat, using smoother strokes.
- Milky/cloudy appearance → Too much moisture; let dry longer between coats.
- Bubbles → Over-brushing or shaking the can; stir gently and apply thinner coats.
✨ Final Thought: Refinishing may take more time than a quick refresh, but it’s worth it! Not only do you get a flawless finish, you also extend the life of your furniture for years to come.
Bye-Bye Acrylic Clear Coat: A Step-by-Step Guide to Stripping Away the Tough Stuff
Jumping straight into this chapter? This is your step-by-step guide to removing the superhero of beginner-friendly clear coats. Water-based acrylic finishes are shiny, protective, and stubborn enough to need some extra attention when it’s time for a redo. Don’t worry, this is totally beginner-friendly with the right approach. Let’s roll up our sleeves and do it together!
How Do You Know It’s Water-Based Acrylic?
- The finish feels like a thin sheet of plastic sitting on top of the wood.
- Can resist light sanding, but not as stubborn as polyurethane.
- Crystal-clear finish without the yellow tint of older oil-based poly.
💡 Pro Tip: If you’re not sure, do a little test spot. A few drops of denatured alcohol will soften acrylic (it won’t hurt the wood), making it easier to remove.
Tools & Materials (Your DIY Sidekicks)
- Safety first! Nitrile gloves, goggles, and a respirator or mask.
- Drop cloths or plastic sheeting to protect your workspace.
- Water-based acrylic remover or gel-style citrus/soy-based stripper (gentle is key).
- Plastic or metal scrapers (plastic for delicate wood, metal for sturdier areas).
- Sandpaper (120, 180, 220 grit) + sanding block or orbital sander.
- Nylon or brass brushes, non-scratch pads for curves and carved details.
- Rags and tack cloths.
- Distilled water and a small amount of denatured alcohol (for cleanup).
- A healthy dose of patience. Don’t worry, I’ve got your back!🎉
A Quick Word on Safety
Even though water-based acrylic is gentler than polyurethane:
- Work in a ventilated area (outside is best).
- Test old finishes for lead if your piece is older than 1978.
- Dispose of rags and scraps carefully. Don’t leave them damp in a pile.
✨ Friendly Reminder: Think of this step like setting up the spa before a makeover. You want it safe, clean, and ready for transformation!
Which Removal Path Should You Take?
- Lots of carving/ornate details? → Chemical stripper is your BFF (and my personal pick!)
- Flat, broad surfaces (like a tabletop)? → Sanding will get you there faster.
- Super stubborn or thick finish? → A combo of stripper + sanding is the magic mix.
- Feeling adventurous? → Heat guns can help, but they’re a little fiery-tempered, so use with caution.
Step-by-Step: Chemical Stripping (Beginner-Friendly Hero)
- Prep your piece
Move it to a safe space, lay down your drop cloth, and take off any hardware. - Frost it up
Brush on your stripper nice and thick—imagine frosting a cake, just a little less delicious. - Let it bubble
Acrylic finishes will soften, wrinkle, or start peeling—your cue to start scraping gently. - Scrape away
Use your scraper to gently coax the goo off. Always go with the grain. For nooks and crannies, bring in the brushes or pads. - Clean the slate
Wipe everything down with a cloth dampened with denatured alcohol to remove residue. - Smooth it out
Once it’s dry, give your piece a gentle sanding (start at 180 and end at 220) to make it silky-smooth for the next finish.
Step-by-Step: Sanding (Best for Flat Surfaces)
- Gear up with a respirator or mask. Acrylic dust isn’t fun to breathe!
- Start medium with 120 grit. Keep the sander moving smoothly across the surface.
- Step up to 180 grit, then finish with 220 grit for a silky-smooth canvas.
- Edge cleanup using a sanding block or sponge.
- Wipe down with a tack cloth and admire your freshly “naked” wood!
💡 Helpful Hint: Water-based acrylic sands more easily than polyurethane, so you can often get away without harsh chemicals if the piece is flat.
✨ Helpful Hint: Sanding will likely take off stain as well. If you want to keep the wood color, chemical stripping may be the gentler choice.
Heat Gun Method (Handle with Care)
- Hold the gun a few inches away and keep it moving (you’re warming, not toasting).
- Scrape gently as the finish softens.
- Avoid veneer—heat can loosen glue and lift it right off.
After the Finish is Gone: What’s Next?
- Give your piece a final clean with a damp cloth or mild alcohol wipe.
- Smooth everything with 220-grit sandpaper.
- Choose your next finish: stain, paint, or another round of water-based acrylic.
- Pat yourself on the back—you just gave your furniture a fresh start! 🎉
Troubleshooting (Because We’re Friends, and I Know Things Get Messy)
| Problem | Quick Fix |
|---|---|
| Still sticky after stripping | Wipe gently with denatured alcohol and let it dry fully |
| Cloudy spots after sanding | Use finer sandpaper or a second light stripping pass |
| Scratches from scraping | Sand lightly with 180 grit and recoat |
| Veneer damage | Patch or lean into a painted finish—your piece can still shine |
✨ Friendly Reminder: Removing water-based acrylic is less about brute force and more about patience. Work in layers, keep tools clean, and celebrate each stage. You’re uncovering the story beneath, ready for its next chapter.
Keeping Your Clear Coat Crystal-Clean
So you’ve put in the work, brushed on that gorgeous water-based acrylic finish, and now you want it to keep shining. The secret? A simple cleaning routine! 💡 The great thing about water-based acrylic finishes is that they don’t need high-maintenance care—just regular, gentle love.
Here’s your step-by-step cleaning guide and schedule to keep your furniture looking fresh, happy, and ready for compliments.
Cleaning & Care Schedule Table
| Task | Frequency | Tools & Materials | Tips & Tricks ✨ |
|---|---|---|---|
| Dusting | Daily (or as needed) | Microfiber cloth, feather duster | Dust with the grain to avoid pushing particles into tiny scratches. |
| Spill Cleanup | Immediately | Soft cloth, paper towel | Blot, don’t rub! Rubbing can spread moisture into the finish. |
| Light Wipe Down | Weekly | Soft cloth, distilled water | Wring out cloth until just damp—think “barely kissed by water.” |
| Deep Clean | Monthly | Spray bottle, distilled water, tiny splash of distilled vinegar, microfiber cloth | Vinegar helps cut grease naturally. Go easy—too much can dull the finish. |
| Seasonal Inspection & Touch-Up | Every 3–4 months | Bright light, fine sandpaper (320–400 grit), small brush, leftover finish | Rotate décor (like lamps or vases) so your surface wears evenly. 💡 |
| Furniture Shuffle | Every 6–12 months | Felt pads, extra hands (moving buddy!) | Add felt pads under heavy items to prevent dents and scratches. |
💡 Pro Tip: Skip harsh cleaners, oils, and polishes marketed for wood. They can cloud your beautiful clear coat or leave a sticky residue. Stick with simple, gentle solutions, and your finish will thank you.
✨ Friendly Reminder: Consistency beats intensity. A little care often means fewer big fixes later!
Common Water-Based Acrylic Mistakes (and How to Fix Them)
| Mistake | What Happened | Quick Fix 💡 | Pro Tip for Next Time |
|---|---|---|---|
| Cloudy or Milky Finish | Applied too thick or in humid conditions. | Let it dry completely—sometimes it clears on its own. If not, sand lightly (320–400 grit) and reapply a thinner coat. | Apply in thin layers (like nail polish) and avoid super humid days. A fan helps! |
| Visible Brush Strokes | Too much finish on the brush or overworking the surface. | Lightly sand smooth once dry, then reapply with a high-quality synthetic brush or foam applicator. | Always brush with the grain and resist the urge to “fix” spots after 2–3 strokes—it self-levels! |
| Bubbles or Foamy Spots | Shaken can, fast brushing, or over-rolling. | Pop bubbles with a light sand and touch-up coat. | Stir, don’t shake your finish. Apply with steady, gentle strokes like you’re buttering warm toast. 🥖 |
| Peeling or Flaking | Surface wasn’t clean or sanded enough before finishing. | Sand down the peeling area, feather edges, clean thoroughly, and reapply. | Prep is queen! 👑 Always clean, sand, and dust before finishing. |
| Scratches Show Up Quickly | Finish layer too thin or not fully cured. | Sand lightly and add another coat (or two). | Let each coat dry fully, and give your piece at least a week to cure before heavy use. Patience pays! |
| Tacky/Sticky Finish | Applied too thick or not enough drying time between coats. | Give it extra time—days, not hours. If still sticky, sand lightly and recoat thinly. | Thin coats, good airflow, and proper dry times = smooth sailing. 💨 |
| Yellowing | Wrong product (oil-based poly instead of water-based acrylic) or applied over unstained white paint. | Unfortunately, yellowing can’t be undone—sand back and refinish with a true water-based acrylic. | Always double-check the label before you buy! “Crystal Clear” is your magic phrase. ✨ |
| Streaky/Dull Sheen | Uneven application or mixing different sheen levels. | Scuff-sand lightly and apply one even final coat in your chosen sheen. | Stick with the same product line and sheen for all coats to avoid mismatched shine. |
| Drips & Runs | Too much finish applied, especially on vertical surfaces. | Let dry, then sand flat and reapply carefully. | Apply in thin, even coats, and check edges/sides with good lighting for sneaky drips. 🔍 |
✨ Friendly Reminder: Mistakes (aka misadventures) are just part of the DIY adventure. Every “oops” teaches you something new, and every fix builds your confidence. You’ve got this! 💪
Beginner FAQs: Water-Based Acrylic Finishes
Q: What exactly is a water-based acrylic finish?
A: Think of it as a clear topcoat made with acrylic resins that dries fast, has little to no odor, and stays crystal-clear (no yellowing!). It’s like a protective raincoat for your furniture. ☔
Q: Is water-based acrylic the same as Polycrylic?
A: “Polycrylic” is a brand name (Minwax’s version). Water-based acrylic is the general category, and there are many brands that make it. Polycrylic is just the celebrity of the group.
Q: How is it different from water-based polyurethane?
A: Great question! Water-based polyurethane is made with urethane resins, while acrylic finishes use acrylic resins. The difference? Acrylics are usually clearer (no yellowing), but a little less tough than polyurethane. Polyurethane is like a work boot, while acrylic is like a chic sneaker, protective but lighter-duty.
Q: Can I use water-based acrylic over stain or paint?
A: Yes! It plays very well over water-based stains, paints, and even bare wood. Just make sure everything is clean and dry first. (But skip applying it over oil-based finishes as they don’t mix well!)
Q: Will my finish really stay clear?
Yep! That’s the magic of acrylic. It doesn’t amber or yellow over time like oil-based finishes. Perfect for whites, pastels, or light wood tones.
Q: How many coats do I need?
A: Usually 3–4 thin coats for furniture tops, and 2–3 for lower-wear areas like legs or sides. Thin layers are the key. Think “stacking pancakes” rather than “pouring a cake batter flood.”
Q: How long does it take to dry?
A: Touch dry in 30 minutes to an hour. Ready for recoating in about 2 hours. But full cure (when it reaches max toughness) takes about 7 days. So go easy for that first week!
Q: Can I use a roller instead of a brush?
A: Yes, but pick a high-density foam roller for the smoothest results. And keep the coats light to avoid bubbles.
Q: Do I need to sand between coats?
A: A light scuff sand with fine sandpaper (320–400 grit) or a sanding pad is a good idea. It helps each layer bond and keeps the finish smooth. Just dust off before recoating.
Q: What if I see brush strokes or bubbles?
A: Don’t panic! Once dry, lightly sand the surface smooth and reapply in thinner coats. Acrylic is super forgiving; it wants you to succeed. 💪
Q: Is water-based acrylic food-safe?
A: Not immediately! Only once it’s fully cured (7+ days). After that, yes, it’s considered food-safe for surfaces like trays, but not for cutting boards (because knives cut into the finish).
Q: Can I use water-based acrylic outdoors?
A: Not usually. It’s designed for indoor furniture. For outdoor projects, you’ll want a spar urethane or marine-grade finish.
Q: What cleaners are safe for water-based acrylic finishes?
A: Stick with a soft cloth and gentle cleaners like distilled water or a touch of distilled vinegar. Avoid harsh chemical sprays, oils, and waxes — they can cloud or soften the finish.
Q: What do I do if my finish gets scratched?
A: Small scratches? Lightly sand and apply another coat. Deeper scratches? You may need to sand back that area and blend in new finish. Acrylic layers build easily, so touch-ups are simple.
Q: How long will a water-based acrylic finish last?
A: With good care, several years! Daily dusting, quick spill clean-ups, and the occasional refresh coat can keep it looking new for ages.
✨ Friendly Reminder: There are no silly questions in DIY! Every question brings you one step closer to becoming a confident, fearless finisher.
Final Wrap-Up: Is Water-Based Acrylic the Right Finish for You?
So here’s the scoop: water-based acrylic finishes (yep, the Polycrylic family) are like the best beginner BFF in the clear coat world. They’re easy-going, quick to dry, low on fumes, and stay crystal-clear—no yellowing drama here! Perfect if you’re working on:
- Painted furniture (especially whites and pastels)
- Light-stained wood you want to keep natural-looking
- Indoor projects where durability matters, but you don’t need “industrial strength armor” toughness
Why you’ll love it:
- Fast drying = quicker project turnarounds ✨
- Easy soap-and-water cleanup (bye-bye mineral spirits!)
- Beginner-friendly forgiving formula—you can sand out little oopsies and recoat with ease
- Stays clear, so your hard work looks just as bright years later
Where it might not be your perfect match:
- Heavy-use tabletops, kitchen counters, or outdoor projects (here, polyurethane or spar urethane wears the crown)
- If you want that super-tough, scratch-resistant shield for high-traffic zones, you might outgrow acrylic as your skills grow.
💡 Pro Tip: Start with water-based acrylic for your early projects—it’ll boost your confidence, teach you the ropes, and give you beautiful results without the overwhelm. As you get bolder, you can explore tougher finishes (like polyurethane) or fancier ones (like lacquer or resin).
Every DIY journey starts with one finish, one brush stroke, one project. If you’re a beginner who wants clear, easy, and reliable protection, water-based acrylic might just be your best first step into the wonderful world of furniture refinishing. So grab your brush, stir up that can, and give your piece the protection it deserves!
Thank you so much for stopping by! I hope this information helps you with your next project. Drop a comment below and let me know if you have any questions or tips from your adventures with polyurethane! Happy refinishing, and keep making treasures!
Until next time, have a beautiful and blessed day!

Don’t forget to sign up so you hear all about the next misadventure!