Beginners Guide to Lacquered Wood Furniture Finish
Let’s talk about one of the sassiest stars of the furniture refinishing world: lacquer! It’s shiny. It’s smooth. It dries faster than your coffee cools off—and the finish? Oh, so shiny and sparkly! Whether you’re refinishing a vintage treasure or adding pizzazz to a plain Jane piece, lacquer might just be your new best friend. So let’s dive in, shall we?
Whether you’re curious about lacquer’s glamorous history or itching to refresh a tired tabletop, this beginner’s guide is here to walk you through it all—step by fabulous step!
THIS POST CONTAINS AFFILIATE LINKS TO PRODUCTS THAT I HAVE OR WOULD USE.
AS AN AMAZON ASSOCIATE, I EARN FROM QUALIFYING PURCHASES AT NO COST TO YOU.
YOU CAN SEE MY FULL DISCLOSURE HERE.
What is Lacquer?
Lacquer is a clear or colored wood finish that dries by solvent evaporation, leaving a hard, durable, and glossy surface. It’s known for its quick-drying properties and ability to be polished to a high sheen.
Chemical Composition:
Modern lacquer typically consists of:
- Additives: Improve flow, leveling, and other properties.
- Resins: Provide the film-forming component.
- Solvents: Such as toluene, xylene, or acetone, which dissolve the resins and evaporate during drying.
- Plasticizers: Enhance flexibility and durability.
Unlike oil-based finishes that soak into the wood like a sponge, lacquer sits proudly on top—like the cherry on a very polished sundae.

The (Not So Brief) History of Lacquer
Bear with me as I nerd out a little here, but I love the history of furniture and how it has evolved! That is especially true of furniture finishes such as lacquer, which dates back thousands of years.
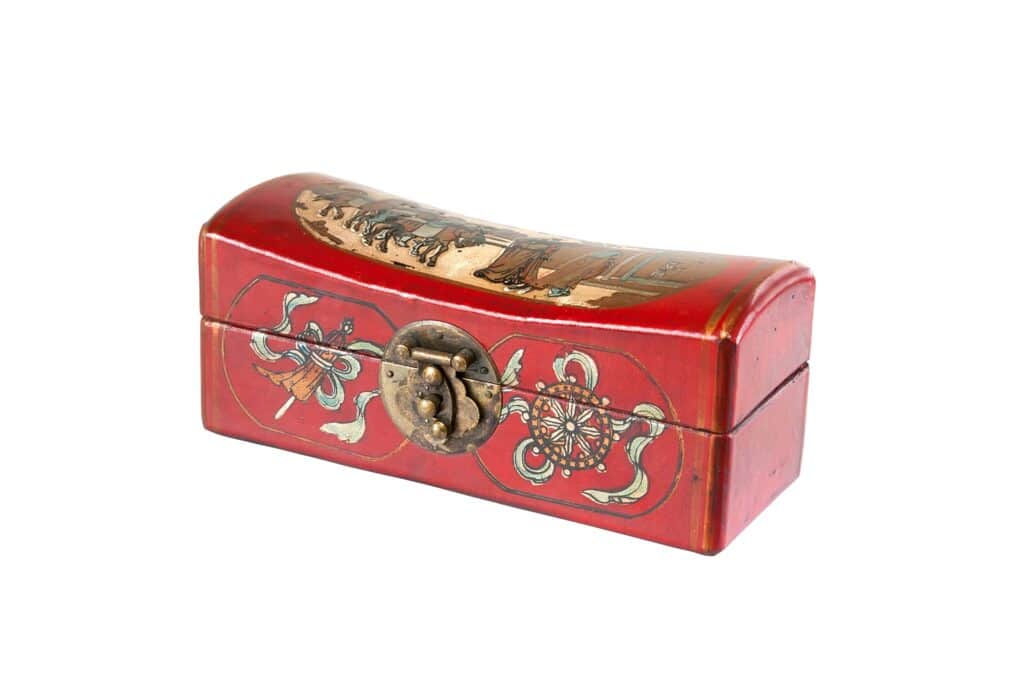
The earliest known versions come from ancient East Asia, where artisans used the sticky sap of the lacquer tree (Toxicodendron vernicifluum) to coat everything from bowls to boxes. This traditional “urushi” lacquer was the real deal—beautiful, durable, and highly prized. But it was also super slow—taking weeks to cure in humid conditions!
Fun nerd fact: The lacquer tree is related to poison ivy!
Fast-forward to the Roaring Twenties, and modern lacquer strutted onto the scene. Nitrocellulose lacquer, born from the auto industry, brought quick-dry shine to the furniture world. It became the darling of the Art Deco era and remains a timeless choice for woodworkers today thanks to its fast application and luxurious look.
How Traditional Lacquer Was (and Still Is!) Made
Unlike modern synthetic lacquers, traditional lacquer—also known as Urushi lacquer—is a completely natural finish made from the lacquer tree sap.
The Production Process:
- Tapping the Tree
Lacquer trees are carefully scored to allow the sap (urushiol) to ooze out. This is a slow, labor-intensive process. Each tree yields only a small amount of usable sap per year. - Purifying the Sap
The raw sap is filtered and stirred to remove impurities and excess water. This process can take days or weeks, depending on the intended use and desired viscosity. - Aging the Lacquer
The filtered sap may be aged for months or years, improving clarity and workability. Some master lacquer artisans even blend batches like vintage wine! - Application in Thin Layers
The lacquer is applied by brush in ultra-thin coats—sometimes dozens! Each layer must be cured in a humid, warm environment (called a furo or lacquer room), where the urushiol hardens by polymerizing through exposure to oxygen and moisture. - Buffing and Polishing
After drying, each layer is sanded or burnished before the next is applied. This builds a rich, deep gloss with remarkable depth and clarity.
If you’re ever lucky enough to see an original Urushi-lacquered piece in person, take a moment to admire the craftsmanship and time involved—it’s truly an art form!
Fun Fact: Some lacquered items have survived thousands of years. Ancient Chinese lacquerware has been found still glossy after centuries underground. That’s staying power!
Is Traditional Lacquer Still Made Today?
Yes! Traditional Urushi lacquer is still made and used in Japan, China, Korea, and Vietnam for high-end crafts like:
- Decorative boxes
- Bowls and utensils
- Buddhist statues and temple ornaments
- Traditional musical instruments
- Museum-quality furniture restoration
Artisans who specialize in this technique are highly trained, and the craft is often passed down through generations. In Japan, it’s even designated as an intangible cultural heritage!

However, because it’s so labor-intensive, Urushi lacquer is rare and expensive. Which is why modern furniture lacquer sold in the West today is based on nitrocellulose, acrylic, or catalyzed resins—faster to apply and easier to mass-produce, if lacking that centuries-old mystique.
What’s in Modern Lacquer?
Modern lacquer is basically a cocktail of resins and solvents that evaporate quickly, leaving behind a hard, glossy film. There are a couple of popular types:
- Nitrocellulose Lacquer – Made from cotton-derived cellulose mixed with fast-evaporating solvents. It’s beloved for its ease of repair and beautiful clarity.
- Catalyzed Lacquer (Pre- or Post-Catalyzed) – Has extra hardeners that chemically cure, creating a more durable and water-resistant finish. Slightly trickier to use, but built to last.
Application Method: How Modern Nitrocellulose Lacquer Works
Lacquer is unique in that it dries through solvent evaporation—it doesn’t “cure” like polyurethane or harden by oxygen like oil finishes. This makes it quick-drying and easy to build in multiple layers.
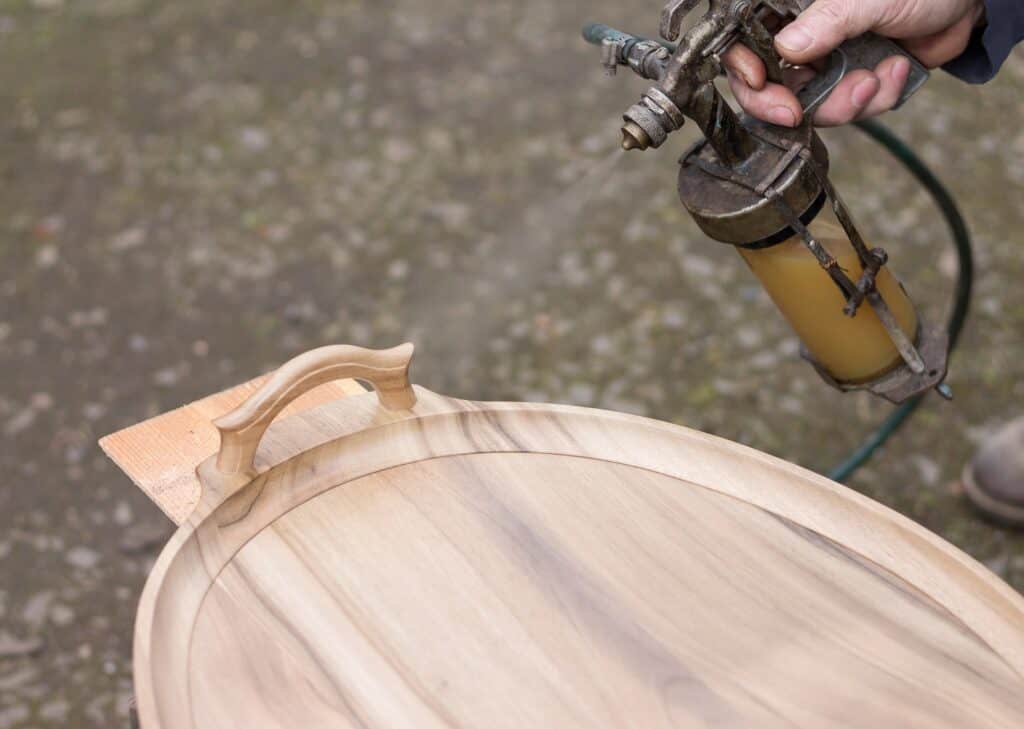
You’ll usually find lacquer applied in one of two ways:
- Spray Application – This is the most common method, delivering a smooth, even coat that dries in minutes.
- Brushing Lacquer – Specially formulated for brush-on use, although it’s a bit trickier and dries quickly (so work fast!).
Pro Tip: Always use lacquer in a well-ventilated area or spray booth, and wear the proper safety gear (respirator, gloves, goggles)—lacquer fumes are no joke!
Where and Why to Use Lacquer
Is lacquer the perfect finish for your piece? Lacquer is a versatile finish, but it’s essential to understand its strengths and limitations. Here are all the details to help you decide!
| Where It Shines | What’s to Love | What’s Not to Love |
|---|---|---|
| Furniture, cabinets, musical instruments | Quick-drying—great for impatient DIYers! High-gloss finish Easy to repair | Sensitive to heat and chemicals, Can yellow slightly over time (especially the nitrocellulose variety) Brush application can be tricky – spraying is definitely the way to go! The fumes are fierce—ventilation is a must! |
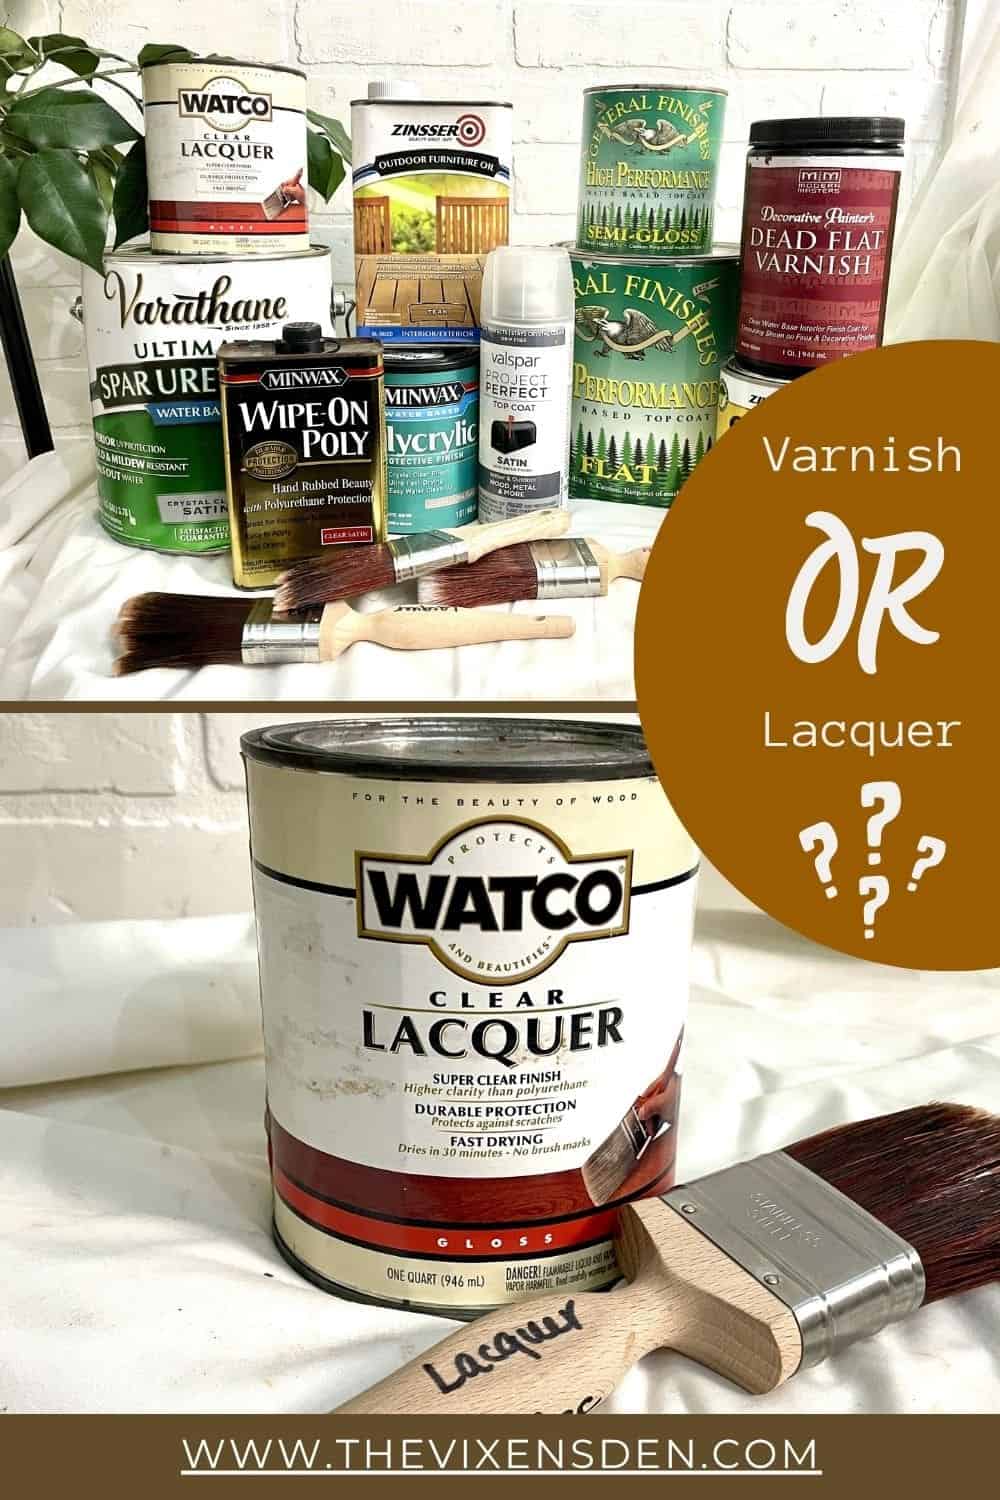
Which Product Is Right for You?
Choosing the right lacquer depends on your experience level and project requirements. Here are some thoughtfully researched favorites among the wood-working pros:
| Lacquer Type | Beginner | Creatively Confident | Pros |
|---|
| Nitrocellulose | Deft Interior Clear Wood Finish Gloss Brushing Lacquer | Mohawk Finisher’s Choice Clear Satin | Rothko & Frost Oxblood Pigmented Nitrocellulose Guitar Lacquer |
| Acrylic | Aqua Coat Clear Lacquer Water-Based Wood Finish (Satin) | Sherwin-Williams Pre-Cat CAB-Acrylic Lacquer | Restoration Shop Pure White Acrylic Lacquer Auto Paint |
| Catalyzed | Mohawk Pre-Catalyzed Lacquer | Valspar Pre-Catalyzed Lacquer | Mohawk Versalac Post-Catalyzed Clear Lacquer Top Coat |
Nitrocellulose Lacquer
Best for Beginners: Deft Interior Clear Wood Finish Gloss Brushing Lacquer
- Pros: User-friendly; no sanding required between coats; fast-drying.
- Cons: Less durable than catalyzed options; may yellow over time.
Best for Creatively Confident: Mohawk Finisher’s Choice Clear Satin
- Pros: Professional-grade finish; suitable for various applications.
- Cons: Requires spray equipment; higher cost.
Best for Pros: Rothko & Frost Oxblood Pigmented Nitrocellulose Guitar Lacquer
- Pros: High-quality pigment; excellent for musical instruments.
- Cons: Specialized use; requires experience for best results.
Acrylic Lacquer
Best for Beginners: Aqua Coat Clear Lacquer Water-Based Wood Finish (Satin)
- Pros: Low VOC; easy cleanup; fast-drying.
- Cons: May require multiple coats for desired finish.
Best for Creatively Confident: Sherwin-Williams Pre-Cat CAB-Acrylic Lacquer
- Pros: Durable; non-yellowing; lower toxic off-gassing.
- Cons: Availability may vary; requires spray equipment.
Best for Pros: Restoration Shop Pure White Acrylic Lacquer Auto Paint
- Cons: Designed for automotive use; may require adaptation for furniture.
- Pros: High-gloss finish; professional-grade quality.
Catalyzed Lacquer
Best for Beginners: Mohawk Pre-Catalyzed Lacquer
- Pros: Ready-to-use; more durable than nitrocellulose; easy application.
- Cons: Shorter shelf life once opened.
Best for Creatively Confident: Valspar Pre-Catalyzed Lacquer
- Pros: Available in various sheens; good durability.
- Cons: May require professional equipment for application.
Best for Pros: Mohawk Versalac Post-Catalyzed Clear Lacquer Top Coat
- Cons: Requires precise mixing; professional application recommended.
- Pros: High durability; suitable for high-contact areas; long shelf life after catalyzation.
What’s in the Finishing Toolkit?
Now it’s time to get into the nitty-gritty business! Ready to give your piece a dazzling lacquer makeover? Here is everything you will need to revive your furniture with this classic finish:
Tools
- LVLP or conventional spray gun with compatible air compressor (or aerosol cans for smaller projects)
- Paintbrush (if not spraying)
- Respirator and safety goggles (your lungs will thank you)
- A well-ventilated, dust-free spray zone
Materials
- Lacquer
- Lacquer thinner (for thinning and cleaning)
- Finish-appropriate chemical finish remover (if removing existing finish)
- Sandpaper (320 to 400 grit and 1000 to 1500 if buffing)
- Tack cloths
Pro Tips: Before You Begin
Humidity and Temperature: Ideal conditions are around 77°F (25°C) and 50% relative humidity.
Surface Preparation: Ensure the wood is clean, dry, and sanded smooth.
Test First: Always test the lacquer on a scrap piece or inconspicuous area.
Ventilation: Work in a well-ventilated area to avoid inhaling fumes.
How to Apply Lacquer Furniture Finish
Step 1: Prep Like a Pro
- Clean the surface thoroughly using mineral spirits, a mix of distilled water and mild soap, or distilled vinegar and water to remove grime, oils, and old waxes.
- Remove the hardware and set it aside safely.
- If there’s an old finish, test it to determine if it’s lacquer. (Not sure what finish is on your piece? This post walks you through the process of testing finishes.)
- If the existing finish is lacquer and it’s just dull or scratched, a light sanding and fresh coat may be all you need.
- If the finish is not lacquer, then you will want to start with a clean slate! Remove the finish using the chemical remover that matches your finish test. (Just sanding off finish is never the best first step. This ebook walks you through why and what to do instead, step by step!)
- Sand the surface with 220-grit sandpaper for smoothness and to create “tooth” for adhesion. Wipe down with a tack cloth.
Step 2: Choose Your Lacquer
Pick your lacquer type.
Nitrocellulose is great for beginners. Catalyzed lacquer is tougher but requires a bit more finesse. There are several types of lacquer, so choose based on your project:
- Nitrocellulose Lacquer – Classic, fast-drying, and rich in appearance.
- Acrylic Lacquer – Clearer and non-yellowing over time.
- Catalyzed Lacquer – Durable and resistant to wear—great for tabletops and high-use pieces.
Becky’s Favorite Lacquer Brands
- Mohawk Clear Lacquer – Pro-level beauty in a can or bulk.
- Deft Clear Wood Finish – Perfect for DIY lacquer newbies!
- General Finishes Water-Based Lacquer – If you’re team water-based, this one’s a gem.
- Sherwin-Williams Pre-Catalyzed CAB-Acrylic Lacquer – Loved for its rock-solid durability and low-odor formula—a refreshing upgrade from traditional nitrocellulose!
- Sherwin-Williams Pre-Catalyzed Lacquer – Widely hailed as the gold standard for unbeatable toughness and rock-solid reliability!
Step 3: Apply Like a Champ
If Spraying:
- Thin your lacquer (if needed) per the manufacturer’s instructions.
- Load into a LVLP sprayer or aerosol can.
- Hold your spray gun 6–8 inches from the surface. Use smooth, overlapping passes.
- Start with a light tack coat, wait 15 minutes, then layer on a couple of medium coats.
- Let each coat dry (usually within 15–30 minutes).
- Lightly sand between coats with 320-grit sandpaper.
- Apply 3–5 coats for depth and durability, but you can add more if you want that high-gloss glam
If Brushing:
- Use a high-quality natural bristle brush. (Find your perfect brush here!)
- Work quickly in long strokes with minimal overlap.
- Sand lightly between coats as above.
- Consider adding retarder to slow drying and reduce brush marks.
Pro Tip: Lacquer takes seconds to dry in high temperatures, so try to plan for cooler days or work in a controlled temperature and humidity environment.
Step 4: Buff It Beautiful
Once your final coat is dry and cured (wait 1–2 days for light use or up to a week for full cure):
- Lightly wet-sand with 1000-1500 grit if needed for smoothness.
- Use a fine polishing compound to buff the finish to your desired sheen—matte, satin, semi-gloss, or high-gloss.
- Wipe clean with a microfiber cloth.
Application Best Practices
- Best Temperature Range: Aim for 70-75°F (21-24°C).
- Best Humidity Range: 40–60%. Too humid? You’ll get “blushing” (that milky haze nobody wants).
- Touch Dry Time: 10–15 minutes
- Recoat Time: 30 minutes
- Full Cure: 48–72 hours
- Number of Coats: 3-4 coats provide optimal protection and appearance.
When and How to Refresh Lacquer Furniture Finish
So, your lacquer finish has seen better days. Maybe it’s dulled, scratched, or just not living up to its former glory. The good news? Refinishing lacquer is one of the most forgiving and rewarding processes for furniture refinishers of all skill levels, especially when you follow a few key steps!
Unlike polyurethanes that often require complete stripping, lacquer can be refreshed with a process called reflowing, where new coats of lacquer melt into the old, creating a seamless, revitalized finish. Magic? Almost!
Signs It’s Time to Refresh:
- Dullness or loss of gloss.
- Minor scratches or scuffs.
- Discoloration or yellowing.
Refreshing Steps:
Step 1: Assess the Surface
Take a good look. If the finish is mostly intact—just a bit cloudy or scratched—you’re likely a perfect candidate for recoating. But if it’s cracked, peeling, or flaking off like pastry crust, you’ll want to remove and start fresh (head to the “Refinishing” section).
Step 2: Clean Thoroughly
Before doing anything else, give the piece a gentle but thorough cleaning. A soft cloth dampened with a mix of distilled water and mild dish soap—or a 50/50 blend of distilled water and distilled white vinegar—will lift away oils, dust, and waxes that can interfere with adhesion.
Step 3: Lightly Sand the Surface
Use 400- to 600-grit sandpaper to gently scuff the finish. You’re not trying to remove the lacquer, just create a little “tooth” for the new coat to grip onto. Always sand with the grain, and follow up with a tack cloth to remove dust.
Step 4: Apply a Fresh Coat of Lacquer
Start with a light mist coat to settle into any imperfections, then build up with two to three full coats. Let each coat dry completely according to the product’s instructions—typically 15 to 30 minutes for nitrocellulose or acrylic lacquers, and at least an hour for catalyzed lacquers.
Step 5: Buff to a Shine (Optional but Delightful)
Once fully cured, you can lightly buff the surface using #0000 steel wool or a cotton cloth and polishing compound to bring out a dreamy, high-gloss shine. Just make sure you’re using polish that’s lacquer-safe!
Pro Tips:
Not sure what kind of lacquer you’re dealing with? Test a hidden area with lacquer thinner. If it softens or becomes tacky, you’re likely working with a re-coatable lacquer like nitrocellulose or acrylic.
Stick to like-for-like. Avoid applying catalyzed lacquer over nitrocellulose without compatibility testing as it can cause cracking or adhesion issues.
Don’t rush the cure time! Even though lacquer dries quickly, curing takes longer, especially in humid environments. Be patient for the best results.
Refinishing Lacquer Furniture Finish
Not all finishes can be saved with a quick spritz and buff! Here’s how to tell when your lacquer finish has crossed into “refinish me now” territory:
Signs It’s Time to Refinish (Not Just Refresh) Lacquer
- Flaking or Peeling
If the lacquer is lifting, curling, or coming off in flakes (especially around edges or corners), it’s no longer bonding with the wood beneath. A new coat won’t stick to a finish that’s already giving up—so it’s time to strip and start fresh. - Deep Cracks or Crazing
Lacquer develops a fine network of cracks over time, especially in older or sun-exposed pieces. While some shallow crazing can be buffed out or sealed, deep spiderweb cracks mean the finish has lost its integrity and needs full removal and replacement. - Severe Discoloration or Cloudiness
If the finish looks milky, yellowed, or patchy—and cleaning or buffing doesn’t help—the damage has usually penetrated too deeply. Trapped moisture, UV damage, or chemical breakdown may require a total refinish. - Sticky or Tacky Feel
Lacquer should cure to a hard, smooth finish. If it feels sticky or soft long after it should have dried, the chemical structure may have broken down due to age, heat, or incompatible products. A full refinish is your best bet. - Stains or Burns Beneath the Finish
Water rings, ink stains, or burn marks that lie under the lacquer can’t be removed without removing the finish itself. If the damage goes beyond the surface, refinishing is the only way to reclaim that beautiful wood grain. - Finish is Wearing Off to Bare Wood
If you’re seeing bald spots where the finish has worn completely through—especially on tabletops or armrests—it’s time to go all in. Recoating won’t even things out, and bare wood needs sealing protection ASAP.
Understanding the Chemistry Behind Lacquer Removal
Removing lacquer should be as simple as painting on some lacquer thinner. Right? Umm….no! While some removers are versatile and work across multiple lacquer types, others are better tailored to break down specific chemical bonds. Let’s walk through the details so you can choose the right tool for the job.
Each lacquer type has a unique chemical structure, and that matters big time when it comes to stripping them off:
| Lacquer Type | Base Chemistry | Why It Matters for Removal |
|---|---|---|
| Nitrocellulose Lacquer | Dissolves in solvents like acetone or lacquer thinner | Soft, re-dissolvable layers make it easiest to strip with traditional solvents or furniture-grade strippers. |
| Acrylic Lacquer | Similar solvent-soluble structure, but with acrylic resin | Slightly tougher than nitro, but still dissolves well with standard lacquer removers. |
| Catalyzed Lacquer (pre- or post-catalyzed) | Contains a catalyst that chemically cures the finish | Crosslinked for toughness—removal requires industrial-strength strippers, often with methylene chloride. |
The Right Remover for the Right Lacquer
Here’s a clear breakdown of which remover works best for which lacquer, so you can skip the trial-and-error phase and jump straight into confident refinishing.
| Remover | Best On | Avoid If | Pros | Cons |
|---|---|---|---|---|
| Lacquer Thinner (e.g., Klean-Strip Lacquer Thinner) | Nitrocellulose, Acrylic | Catalyzed Lacquer | Readily available, fast-acting | Can smear softened finish into the wood grain if overused |
| Mohawk Remover 5 | Nitrocellulose, Acrylic | May struggle with catalyzed finishes | Furniture-specific, low odor, moderate evaporation rate | May require multiple applications on thick layers |
| Klean-Strip Premium Stripper (methylene chloride–based) | All lacquer types, including catalyzed | Indoor projects without heavy ventilation | Removes anything quickly and effectively | Strong fumes, requires PPE and well-ventilated space |
| Citristrip or soy-based removers | Thin nitrocellulose or acrylic finishes | Catalyzed lacquer or thick, multi-layered coatings | Low odor, safer for indoor use, gentle on detail work | Slower to work, may require multiple rounds |
| Jasco Premium Paint & Epoxy Remover | Catalyzed lacquer, epoxy, thick finishes | Projects with delicate veneers or low ventilation | Heavy-duty, highly effective | Very strong fumes and high toxicity—must use PPE and caution |
Pro Tip
If you’re unsure what kind of lacquer you’re dealing with, try a small test spot with Mohawk Remover 5. If the finish softens or bubbles within 10 minutes, you’re likely working with nitrocellulose or acrylic lacquer. If nothing happens, you’re probably facing catalyzed lacquer—and that means it’s time to bring in a stronger stripper like Klean-Strip Premium or Jasco.
Safety First
No matter what remover you choose, safety always comes first. Here’s what you need in your protective gear lineup:
- A metal container for safe disposal of used steel wool, rags, and towels (to avoid spontaneous combustion)
- A full-face respirator or a snug-fitting half-mask with organic vapor cartridges
- Chemical-resistant gloves (nitrile or neoprene)
- Long sleeves, pants, and safety glasses
- Excellent ventilation (or better yet, work outdoors)
How to Identify the Lacquer on Your Furniture
Before you reach for that remover, it’s essential to figure out exactly what kind of lacquer you’re dealing with. Is it the soft, vintage-friendly nitrocellulose? The sleek, slightly tougher acrylic? Or the rock-solid, chemically-cured, catalyzed kind? Let’s break it down in a way that makes your next step clear and easy.
Step 1: Start with the Era
Use the age of the furniture as your first clue:
| Era | Likely Lacquer Type |
|---|---|
| Pre-1920s | Shellac (not lacquer) |
| 1920s–1950s | Nitrocellulose lacquer (common in American furniture) |
| 1960s–1980s | Nitrocellulose or early acrylic blends |
| 1990s–Today | Catalyzed lacquer on high-end and factory finishes; acrylic on lower-VOC pieces |
Not sure about the age? Try these other steps.
Step 2: Perform a Solvent Spot Test
This is your beginner-friendly chemical detective work!
- Choose a hidden area—like the back of a leg or underside of a drawer.
- Apply a few drops of acetone, denatured alcohol, or Mohawk Remover 5.
- Let sit for 30 seconds, then rub gently with a cotton swab.
Results:
| What Happens | What It Means |
|---|---|
| Finish softens, gets sticky, or comes off | Likely nitrocellulose or acrylic lacquer |
| No reaction at all | Likely catalyzed lacquer or a polyurethane/varnish (entirely different class!) |
| Turns milky or dissolves quickly with alcohol | Could be shellac, not lacquer |
Pro Tip: If you’re using Mohawk Remover 5 and the finish bubbles or wipes off easily, you’ve probably got an older, softer lacquer—nitrocellulose is your best guess.
Step 3: Look at the Sheen and Surface Clues
- Nitrocellulose lacquer: Often yellows with age, especially on light woods. May have slight crazing or small cracks.
- Acrylic lacquer: Remains clear over time and resists yellowing. Slightly more modern, glossy look.
- Catalyzed lacquer: Looks like a factory-perfect coating—durable, hard, and often used on cabinetry and commercial furniture. Resists all common solvents.
Step 4: Tap Test (Yes, really!)
Tap a fingernail gently against the surface.
- Soft, faintly tacky feel? Could be older nitrocellulose lacquer.
- Cool, slick, super-hard? Catalyzed lacquer.
- Smooth and clear, but not glass-hard? Acrylic lacquer.
What’s Next?
Now that you’ve got a solid idea of what you’re working with, you’re ready to move into the removal process, tailored to your finish type! Up next, I’ll guide you step-by-step through how to remove each kind of lacquer safely and effectively, using the right remover and technique for the job.
How to Remove Nitrocellulose Lacquer
Good news: This is the easiest of the three to remove! Nitrocellulose lacquer is soft, solvent-soluble, and responds beautifully to the right chemical or mechanical treatment.
Best Removers:
Acetone or Lacquer Thinner – for small spot treatments and delicate work
Mohawk Remover 5 – professional-grade, fast, and reliable
Klean-Strip Premium Stripper (gel formula) – beginner-friendly and widely available
Tools
- Chemical-resistant nitrile gloves
- Respirator mask
- Safety glasses
- Drop cloths or plastic sheeting
- Natural bristle brush or disposable chip brush
- Plastic scraper or card scraper
Materials
- Remover of choice (see above)
- Fine steel wool (#0000)
- Denatured alcohol (for final cleanup)
- Lint-free rags
Step-by-Step Removal Process:
- Prep your space: Work in a well-ventilated area (outdoors if possible). Protect the floor and nearby surfaces with drop cloths.
- Apply remover: Brush on a thick layer of your chosen remover and let it sit (10–15 minutes for Mohawk or Klean-Strip).
- Watch for bubbling: When the surface starts to wrinkle or bubble, it’s ready.
- Scrape gently: Use a plastic scraper to remove the softened lacquer.
- Repeat if needed: For stubborn areas, apply a second coat.
- Detail clean: Use fine steel wool dipped in denatured alcohol to clean out corners and carvings.
- Final wipe-down: Use clean, lint-free rags and more denatured alcohol to remove residue.
Pro Tip: Nitro lacquer sometimes soaks into wood grain. If it does, a light sanding after stripping will help prep the surface for a fresh finish.
How to Remove Acrylic Lacquer
Acrylic lacquer is a bit tougher than nitrocellulose. It doesn’t always respond to traditional lacquer thinners, so you’ll want to bring in a more modern remover and a bit more patience.
Best Removers:
Mohawk E-Z Vinyl Remover – designed for stubborn acrylic and vinyl finishes
Citristrip Paint & Varnish Remover – low odor, safer for indoor use (but slower!)
Tools
- Chemical-resistant nitrile gloves
- Respirator mask
- Safety glasses
- Drop cloths or plastic sheeting
- Natural bristle brush or disposable chip brush
- Plastic scraper or card scraper
- Patience – lots of patience
Materials
- Remover of choice (see above)
- Fine steel wool (#0000)
- Denatured alcohol (for final cleanup)
- Lint-free rags
Step-by-Step:
- Prep thoroughly: Cover everything. Acrylic lacquer can require more dwell time.
- Apply remover generously: Use a thick coat and cover with plastic wrap to prevent evaporation (especially with Citristrip).
- Wait 30–60 minutes: Check for bubbling or softened finish.
- Scrape carefully: Acrylic gets gummy—use short, light strokes.
- Clean with steel wool and alcohol: This helps break up residue and any embedded finish.
- Rinse & dry: Wipe down with clean rags and allow to fully dry before refinishing.
Pro Tip: Acrylic can soften into a sticky mess. Go slow and test small areas to avoid gumming up your tools.
How to Remove Catalyzed Lacquer
Catalyzed lacquer is the heavyweight champ of durability—and that means it’s also the most stubborn to remove. This finish is chemically cross-linked, so standard lacquer thinners won’t do the trick. You’ll need stronger chemical removers or abrasive mechanical methods.
Best Removers:
Abrasive sanding – sometimes the only option for large surfaces
Jasco Premium Paint & Epoxy Remover – heavy-duty and fast-acting
Stripwell QCS – industrial-strength stripper used by refinishers
Tools
- Heavy-duty chemical-resistant gloves
- NIOSH-approved respirator
- Heavy-duty safety glasses
- Drop cloths or plastic sheeting
- Natural bristle brush or disposable chip brush
- Stainless steel or plastic scraper
- Orbital sander
- Patience – lots of patience
Materials
- Remover of choice (see above)
- Stripping pad
- Lacquer thinner or acetone (for cleanup)
- Coarse sandpaper (80–120 grit)
- Lint-free rags
Step-by-Step:
- Test first: Try your remover in a hidden area. If it doesn’t budge, plan for sanding.
- Apply remover: Use a thick coat of Jasco or Stripwell. Let it dwell 15–30 minutes.
- Scrape away what you can: Often, only the top layer will lift.
- Repeat or sand: Apply a second round if needed, or break out the orbital sander.
- Final cleanup: Use lacquer thinner or acetone on rags to remove residue.
Pro Tip: Catalyzed lacquer is often used on cabinets and commercial furniture. If you’re refinishing a modern piece and the finish won’t budge, you’re likely dealing with this tough customer.
Summary Table: Best Removal Methods by Lacquer Type
| Lacquer Type | Best Removers | Difficulty | Time Required |
|---|---|---|---|
| Nitrocellulose Lacquer | Mohawk Remover 5, Klean-Strip, Acetone | Easy | Fast (30–60 min) |
| Acrylic Lacquer | Citristrip, Mohawk E-Z Vinyl Remover | Medium | Moderate (1–2 hrs) |
| Catalyzed Lacquer | Jasco, Stripwell QCS, Orbital sanding | Hard | Long (2+ hrs) |
How to Care for Lacquered Furniture
Once your masterpiece is finished, treat it with love and it’ll shine for years!
Do’s:
- Dust regularly with a soft microfiber cloth.
- Clean spills immediately with distilled water and a soft cloth.
- Use coasters and placemats to prevent water rings and scratches.
- Use paste wax or polish occasionally to revive the shine (only on older lacquer finishes, not newer catalyzed ones).
Don’ts:
- Avoid silicone-based polishes—they can cloud the finish.
- Don’t use ammonia-based cleaners.
- Keep away from prolonged exposure to direct sunlight or extreme humidity.
Common Lacquer Finishing & Refinishing Mistakes (And How to Fix Them)
| Mistake | What Happened? | Why It Happened | How to Fix It |
|---|---|---|---|
| Cloudy or Blushed Finish | The lacquer looks milky or hazy | Applied in high humidity; moisture got trapped in the film | Lightly warm the surface with a hair dryer to release moisture, or use a blush remover spray like Mohawk No Blush™ |
| Orange Peel Texture | The finish looks bumpy or uneven, like citrus skin | Sprayed too far from surface, wrong viscosity, or poor airflow | Sand smooth with 400–600 grit, then apply another thin, even coat—closer and with better overlap |
| Fish Eyes | Small craters or “repelled” spots in the finish | Surface contamination (oils, waxes, silicone) | Stop and clean thoroughly with degreaser; add fish-eye eliminator to the next coat |
| Runs or Sags | Finish pools or drips on vertical surfaces | Applied too heavily in one pass | Let dry, then sand the run smooth and recoat with light, even layers |
| White Specks or Dust Nibs | Tiny particles appear trapped in the surface | Dust contamination in the workspace or on the surface | Sand lightly with 600 grit and tack cloth between coats; finish in a dust-free zone |
| Finish Won’t Dry/Cure | The lacquer stays tacky or soft | Cold temperatures or excessive thickness | Move the piece to a warmer, dry area; if too thick, allow extra curing time or strip and reapply correctly |
| Peeling or Flaking | Finish is separating from the wood | Poor adhesion—possibly applied over a contaminated or glossy surface | Strip the finish completely, sand, clean, and reapply with proper surface prep |
| Bubbles in the Finish | Small air pockets or bubbles form in the coating | Shaking the can, spraying too close, or too thick | Let dry, sand smooth, and reapply with proper spray distance and light coats |
| Cracking or Crazing | Web-like lines or cracks appear in the finish | Finish was applied too thick or cured too fast | Strip the finish, sand smooth, and refinish using thinner coats and proper cure times |
| Color Shifting or Yellowing | The piece looks more amber over time | Normal aging for nitrocellulose lacquer | Choose acrylic lacquer for a water-clear finish, or embrace the patina as vintage charm! |
Pro Tips:
- When in doubt, less is more—thin, even coats, and proper dry times win the race.
- Keep your workspace clean, well-ventilated, and within the recommended temp/humidity range.
- Always test your products and technique on a scrap piece or hidden spot before tackling the full piece.
FAQs
Q: Is lacquer food safe?
A: Yep! Once fully cured, lacquer is safe for occasional food contact, like serving trays or tabletops. But skip it for cutting boards or utensils.
Q: Can I brush lacquer on?
A: Technically, yes. Realistically? It’s a race against time—lacquer dries too fast for brushing to work well. Spraying is where it shines!
Q: Does lacquer yellow over time?
A: Some types do, especially if exposed to sunlight. Catalyzed lacquer resists yellowing better than nitrocellulose.
Q: Can I lacquer over an old finish?
A: Only if that finish is compatible and properly prepped. When in doubt, strip it out.
Q: Can I mix lacquer with other finishes?
A: Nope! Lacquer is a lone wolf. Stick with its own kind.
Q: How do I fix a run or drip in the lacquer?
A: Allow it to dry completely, then sand the area smooth and reapply a thin coat.
Pro Tips to Lacquer Like a Legend
- Spray outside or in a spray tent to keep your space (and your lungs!) clean.
- Add a retarder if you’re working in humid weather—it slows drying and prevents blushing.
- Don’t panic if you mess up—lacquer is super forgiving. Just sand it back and recoat. It’ll melt right in
- Always test spray patterns and drying times on a scrap piece first!
- For high-wear pieces, consider catalyzed lacquer for extra durability.
- Want a silky-smooth final feel? Wet sand and buff with ultra-fine paper and polish!
Final Thoughts
Lacquer is one of those magical finishes that can take your project from “nice” to “jaw-dropping” in just a few coats. With a little prep, a dash of practice, and a good sprayer, you’ll be laying down layers of shine that would make even a grand piano jealous.
So grab your goggles, channel your inner refinishing rockstar, and go for the gloss! At The Vixen’s Den, we believe in sparkle, sass, and seriously stunning furniture—one fabulous finish at a time.
Thank you so much for stopping by! I hope this information helps you with your next project. Leave a comment below with your questions or misadventures with lacquer finishing!
Until next time, have a beautiful and blessed day!

Don’t forget to sign up so you hear all about the next misadventure! Until then, you may also like this Magazine Rack makeover or this Dresser upcycle.