How to Stain a Dresser for a Natural Wood Look and Add a DIY Transfer
Do you have an orange dresser that just screams “construction work ahead”? Would you like to soften that hi-vis glow into a gentler more natural-looking wood tone? Let’s stain that dresser and create a natural wood look, with some beautiful unexpected details.
I found this dresser through Craigslist. It had a very sad story. The owner’s fiance had passed away and she was selling everything to move away from the area. She had started working on this piece but wasn’t able to finish it. I was honored to pick up where she had left off and see if I could give this dresser a chance at a new look. I really liked the curved corners and simple style.
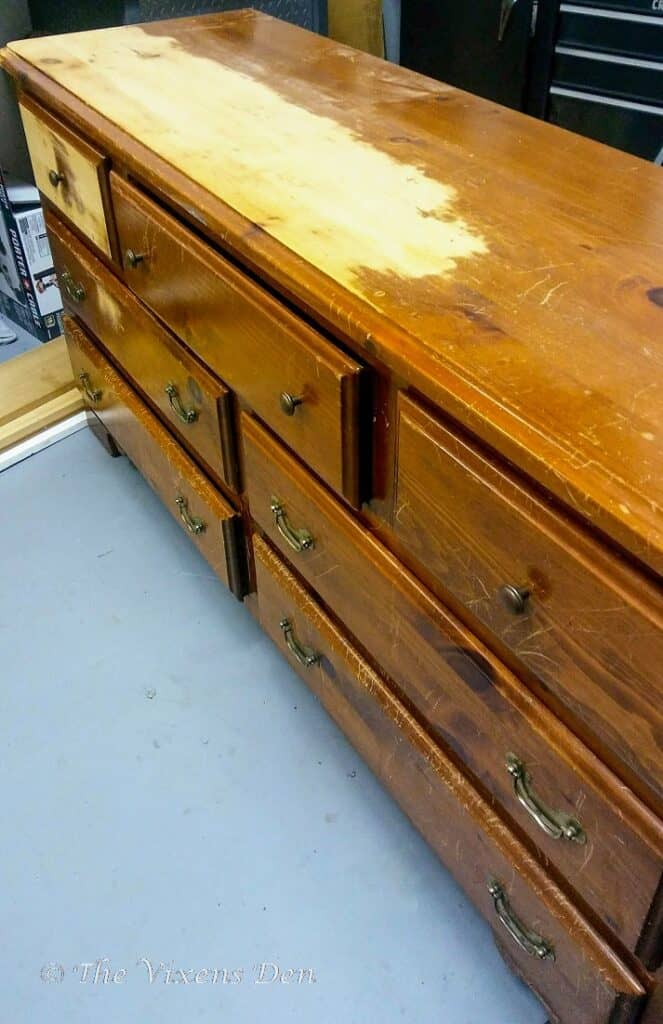
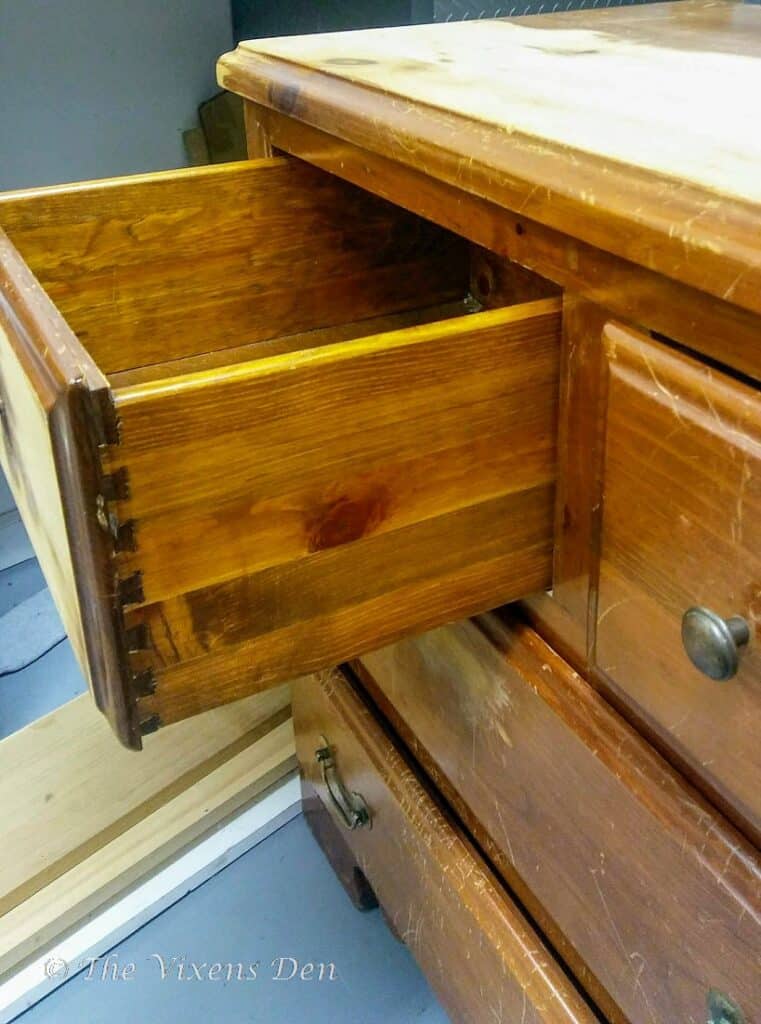
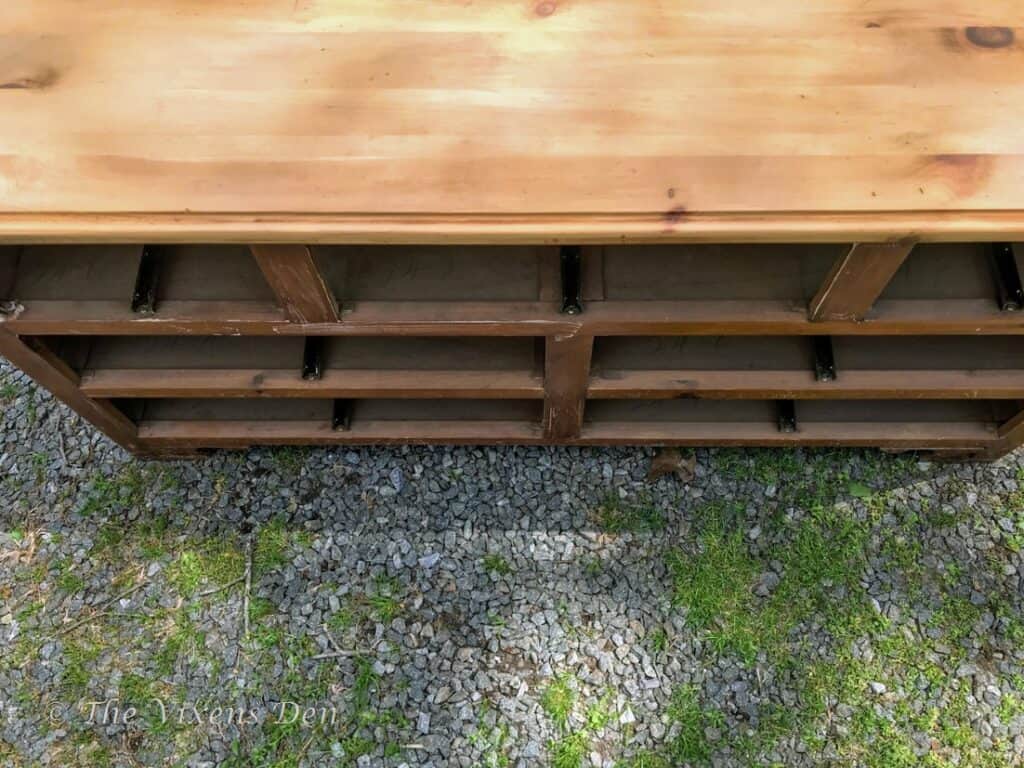
Although the surface looked as if it had been through a war zone, with lots of deep scratches and gouges, the dresser was solid wood (no particle board drawer fronts this time!) and was solidly built. There wasn’t any wiggle when we lifted it and the drawers were dovetailed. I have all the heart eyes for some dovetailed drawers!
The Makeover Plan
For this makeover, I wanted to give my husband something special. He loves the outdoors, so I thought I would try to bring that to this piece using stencils and a transfer process that I had used to make Christmas ornaments. This turned out to be much more challenging than I had expected! In fact, just about every step along the way encountered a hiccup of some kind. Hopefully, these experiences can help you avoid some of those challenges or at least have an idea of how to fix them.
Here’s the tools and materials list for this project:
AS AN AMAZON ASSOCIATE I EARN FROM QUALIFYING PURCHASES AT NO COST TO YOU.
YOU CAN SEE MY FULL DISCLOSURE HERE.
Tools
- Screwdriver
- Chip brush
- Plastic scraper
- Steel wool
- Tin can
- Mouse sander
- Rag
- Paint brush
- Stencils
- Spray bottle
Materials
- Furniture stripper – CitriStrip Stripping Gel
- Mineral Spirits
- Minwax Pre-Stain
- Stain – MinWax in Weathered Oak
- Stain – MinWax in Simply White
- Vinegar
- Baking soda
- Spray primer – Rustoleum Self-Etching Primer
- Spray paint – Rustoleum Hammered Black in Matte
- Cornstarch
- Drawer liner fabric
- Transfer print from Staples or Fedex
- Topcoat – General Finishes in Flat
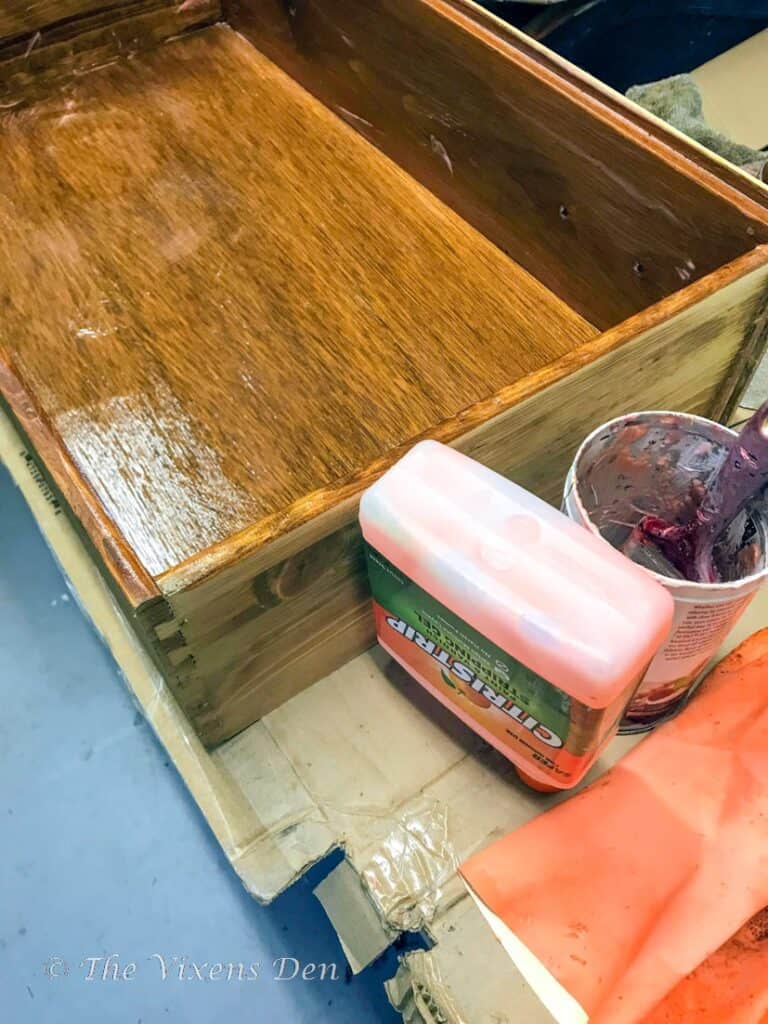
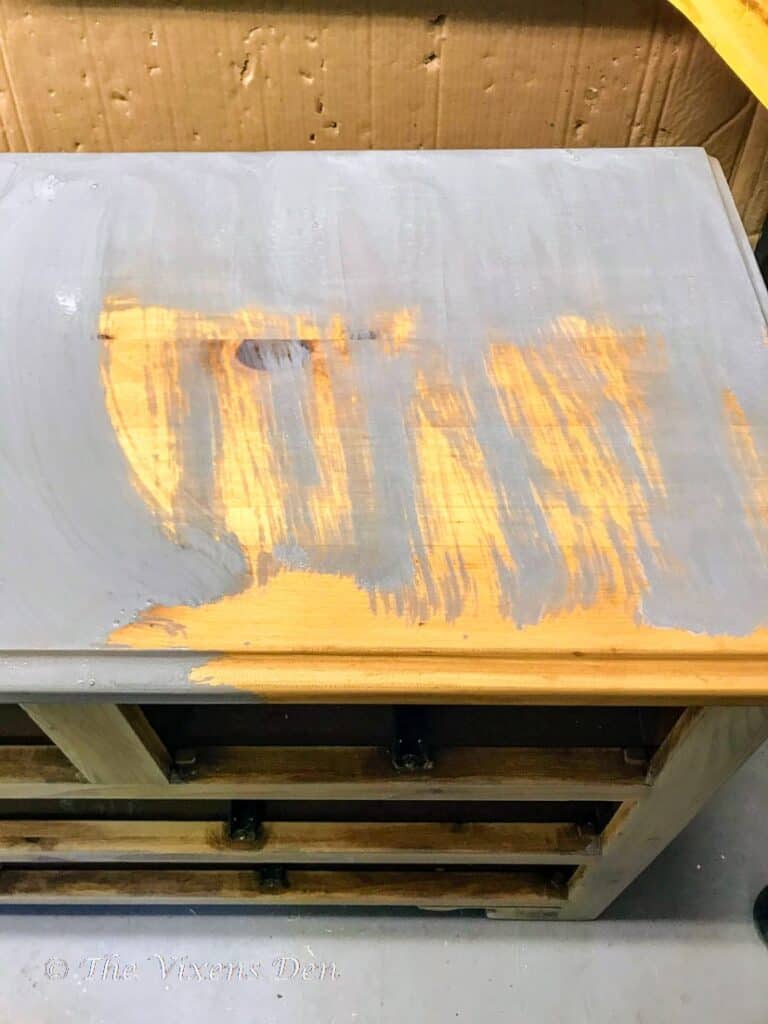
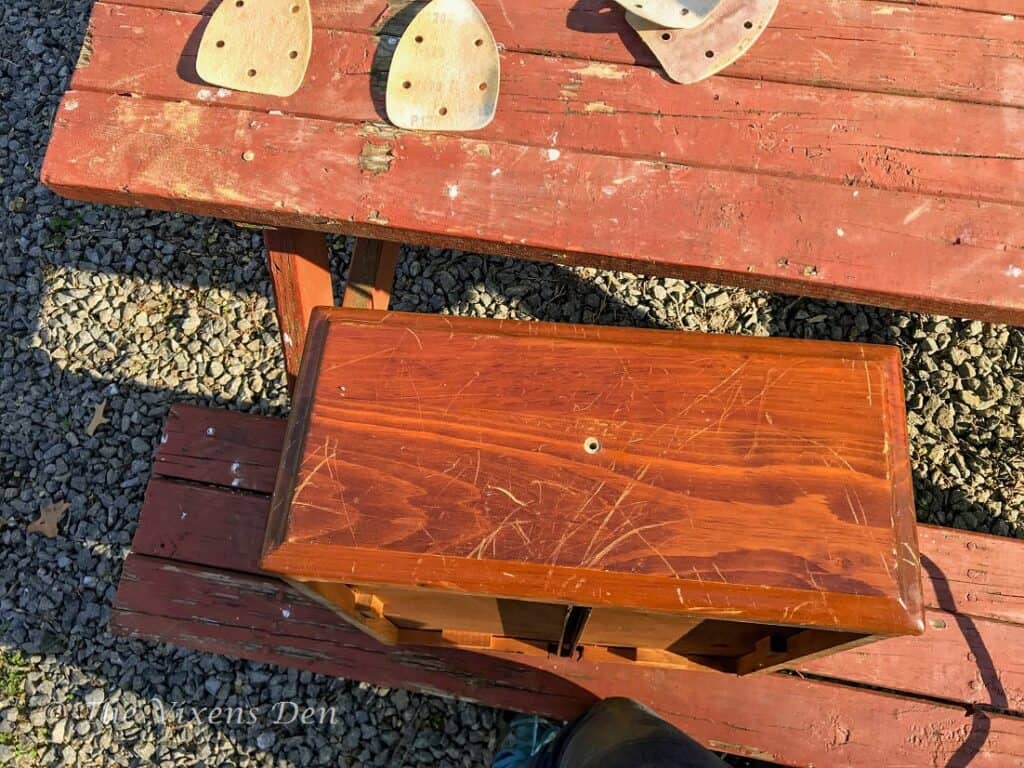
Although I knew that I was eventually going to have to sand the top of the dresser, just to even out what the previous owner had started, I prefer using a chemical stripper to remove finishes. My favorite furniture stripper is Citri-Strip. I paint on a layer of Citri-Strip, go work on something else and come back in an hour or two to scrape off all the old finish. It’s a very satisfying process and I very much prefer it to sanding.
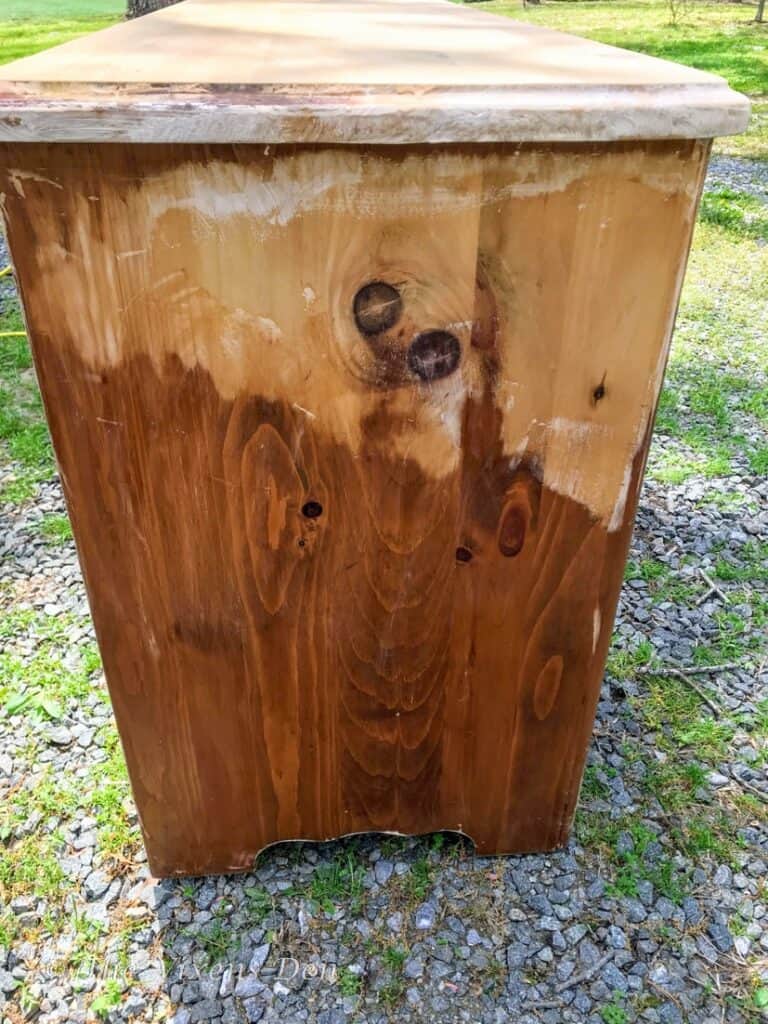
There are also some sections that just wouldn’t hold up well to sanding, at least not with me behind the sander, such as along the delicate curves of the top. Those areas always turn out best for me if I remove the surface finish with paint stripper and steel wool and then follow up with a light sanding to smooth out the wood surface.
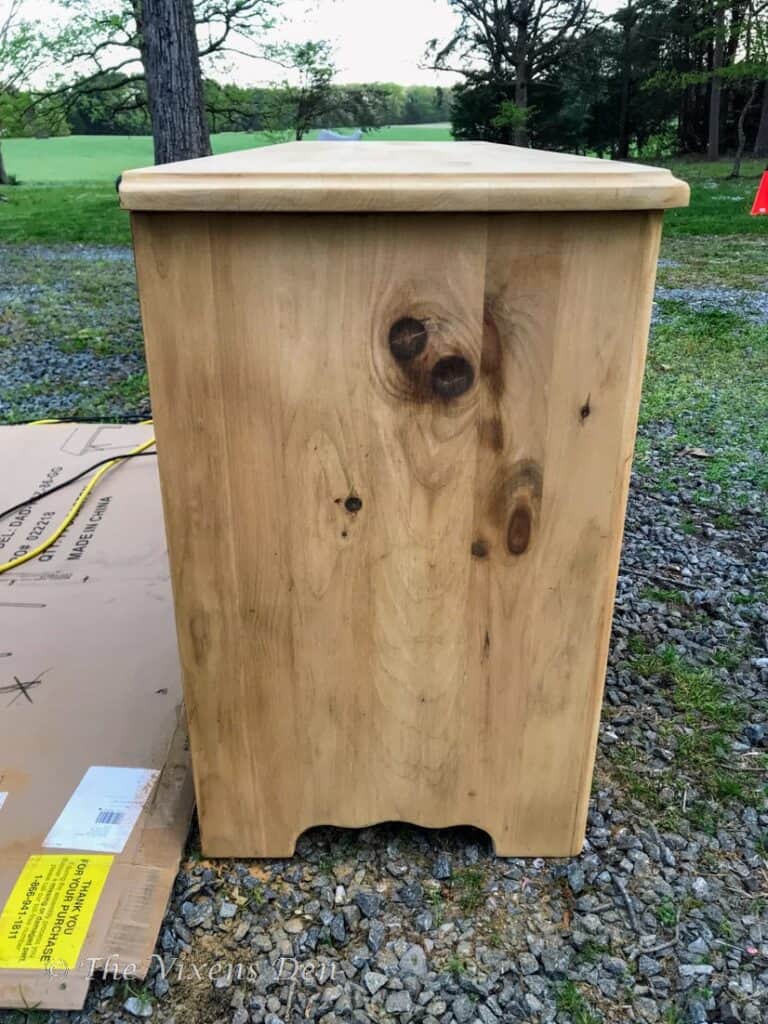
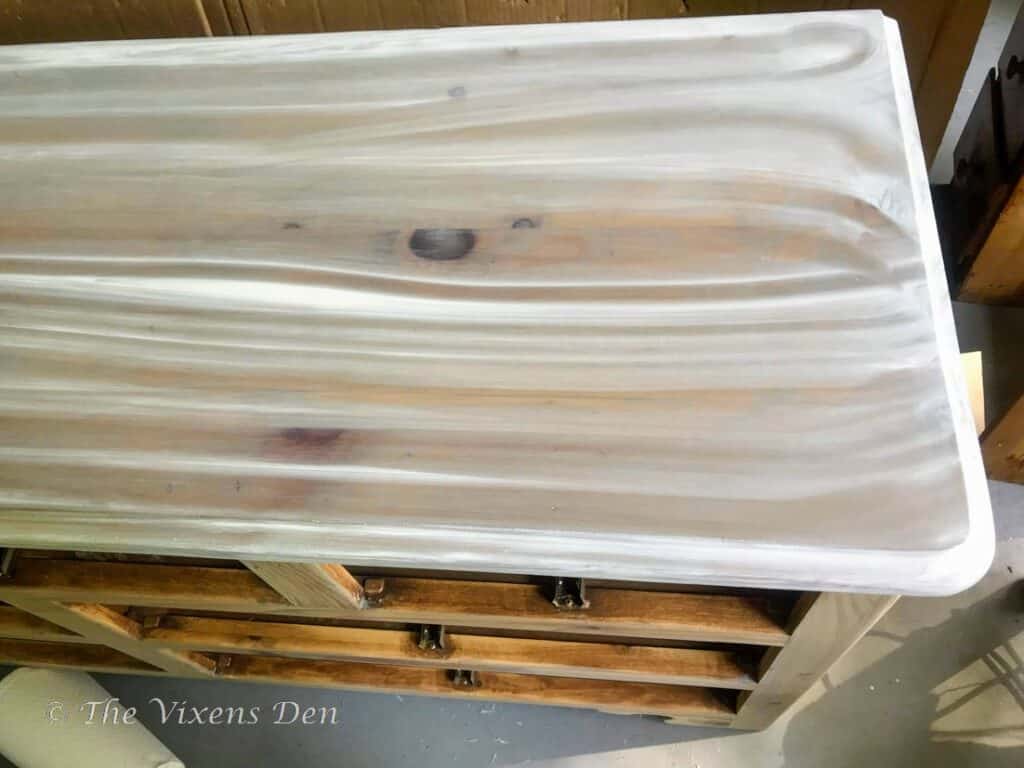
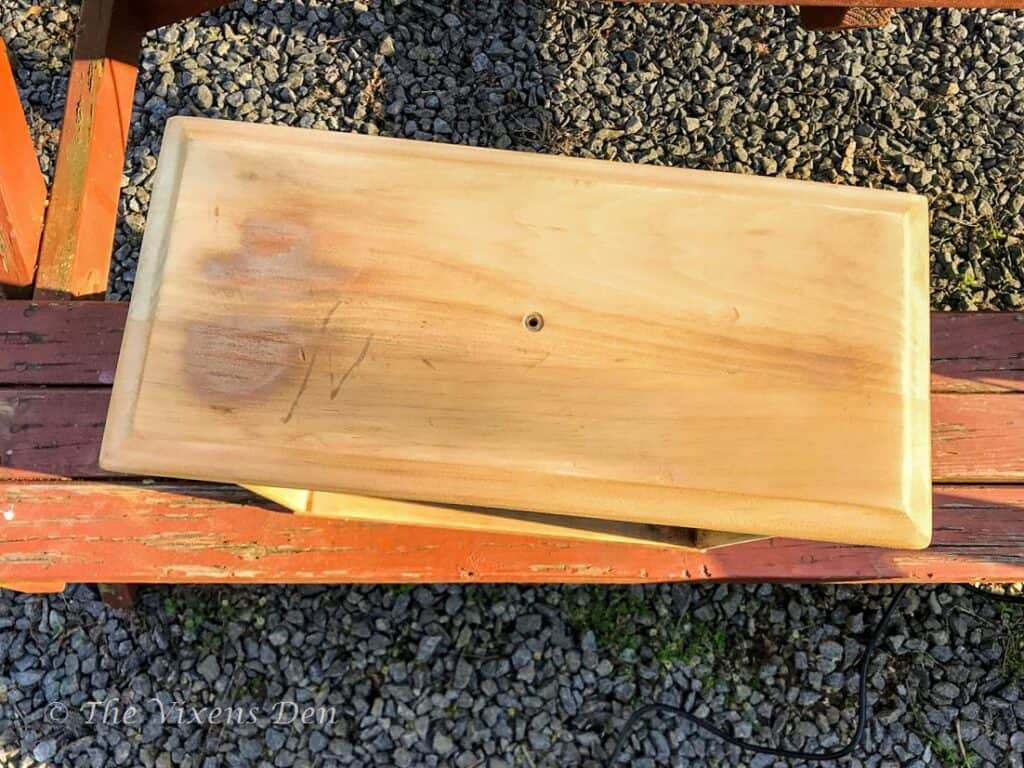
Once the finish was removed, I could see just how deep the scratches and gouges were and how much sanding would be involved. I started with the top, smoothing out the surface and leveling off where the previous owner had started sanding. The wood grain was very nice, with just a few knots to add some characters.
Staining for a Weathered Wood Look
One step that I’ve learned not to skip when staining furniture, is applying a coat of wood conditioner. This keeps the wood from becoming splotchy when you apply stain and also gives you an idea of what the wood tones will look like if you just apply a clear coat.

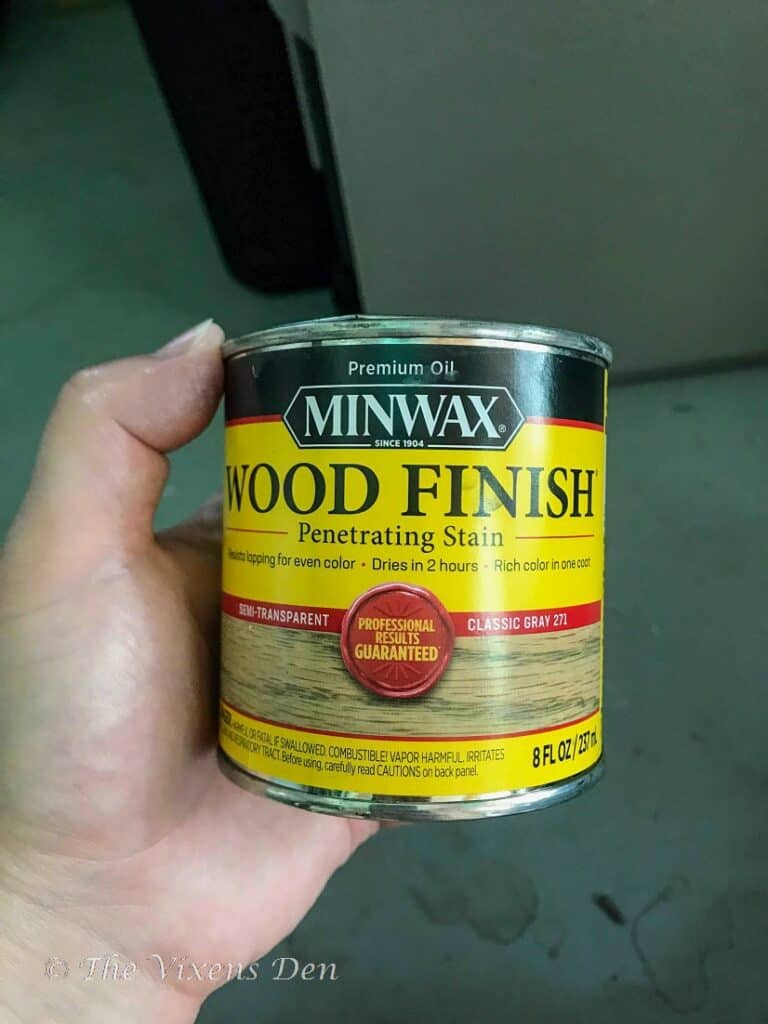
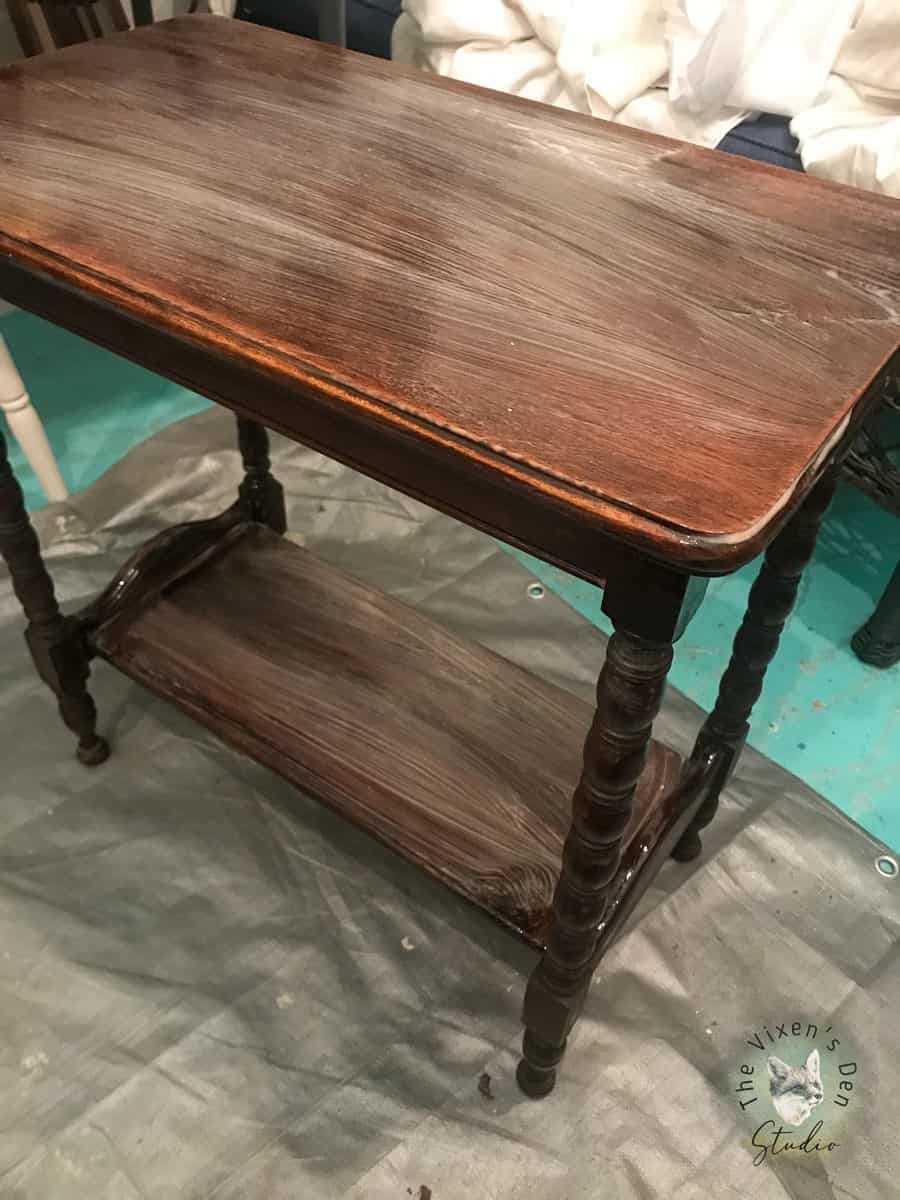
I absolutely loved the look of the raw wood when it was dry, but as soon as I applied the wood conditioner, I knew that it was going to take some creative stain combinations to soften the orange undertones. I started with Minwax Classic Gray. Kind of scary looking isn’t it?
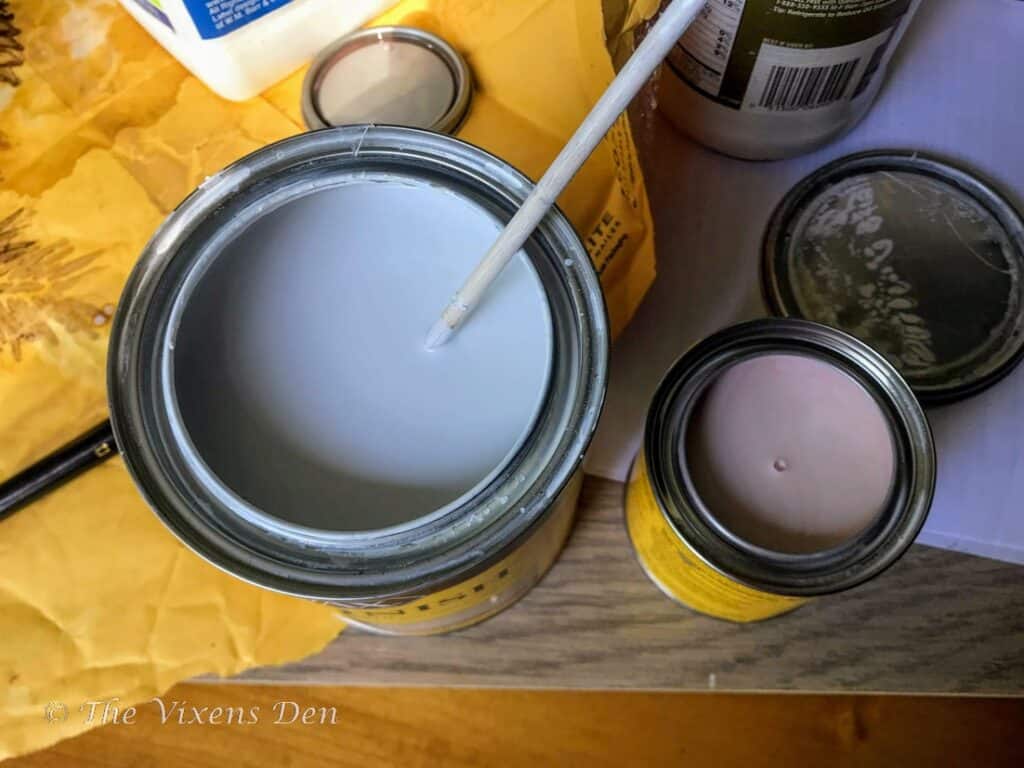
In this case, I applied the stain with a brush, because I wanted full coverage with a deep tone. I allowed the stain some time to penetrate into the wood and then I wiped off the excess with a rag. Next, I brushed on a layer of Minwax Simply White, again allowing the stain to penetrate and wiping off the excess.
After the process was finished, I hated it. I’m not going to sugarcoat it. This was a disaster. The gray was too dark, the stain was blotchy and ugly and the whole look was not at all what I had in mind.
So, I sanded the entire dresser down again.
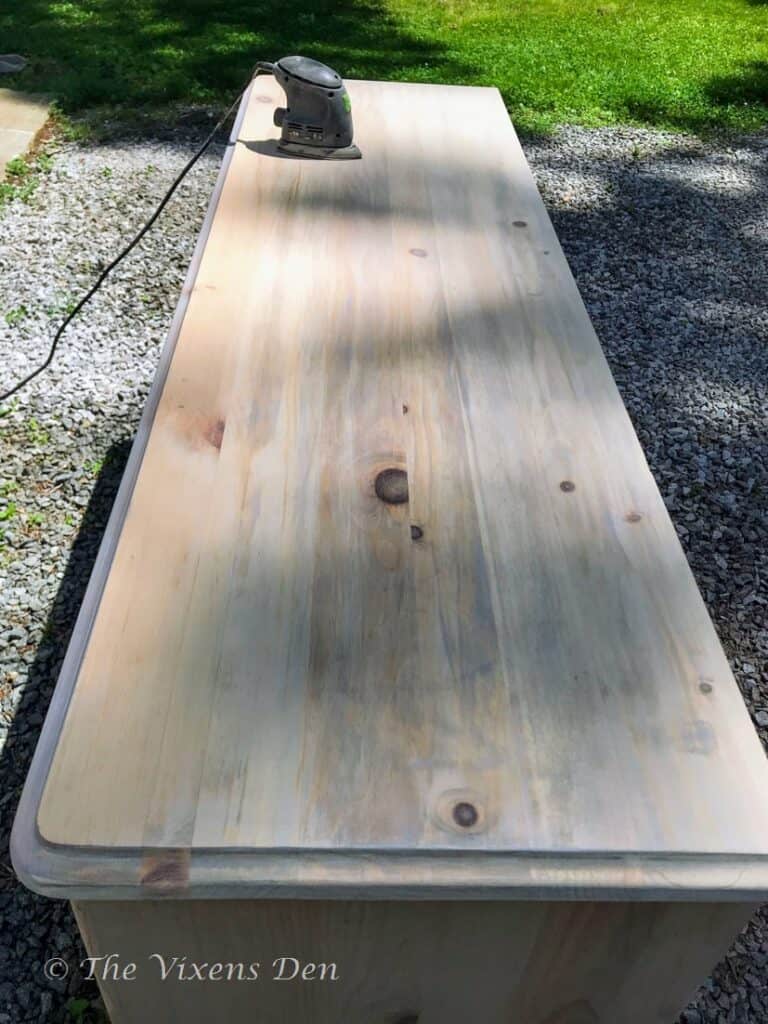
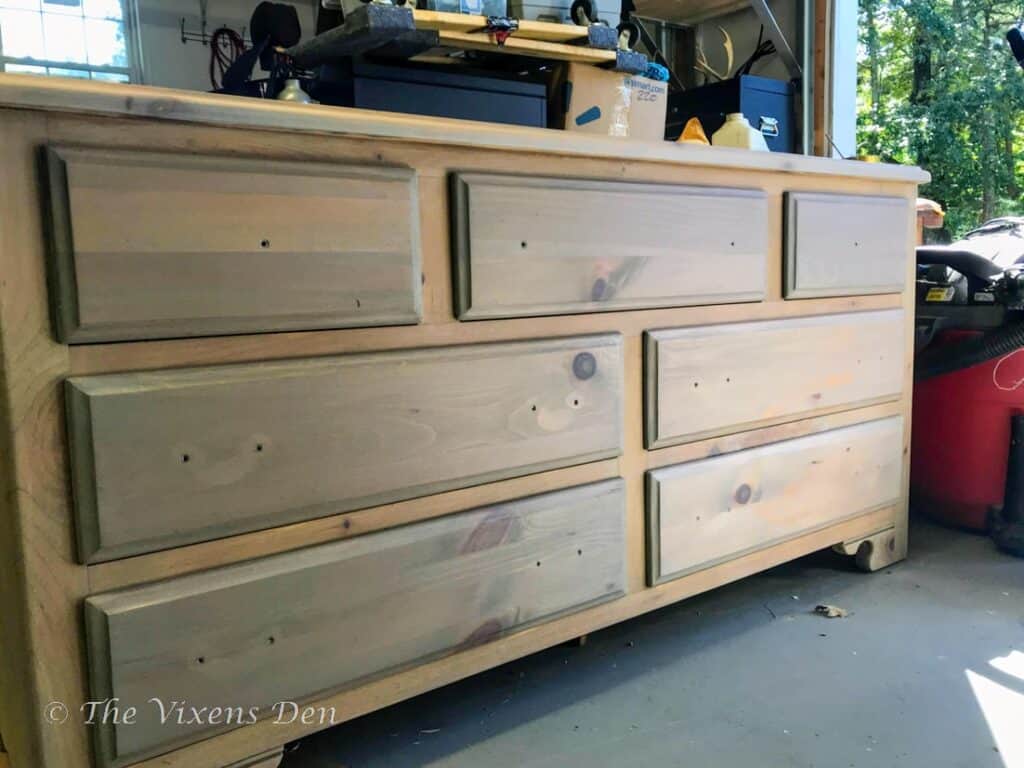
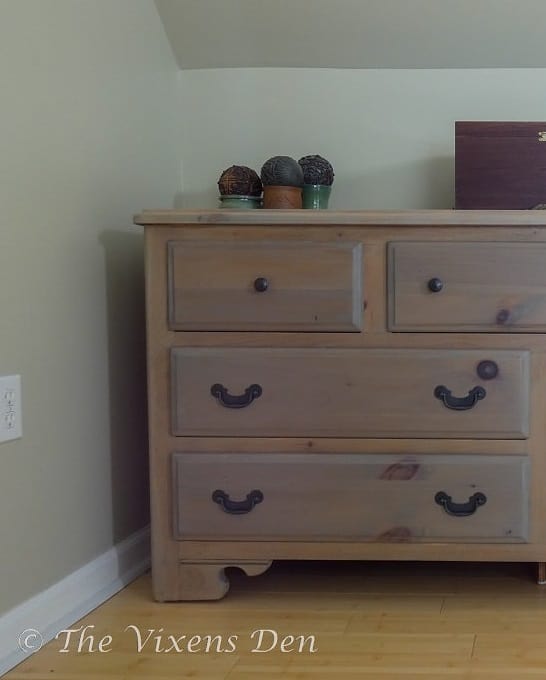
I started with a little MinWax Weathered Oak this time, just to soften the orange but much more subtly than the Classic Gray. Once I topped the Weathered Oak with Simply White, it all came together! The finished look was so much smoother and closer to the natural wood, with just a hint of weathering.
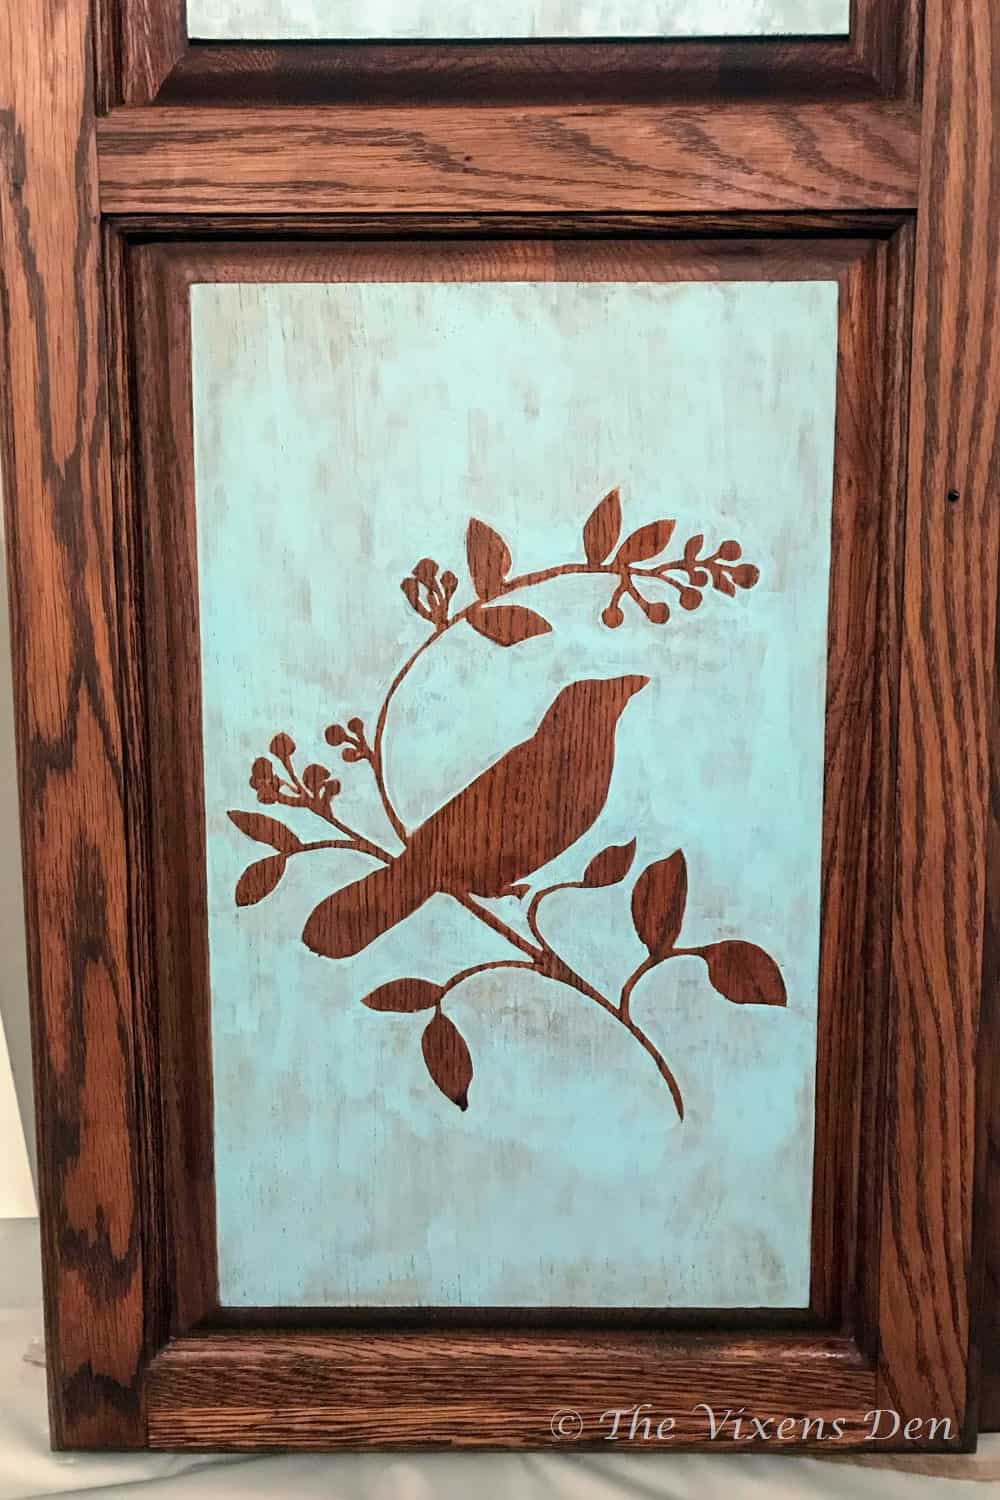
DIY Wood Transfer
So that problem was solved, but then came the challenge of my fancy transfer idea. I found the picture that I wanted to use and downloaded it to my computer. I recommend using a stock photo provider, such as Unsplash, Pexels, Dreamstime, Pixabay, etc., or your own personal photo. This photo was purchased from Getty Images. Once I had the photo downloaded, I reversed the image and sent it to FedEx for printing as an engineering laser print in full color.
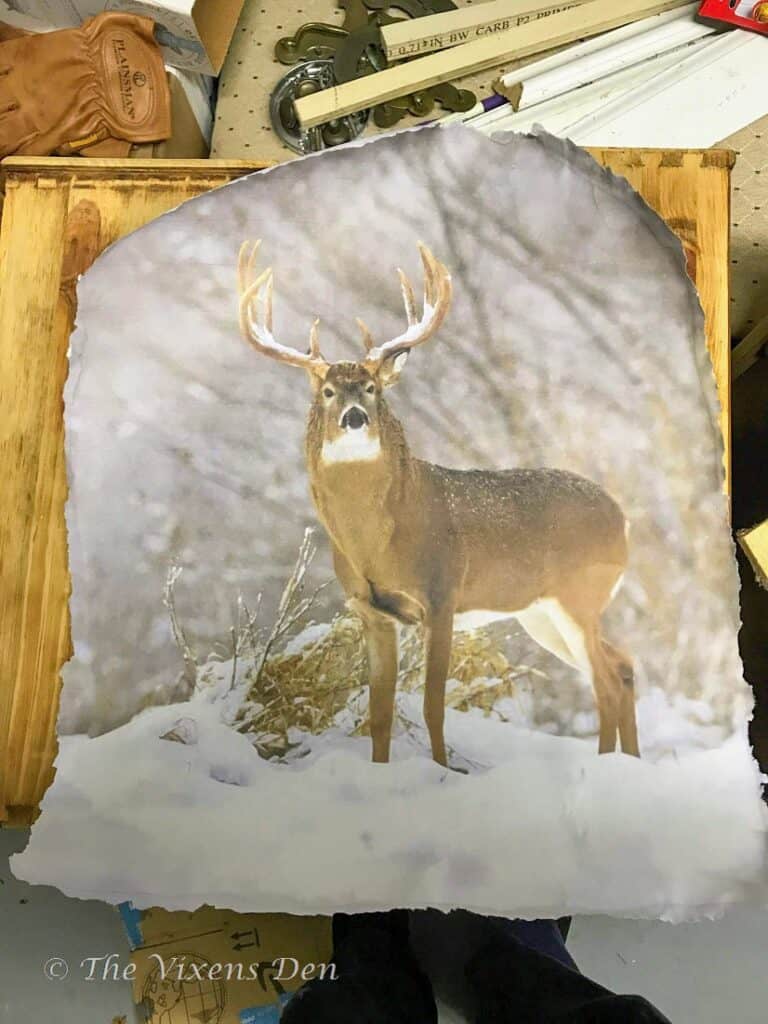
I “painted” the edges of the paper with water, and then gently tore away the edges so that they were uneven. I think it adds to the rustic look.
Everything was going pretty smoothly… until it wasn’t. Remember how I said I really don’t like having to do something twice? Well, it was about to happen again. I got a little impatient and didn’t allow the Mod Podge to dry long enough before rubbing off the paper backing, so holes started developing in the image. Ugh!
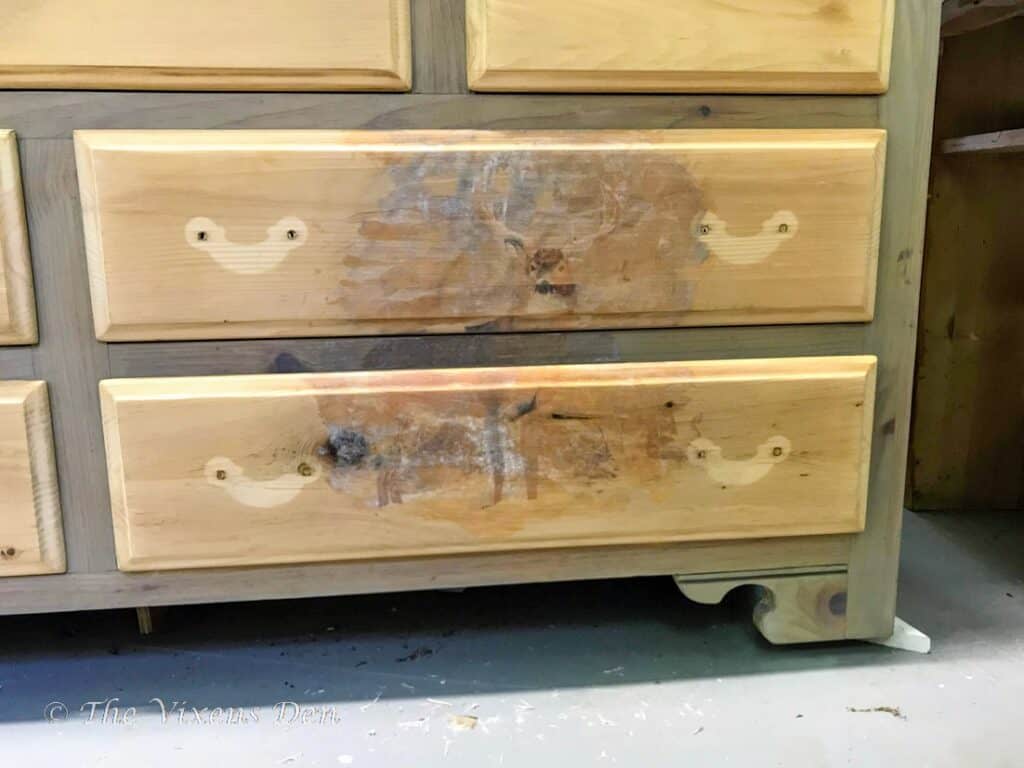
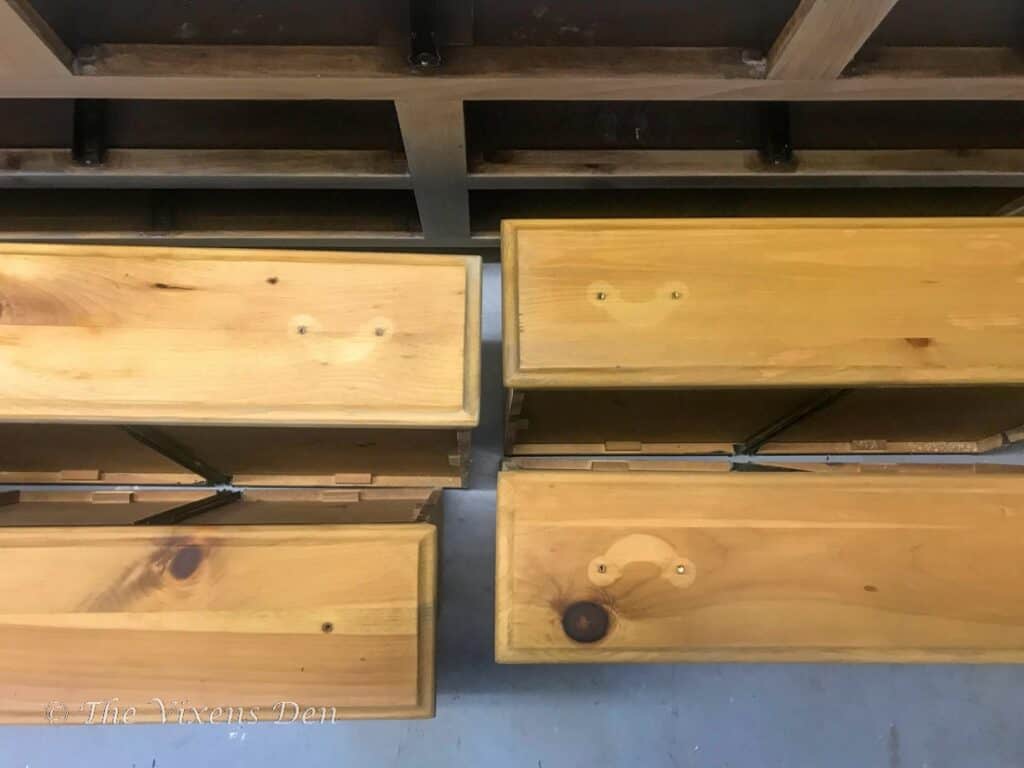
The other problem that I realized only after applying the transfer, was that since I hadn’t stained the drawers beforehand, the wood behind the transfer would always appear orange.
Double ugh!
So, once again, I sanded everything down smooth again and sent in another print request. This time to Staples. The customer service rep was super helpful and seemed knowledgeable about wood transfer projects. She suggested that I needed an inkjet print instead of a laser print. So, I went with it.
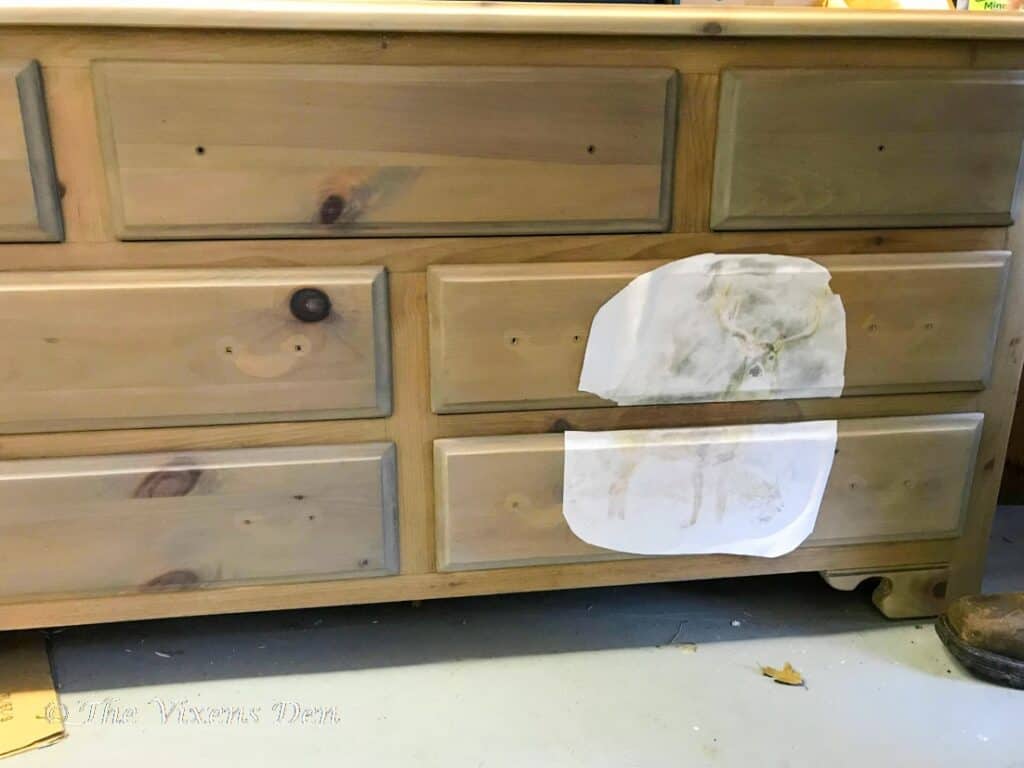
This time, I stained the drawers in advance and I completely skipped tearing the edges of the paper. I also somehow managed to lose the piece in the middle that I was supposed to apply between the drawers. *sigh*
I was a little gentler when I removed the paper backing, so the image is much more clear than the previous attempt. I still think the laser print was what I was truly after, with a sort of sheer almost ghostlike quality, but I also think the final piece turned out very nicely.
Hardware Hiccups
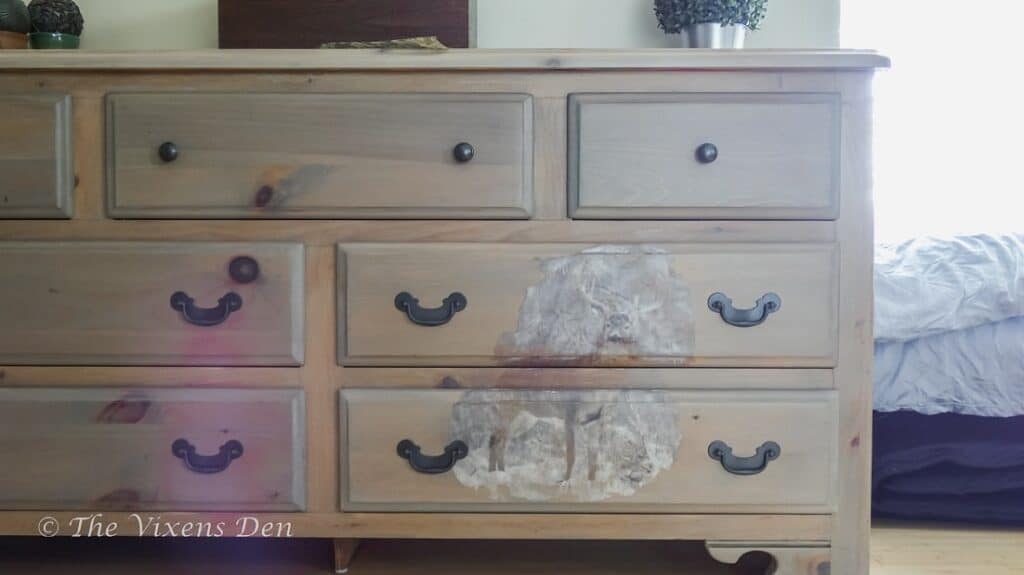
The final finish had come together nicely and was creating that rustic outdoorsy look that I hoped to create. I had a lot of fun ideas for updating the drawer hardware, unfortunately, the drawer fronts were not cooperating with my plan.
No matter how many times I sanded, even with the most aggressive grits possible, I wasn’t able to remove the imprint of the original hardware from the bottom drawers. And with all of the gouges in the wood, I had to sand quite a bit! This was super frustrating because I was so looking forward to installing new hardware. But since I was staining instead of painting, that was just not an option unless I found hardware in the exact same shape as the original.
So I punted and painted the original hardware instead.
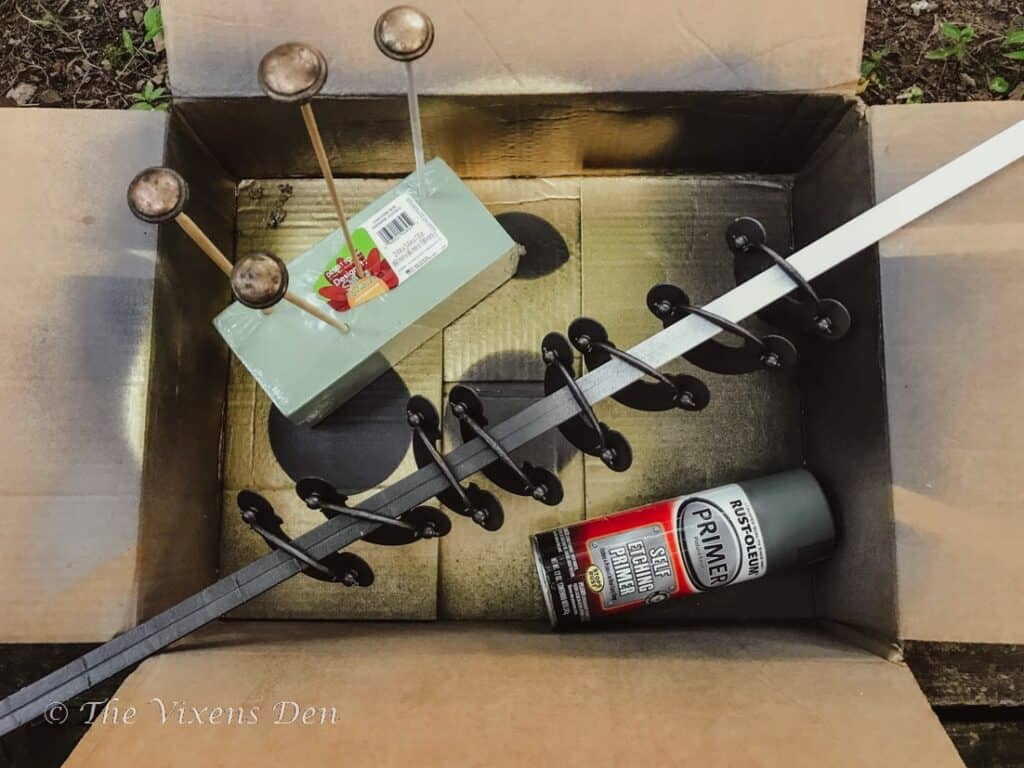
Some of the hardware had developed a bit of corrosion and darkened, so I soaked it in a water and vinegar bath to clean some of that off. Then I neutralized the vinegar with a follow-up baking soda bath. After a light scrubbing with an old toothbrush, everything looked much better. I sprayed it with two light coats of Rustoleum Self-Etching Primer and followed up with two coats of Rustoleum Hammered Matte Black.
The updated hardware really stands out against the weathered natural wood finish and adds to the rustic look of this piece.
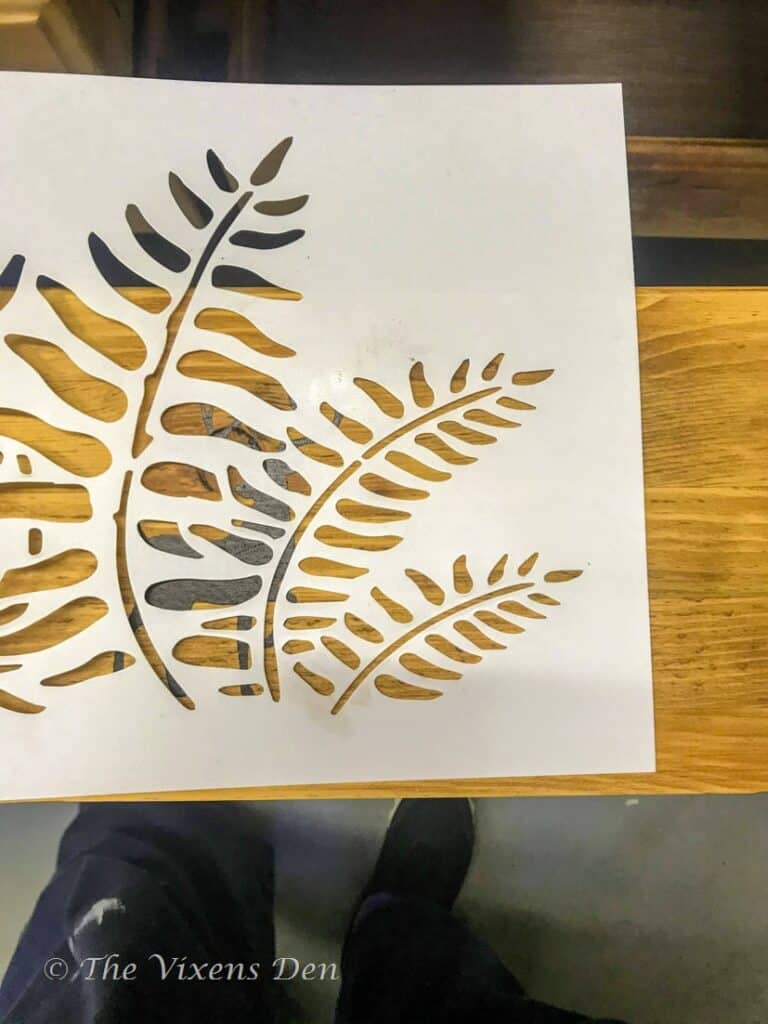
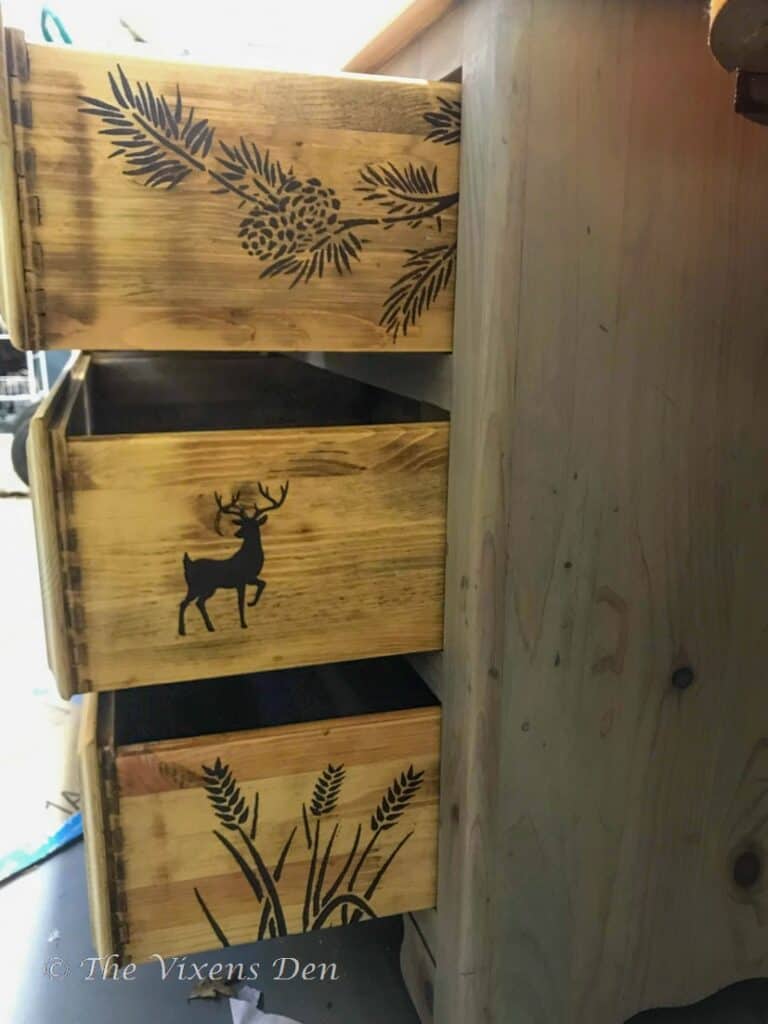
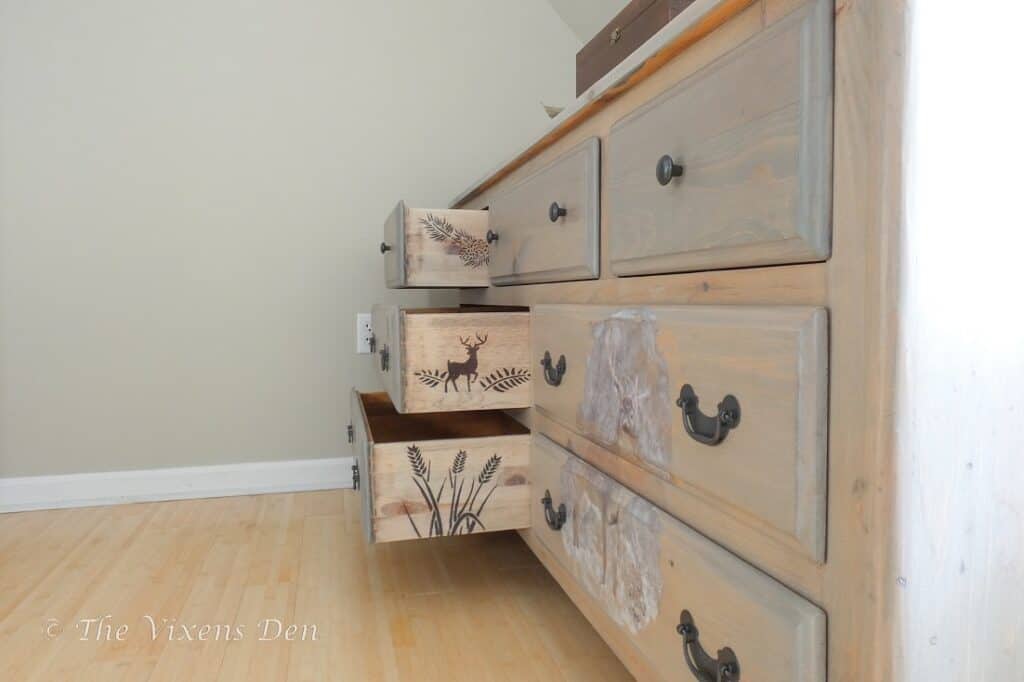
Drawer Side Stenciling with Stain
This part was a little tricky, but turned out beautifully! I used a combination of stencils from Acid Tactical and Cedar Creek Stencil Co. to create this fun stencil effect.
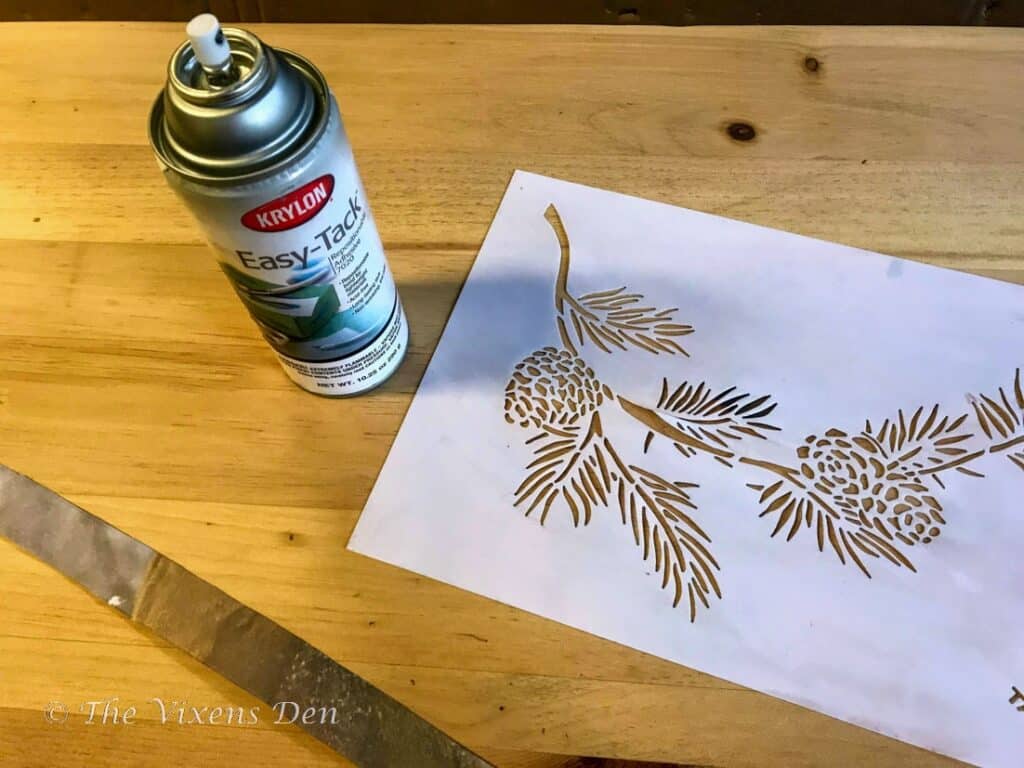
My secret weapon for this part of the project was Krylon Easy-Tack removable spray adhesive. A light spray on the back of the stencil helped keep it in place during the staining process and limited bleeding.
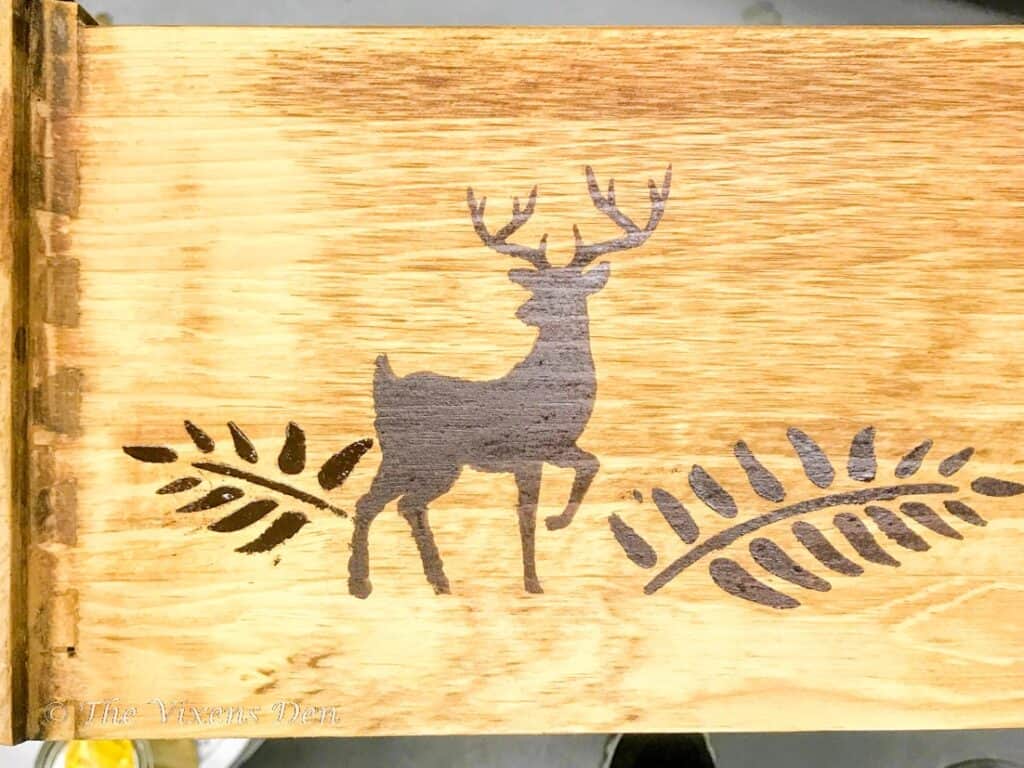
The goal was to use the stencils to create a scene when the drawers are opened. I did have a little hiccup along the way when I decided to stain the drawers…after I stenciled them. I know. Nothing is ever easy with me. lol
Luckily, it worked out and the project turned out exactly the way I’d envisioned. Isn’t it fun?
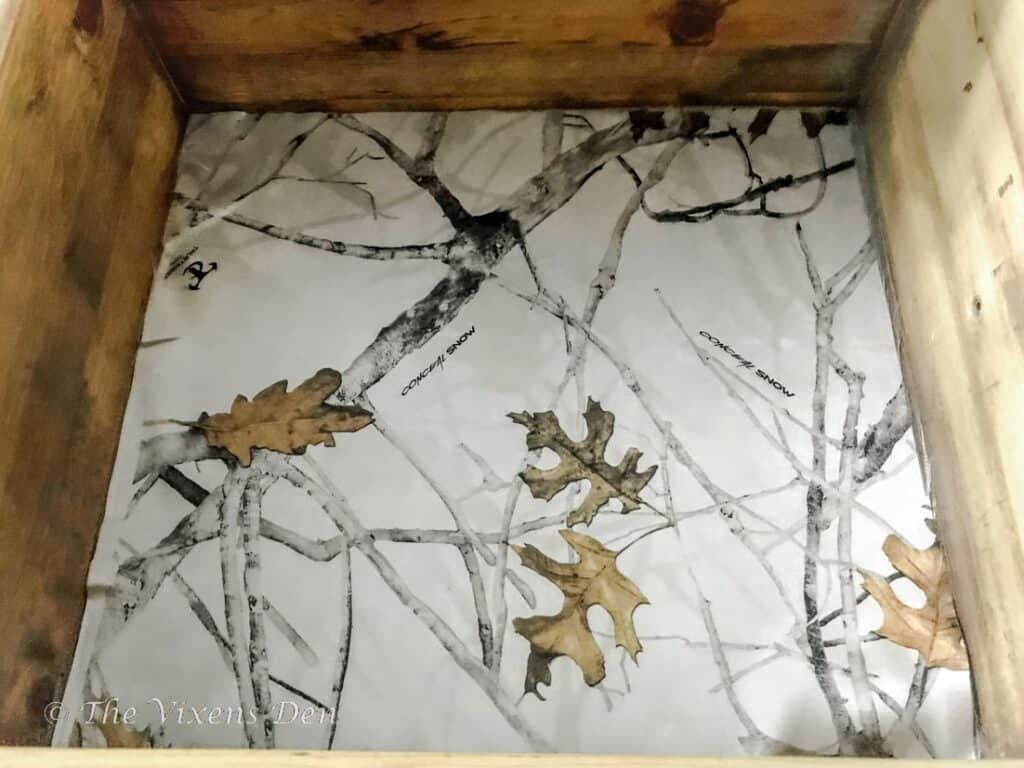
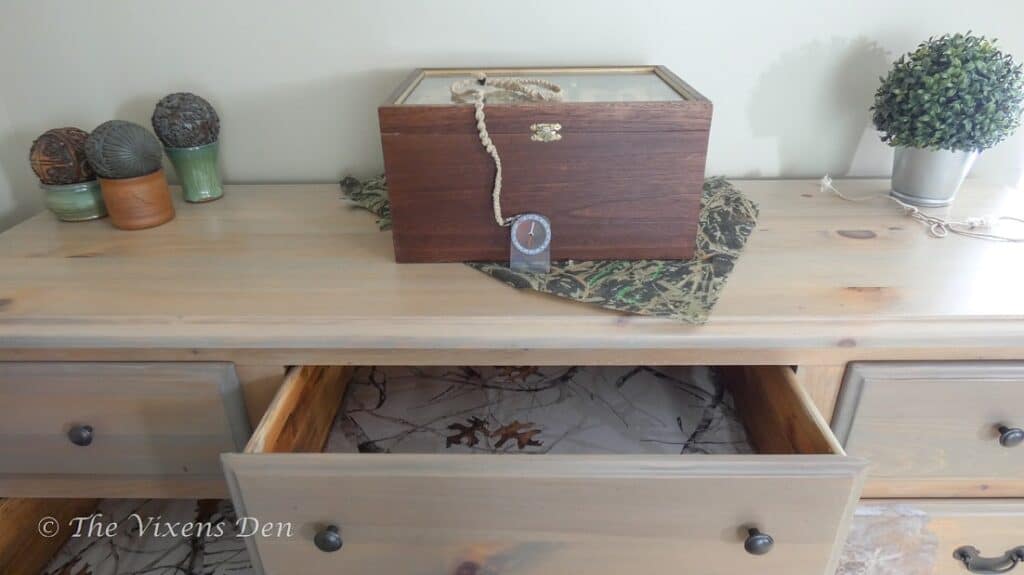
Fabric Drawer Liners
This part was also challenging, but mainly because of the type of fabric that I chose. Previously, I had stenciled drawer liners, so using fabric was a new challenge for me. I had seen lots of beautifully lined drawers and thought it would be lovely to include snow camo drawer liners for this project. I found this absolutely gorgeous fabric.
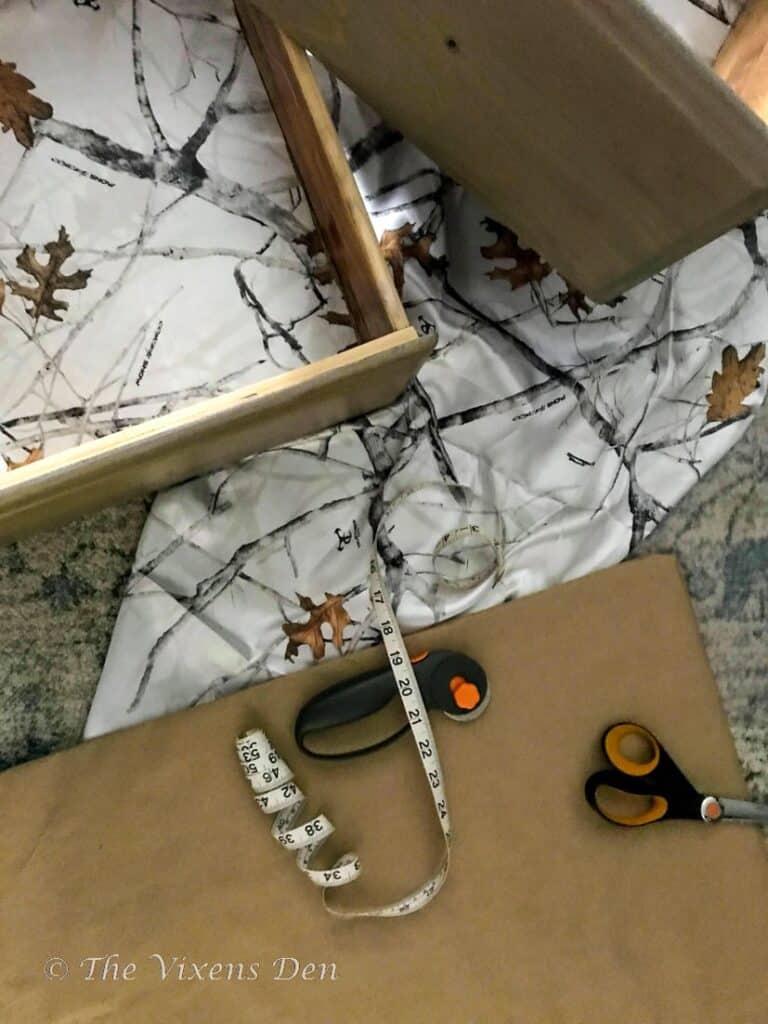
The challenge was that this gorgeous fabric is 100% Polyester and as slippery as an eel in mud. I tried to cut it as evenly as possible, using both a craft cutter and scissors. The scissors tended to leave very jagged edges, so I made the first cuts with the craft cutter and then trimmed the edges with the scissors.
Since this dresser is intended to store my husband’s clothes, having a low to no smell method of attaching the fabric to the drawers was a must. My favorite material, Mod Podge was definitely not an option. Instead, I searched the internet for a trusty liquid starch recipe. It worked out fabulously! The fabric is odorless, completely removable, but firmly attached to the drawer. Win, win, win!
Pulling it All Together
This project was a fun combination of a lot of different elements: natural wood look stain, DIY transfer, stenciling with stain, and fabric drawer liners. Whew! I’m tired all over again just thinking about it! In spite of all the challenges along the way, I think it turned out beautifully.
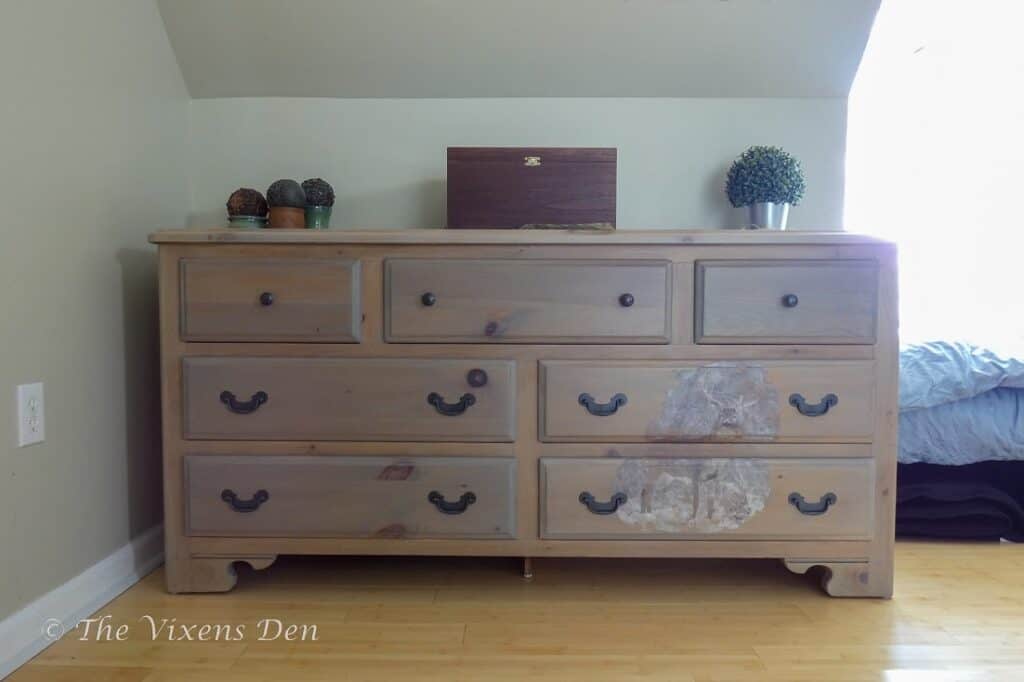
How about a before and after shot of the transformation? I just adore a good before and after, and this one is pretty incredible, don’t you agree?
If you enjoy DIY makeovers like this one, be sure to subscribe so that you receive an email when new misadventures are posted. If you like this dresser makeover, then you may also enjoy seeing this gun cabinet transformed into a linen cabinet. Enjoy!
Wow you have the patience of a saint! The dresser looks fantastic! I have done some furniture makeovers in the past and I really enjoyed it.
I have enjoyed all of your makeovers but this dresser takes the cake. It looks amazing and I love the outdoor theme stenciling. Well done!!!
Thank you so much!