Beginners Guide to Setting Up the xTool P2 CO2 Laser Machine
Have you been thinking about adding a laser machine to your tool lineup? Or maybe you’ve just seen advertisements for machines and were wondering what it’s all about?
Last year, when I was creating these wood slices for my daughter’s wedding we talked about the idea that one day, waaaaay off in the future, I might invest in an engraving machine. She had found so many custom decorations that she just loved and I wished that I could make them for her.
While there were ways to create a lot of those designs, those methods were a bit time-consuming so we ended up buying a lot of the custom decor that she wanted. When I was offered the chance to work with xTool, it seemed that “waaaaaay off” was going to be a lot sooner!
So exactly what is all this fuss about the xTool P2 you ask? Grab a cup of tea and get comfy as we dig into what it is and what you will need to set it up right!
This post is sponsored by xTool. While they provided the machine for this project, all opinions are my own.
Follow this affiliate link to see all of their amazing laser engraving and cutting machines and materials!
AS AN AMAZON ASSOCIATE I EARN FROM QUALIFYING PURCHASES AT NO COST TO YOU.
YOU CAN SEE MY FULL DISCLOSURE HERE.
Who is xTool?
The history of a company is important to me because I love the stories behind how a product or company came into existence. Let’s start with a little bit of background on who exactly xTool is and how they came to be.
xTool is a brand owned by creative tech company Make Block Co. LTD which is based in Shenzhen China. Make Block was founded by Jasen Wang to create easy ways for children to explore creativity through robotics.
As Jasen explained in his 2018 interview with Forbes Magazine, he grew up in a poor village. It wasn’t until he went to university that he had an opportunity to work with robotics. This quickly became his passion but he found it challenging to find all of the materials that he needed to create the robots that he envisioned. Founding Make Block was his opportunity to share that passion with young children by creating robotic kits that included all of the necessary materials to explore building and programming robots.
But Jasen wasn’t just interested in science and technology. He felt that STEM should also include artistic creativity.
In 2019 Make Block expanded into laser machines with the Laserbox and in 2021 xTool was born! Since then, a new laser machine has been introduced to the market each year. Each new machine includes greater power and options to allow greater creativity, which brings us to where we are today!
Which xTool Machine is Right for You?
With so many machine options, it can be difficult to decide which one is right for your studio. xTool has an excellent pre-sales support structure to help you make sure that you’re getting the perfect machine for your creative goals.
When you first click on their website, you are greeted with images of each of the laser machines followed by a quiz that walks you through exactly what you want to accomplish with the new machine. If you have additional questions, there is also a phone number, email address, and Facebook support group.
I emailed back and forth several times with my support representative before we settled on the P2 as the best machine for my needs. Celia was always very courteous. She seemed genuinely interested in making certain that all of my questions were answered and that this machine was the right fit for me.
Why the P2 Laser Machine?
xTool offers many laser machine options, including diode, diode and infrared, diode and blade, and CO2. If you’re completely new to the laser world, as I am, it can be a little overwhelming which is why the pre-sales support is so important.
Celia and I settled on the P2, which is a CO2 laser cutting and engraving machine, for my studio. I have a lot of project ideas that I wasn’t sure I could ever see come true because I wasn’t sure how I could create them. With the ability to cut wood, mylar, and acrylic and engrave intricate designs in wood, acrylic, metal, stone, leather, and more, the possibilities are almost limitless!
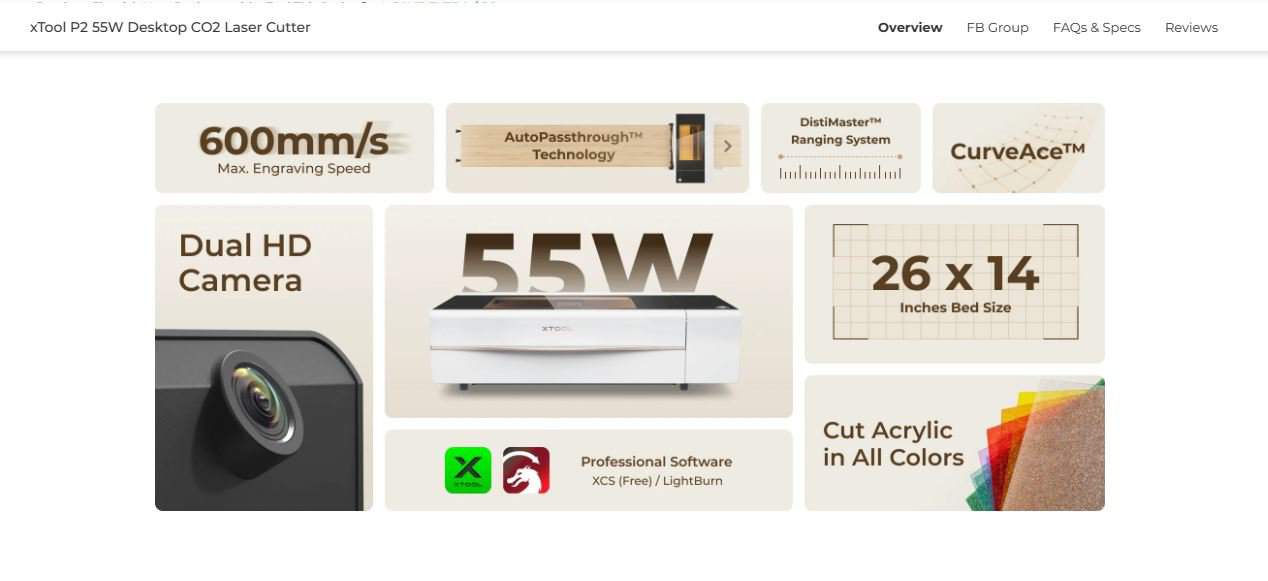
The P2 is the most versatile of all the machines offered due to the large engraving bed size of 23.6 by 12 inches. But wait, there’s more! If you add the optional riser base, then the maximum height of your project piece increases from 2.7 inches to 8.5 inches. This is the perfect height for engraving larger items like boxes or mugs.
Now for the finale! Add the optional conveyor and your project lengths become limited only by the material and your workspace. This truly is an amazing and incredibly versatile machine!
What to Know BEFORE Ordering an xTool P2
So you may be wondering, what’s the catch to all of this because it sounds too good to be true. With such amazing capabilities come some considerations, it’s true.
The first is that this machine is heavy, weighing in at 100 pounds. If you have a partner at home who can help you team-lift this bad boy, then it won’t be a problem. However, if you’re planning to take it up several flights of stairs, just be prepared with some heavy-duty help.
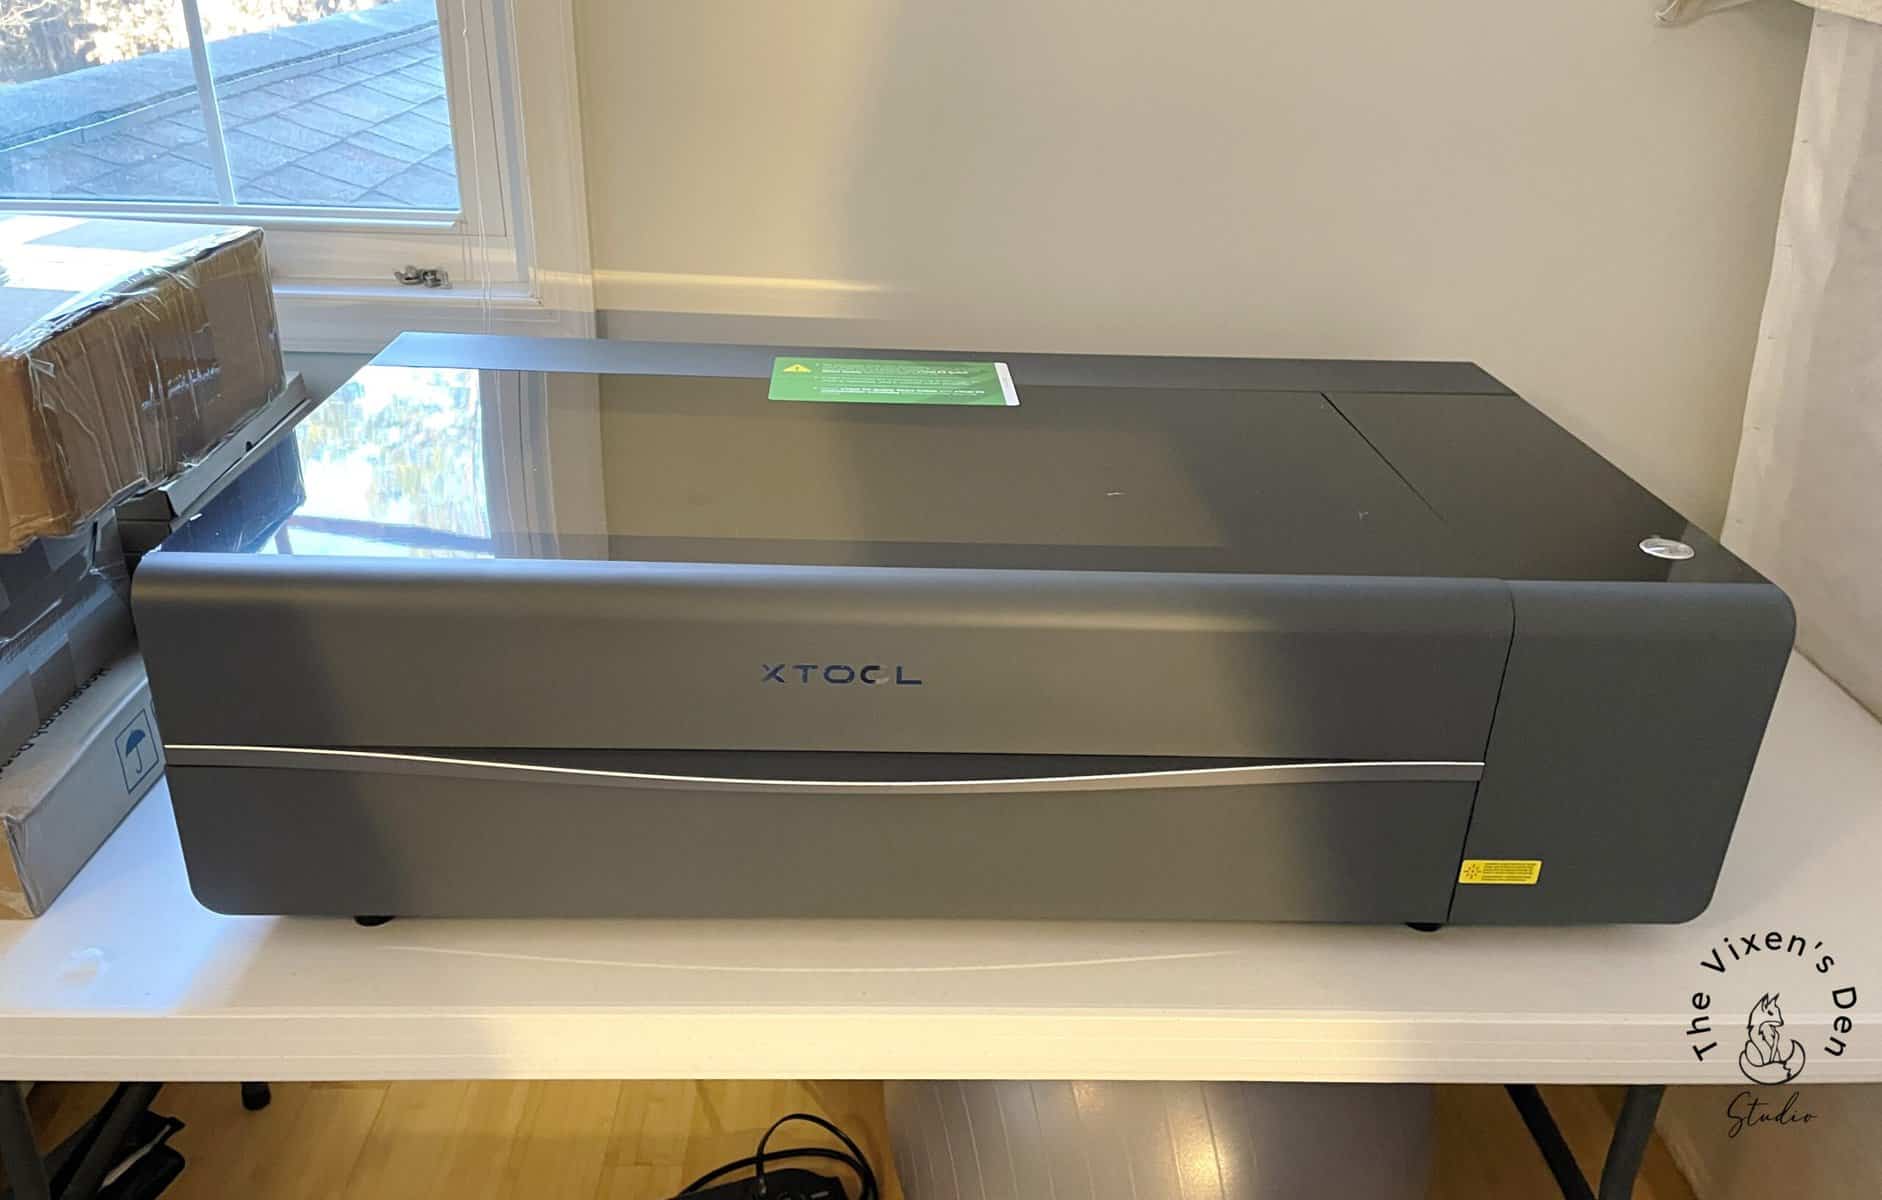
This machine is no diminutive lady either. The P2 measures 39.4 inches wide by 25.1 inches deep and 10.6 inches tall. While mine is currently sitting on a heavy-duty folding table, I’ve seen a lot of owners investing in this Husky table.
Pro Tip: I am upgrading to a rolling desk, and would not consider putting this machine on anything that doesn’t have wheels on it. More on this later.
Smoke and fumes are part of the laser engraving and cutting process. There are two ways to handle this, either by venting straight to a window as I did using this window exhaust insert or by purchasing an air purification system. xTool offers this one which can be ordered as a package with the machine.
A laser engraver is a finely tuned machine that requires maintenance. There are a few simple items that you will want to have on hand to set it up and maintain it properly:
- Purified water
- Exhaust solution (I used this window exhaust opening)
- Lint-free microfiber cloths
- Lint-free swabs or lint-free lens wipes
- Minimum 70% Isopropyl Alcohol or lint-free lens wipes
- Masking tape
- Compressed air
- Caliper
Setting Up Your New P2
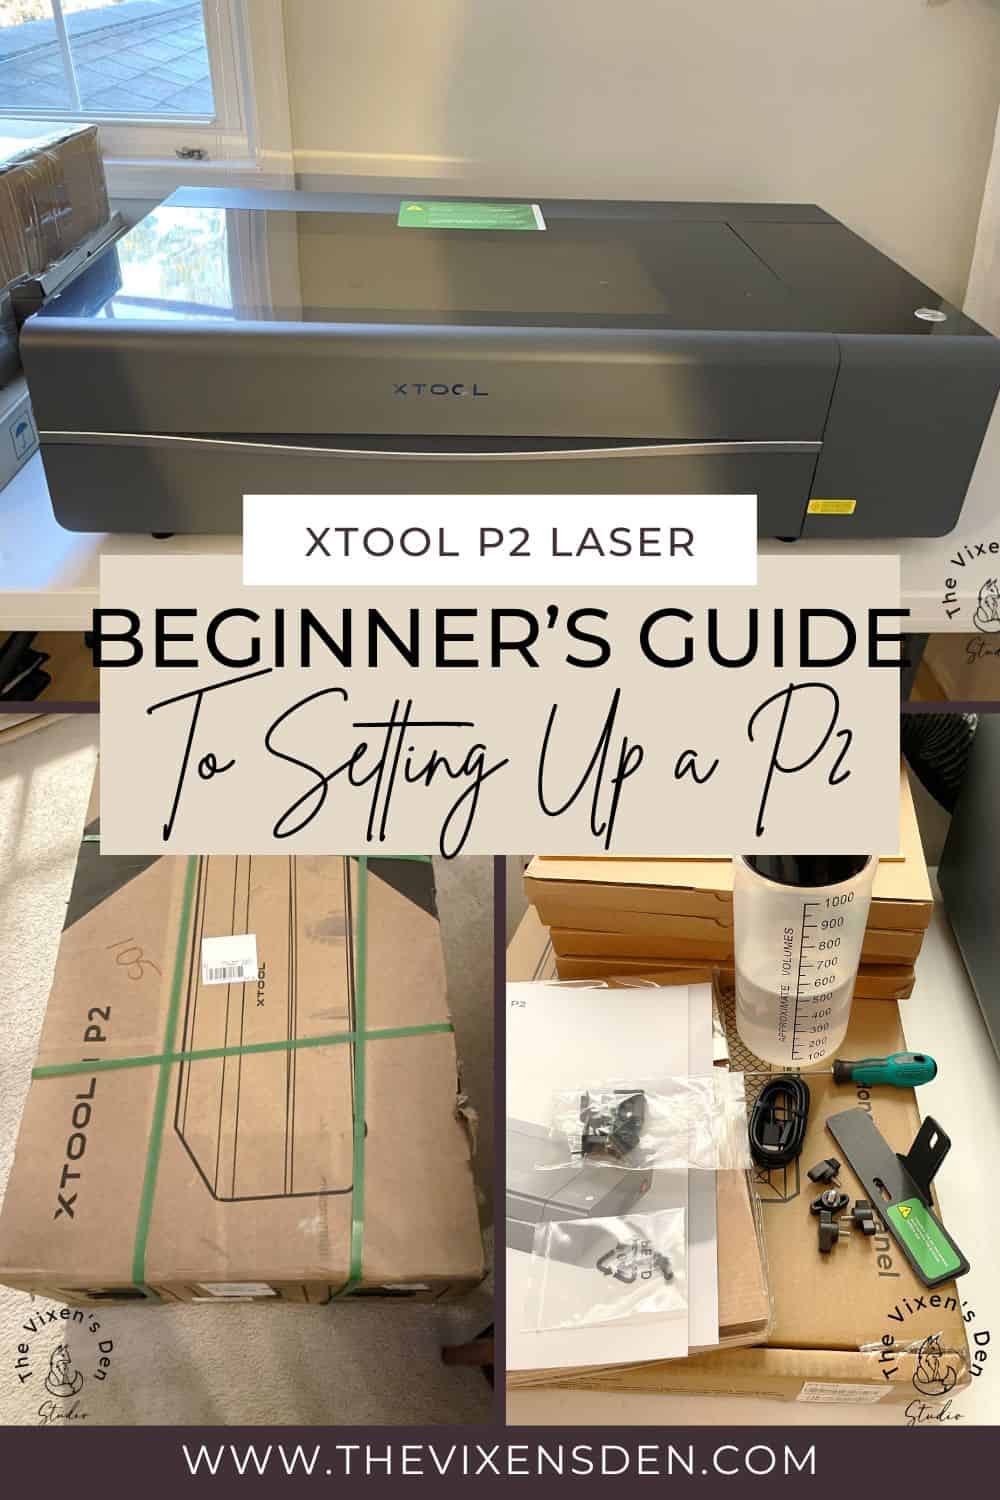
It’s here, it’s here!! Those were pretty much my exact words when I saw this giant box sitting at my door. I had tracked the order from California all the way to Virginia and couldn’t wait to get it set up!
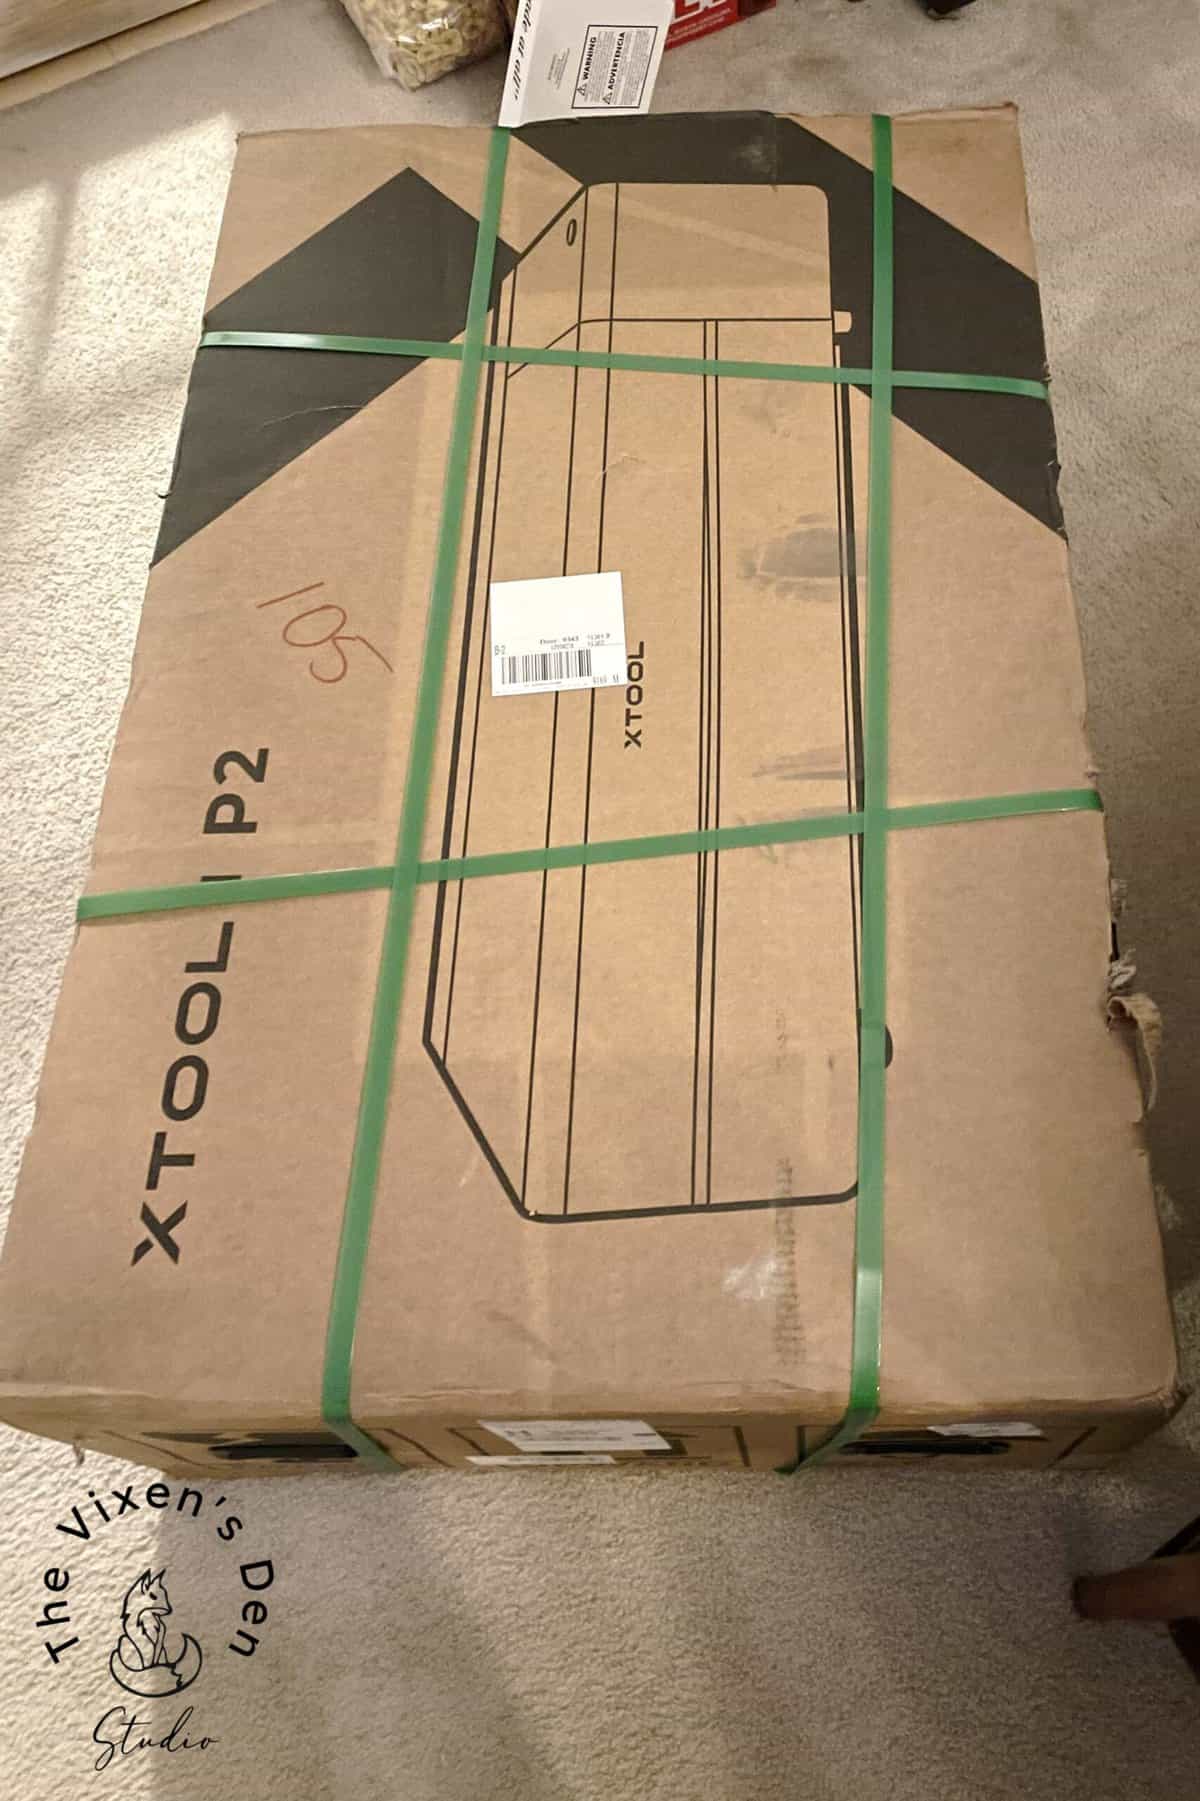
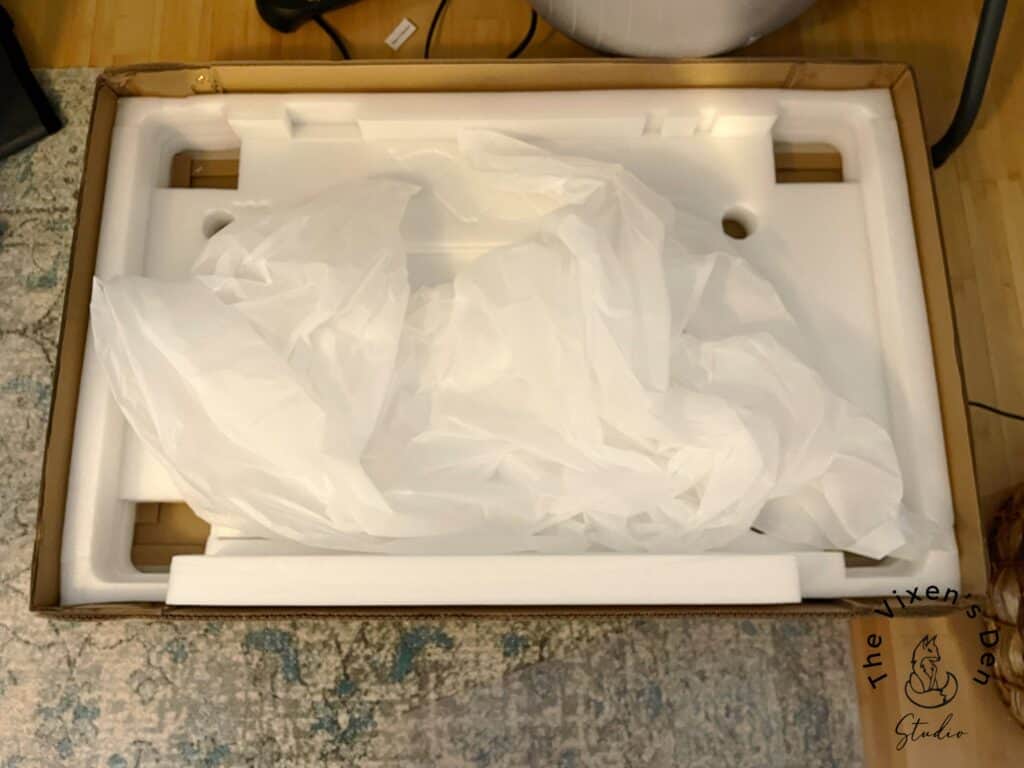
I have to admit, I was a little alarmed at the condition of the box, especially considering it clearly states that it is fragile. However, xTool had thought of that. The P2 was carefully sandwiched inside and out with layers of really good squishy foam (not the kind that breaks when you bend it.)
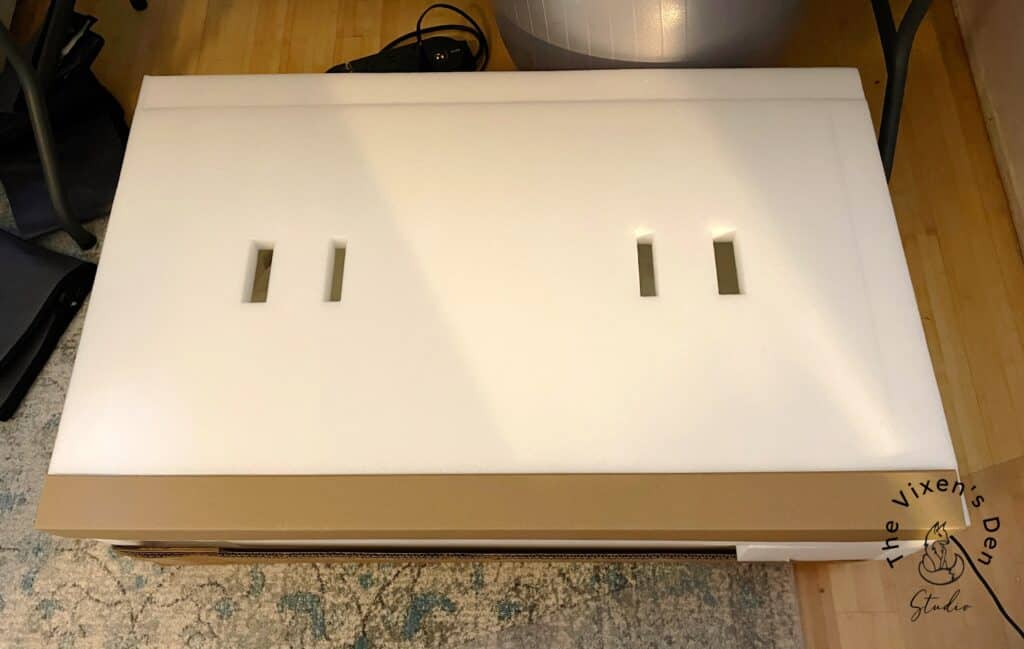
After team-lifting the machine out of its foam swaddle and onto the temporary folding table, it was time to set it up!
The P2 arrived with a very simple and easy-to-follow Quick Start guide along with an Instructions guide and a Self-Check Guide. As I waited for the P2 to arrive, I watched the unboxing and setup videos on the XTool website. This made following the Quick Start guide even easier.
Pro Tip: I’m a fairly handy lady, so I have a habit of trying to complete projects using intuition rather than instruction manuals. In this case, however, I followed the instructions step by step.
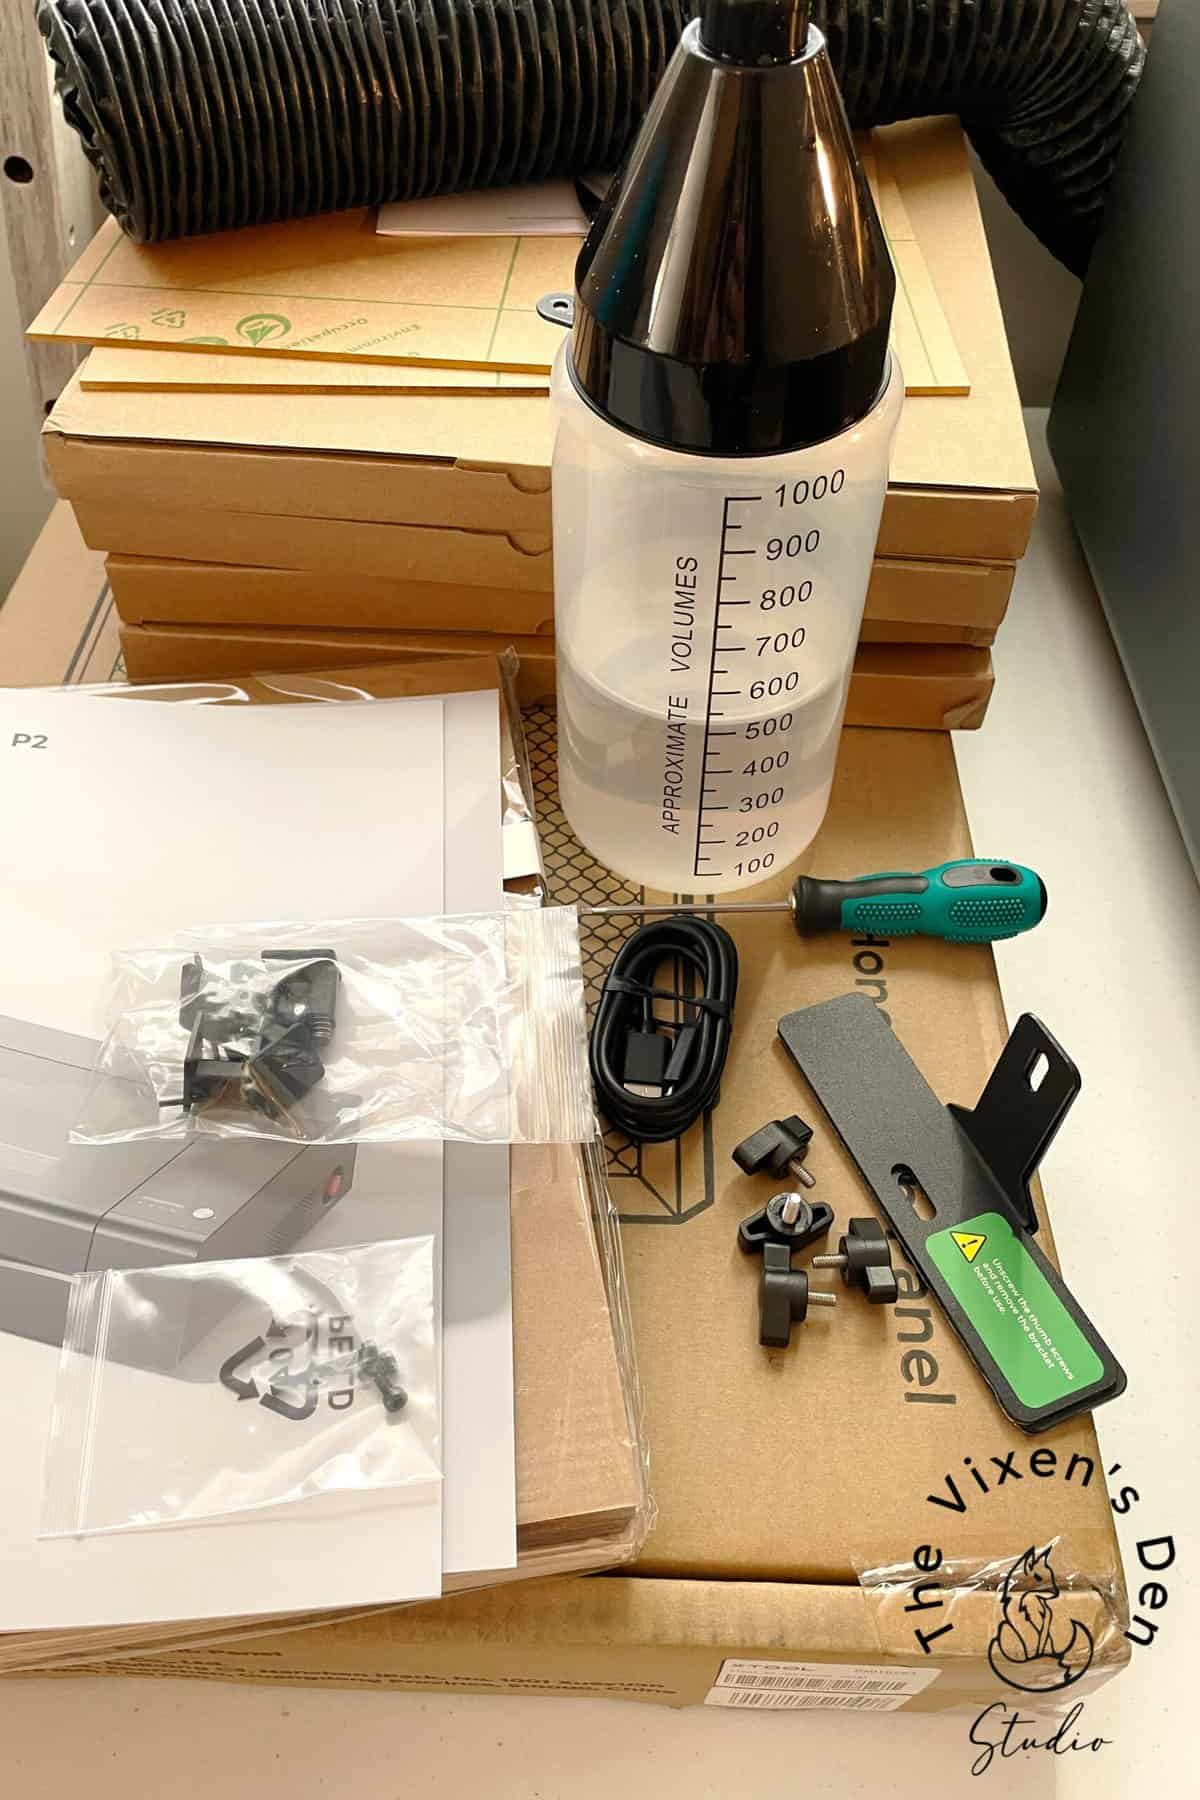
When I first lifted the lid of the P2, I was really impressed with the weight of the lid and the smoothness of the gas-powered lifts. This feels like a high-quality machine! Inside I found all of the tools, cables, exhaust hose, anti-freeze, and even a funnel for the antifreeze. There were also some spare parts, materials clamps, and a complimentary sample pack of basswood, cardboard, and acrylic sheets.
xTool has thought of everything to help you get started!
As I began unpacking everything from inside the bed of the machine, I also noticed small green stickers positioned all over the machine. These stickers identified screws and clamps that needed to be removed as well as control buttons. They even had a sticker over the USB port to connect the P2 to a computer.
For the actual setup, I don’t think it’s possible to create a better guide than xTool already has in their combination Quick Start Guide and unboxing video, but I did give it a try. I added some tips below and in the video to address some things that challenged me when I was completing the setup process:
Pro Tip: I somehow missed the upper thumbscrew and the bracket located on the underside of the rail in the diagram of Step 2 on Page 2 of the Quick Start Guide. So, just make sure that you remove both of the thumbscrews and the brackets on each side. (Again, there were green stickers, the packaging was just so sturdy that it looked like it belonged there!)
Pro Tip: One of the setup steps that I had a problem with was when I was reinstalling the baseplate after removing the protective foam and complimentary starter pack of materials. There is a rubber seal that runs along the width of the machine that the baseplate kept catching on. I had to slightly lift the front of the machine to guide the baseplate back onto the top of the seal and then give it a good shove. This realigned the front of the baseplate with the front lip of the machine so that I could reinstall the mounting screw.
Pro Tip: While the cover is off, go ahead and inspect everything carefully. Make sure that there are no cracks in the laser tube, wires pulled loose, or that the mirrors seem out of place. This last part is actually the first step of the calibration process. So don’t skip it.
Hardware and Software Requirements
One of the best parts about this machine is that you don’t have to invest in a super expensive computer or software in able to use it. I am using an HP laptop running off a 10th-generation Intel Core i7 processor. Nice, but not a powerhouse. You can find a similar model here.
Here are the minimum requirements recommended by xTool:
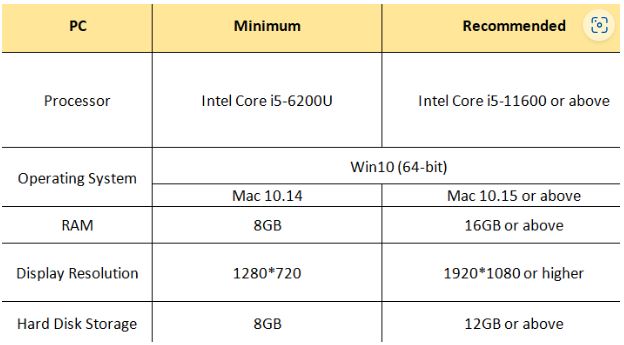
I did have to download the xTool XCS software, but xTool has instructions for using the XCS software with an iPad or a mobile phone, so you have plenty of hardware options from which to choose.
Pro Tip: If you’re looking for the XCS software in your software list after you download it, you’ll find it under “Makeblock” instead of xTools.
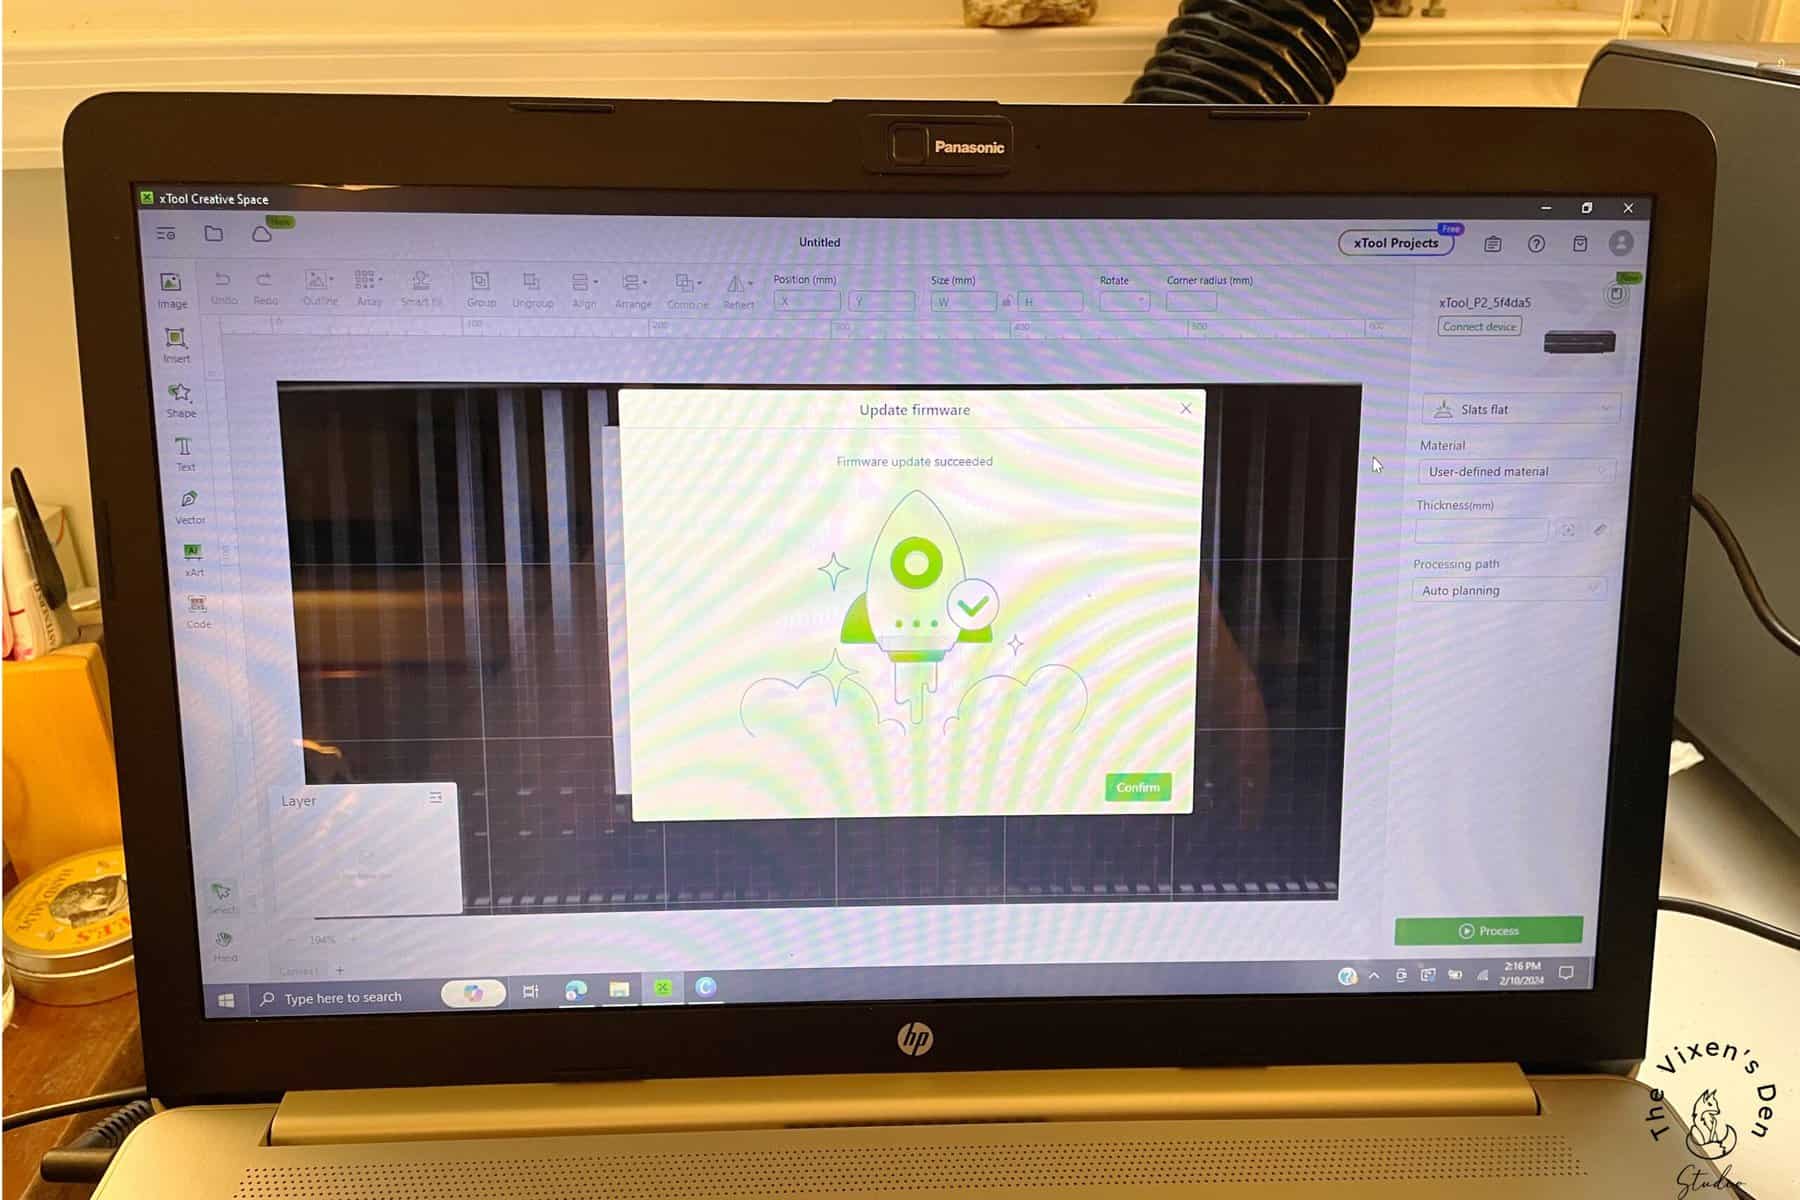
Once I opened the software, I was prompted to upgrade the firmware on the machine. It only took a moment or two and it was done!
Rail Alignment
Once the antifreeze and water mixture was added, and all of the buttons were tested, I put the covers back on and proceeded to the next step which was checking the alignment. This step is absolutely crucial, so don’t skip it!
Pro Tip: I watched the video about calibrating the laser path. What I didn’t do was read the Self-Check Guide. That eventually came back to bite me.
The first step to checking alignment is to (with the machine turned off) pull the laser head rail (x-axis guide rails) all the way to the front of the machine and slide it left to right and back again. If there are any gaps between the laser head and the front of the machine, then the rail is out of alignment and needs to be fixed before doing anything else.
There are two ways to fix the misalignment:
- Method 1: This method is the easiest. Push the rail all the way against the back of the machine and push hard on the side that is most out of alignment. If this works then you should hear a slight click as the rail jumps into place on the track.
- Method 2: This method is a bit more complicated and requires opening up the back cover from the inside:
- Remove the back panel.
- Loosen the screws on the back coupling.
- Adjust the position of the x-axis guide rails.
- Once they are parallel to the front and rear of the machine, tighten the screws on the coupling.
- Reattach the back panel.
With the rails aligned, the next step is to check the lens calibration.
Lens Calibration Test
To calibrate the lens, I first plugged in the P2 laser machine and turned it on. Then I plugged the USB cable into the left side of the machine and the other end into my laptop. I opened up the XCS software and connected my P2. Then I followed the steps in this guide and this video to complete the lens calibration test.
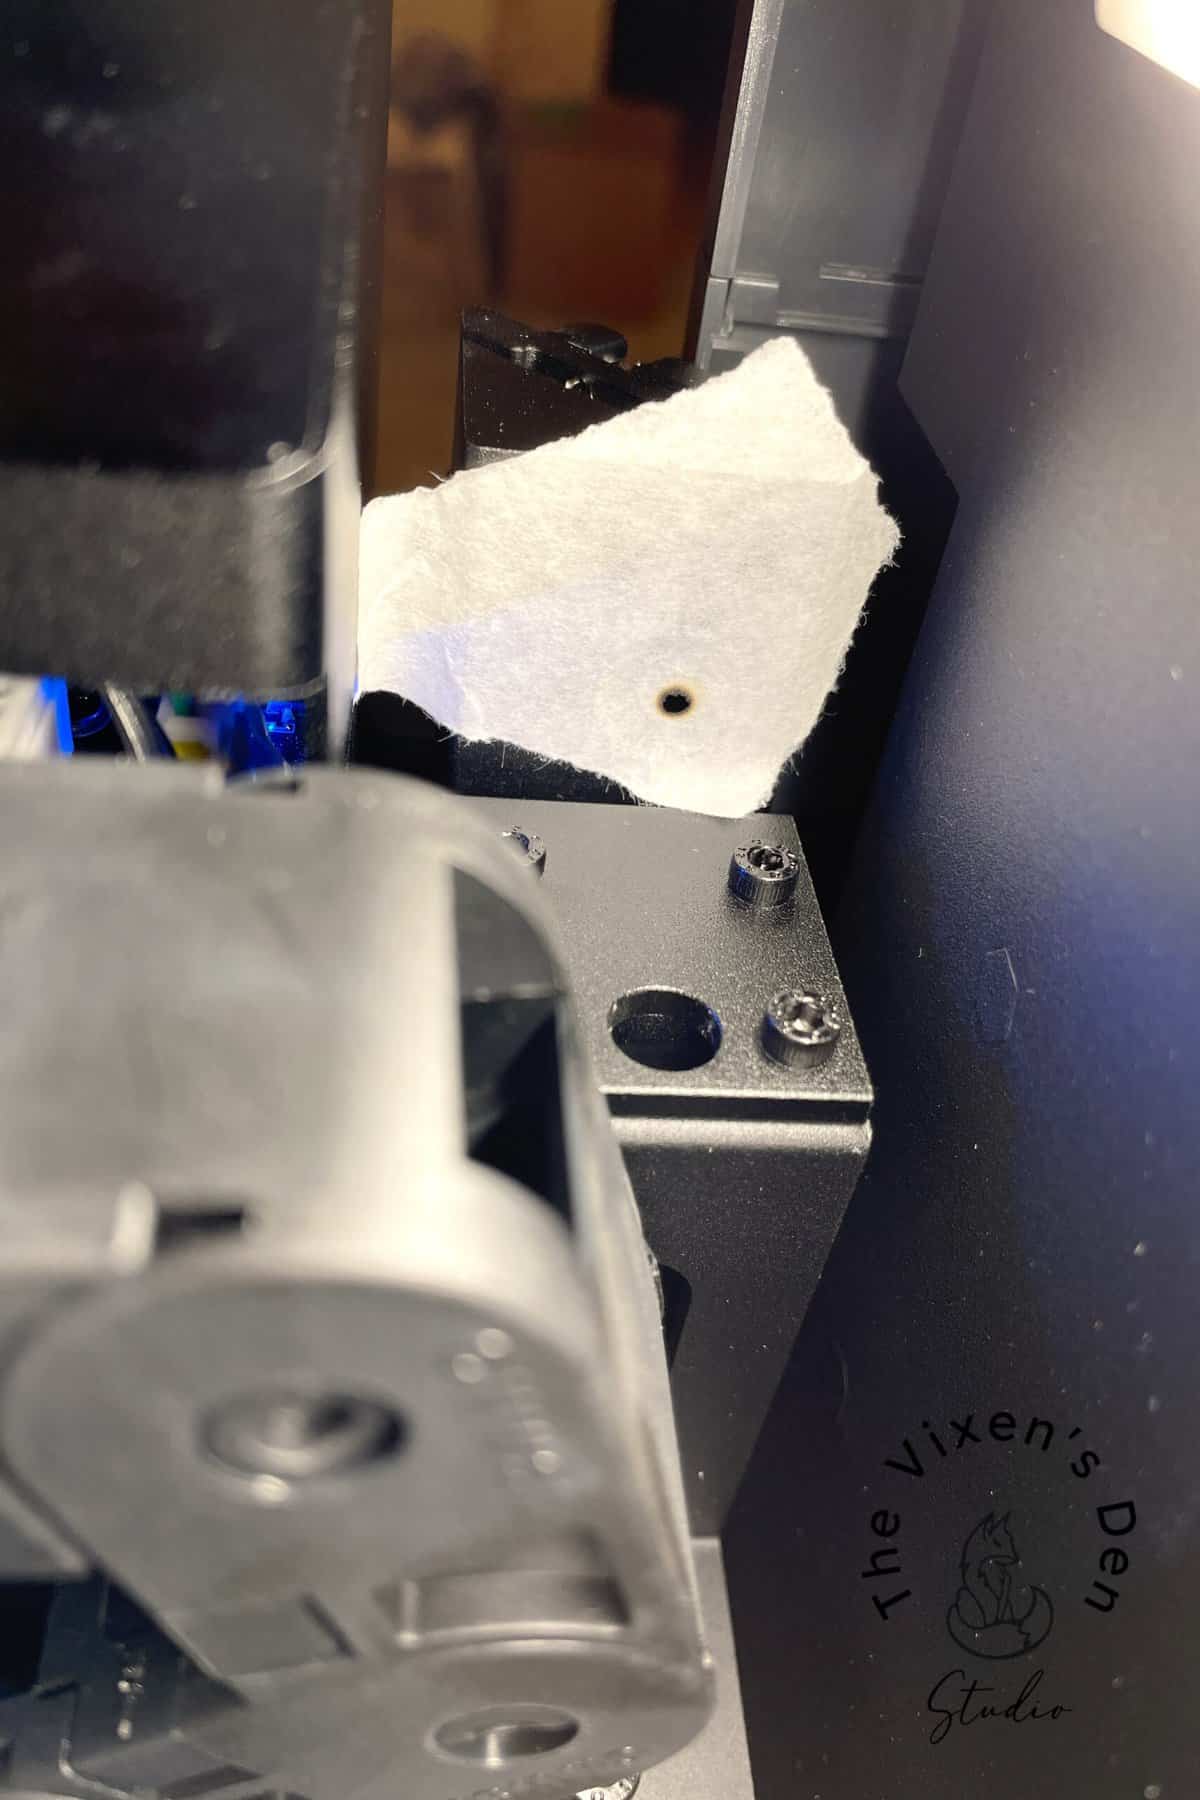
The key with this test is to pulse the laser a couple of times so that you can clearly see the laser path, without over-burning the edges.
Pro Tip: Painter’s tape or masking tape could work for this test. I did read that some users experienced a chemical smell when using painter’s tape, but others used it just fine.
I chose not to clean the mirrors before completing this test because I was interested to see how the machine would perform out of the box. As you can see, the alignment was spot on!
Measuring and Testing Materials
Once the machine was lined up and ready to go, it was time to run some materials tests! I know this might not seem very exciting, but it’s an extremely important step that you don’t want to skip. I know I’m saying that a lot, but seriously, don’t skip it.
Pro Tip: This step is so important, that I wrote an entire article about it!
Before you can properly test a material, you need to know two basic pieces of information:
- What it’s made of
- How thick it is
The first part is important because certain materials can send off some deadly fumes during the engraving process, such as resin, so I won’t be doing any resin engraving. Also, some acrylics aren’t the proper composition and will melt instead of cutting or engraving.
Pro Tip: If in doubt, just order directly from the wide selection of materials offered by XTool to ensure that you have the right product for the right job every time.
The pack of test materials that are included with the P2 includes 4 sheets of 3.5mm cardboard, 4 sheets of 3 mm basswood, and 2 sheets of clear acrylic. I started with a sheet of basswood and the simple Grid Test file on XTool’s site. After downloading and opening the file, I clicked through the menus, clicked start in the XCS program, and then pressed the start button on the machine.
After a few moments of processing, this was born!
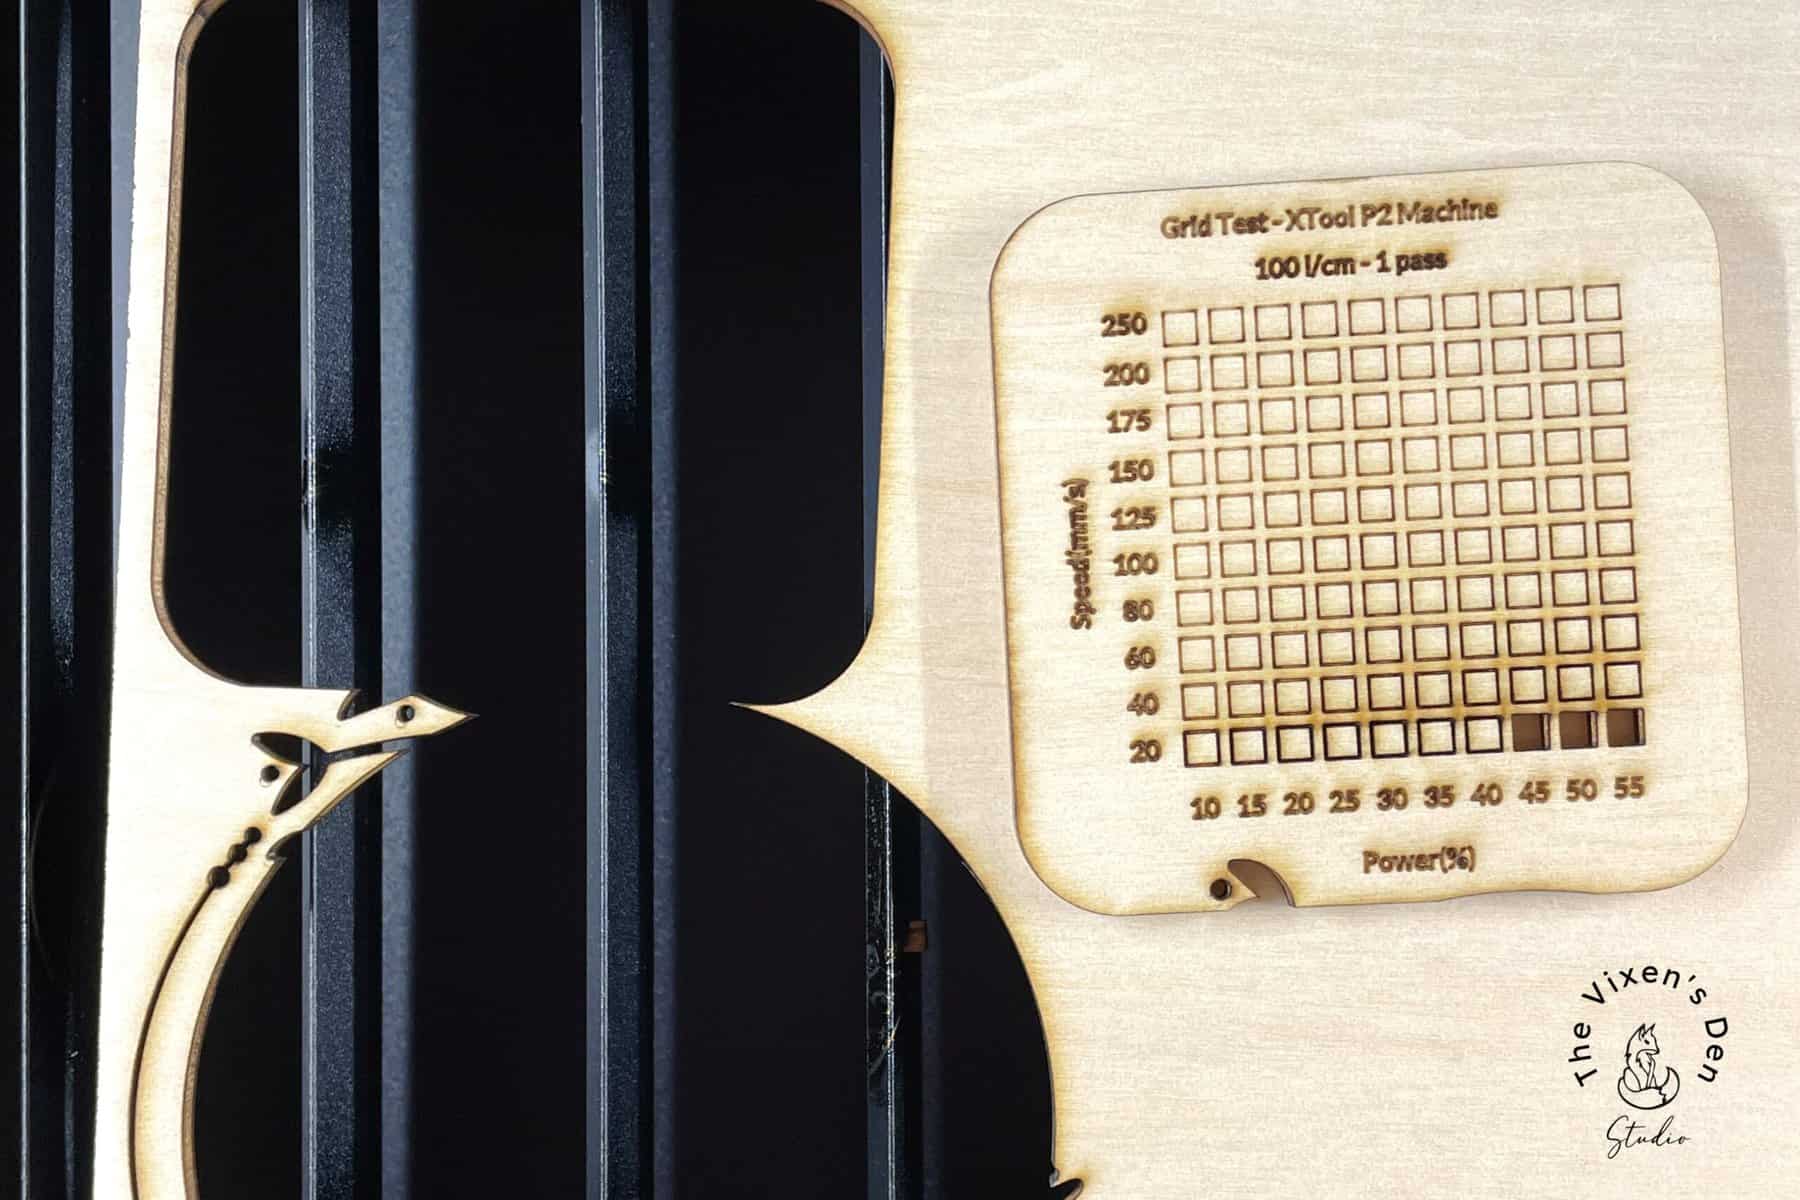
I tried a few other tests, including The Vixen’s Den logo:
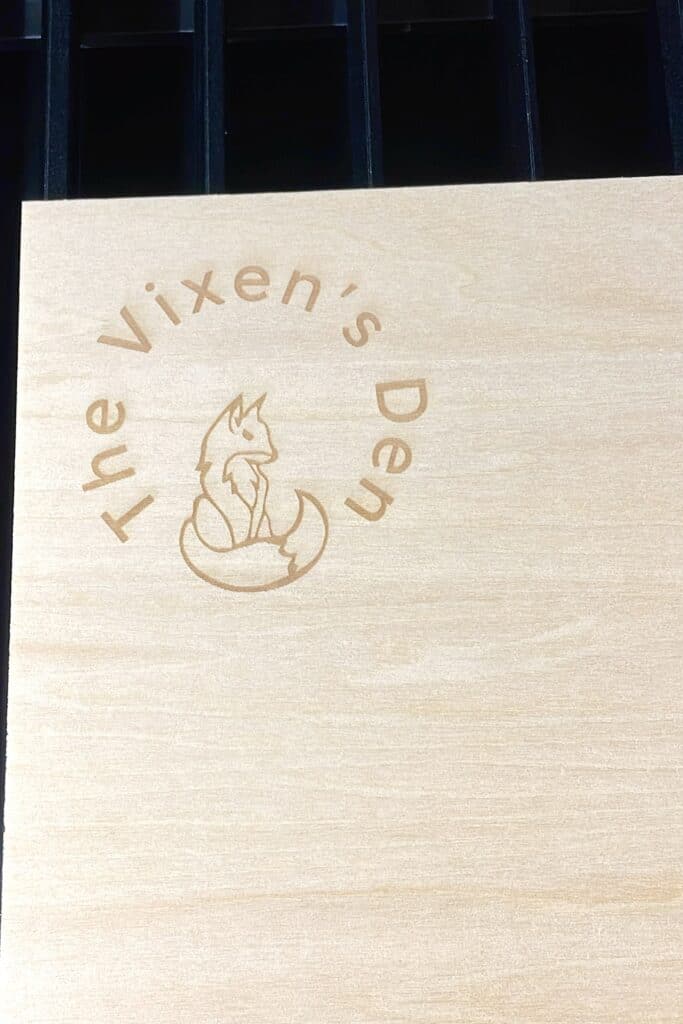
This was engraved using the standard basswood settings. Next time, I will increase the power a bit. Therein lies the importance of running a test grid, so you can see which power and speed settings will give you the desired result.
If you prefer to see this in action, here’s my unboxing video!
Project Files and Tutorials
The xTool Learning Center provides step-by-step instructions to help you get started with your first project! Support is provided through articles, videos, and open community Q&As.
Once you’re ready to start creating, hop over to xTool Projects to find free files and instructions! I did find that the search feature on this site leaves a bit to be desired. I searched for “cardboard” and found some projects that didn’t show up when I clicked on the “Paper” selection and vice versa.
However, new files are being added all of the time. The main page keeps a running list of what’s popular, typically based on the current season. xTool also encourages creatives to contribute designs through contests and reward programs.
Once you feel comfortable using the software, you can create cut files in XCS, such as your own test file by following the steps in this article. Alternatively, you can download files from outside sources. I have found several on Creative Fabrica and Etsy that I’m really looking forward to testing out!
One aspect that I really like about xTool is that they don’t try to push expensive software, such as Lightburn. Instead, they offer suggestions on how to edit files using Inkscape, which is a completely free software similar to the Adobe Suite.
What I’m Loving So Far
Quality – this feels like a machine that will last. While it does have plastic components, the machine feels thoughtfully made…although I might recommend placing the start button on the same side as the USB port….
Customer Support – I have received nothing but responsive, considerate, and polite customer support from day one! It was very important to me to test the level of customer support through email as I know that not everyone uses Facebook. The email responses have been impeccable, even though a lot of my questions have been user error (we’ll talk about those next time.)
What’s wonderful is that the exact same level of customer support is provided in the Facebook group. I’ve been lurking in the wings reading the questions and support responses, and they are as thorough as what I’m receiving by email, with offers for additional assistance if the customer seems to need a little more hands-on approach.
This leads me to the next favorite part – a fantastic selection of detailed articles and video guides. The company is indeed based in China, so you’re not going to be able to just pack your machine up and drive it down the road to have it serviced (and if you can do that, let me know where you’re at!) However, if you’re a fairly handy person who is comfortable taking things apart and watching videos on how to put them back together, then I’m confident that you can troubleshoot most of the issues that you might run into.
(This post is long enough, so we’re not going to get into that today.)
Finally, I appreciate the variety of sample materials that are provided to try out. These are very basic, but provide just enough variety for a brand new laser operator to get their feet wet and give them the bug to create more! The xTool Materials page contains even more amazing products and they are adding more all the time!
What Could Be Better
It’s true, though that not everything is perfect. While the tutorials and guides are fantastic, the sites are tough to navigate with inconsistent results when searching. I did find that clicking on the descriptive tags was helpful so give that a try. That’s how I found some of the videos and articles that are included in this post.
Millimeters versus inches – every description and material is measured in metric. While that works well for all our friends across the pond, this USA-born girl does not appreciate having to do math! Luckily, my handy-dandy caliper does the work for me. (I also noticed that some of the descriptions have been updated to include both metric and standard measurements. Bless you for that, xTool!)
My Current Thoughts
This is a great machine with a lot of potential! I’ve had a bumpy start with this machine, again mostly due to user error. I am completely green when it comes to laser machines and there have been times that I’m trying to troubleshoot and I just can’t get the darn hoses off because I’m afraid of breaking something.
My baby-step-stumbling, aside, however, I can see how this machine will allow me to create things that I never thought possible! I’m really looking forward to testing out all of its features and incorporating new designs and materials in the future!
This is going to be SO MUCH FUN!!!
“Pro” Tips Summary
In case you skipped all the juicy stuff, here are my key takeaways from the start of this little adventure:
- Make sure you have sufficient space to operate the P2, especially if you might add the riser and conveyor
- Read the Quick Start Guide and watch the setup video before setting up the machine. Everything will make much more sense and be far less intimidating.
- After you finish setting up the machine, immediately read through the Self-Check Guide.
- Don’t be afraid to tug and shove on this machine to make things line up. It even recommends doing so in the instructions! lol
- Use the meta tags (in the box on the left-hand side of the screen) to navigate through the tutorials in the xTool Learning Center. I found that much more helpful than the search feature.
- Have fun! This machine was built to inspire creativity. Enjoy the creative process as you and your machine grow together.
Ready to dive into the creative world of xTool laser engraving and cutting? Click below to start your xTool journey. At checkout, enter code AFFMTRS15 to receive 15% off select materials!


Thank you so much for stopping by! In the next post, we will explore some of the user-error challenges that I faced, and how I overcame them. Until next time, have a beautiful and blessed day!

Don’t forget to sign up so you hear all about the next misadventure! Until then, you may also like this post about Finding the Right Power and Speed Settings or How to Make a Custom Acrylic Dinosaur Cake Topper.