How to Apply Rub On Transfers to a Rounded Surface
With an Adorable Ceramic Dinosaur Makeover
Rub-on transfers are an easy way to add a beautiful design quickly and easily…on a flat surface. But how easy is it to apply a transfer to a rounded surface? Let’s find out!
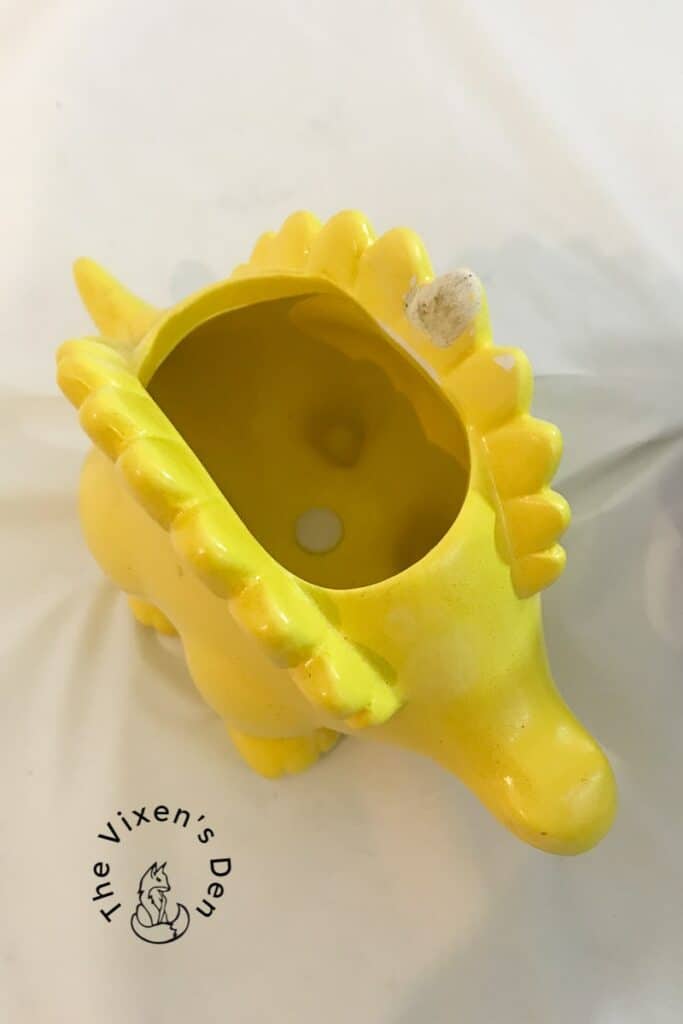
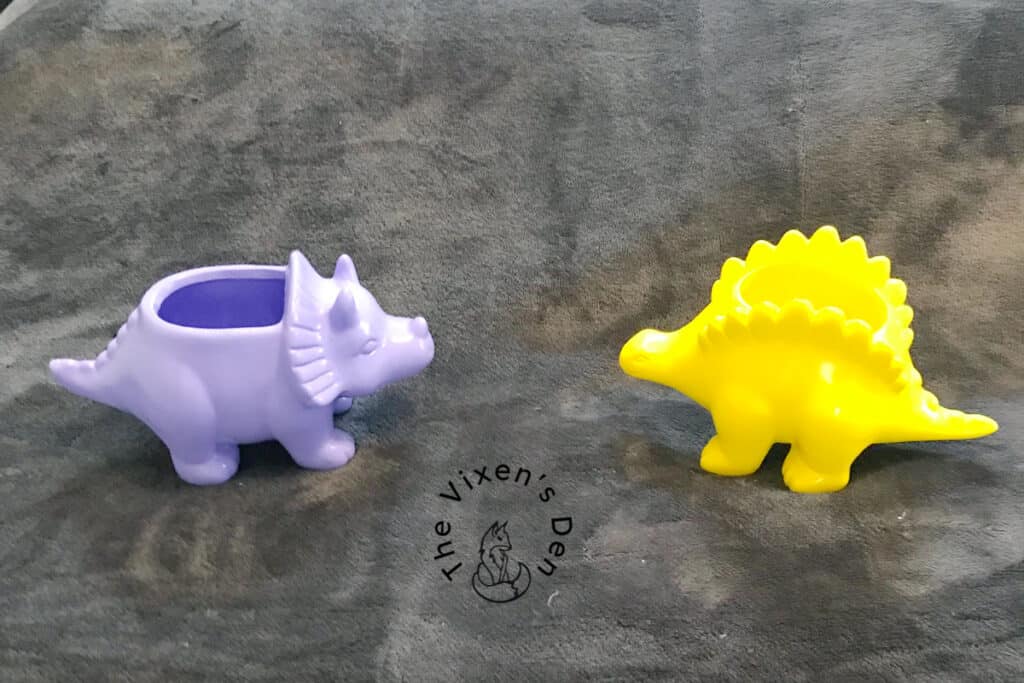
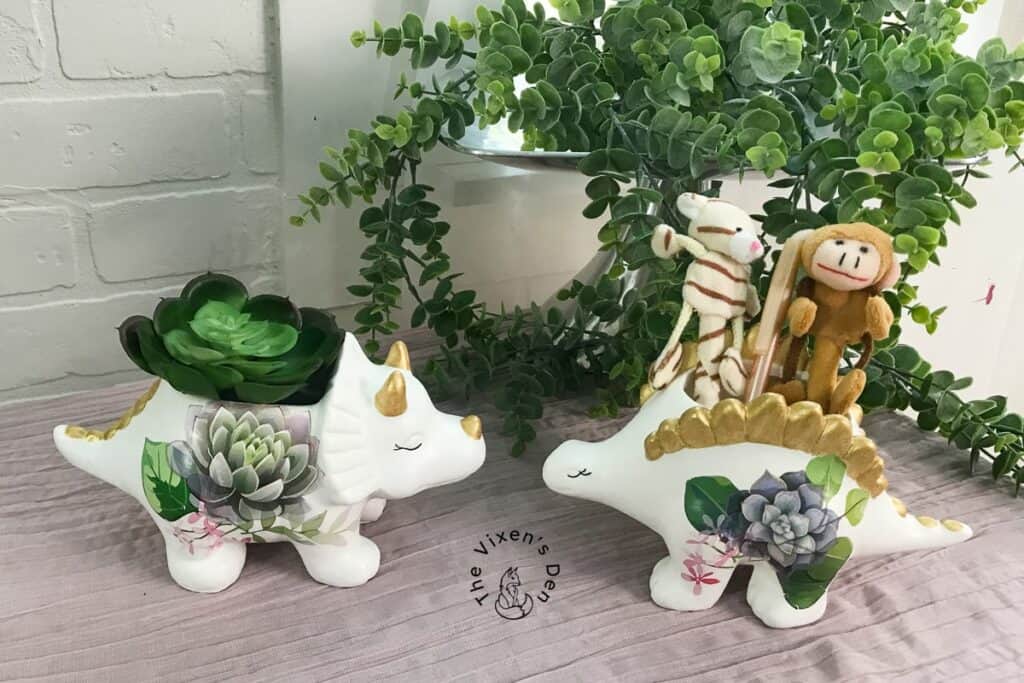
At some point, while my daughter was pregnant, she developed a fascination with dinosaurs. She found pastel dinosaurs everywhere! These ceramic lavender and yellow dinosaurs were a result of that new obsession.

They are cute in their own right, with those perfect nursery colors, but they weren’t quite what my daughter had in mind. So we made them even cuter!
This post is sponsored by Dixie Belle Paint Company. While they provided some of the products for this project, all of the opinions are my own. Follow this affiliate link to see all of their amazing products!
AS AN AMAZON ASSOCIATE I EARN FROM QUALIFYING PURCHASES AT NO COST TO YOU.
YOU CAN SEE MY FULL DISCLOSURE HERE.
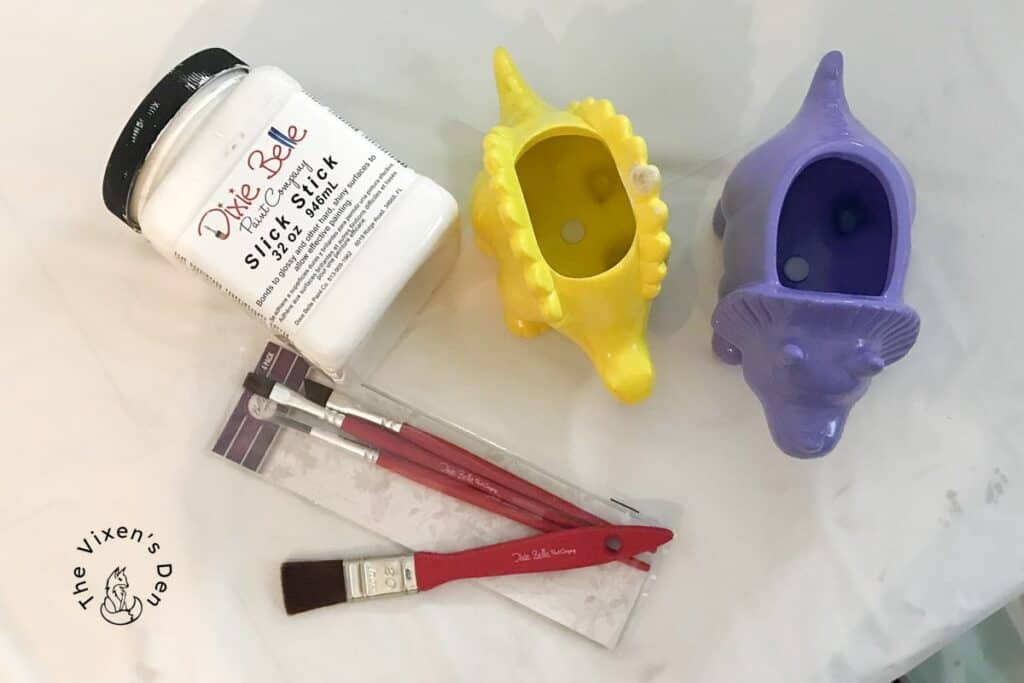
Tools and Materials
Tools
- Blue scrubber
- Oval brush
- Artist brush
Materials
- White Lightning
- Loctite All Purpose Epoxy Putty
- Sandpaper
- Slick Stick – White
- Silk Mineral Paint – Whitecap, Desert Rose, Morning Sunrise, and Bay Breeze
- Chalk Paint – Tea Rose and Caviar
- Transfer – Cacti & Succulents
- Moonshine Metallics Paint – Gold
- Clear Coat – Satin
- Gator Hide
Cleaning & Prepping
The first step is always to clean the surface. I used Dixie Belle White Lightning and a small blue scrubber to make certain that any dust, dirt, or oils were removed completely. I followed that up by rinsing thoroughly under warm water.
Once the dinosaurs were shiny and clean, it was time to repair the chip in the yellow stegosaurus’s back plate. I pinched off a piece of Loctite Putty and massaged it together between my fingers to combine it. Once the color was uniform, I pressed the Loctite Putty firmly into place and shaped it to match the other plates. I let the putty dry overnight and then sanded it lightly with 120 and then 220 grit sandpaper.
With the repair complete, I then primed both pieces by applying a coat of Slick Stick in white with an oval brush. It was a little challenging to prime the inside. I found that an artist’s brush worked best.
After two hours, I then applied a second coat of Slick Stick, allowing the second coat to dry overnight before moving on to the next step.
Paint
To achieve the bright boho look that my daughter wanted, I applied a coat of Silk Mineral Paint in Whitecap. This paint is wonderful because it contains both primer and topcoat and leaves behind a near-matte finish. I applied two coats to ensure that I had full coverage and a smooth finish.
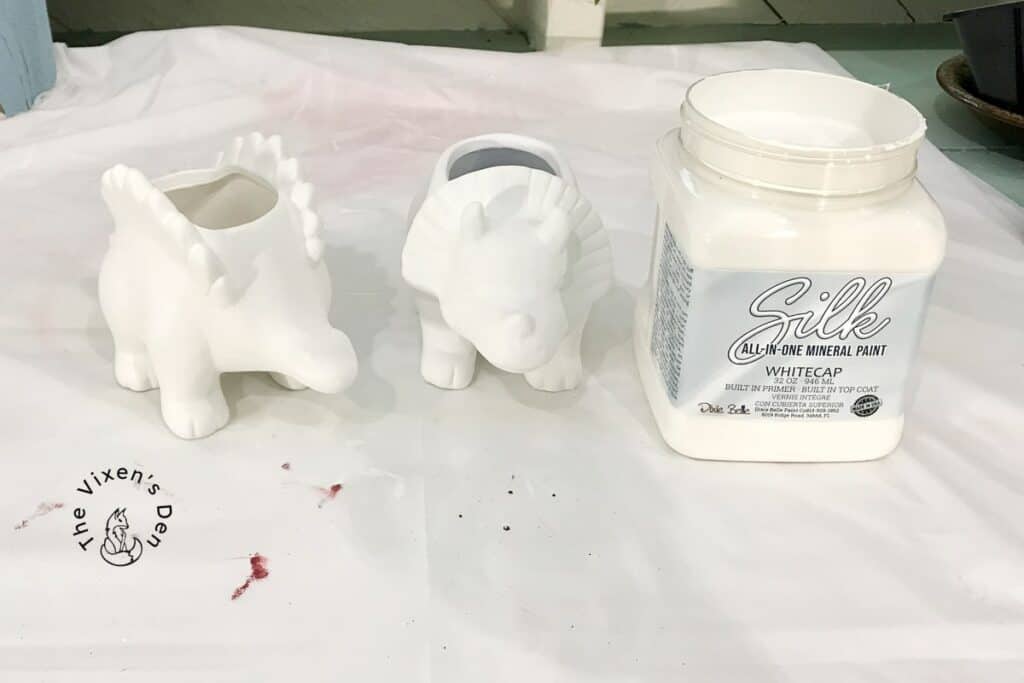
Saltwater Silk Mineral Paint created the perfect blank canvas.
Apply Rub-on Transfers
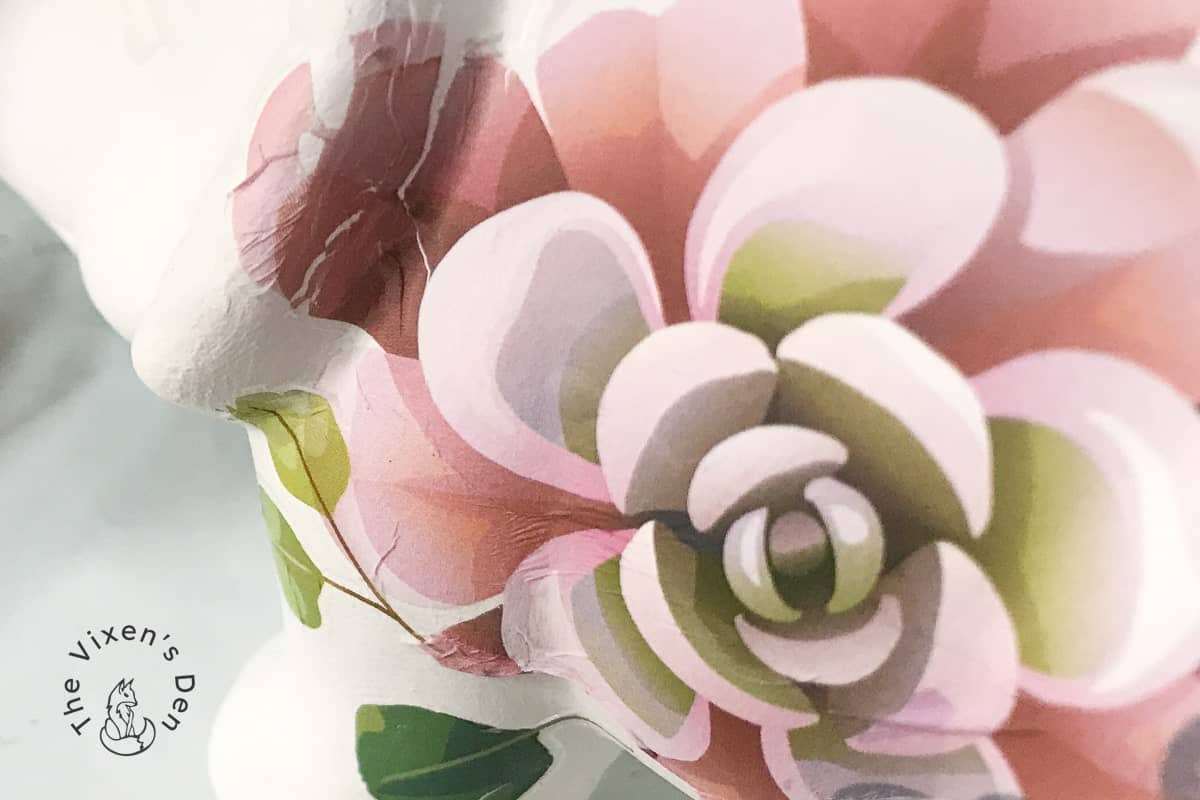
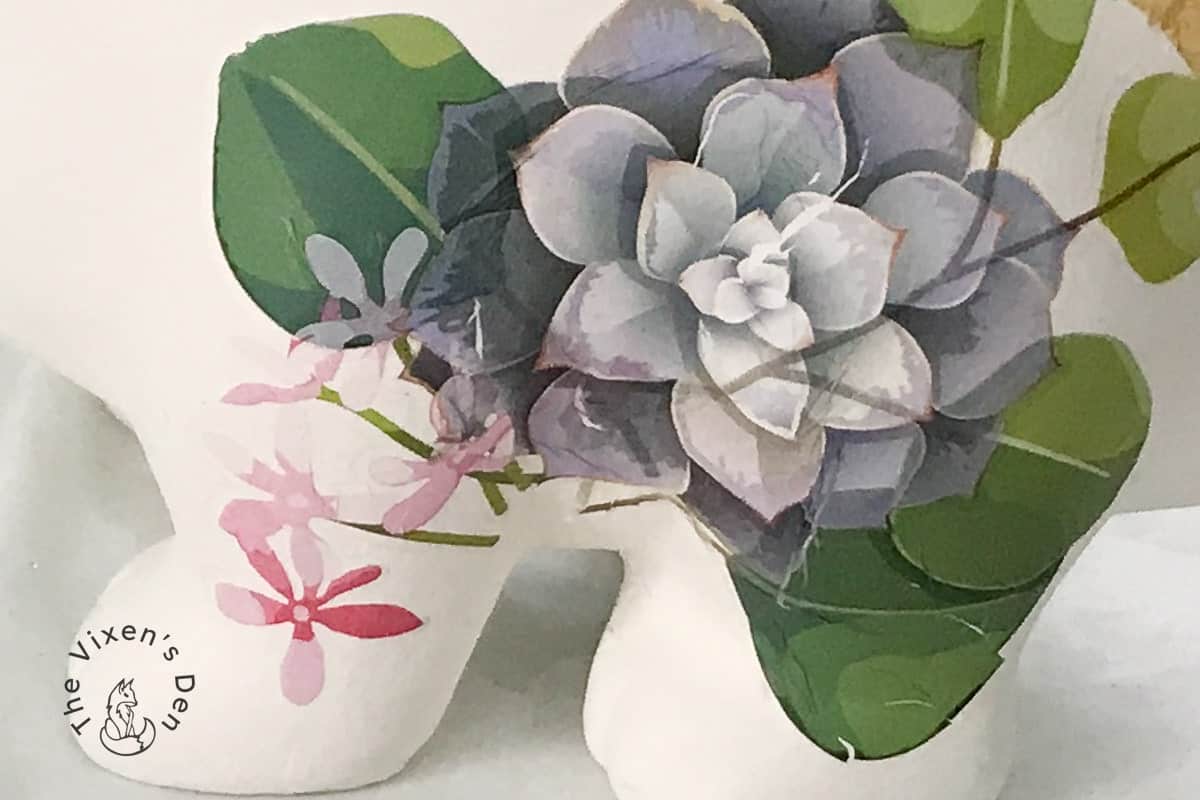
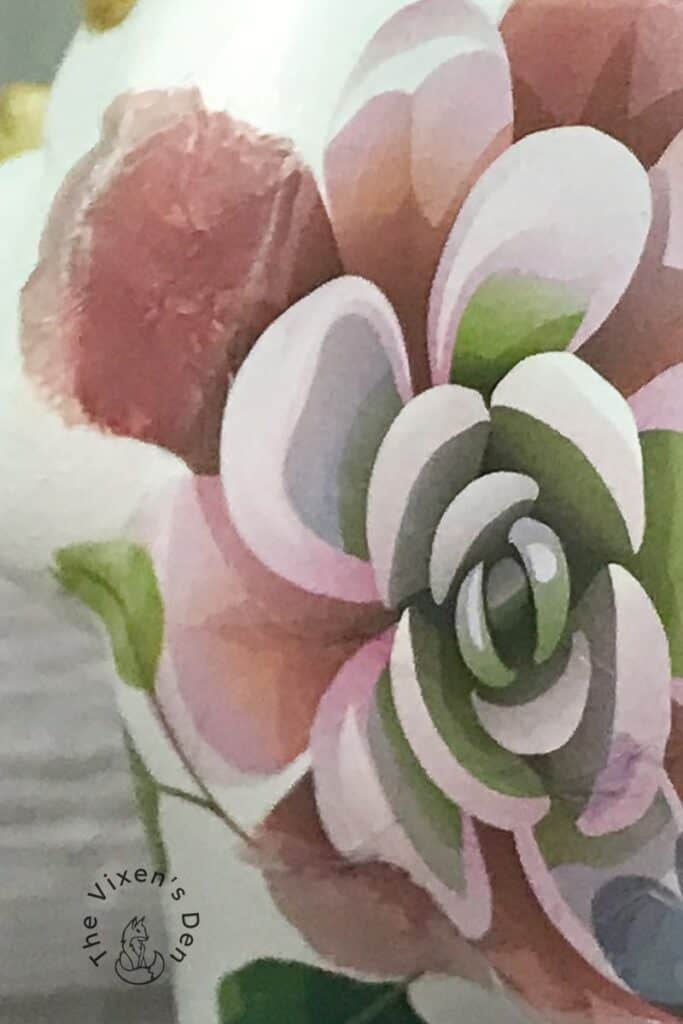
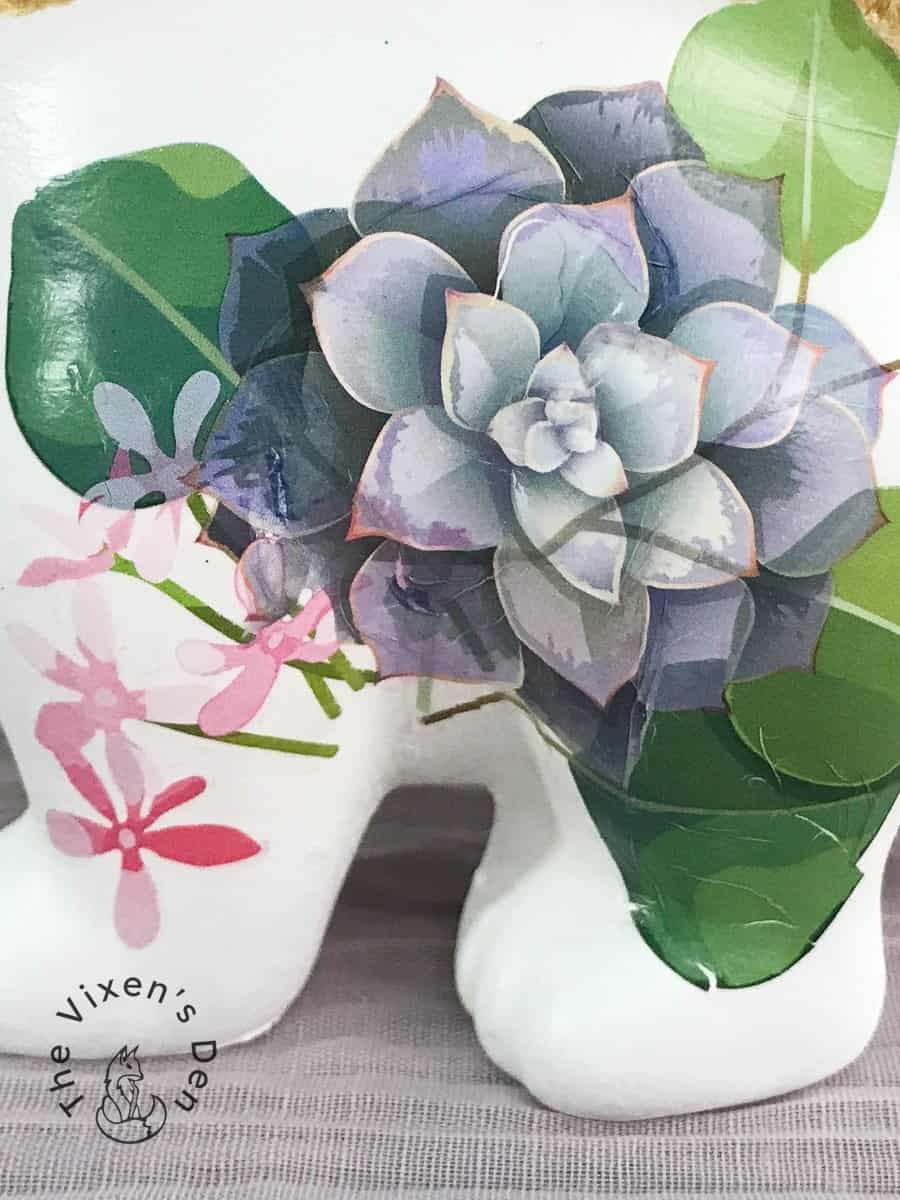
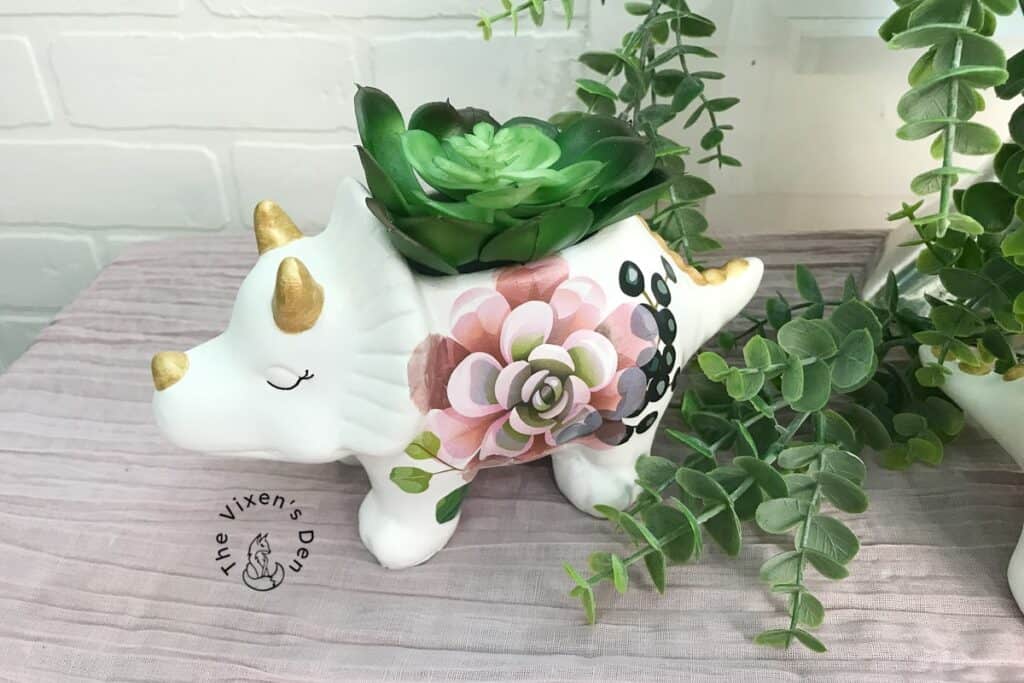
To match my daughter’s bright and feminine boho vision, I chose the adorable Cacti and Succulents transfer from Dixie Belle’s “Belles and Whistles” line. This transfer not only has the sweetest collection of succulents, but it also contains a sheet of glam modern succulents in an all-over design and some gorgeous compilations. So whether you need some inspiration, or you’re ready to jump right in with your own ideas, this transfer is a winner!
These dinosaurs aren’t very large, so I chose some of the medium size succulents along with some smaller elements to combine into my own design. One of the great things about rub-on transfers is that you can easily layer them to create your own design.
I cut out the pieces that I wanted to use with scissors, then rolled up the rest of the sheets and tucked them back in the tube for safekeeping.
Before applying the rub-on transfers, I first lay them out on the table and held them against the projects to get an idea of the order and the position in which each piece should be applied. With the composition and steps figured out, I grabbed the wood rubbing stick that is included in each transfer tube from Dixie Belle.
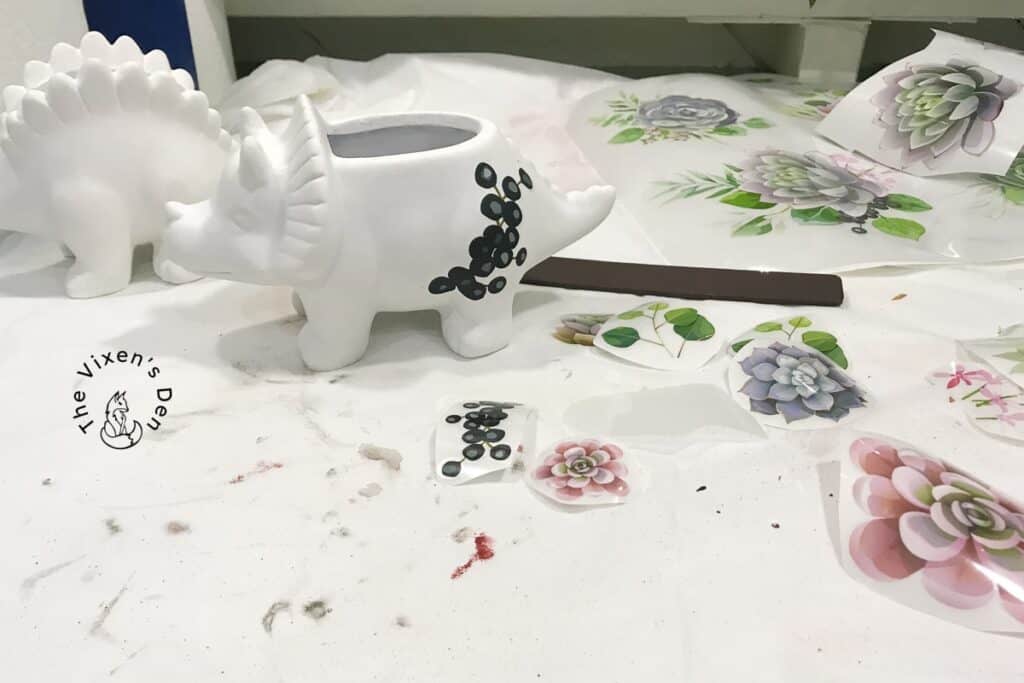
I decided that since I was working with a rounded shape, I should start off by applying the transfer in the steepest part of the curve. The idea was that the transfer would then stretch over the curve and fold a bit in the valleys. This worked to some degree, but what I learned rather quickly is that the transfers tore as they were stretched when the transfer pulled away from the plastic cover.
Hindsight is 20/20 – transfers will tear easily. Ensure the transfer is pressed firmly against the surface. Once released, press with fingertips from the center outwards to attach it to the project.
I wasn’t surprised by this, as the transfers are quite thin. They are very flexible, however, so they actually held up better than I feared. I smoothed out most of the wrinkles with my fingertips and filled in large gaps with chalk paint.
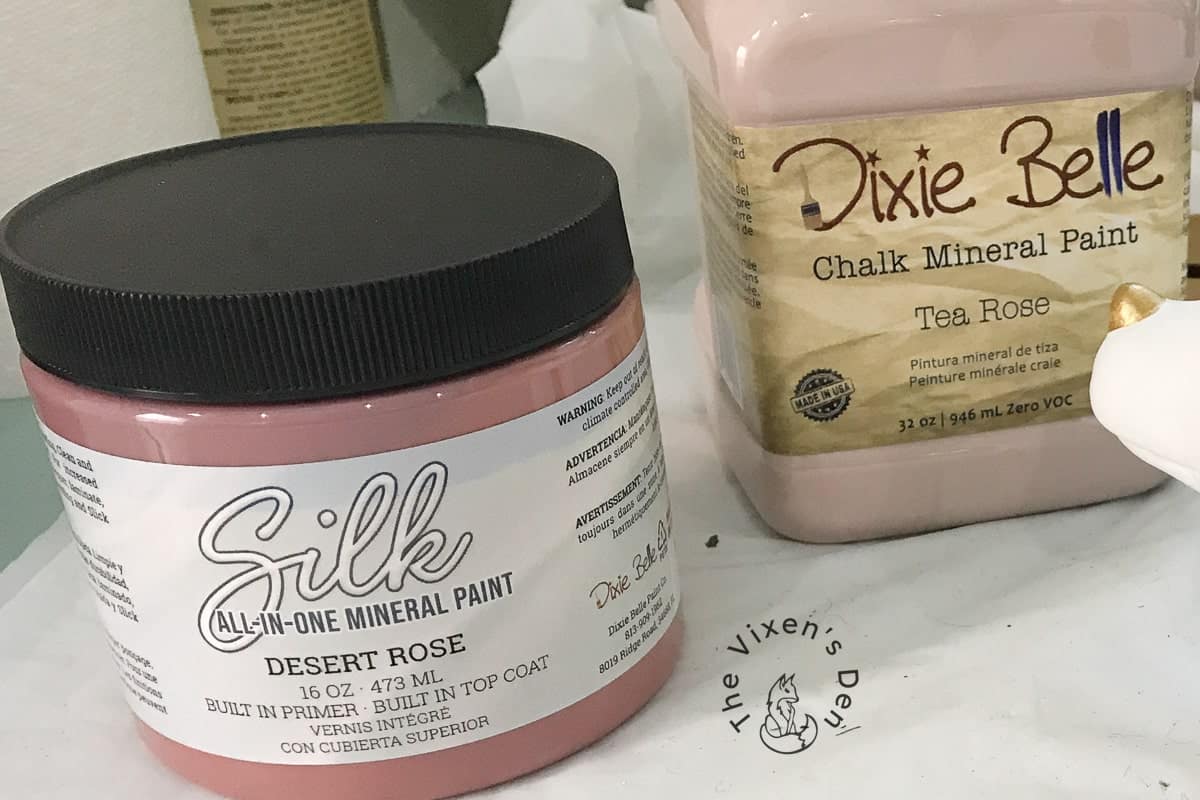
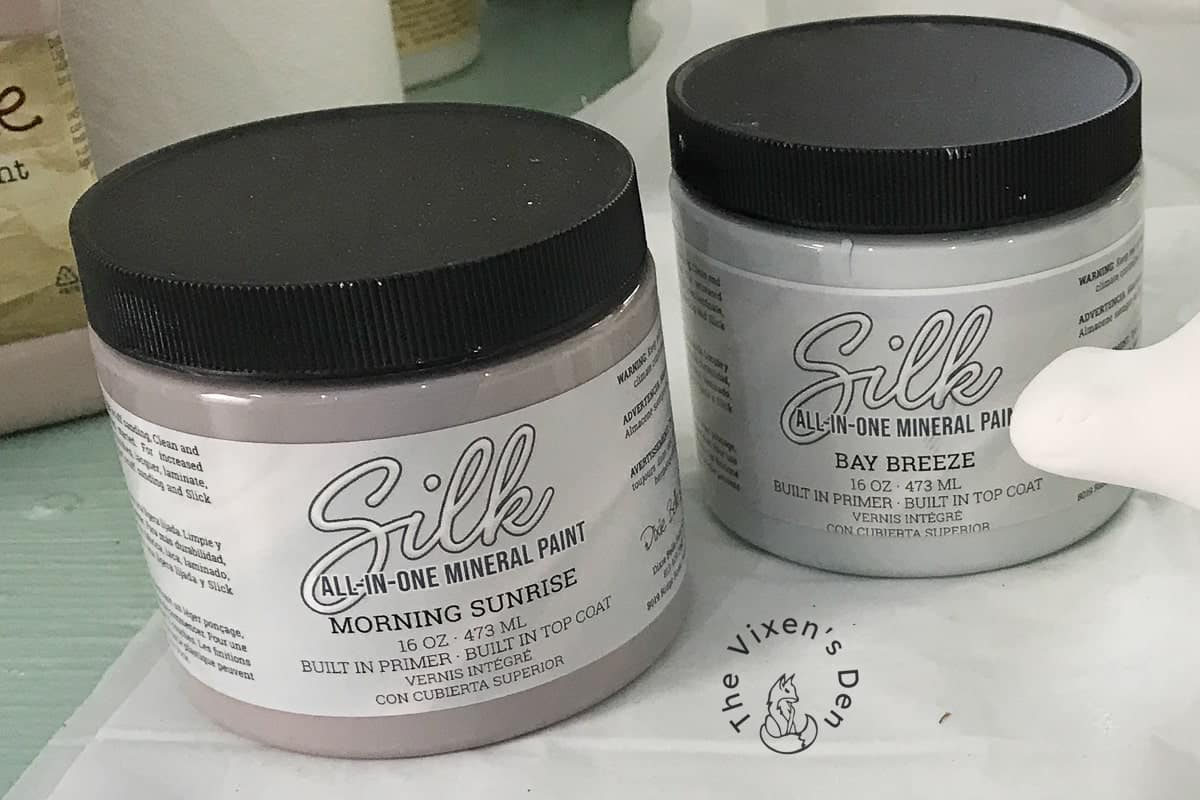
Desert Rose Silk Mineral Paint and Tea Rose Chalk Paint were perfect for one transfer, while Morning Sunrise Silk Mineral Paint and Bay Breeze Chalk matched the other. I also used Caviar Chalk Paint on the berries. I painted in the gaps using an artist’s brush. The paint colors were absolutely perfect with these transfers and helped to hide the tears beautifully!
Add Details
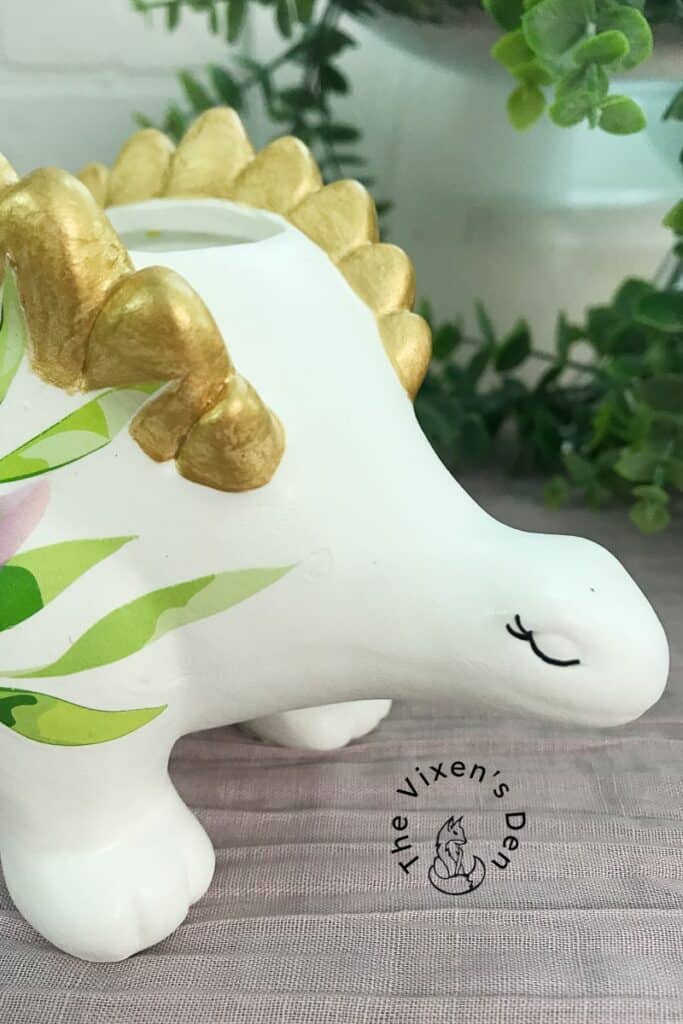
Just adding the paint and transfers was enough to completely transform these dinosaurs. But I knew that just a few extra details could really make them special. These dinosaurs needed a little bit of glam to go with their boho style. Using an artist’s brush, I painted the horns and back plates with three coats of Dixie Belle’s Moonshine Metallics paint in Gold Digger.
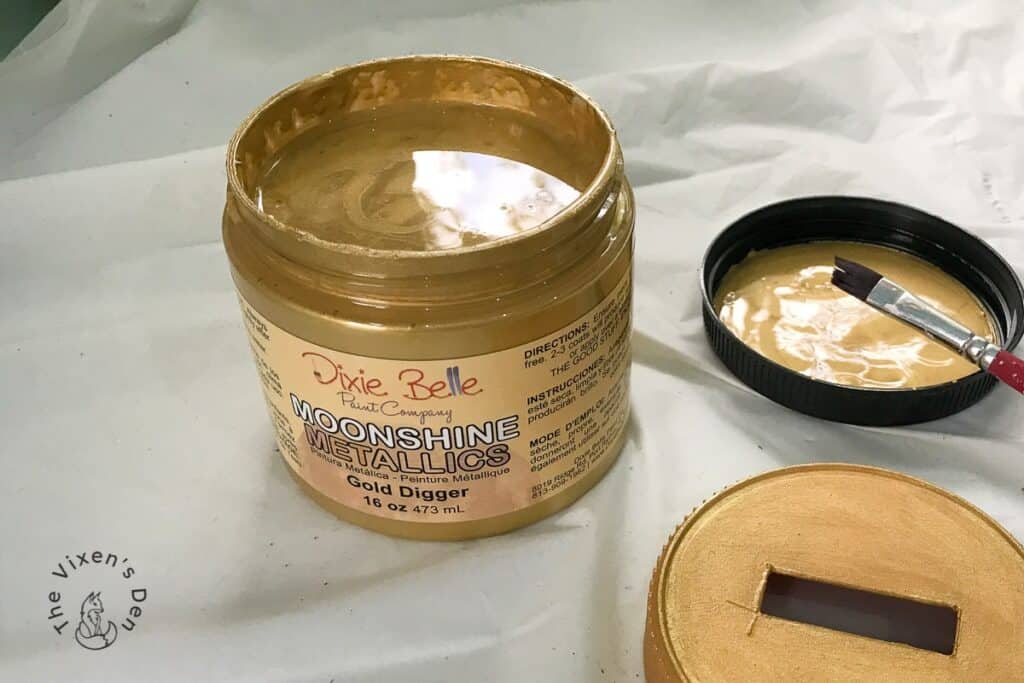
Each layer is sheer, but as you build with each coat you end up with the prettiest gold paint that I’ve ever seen. It’s not too yellow or too white, and it has just a hint of shimmer. It’s perfect!
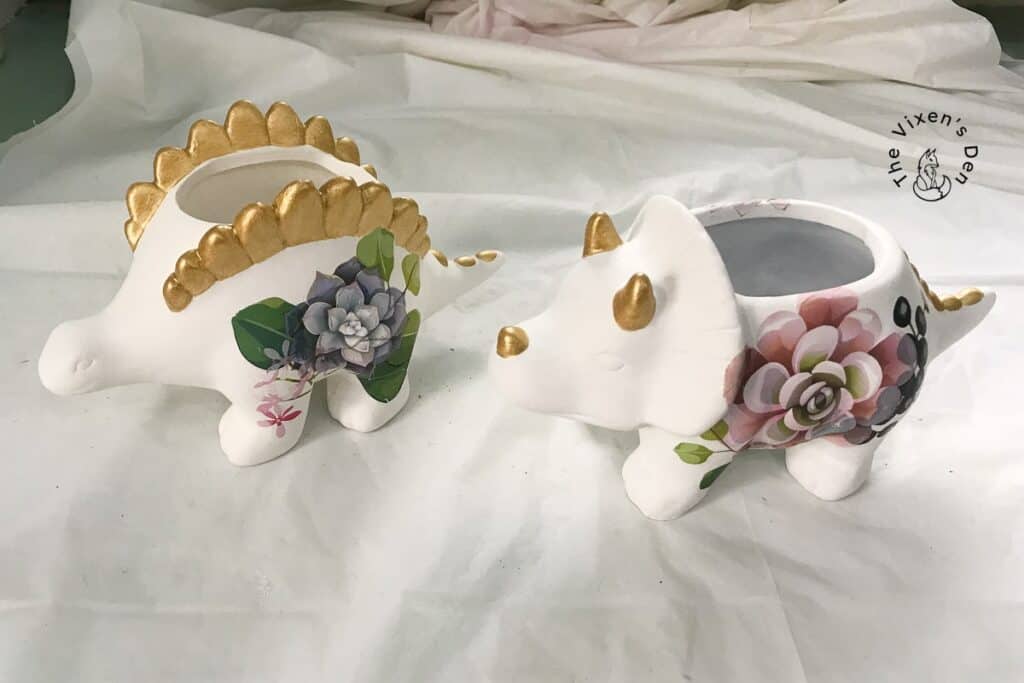
Finally, I added a pop of character with a bit of eyeliner and curly eyelashes. For this step, I used a simple permanent fine-tipped marker. It doesn’t get any easier than that!
Seal the Transfer
The final step was to seal in all that beautiful work. The Silk Mineral paint doesn’t need to be sealed, since it already has a top coat built in, but the transfers do. So, to keep the sheen of the project even, I applied two coats of Dixie Belle Clear Coat in Satin to all of the surfaces, waiting a few hours between coats.
Thinking Ahead Tip: To make the inside extra sturdy (in case these little cuties ever become flowerpots) I also added two coats of Gator Hide just to the inside of each dinosaur.

Final Reveal
Are you ready to see the final before and after?
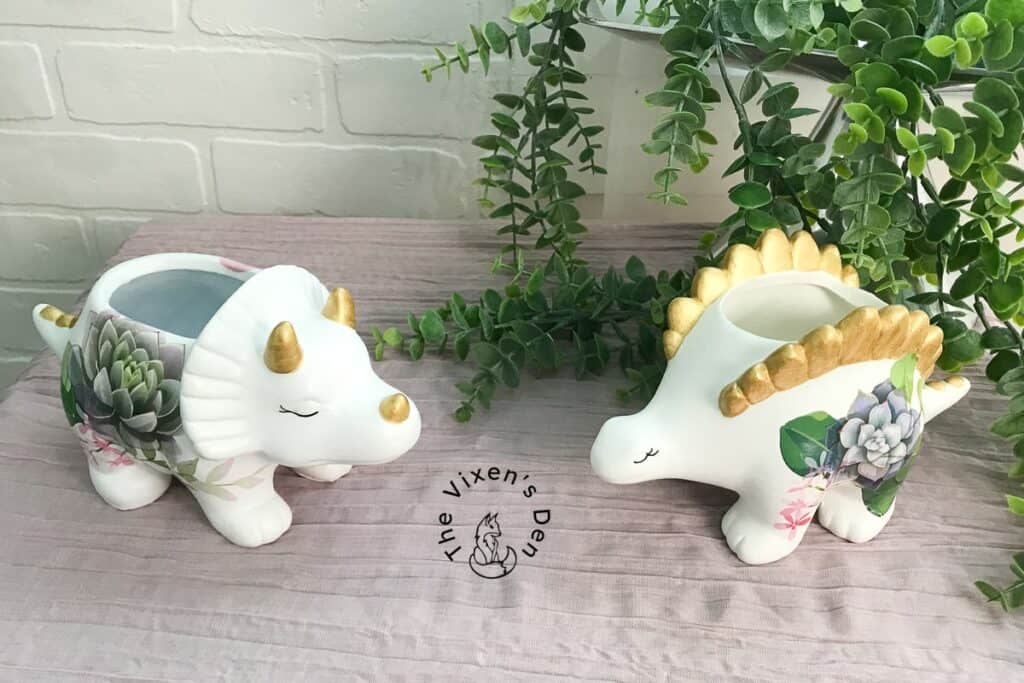
Aren’t they just the cutest things ever? I love the new look and can’t wait to see how my daughter uses them. They would make cute marker and pen holders….
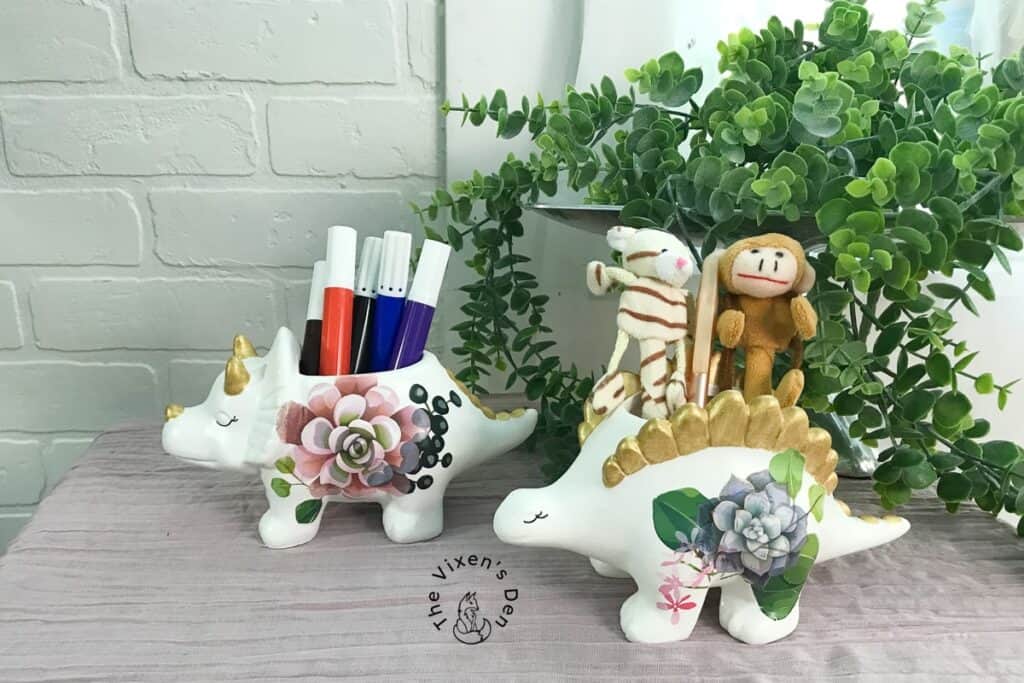
…or adorable succulent planters!
How do you think these ceramic dinosaurs could be used? Let me know in the comments below!
Thank you so much for stopping by! Check out the other amazing projects at the link parties below. I know the hostesses will appreciate your visit and comments.
Until next time, have a beautiful and blessed day!


Linked up to these lovely link party hostesses at:
Don’t forget to sign up so you hear all about the next misadventure! Until then, you may also like this Pink Pumpkin with Transfers or this Chalk Painted Side Table makeover (with transfers!)
Aww, these are so cute! I bet the nursery is adorable decked out with pastel dinosaurs! Thanks for sharing on Crafty Creators!
Wow! That was a lot of work for 2 little knickknacks! But their result is beautiful!! And I’m sure Kayla loved them! Really appreciate your combination of transfers- the colors & placements. Initially when I saw the pic in the email, they had a 3-D look to them. Like the lilac petals were standing straight up. Which was very cool.
Thanks, Beck!