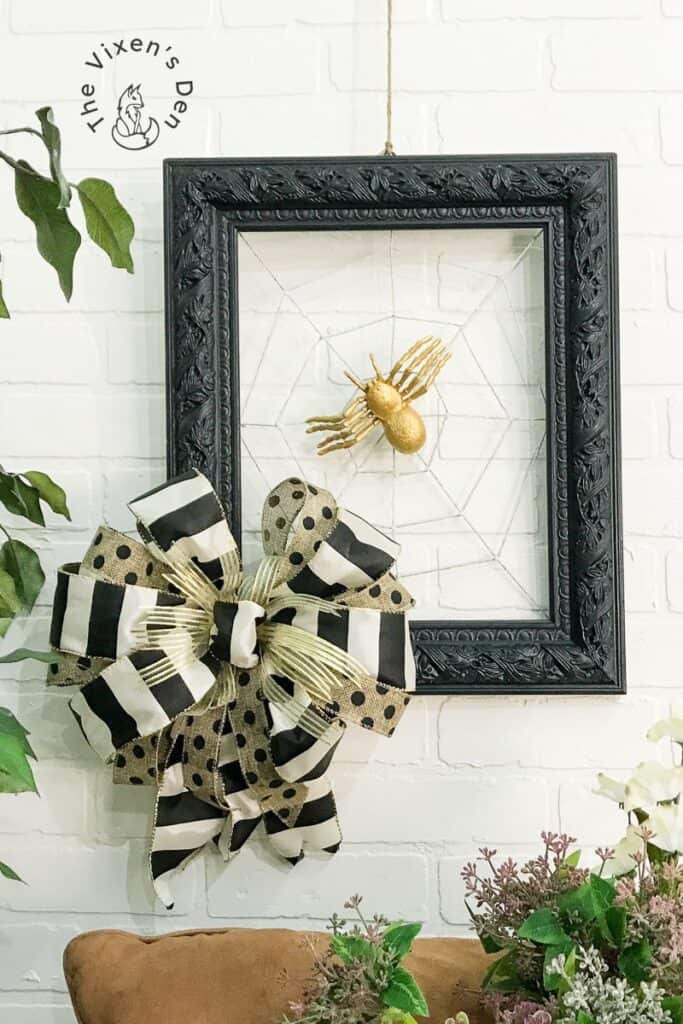
How to Make an Elegant Halloween Spider Web Wreath
Are you looking for an elegant alternative to traditional Halloween decor? My favorite Halloween decorations are elegant with a hint of sparkle, easy to pack away, and don’t cost an arm and a leg.
This DIY uses Dixie Belle Paint to transform Dollar Tree bugs and a thrifted picture frame into an elegant spider web wreath. If you happen to be a fan of spiders, then I dare say that this wreath is so cute that you could keep it up even after all the ghosts and goblins are gone!
This post is sponsored by Dixie Belle Paint Company. While they provided some of the products for this project, all of the opinions are my own. Follow this affiliate link to see all of their amazing products!
AS AN AMAZON ASSOCIATE I EARN FROM QUALIFYING PURCHASES AT NO COST TO YOU.
YOU CAN SEE MY FULL DISCLOSURE HERE.
Tools and Materials
Tools
- Utility knife
- Screwdriver
- Pliers
- Artist brush
- Small flat paintbrush
- Misting spray bottle
- Manual staple gun (or upgrade to an electric staple gun for lots of oomph!)
- Hot glue gun
- Drill
- Drill bit
Materials
- Picture frame
- Plastic spider
- White Lightning
- Blue scrubber
- Slick Stick
- Terra Clay Paint – Onyx
- Moonshine Metallics Paint – Golddigger
- Terra Tuff
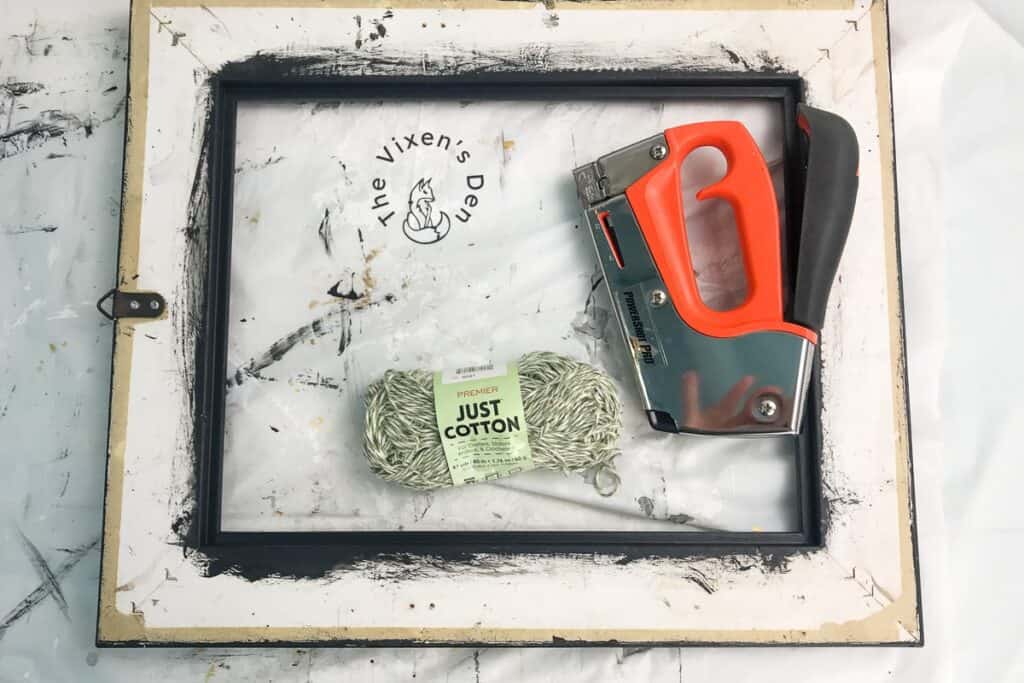
- Cotton Twine
- Staples – 3/8″
- Ribbon – Black and white striped, Burlap polka dot, Sheer gold striped
- Floral wire
- Glue sticks
- E6000 glue
Cleaning & Prepping
Always clean your project, even if it’s a brand-new piece. There is dust and oils that are just waiting to keep the paint from adhering. Just look at how dirty these fresh-from-the-store bugs were after!
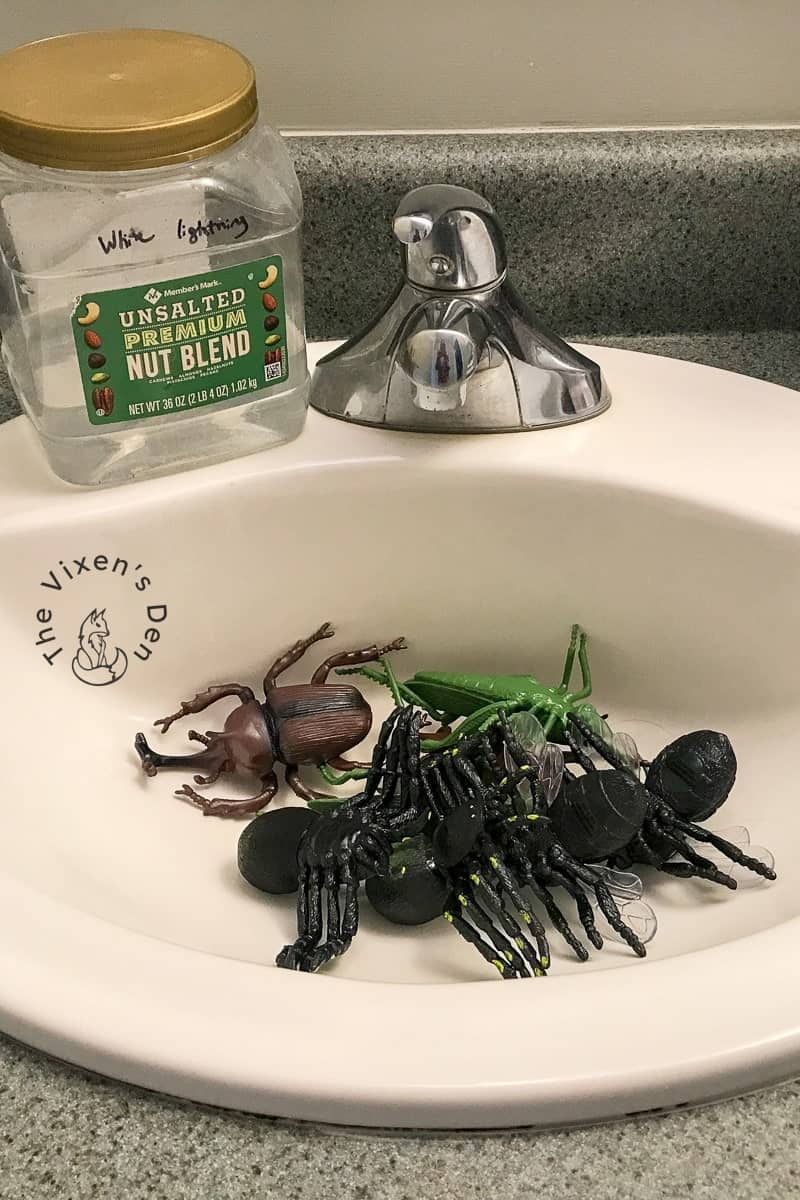
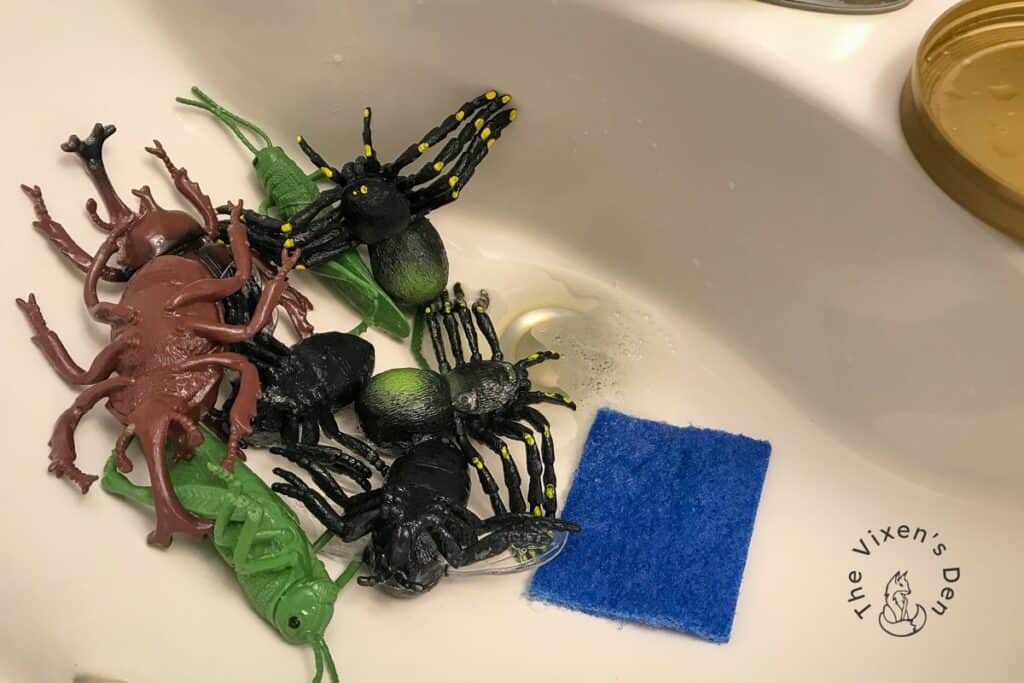
I scrubbed them with my go-to products: White Lightning and a blue scrubber. White Lightning is a TSP substitute that cuts through grease and oils while also deglossing the surface. This simple act of cleaning provides a foundation that helps prevent the frustration of having to start a project over due to peeling paint.
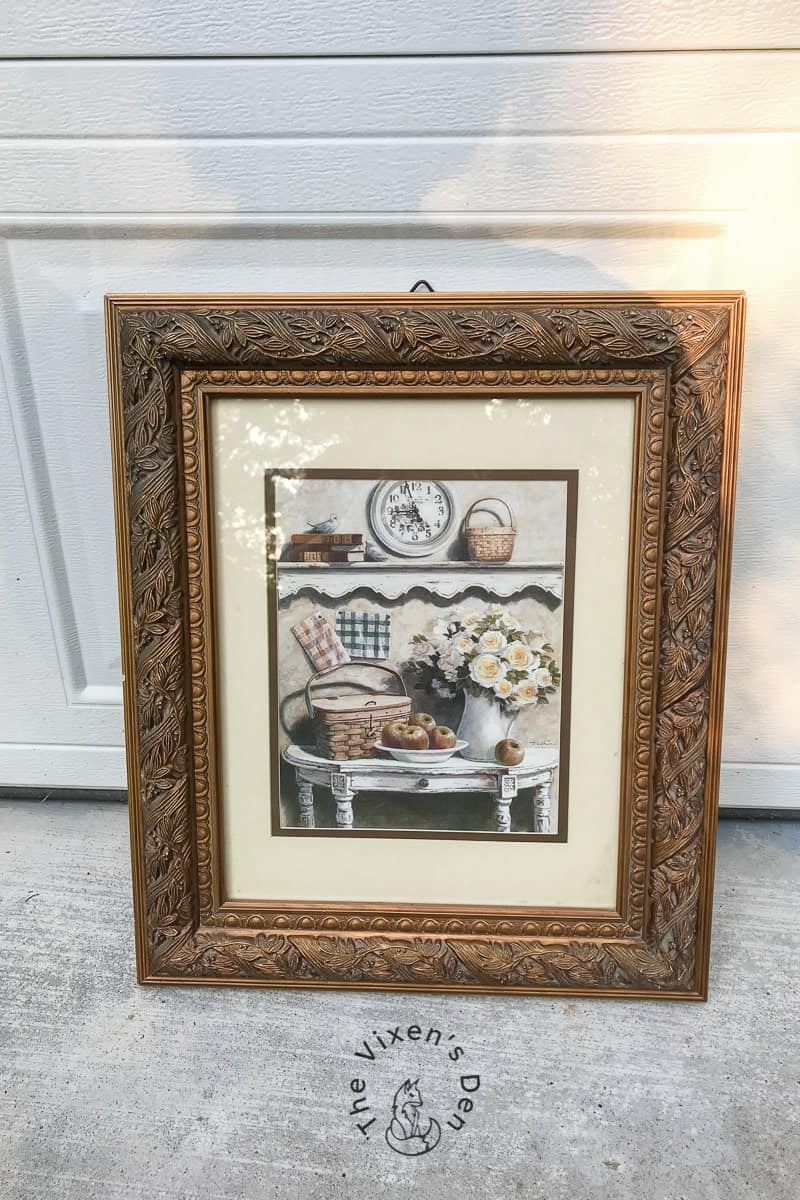
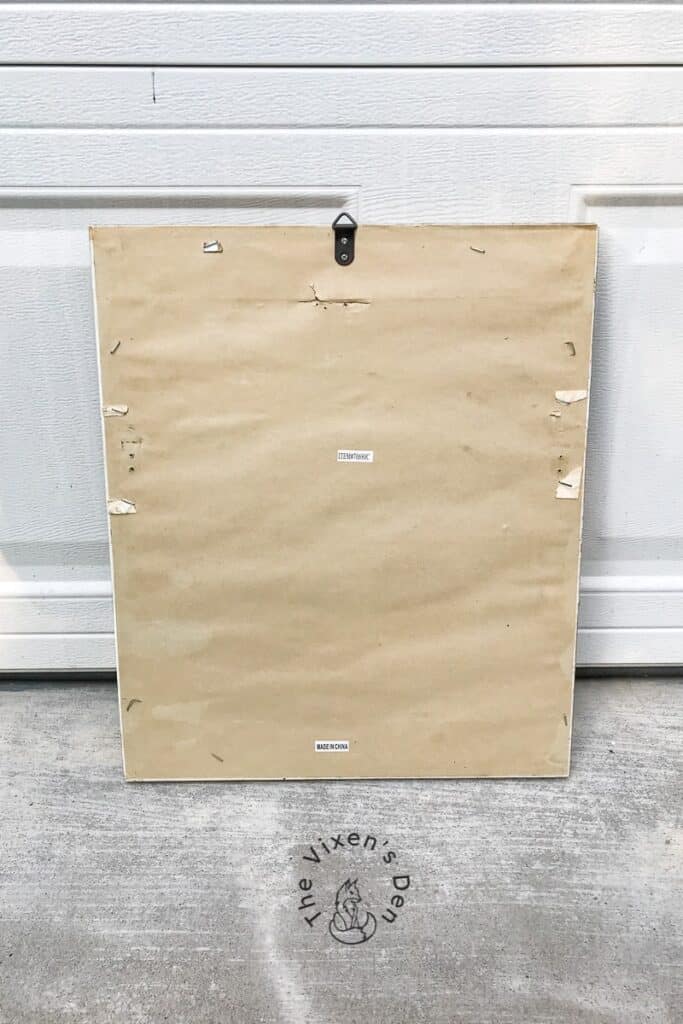
With the spider all cleaned up it was time to get started on the picture frame. First I cut the paper backing off using a utility knife.
Then I removed the picture from the frame using a flat-head screwdriver to pry up the clips, and a pair of pliers to pull them loose. With the picture frame emptied, I scrubbed it with White Lightning and a toothbrush to get into those crevices.
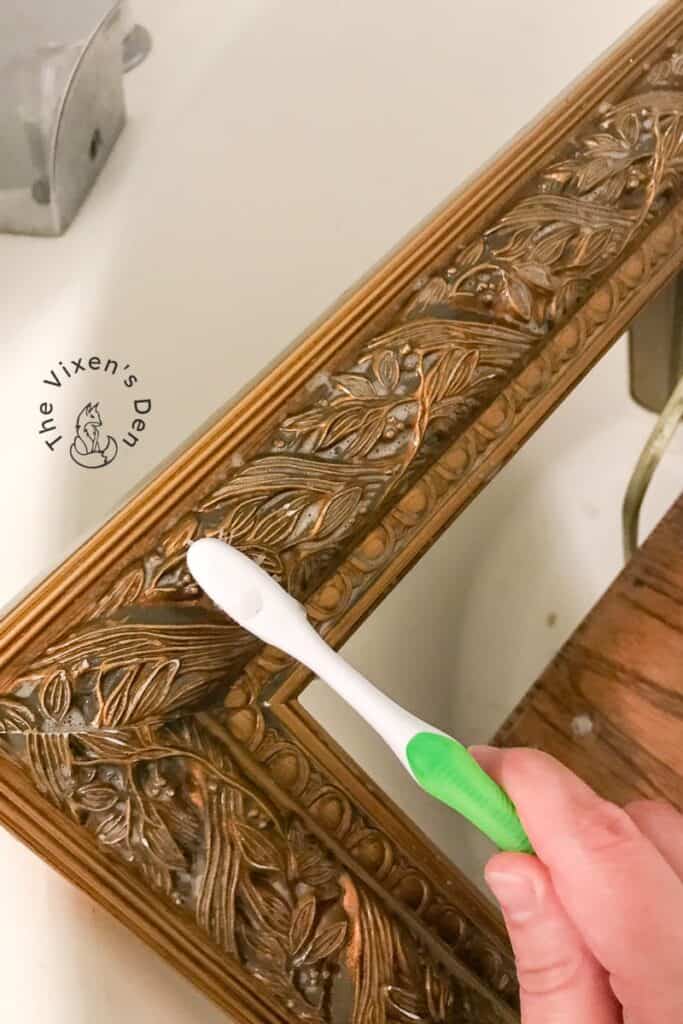
Pro Tip: Make sure to rinse the cleaner from your project thoroughly! I always clean small pieces in the bathtub to thoroughly rinse them and give them time to dry. Large pieces are hosed down with the garden hose. Yes, even furniture. If you have any cleaner left on the piece, the paint may not properly adhere.
Prime with Slick Stick
The plastic spider had texture, but not enough to easily hold clay paint. The picture frame had lots of smooth crevices. Slick Stick bonds to all of these slick surfaces, creating a foundation for the paint to cling to.
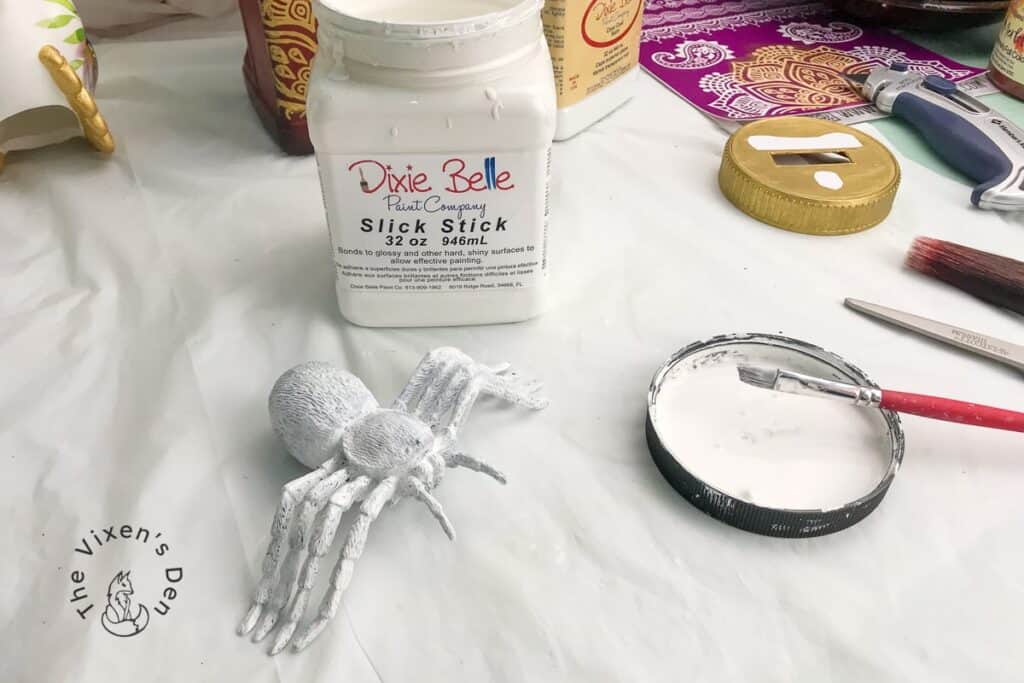
I applied two coats of Slick Stick to each piece, allowing two hours of dry time between coats. Then I let them dry overnight.
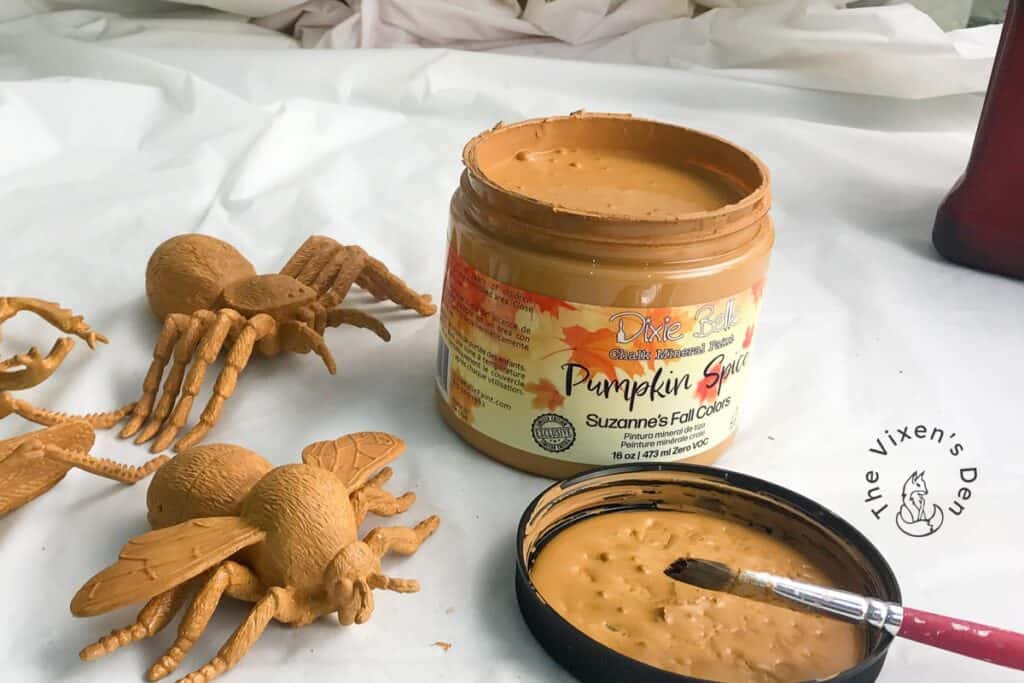
Paint Dollar Tree Spider
A coat of Pumpkin Spice from Suzanne’s 2021 Fall Colors collection was the perfect color to prepare for the next step. This is a limited edition color that is no longer available, but you can use the Dixie Belle Color Mixer to find the paint colors and ratios that you will need to create your own custom blend.
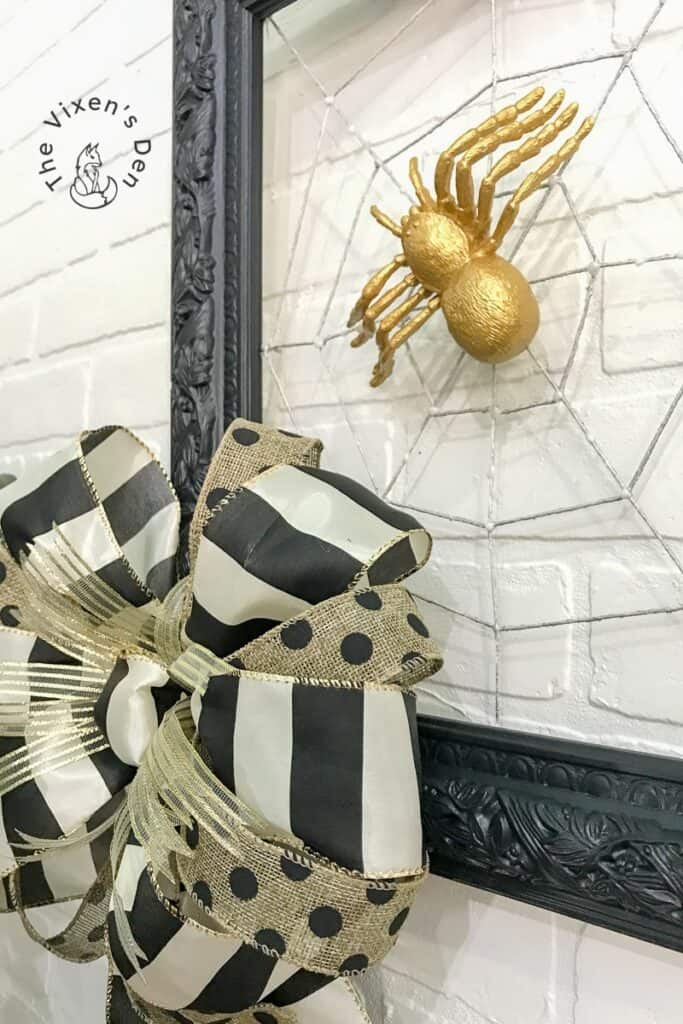
This spider is now extra fabulous, thanks to a few coats of Moonshine Metallics Paint in Golddigger!
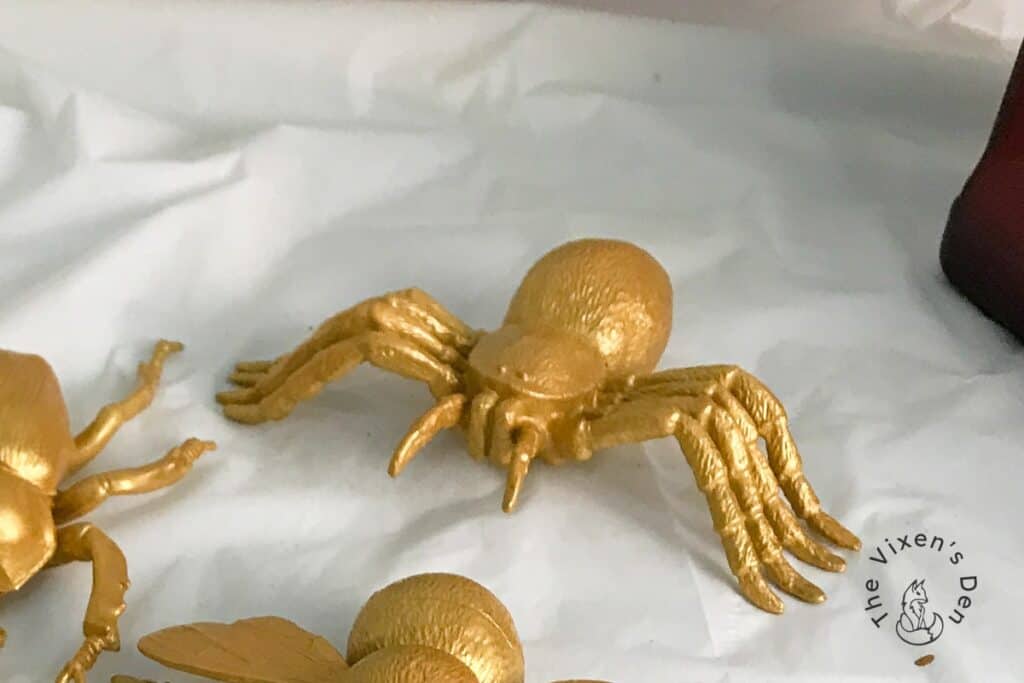
This paint can be a bit sheer, so if you need a richer color then you’ll want to first paint the project with a similar color (like the Pumpkin that I used) and then apply two to three coats. I applied two coats with a third just for touchups.
Paint Thrifted Picture Frame
Onyx Terra Clay Paint is a beautiful, highly pigmented paint with a rich deep black tone. It’s perfect for any occasion, like the little black dress of clay paints! I applied it with a small flat synthetic brush from the Dixie Belle line of synthetic brushes. This brush was perfect for getting into all of those little crevices while still allowing great coverage.
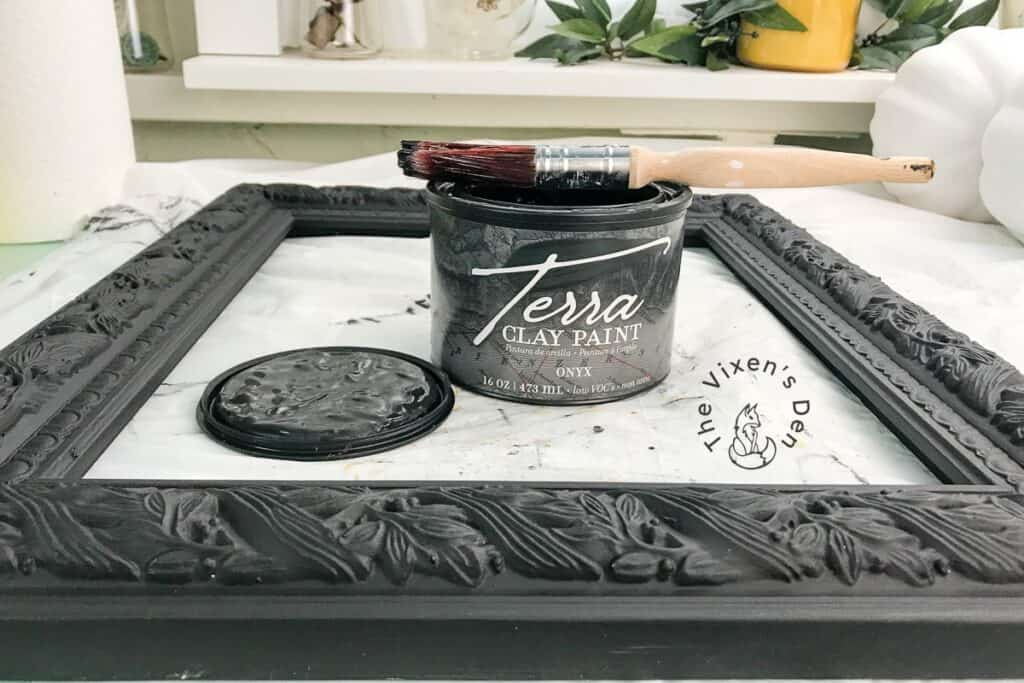
Clay paints are even more “dry” than the traditional Dixie Belle chalk paints. In order to achieve a smooth, brush-stroke-free coverage, it’s absolutely necessary to mist the brush and the piece. This allows the paint to move. It also means that you’ll use less paint to cover the project fully.
Pro Tip: I have found that a standard inexpensive spray bottle sprays out too much water and results in uneven coverage. After using the Dixie Belle spray mister, I’ve found the last spray mister that I’ll ever need.
Seal the Picture Frame
Since this spider web wreath may hang on an exterior door, I chose to give it the best protection possible by sealing it with Terra Tuff. This sealer not only protects from water but also from UV rays. It’s a powerhouse sealer!
Pro Tip: Sometimes applying sealer can result in a ghosting effect over dark finishes. Mix in a tiny bit of paint to the finish before applying it in order to prevent this cloudiness from appearing.
Pro Tip: This sealer does leave the project with a satin sheen. If you want a more matte finish, then you will want to follow up with a coat of Terra Sealer to achieve the maximum protection but with the finish that you’re looking for.
Create a Spider Web from Yarn
If you don’t already know from reading about this project, I’m mathematically challenged. But even I was able to successfully pull off creating this simple spider web using a thrifted picture frame, cotton yarn from Dollar Tree, and a staple gun,
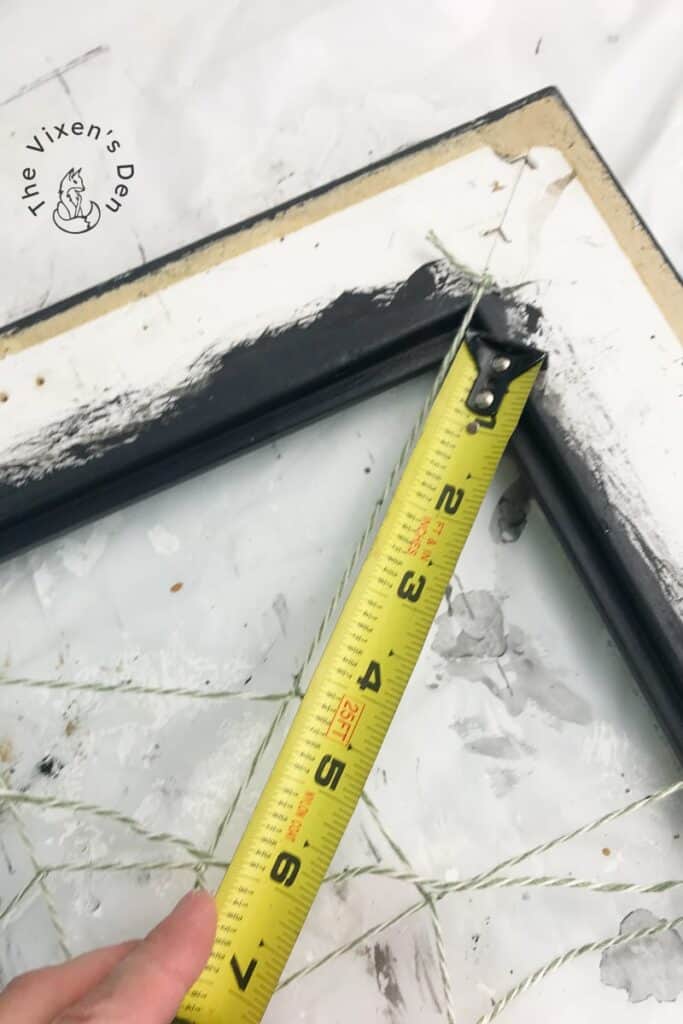
I created an X by knotting one end and stapling that end to one corner, just below the knot. I then pulled the yarn taught to the opposing corner, eyeballed the length, cut the yarn, and tied another knot, stapling that end to the picture frame just below the knot. I repeated this process on the opposite side of the picture frame.
I then bisected the X shape by knotting the yarn and stapling it to the center of the frame on either side of the X and then again to the center of the top and bottom of the X.
With the foundation of the spider web in place, I measured from the center of the spiderweb out and marked it with a permanent marker every one and a half inches.
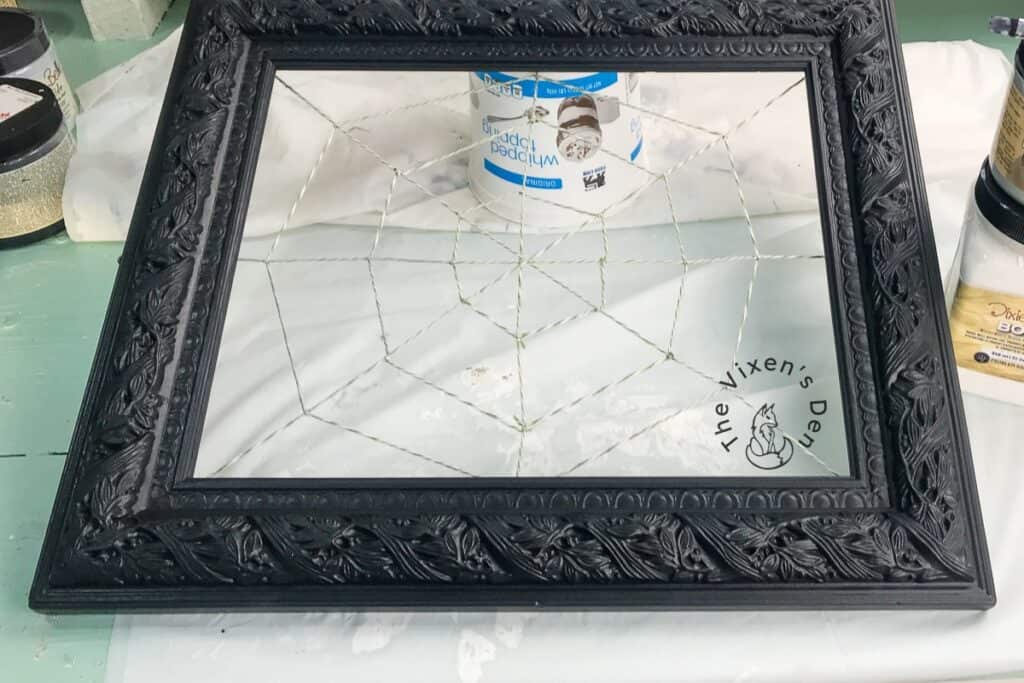
Using these marks as a guide, I tied the yarn to one of the marks, eyeballed the length of yarn that I needed to create a full circle, and cut the yarn to length. I then created a circle by pulling the yarn snugly and tying it in a knot to the next strand of yarn at the same measured and marked point until I had a complete circle of yarn. I repeated this process until I had three circles.
Hindsight is 20/20: Remember not to pull the yarn too snugly when tying it to the next strand. It’s a balancing act getting the right amount of tension.
With the spider web in place, I covered up the green-speckled cotton with Slick Stick and gave it a hint of shimmer with Moonshine Metallics Paint in Silver Bullet. The Dixie Belle artist brush was perfect for this step!
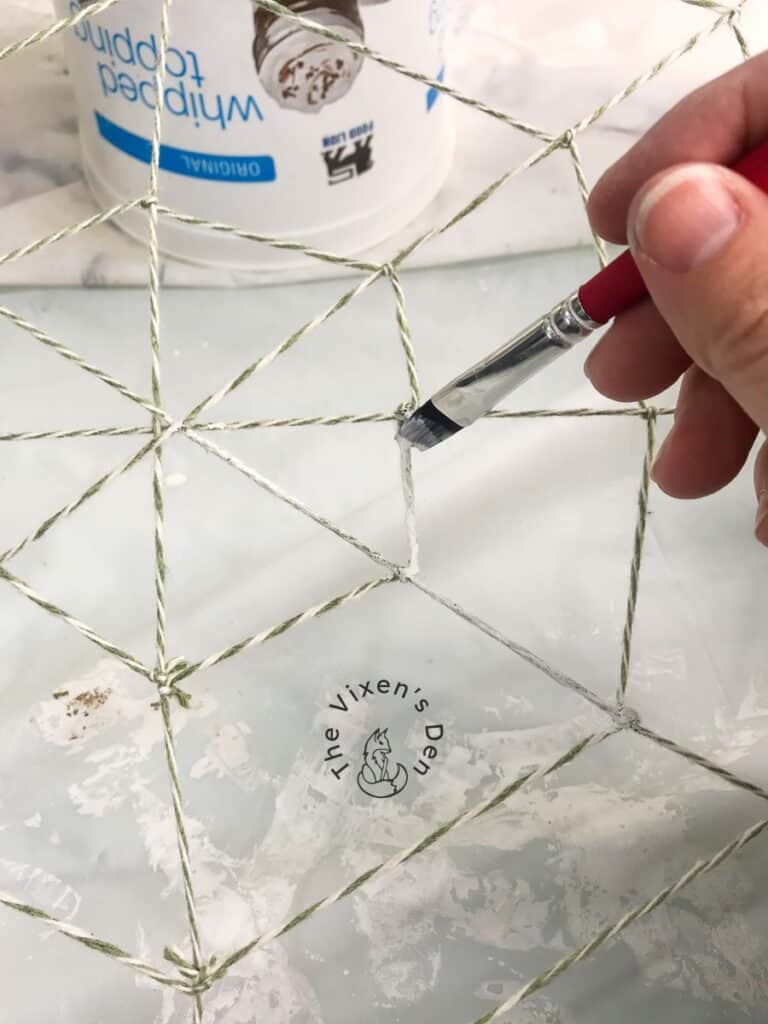
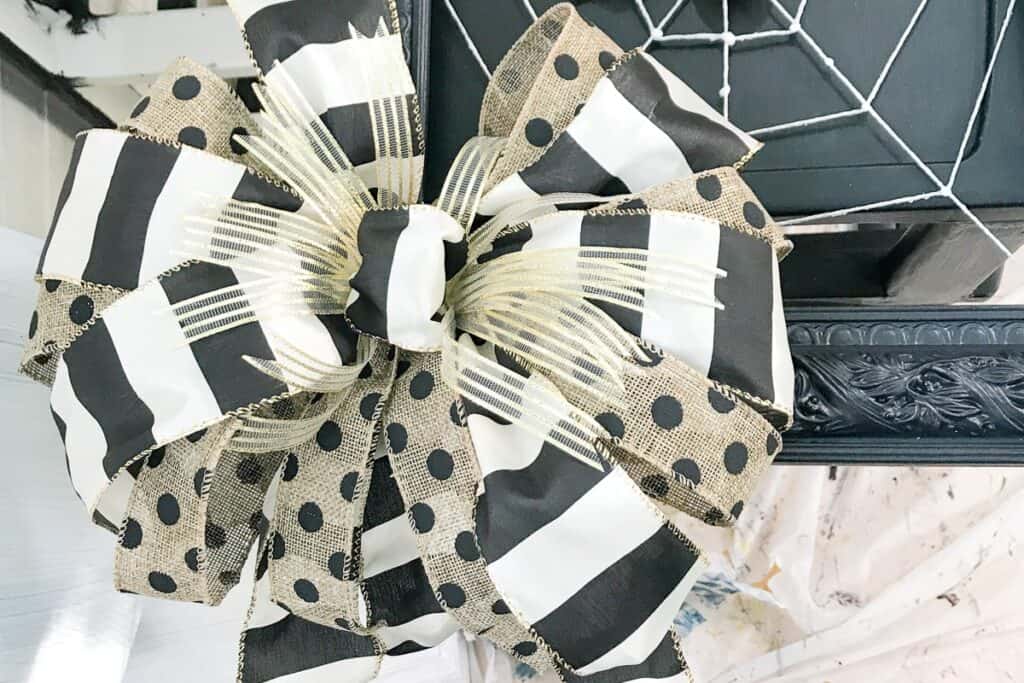
Add Details
With the primary pieces finished, it was time to tie it all up with a bow! Using a mixture of ribbons, I created this beautiful gold bow and attached it to the corner of the frame using fabric-coated floral wire.
I also wanted to wire the spider to the web, so I drilled a hole in its stomach, twisted two pieces of wire to form a small loop in the center, and pushed the loop into the hole. I then squeezed a good-sized dollop of E6000 glue into the hole to secure the wire.
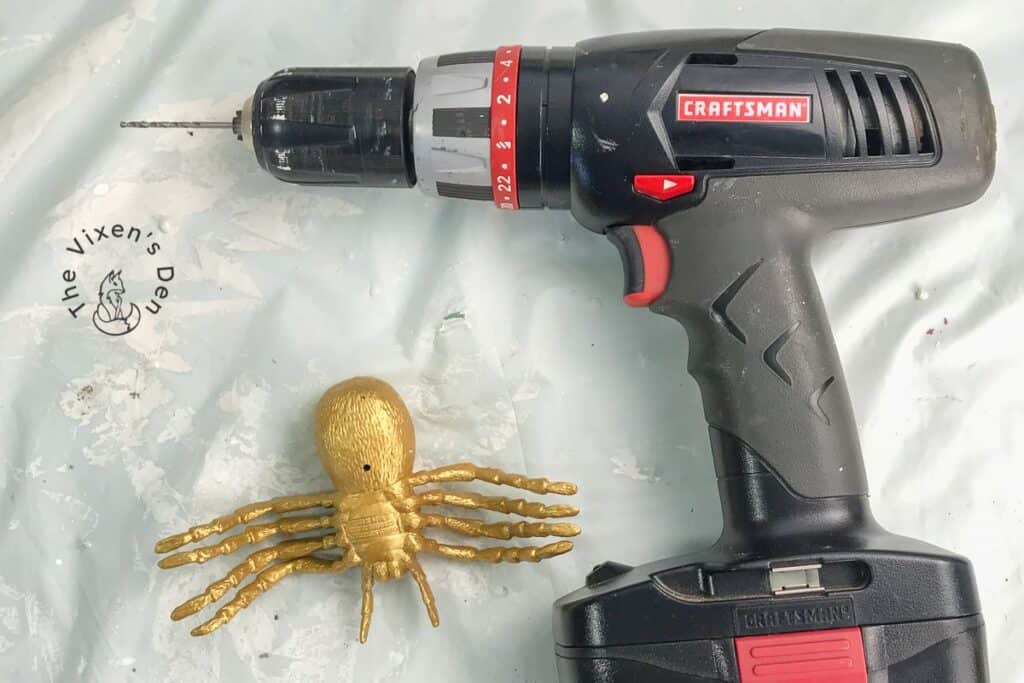
After allowing the glue to dry overnight, the spider was ready to assume his place of honor in the center of his sparkly web.
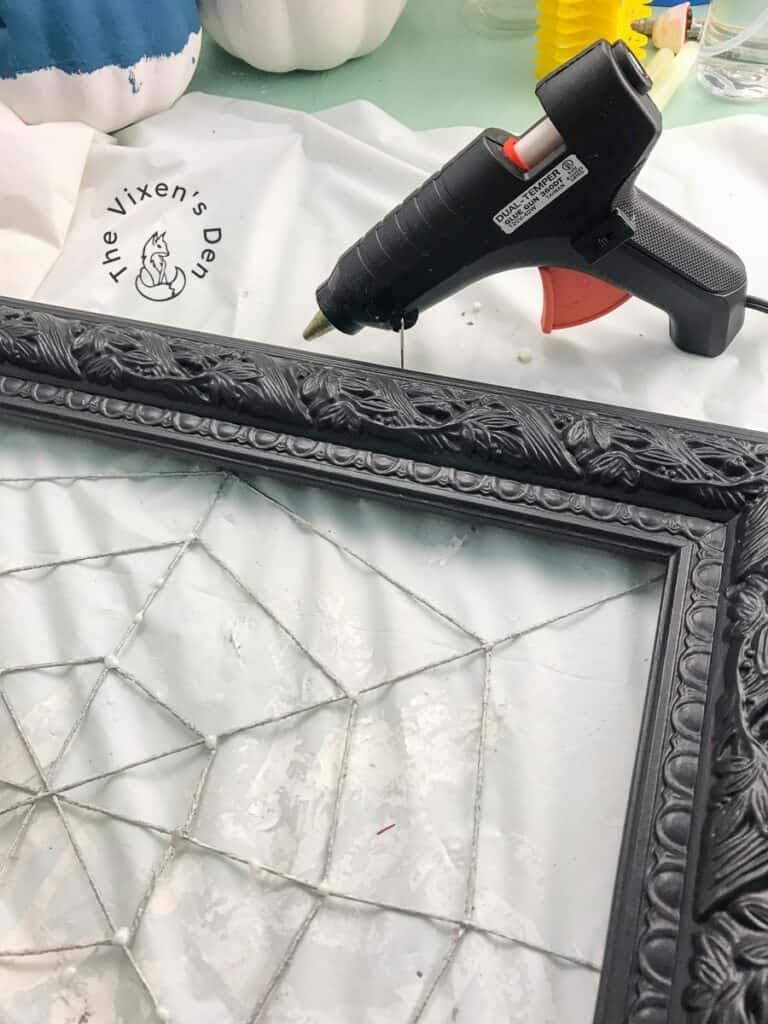
Hindsight is 20/20: I also added dollops of glittery hot glue to the web in an attempt to make the knots seem intentional. The idea was to create a look of a dew-covered spiderweb. I don’t think the hot glue quite pulled it off, and I’m considering redoing this part and using clear beads instead. What do you think I should do? Let me know in the comments below.
Final Reveal
This spider web wreath is definitely a more elegant take on traditional Halloween decorations. I love how all of these pieces came together, as well as the final result! Isn’t this spider fun? I love how big and shiny it is!
Let’s take a quick peek at the before and after again:

So what do you think? Does this project cause you to reconsider those dusty old pictures in gorgeous picture frames? Let me know in the comments below and then sign up so that you don’t miss any of the misadventures!
Thank you so much for stopping by! Check out the other amazing projects at the link parties below. I know the hostesses will appreciate your visit and comments.
Until next time, have a beautiful and blessed day!


Linked up to these lovely link party hostesses at:
Whimsy Home Wednesday
Funky Junk Interiors – New Upcycle Ideas
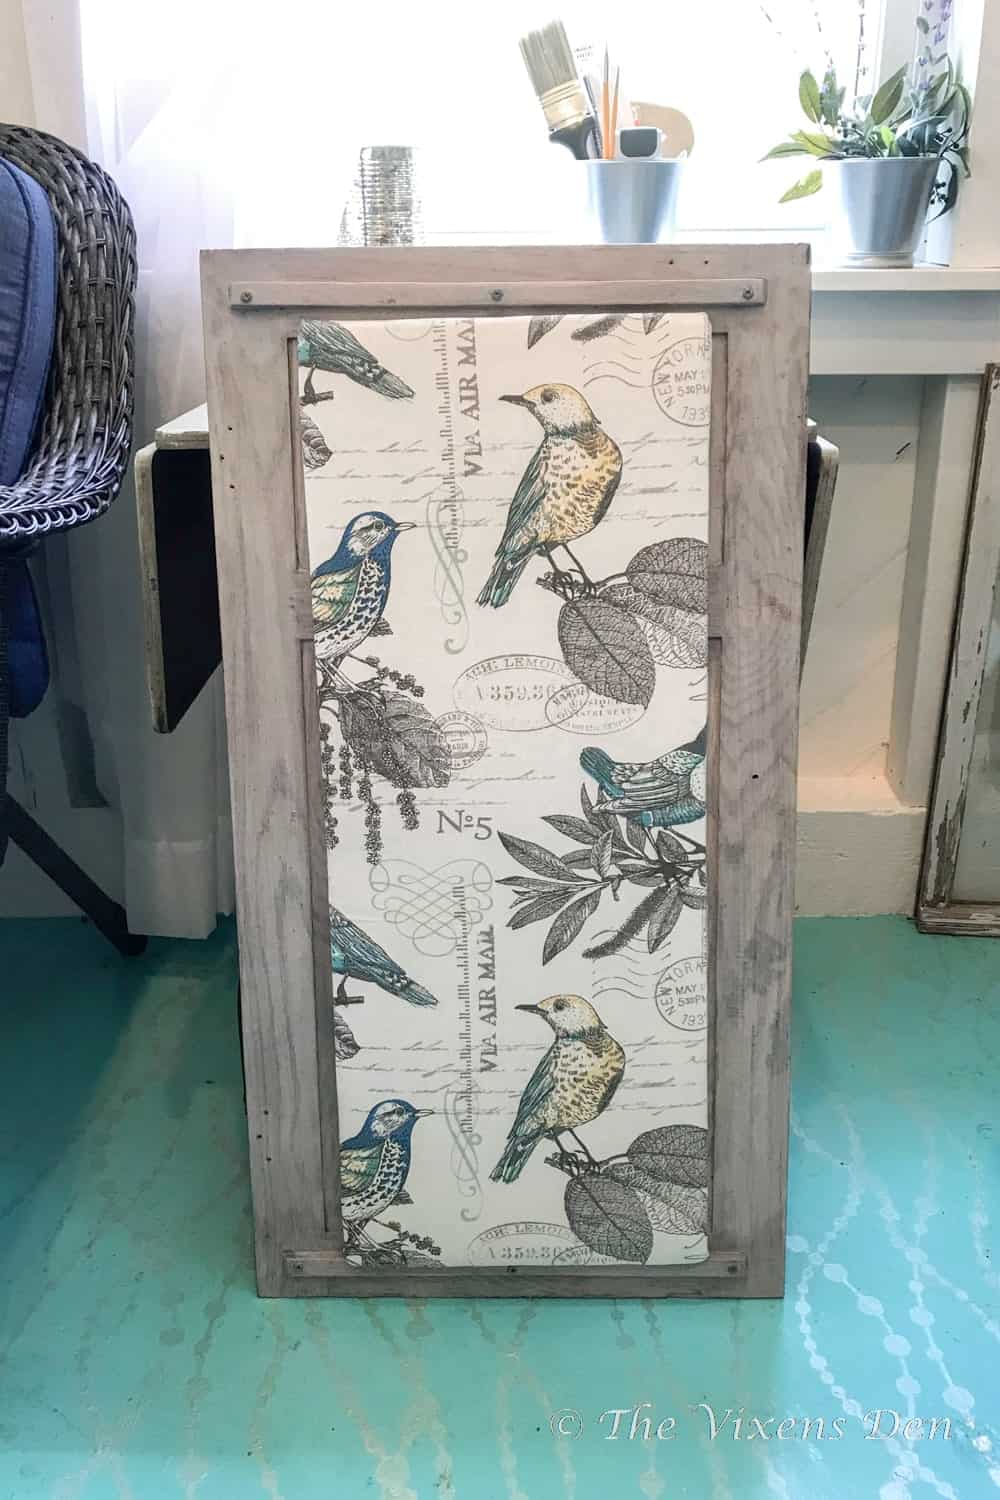
Don’t forget to sign up so you hear all about the next misadventure! Until then, you may also like this picture frame or this cabinet door upcycle.
Love this Spiderweb frame, Becky!
Thanks for hosting a FABULOUS linky party every week !
Don’t forget to join us over at the Creative Crafts Linky Party every Wednesday through Sunday
https://creativelybeth.com/creative-crafts-linky-party/
Followed and Pinned!
Creatively, Beth
Thank you so much, Beth!
That’s a great idea taking frames & decorating them during different seasons!! It would be nice to do the same for my front door- instead of a wreath- use a frame & change out adornments.Although my front door had many unusual horizontal windows in it.
Either my frame would need to be smaller and horizontal also, so it wouldn’t block the window lights.
Something to consider!
Thx, Beck!!
I’m sure it can be worked around.
Hi Donna! I feel certain that we could come up with a solution. There are so many options for frames! You might even like to juxtapose the windows with a round frame instead, so it wouldn’t look awkward against the angles. Thank you so much for stopping by!
Never thought I’d find a spider web pretty (haha!) but you changed my mind about that! This is so unique! I just love how you framed the web and you’re right, this whole spider and web has that special touch of glam that takes the spook right outa it! Lovely!
I absolutely love this project! It is so creative and chic! Nicely done!
This is adorable! I’ll be featuring it on tomorrow’s Crafty Creators Link Party. Hope to see you there!
What an honor! Thank you so much, Niki!