How to Transform a Gun Cabinet into a Linen Cabinet
So, you need more storage in the bathroom and you don’t want to spend a month’s worth of groceries to buy it? Here’s an idea that I bet you haven’t considered. How about turning a gun cabinet into a linen cabinet?
Our bathroom didn’t have a linen closet or a cabinet or shelving of any kind. I thought about adding shelving to the wall, but it’s a pain to have to climb over the toilet to get to everything stashed over top of it. I considered adding a free-standing cabinet in the narrow space between the tub and the doorway, but the nice-looking cabinets that I liked were super pricey and the cheaper ones were rickety, usually made of MDF, and didn’t have enough storage. And then I found this:
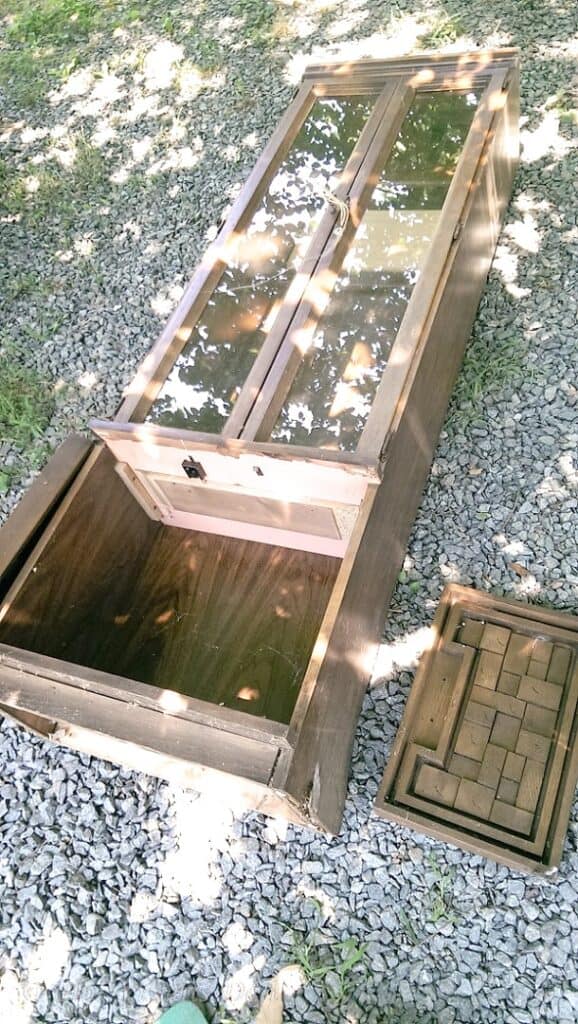
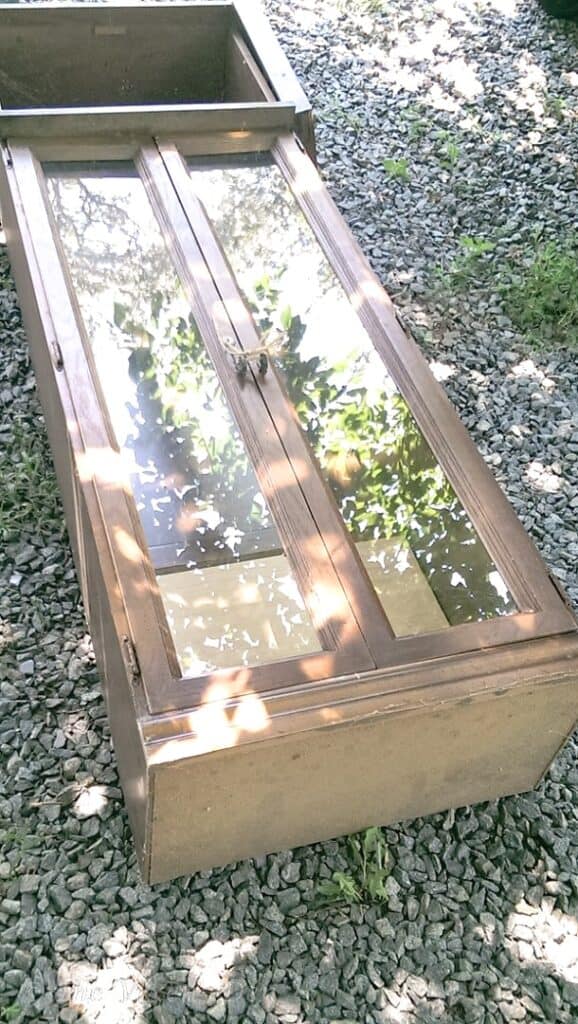
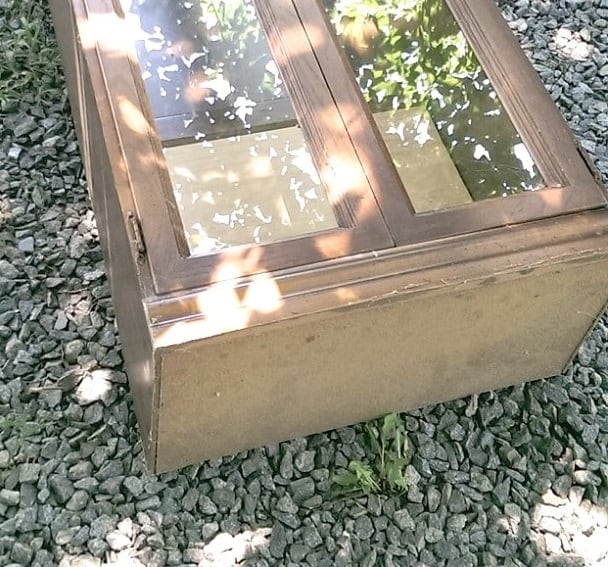
My father-in-law was cleaning out his basement and wanted to get rid of this old gun cabinet. I spotted it and immediately asked if I could have it. I loved the glass doors (because who doesn’t just adore breakable objects in a space where we walk around barefoot?) and it was just the right size for the space beside our tub. Win!
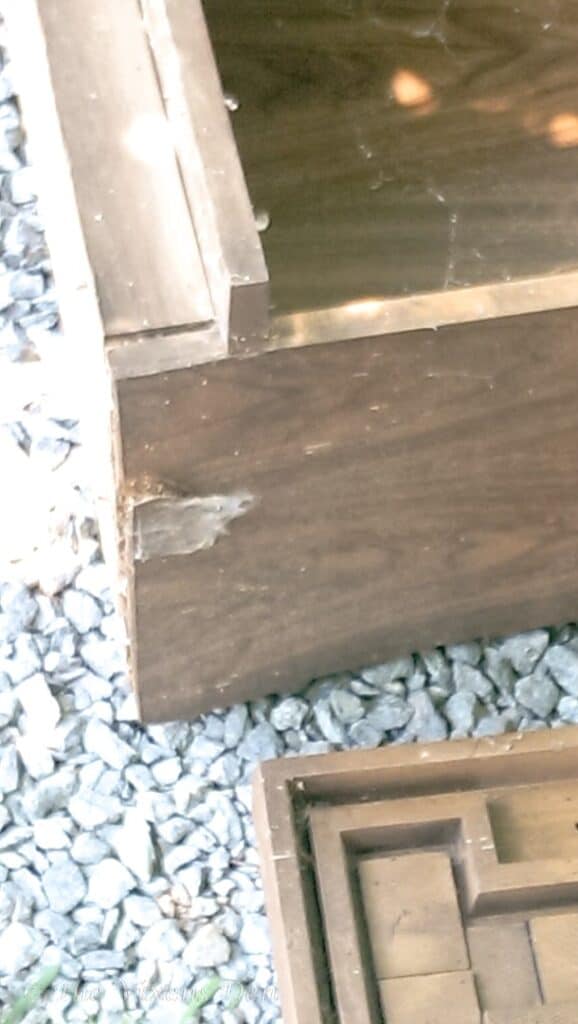
Unfortunately, this piece had some significant challenges. It was made from MDF, and it had suffered quite a bit of damage. The top is a lovely (definitely sarcasm, here) thick cardboard, and the bottom and sides were crumbling from water damage. The bottom doors were a heavy 60’s style that I really didn’t enjoy.
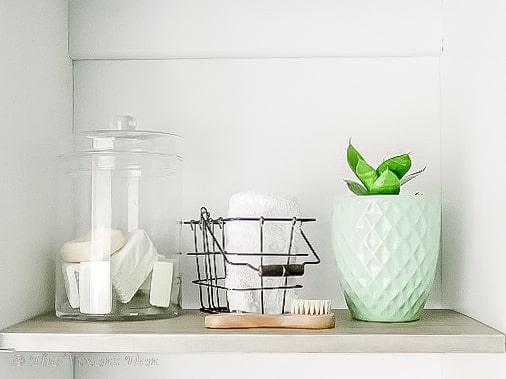
Even with all of the damage, the piece didn’t wobble too badly. I still wasn’t sure if I could revive this piece at all, but I’m a sucker for an underdog and at such an excellent price (free!) I was willing to try. I was looking for a light, bright piece with a modern farmhouse flair, and plenty of shelves to stack linens and stash toilet paper, soaps, and razors. And of course, it had to look pretty.
That’s not too much to ask…right?
Makeover Process
For this project I used the following:
Tools
Materials
- Screwdriver
- Wood clamps
- Drill
- Drill driver insert
- 9/32″ drill bit
- Brad nailer (see notes)
- Caulk gun (see notes)
- Chop saw (see notes)
- Spray can gun attachment (your index finger’s new best friend!)
- Rag
- Paint brush
- Wood glue
- Scrap 2x4s
- Wood screws
- Wood trim
- Caulk
- 60 grit sandpaper
- Spray paint primer
- Spray paint – satin enamel
- Shelf board – 1″x10″x poplar
- Shelf pegs – 1/4″
- Stain – weathered oak
The first step in the process was to remove the doors. I find that it’s best to use a screwdriver so that I am less likely to strip out the screw heads. (#bigger_hammer_syndrome) Once that was done, I filled the damaged sections of MDF with wood glue, and then clamped 2x4s down on either side to help flatten the veneer back into a board shape while the glue dried.
Once the glue was dry, I reinforced the damaged bottom by cutting 2x4s to fit the inside of the base. I used a chop saw to cut the 2x4s to length and butted the ends together before securing them with wood screws to form a square. It didn’t need to be fancy since this was just shoring up the MDF bottom and wouldn’t be visible. If you don’t have access to a chop saw, then a jigsaw or even a hacksaw will work. You can also have your big box store cut the boards to length for you.
I then fastened this base to the interior underside of the cabinet base. (work with me here, I didn’t take pictures of the messy middle on this project) To hide the screws and give it a nicer appearance, I fastened trim to the bottom edges using brad nails. If you don’t have access to an air or battery power finish nailer, then you could easily go old school and just use a hammer and finish nails. Just countersink the nails with a nail set to push them below the surface of the wood.
With the base and trim firmly in place, I caulked all of the trim seams and nail heads. I left the holes from the screws that fastened the doors so that I could use them as a guide when reinstalling the glass doors. Don’t worry if you don’t own a caulk gun. You can actually buy caulk in squeeze tubes. Just be sure to cap off the end tightly so that it doesn’t dry out before your next project.
Luckily, there wasn’t too much green felt to remove. I was actually able to just pull out the special shelf insert that was used to protect the guns while they were in the cabinet.
I have to admit, that part was rather anticlimactic for me. I had envisioned hours of scraping off green felt in the hot sun. Trying one solution after another until, eureka! I would find the perfect combination of vinegar and hot water that would peel the felt off like a dream. *sigh* Back to your regularly scheduled reality…
Once the special insert was removed, the cabinet was ready for a quick sanding to rough up the surface and prep it for painting.
MDF furniture can be tough to paint. Without a decent primer, the paint will easily chip as the piece of furniture is used. It also is super challenging to get a smooth finish. To prevent this, I gave the entire piece a good coat of Rustoleum oil-based spray primer. I made certain to prime all of the edges thoroughly, to prevent future moisture exposure to the MDF fibers.
Once the primer dried, I sprayed on several coats of Rustoleum oil-based satin spray paint. Satin oil-based paints are often used for trim and are quite durable. This was perfect for a steamy bathroom that would see daily use. Again, I made certain to thoroughly cover the MDF, which meant a few extra coats to make sure that all the little gaps were filled.
Using spray paint instead of a roller was not as fast as I expected it to be, and I am not sure that I achieved maximum coverage. Next time, I think I’ll stick with a foam cabinet paint roller, to keep down costs as well as ensure thorough coverage.
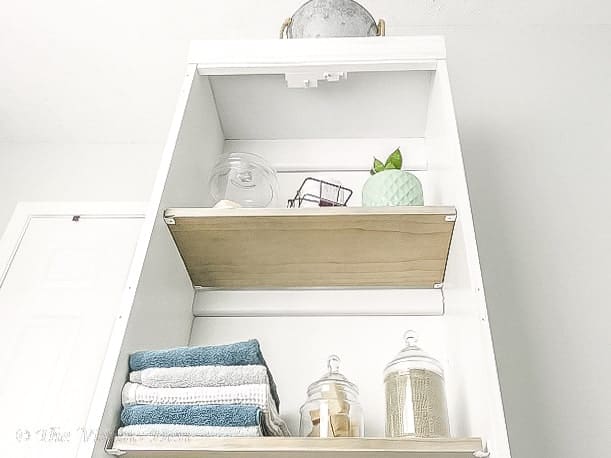
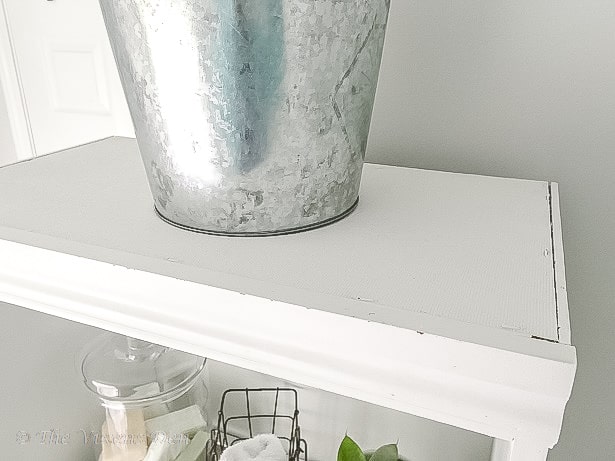
The linen cabinet makeover was starting to come together! The final step was to create shelving. I cut a 1×10 poplar board using the chop saw to create shelves. I stained them weathered gray, by dipping a rag into the stain and wiping it onto the board until I reached the depth of color I wanted. Then I waited a week for the stain to cure before brushing on a water-based polyacrylic sealer.
The holes for the adjustable shelf supports were achieved by drilling 9/32″ holes into the side panels and inserting 1/4″ shelf support pegs. There are several handy jigs that you can use so that the holes are evenly spaced. I’m usually an “eyeballing it is good enough” kind of a girl, but for something like this, I recommend either thorough measuring or a jig to make sure your shelves don’t wobble.
Speaking of wobbling, when I was installing the shelves, I got a little impatient. (I know, shocking, right?) When I cut the boards I accidentally cut one of the shelves too short but didn’t have enough leftover material to cut a third shelf. So, I cheated.
The shelf that’s too short is within a gnat’s butt of being too short to sit on the shelf supports. If the shelf is centered, then it’s supported on all four corners, but if you slide it all the way to one side, it will tip off the peg support and crash to the floor. Naturally, this was also the shelf where I wanted to keep the glass storage containers.
My solution for that problem? Poster putty.
Did you see it?

So far, it’s working. The shelves don’t budge a bit. In hindsight, though, I would probably take the time to measure out the shelving to fit more snugly in the future. Although, with how well the poster putty has worked, I might still use it when installing adjustable shelves in the future. It adds a nice bit of extra stability and is easily removable for when I want to switch things around.
Here’s the final result!
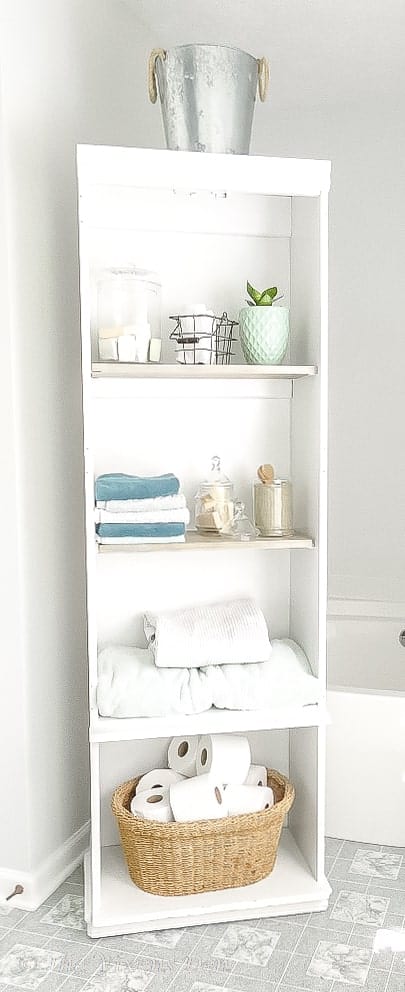
Originally I intended to remount the glass doors, but I didn’t finish them with the cabinet. I wanted to go ahead and start using the cabinet as soon as it was dry. (impatient, much?) It’s years later now, and I’ve decided that I really like not having to open doors to grab a towel or soap. That means I have some beautiful glass doors that are waiting to be transformed into something amazing!
What do you think of this gun cabinet to linen cabinet makeover?
Although a piece of furniture made from MDF will never be my first choice, especially in a bathroom, it can hold up longer than expected if it’s prepped and sealed well. This cabinet has been in use for about 10 years now and hasn’t peeled, cracked, or mildewed. Since I like to turn my showers into saunas, I’d say that’s pretty darn good!
So, in the end, MDF isn’t really all evil, and don’t underestimate the power of wood glue…or poster putty.
If you enjoy DIY makeovers like this one, be sure to subscribe so that you receive an email when new misadventures are posted. If you like this gun cabinet to linen cabinet makeover, then you may also enjoy seeing a dresser transformed into a buffet. Enjoy!
Awesome and creative upcycle, Becky!
Don’t forget to join us over at the Creatively Crafty Linky Party every Wednesday through Sunday
https://creativelybeth.com/creative-crafts-linky-party/
Followed and Pinned!
Creatively, Beth
Thank you for allowing us to share your gun cabinet transformation! I hope to learn how to use some power tools by following your lead. Gotta teach an old dog new tricks from time to time. 😉
I would love that so much! I look forward to learning from each other!
Wow, incredible blog layout! How long have you been blogging for? you made blogging look easy. The overall look of your website is excellent, let alone the content!
Very nice post. I just stumbled upon your weblog and wished to say that I’ve truly enjoyed browsing your blog posts. After all I will be subscribing to your rss feed and I hope you write again very soon!
Fantastic post however I was wondering if you could write a litte more on this topic? I’d be very thankful if you could elaborate a little bit more. Thanks!