How to Paint and Stencil a Crib
Do you have a crib that has seen a lot of love and is ready for a fresh coat of paint for a brand new set of tiny feet? This post shows you how to prep, paint, and stencil your way to a new crib.
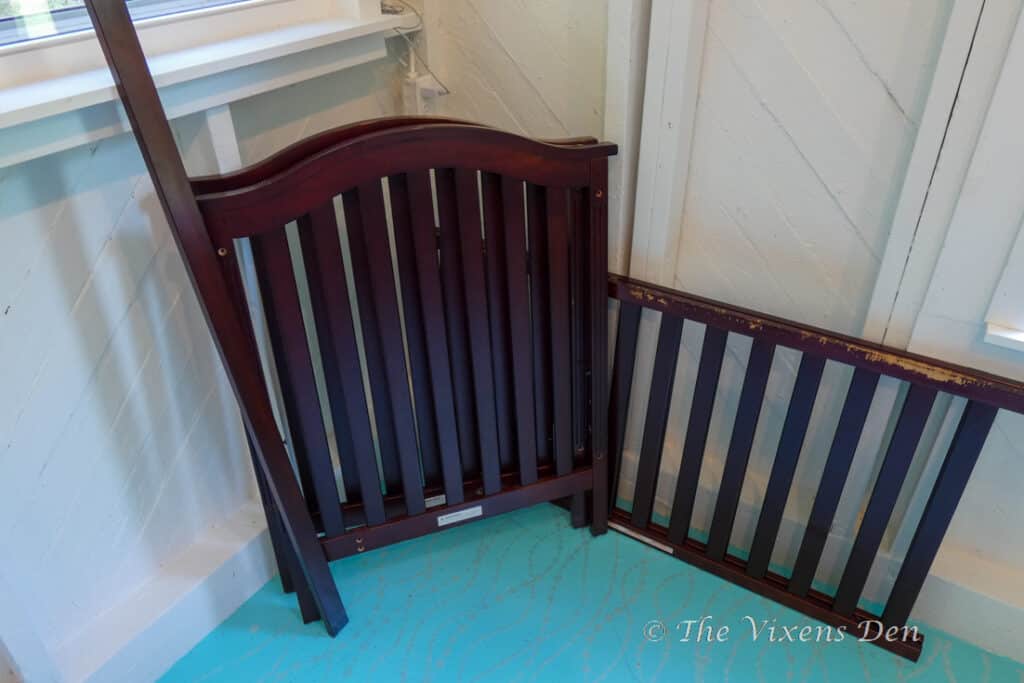
This crib was a gift from a family of six (yes, six!) children. They purchased it for their youngest son and had decided that he was the cherry on top for them! As they were also moving, they gifted the crib to our family just in time for our newest addition! Although the frame was sturdy and all the parts were included, there were some scratches and possibly bite marks(?) that needed some TLC. The new parents decided that a full refresh in white paint was what they wanted for their sweet baby’s nursery.
Time to whip out the sander and paintbrushes!
The Makeover Plan
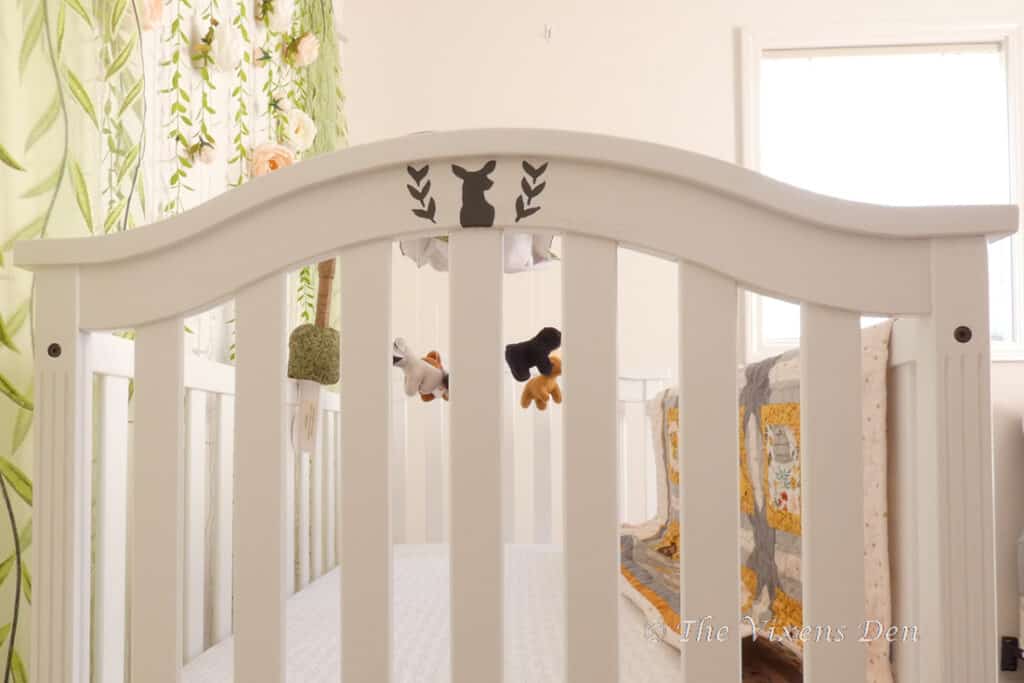
A white crib is a classic, but I wanted to give it some special details to celebrate the unique and sweet little person that would be using it. The nursery theme is woodland creatures, which lends itself to all kinds of adorable animals to choose from. I wasn’t sure exactly which one was going to show up, but I knew that there would be some type of stenciled animal involved.
Here are the tools and materials list for this project:
AS AN AMAZON ASSOCIATE I EARN FROM QUALIFYING PURCHASES AT NO COST TO YOU.
YOU CAN SEE MY FULL DISCLOSURE HERE.
Tools
Materials
- 150-600 grit sandpaper
- Tack cloth
- Water
- Primer – Bulls Eye 1-2-3 All Purpose Primer
- Paint – Sherwin Williams ProClassic Acrylic Latex Enamel – Extra White in Semi-Gloss
- 6″ smooth roller cover
- Paint – Sherwin Williams sample quart – Iron Ore
- Top Coat – MinWax Polycrylic – Clear Satin
The Prepwork
I hate sanding, and will generally avoid it when at all possible. However, the first step in the process was to sand down the bite marks and scratches. For this part, I pulled out my handy little mouse sander and attached a sandpaper pad. I started with 120 grit at first but found that was not quite getting the job done. Once I switched over to 100 grit, all of the scratches were smoothed out and the original finish was suitably scuffed to accept paint.
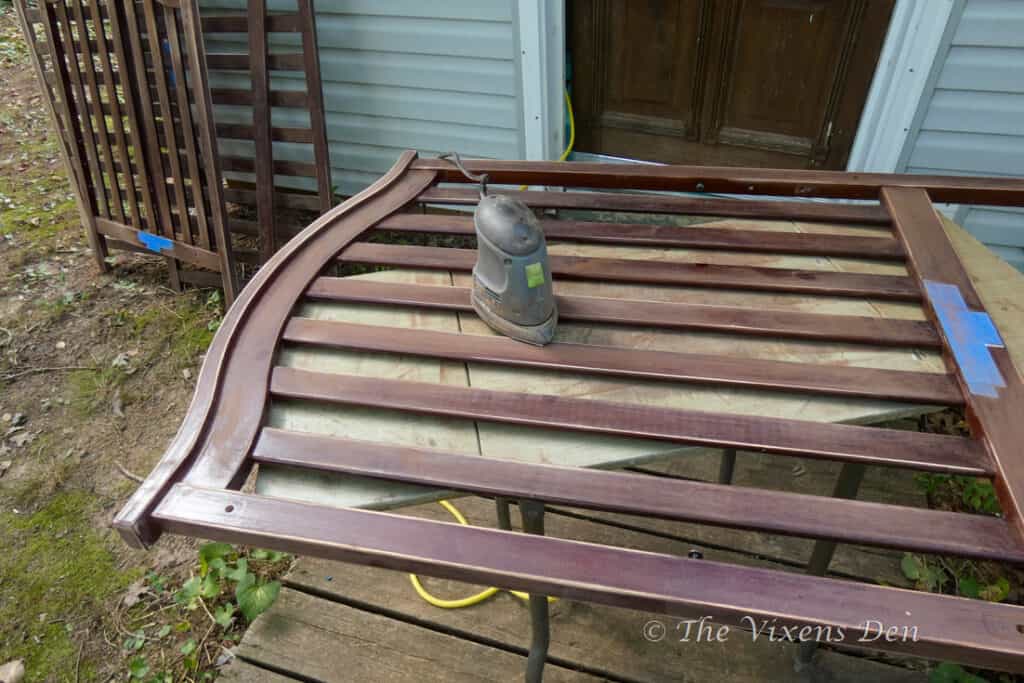
Note – the painter’s tape is covering the instructional stickers that indicate which side of the rail is the inside.
To clean up the dust, I first vacuumed as much of the dust off as possible. I then filled a bucket part of the way with water and wiped everything down with a damp rag. After the pieces were completely dry, I wiped everything again with a tack cloth to make certain that every particle was removed.
Painting
The first step to painting the crib was brushing on a coat of Bullseye Primer to seal in any old stain or paint that might try to bleed through and lay the foundation for good adhesion. Next, I rolled on a coat of ProClassic Acrylic Latex with a 4″ smooth roller. I applied pressure with the tip of the roller to squish the paint into the seams and make sure there was even coverage.
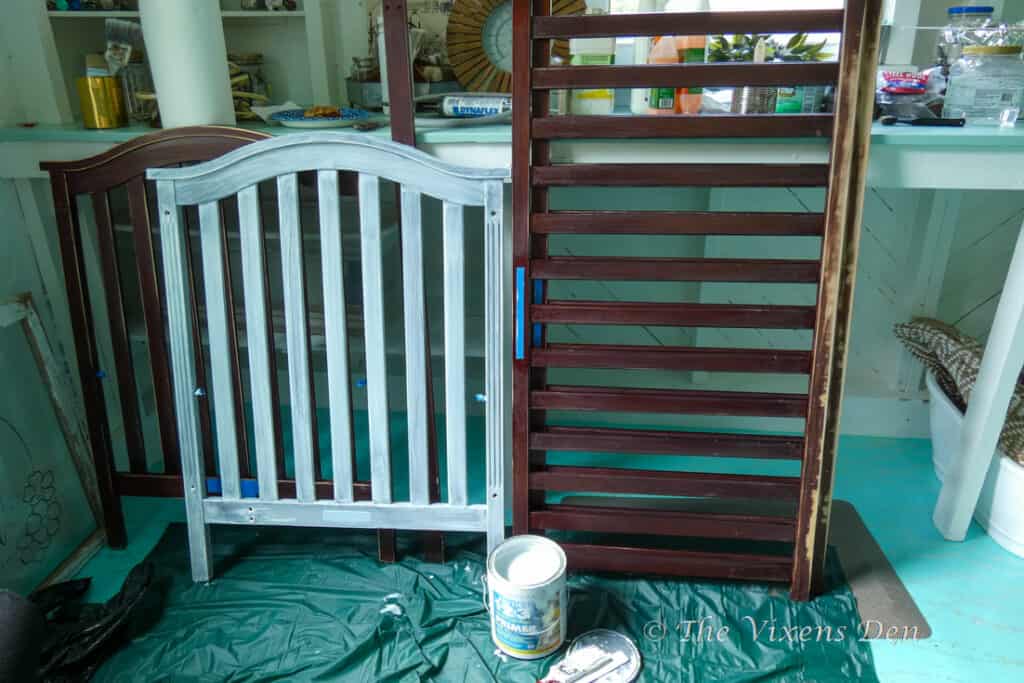
After each coat of paint dried (a minimum of 4 hours in my humid climate), I sanded down any drips or runs. I started off using a 120 grit sanding sponge, but it wasn’t sanding evenly. After I switched to a sanding block, I was able to sand the drips and runs without digging too deeply into the surrounding paint.
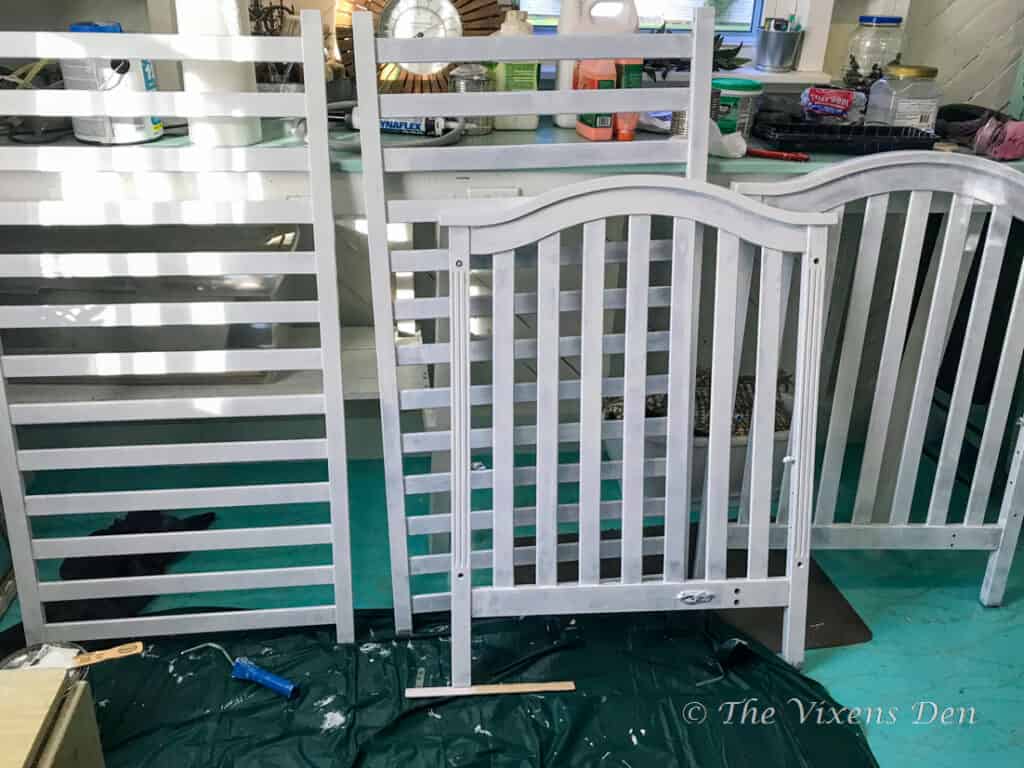
Once the first coat of paint was dry, I started brushing on the remaining coats. This piece required four coats of paint with an additional coat for touchups, with light sanding in between each coat.
In hindsight, I would have applied two or three coats of primer before switching over to the acrylic latex paint. I also would have continued rolling the paint on for even coverage and a smoother finish. Good notes for next time!
Stenciling
I love a new stencil project because I never know if I’ll be adding to my stencil collection or using something that I already have on hand. It’s kind of like a new school year with that fresh new pencil smell. Ahhh!
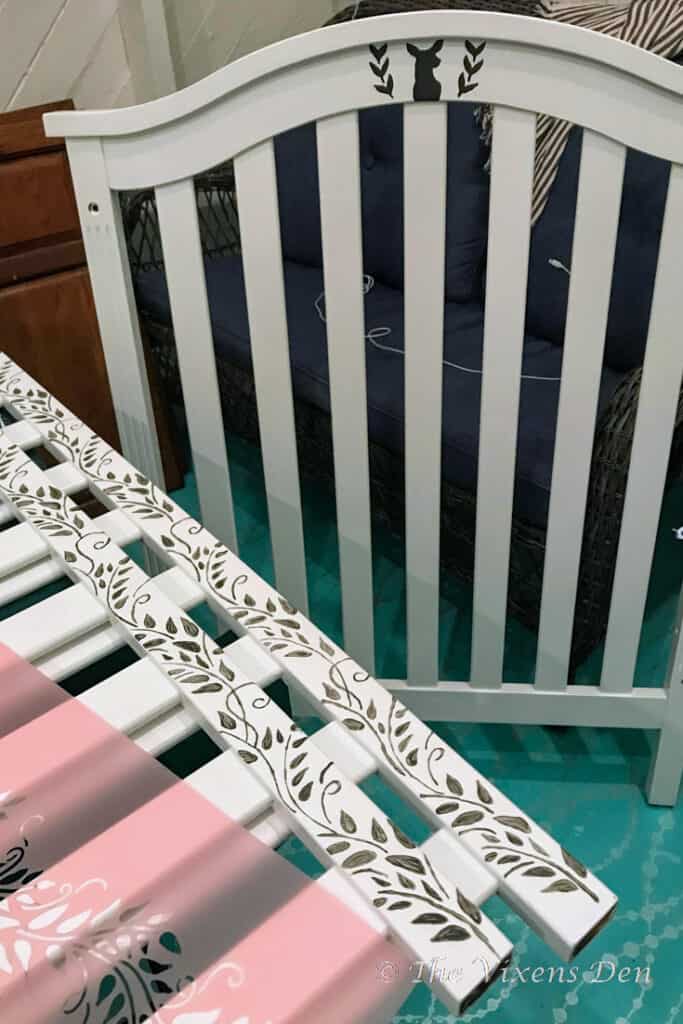
In this case, I did both. I added this adorable deer head stencil to my collection, and I dug out this versatile vine stencil from my stash. Aren’t they perfect together?
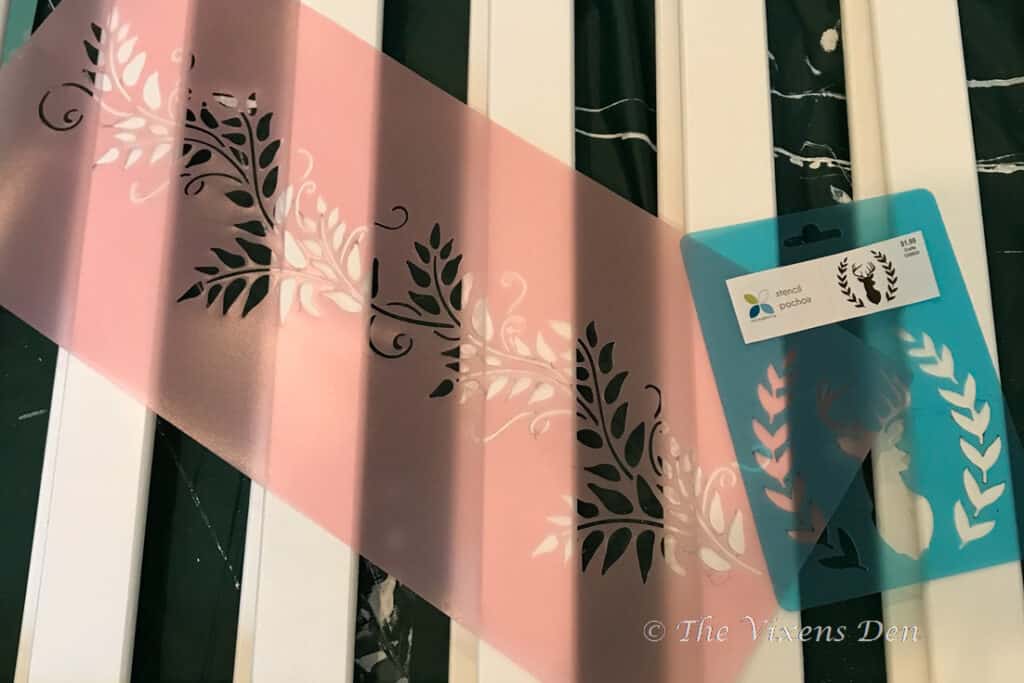
To start the process, I first tried the old method of taping the stencil to the headboard and applying paint with a sponge. But it bled terribly and I had to bend the stencil to hold it into place. I didn’t want to have to cut the stencil, and I didn’t think the removable adhesive that I usually use would hold it snugly enough in place, so I punted and decided to trace it instead.
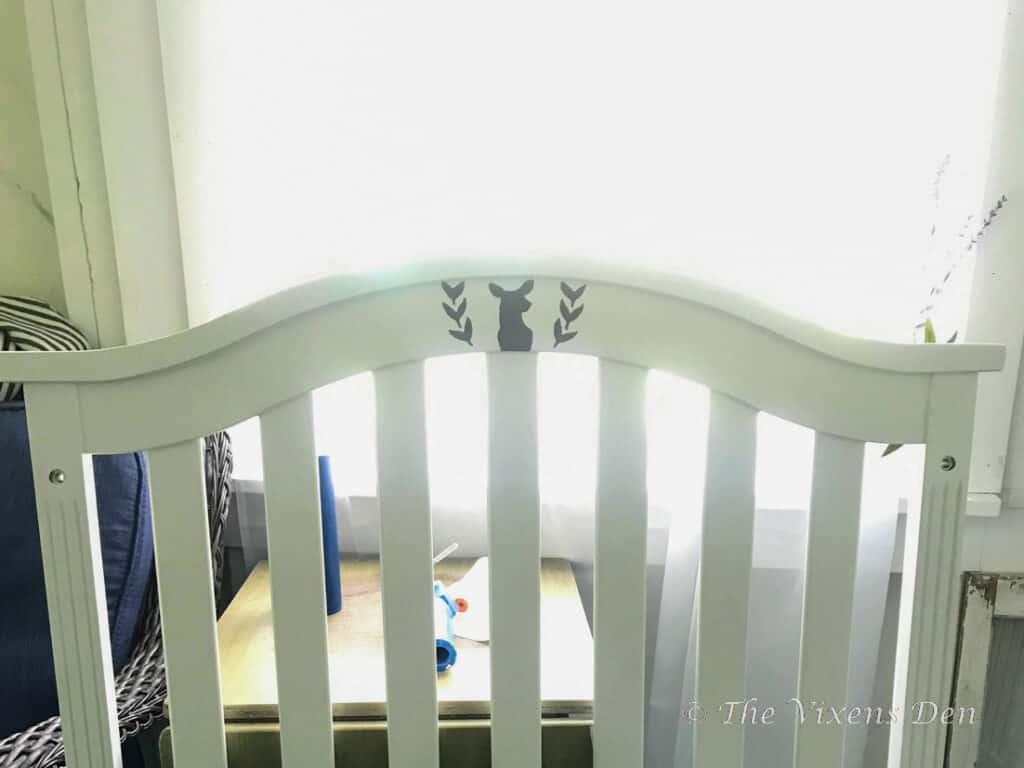
I traced the deer head stencil using a permanent dual-tipped marker, then filled in the outline using an artist’s brush. This created a crisp outline, but it did also require several coats to get it dark enough.
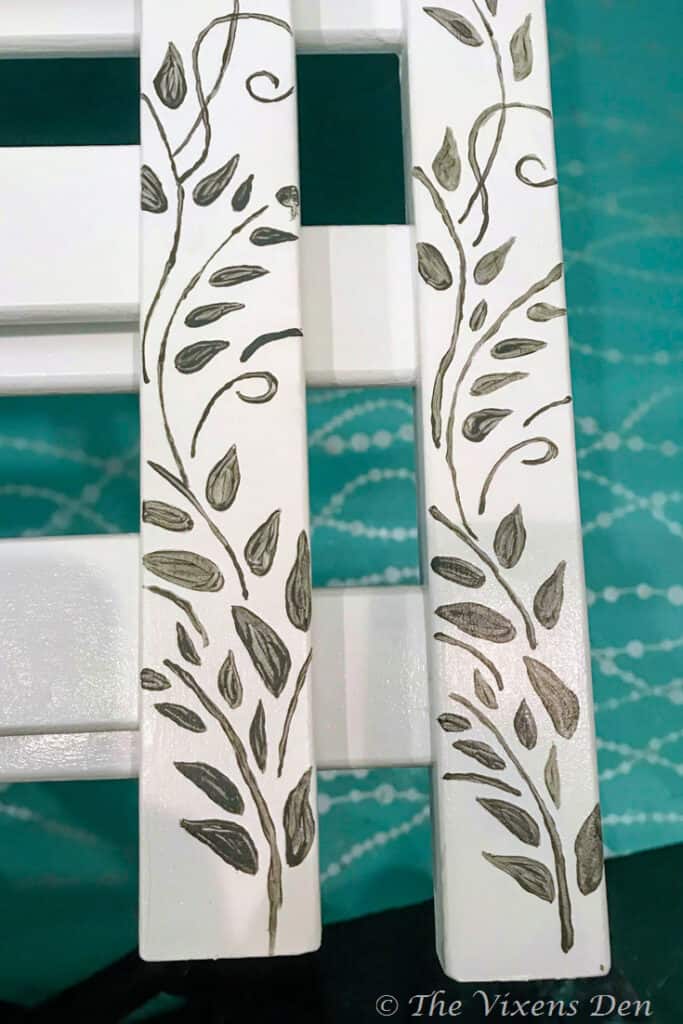
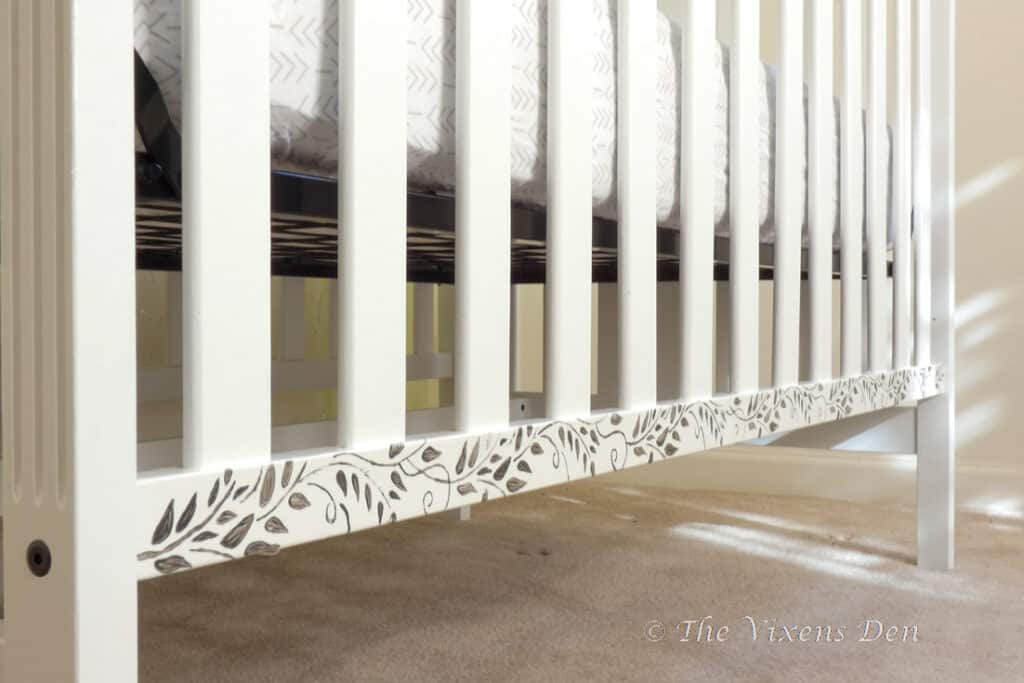
For the vine stencil along the bottom rail, I opted to trace the stencil with a pencil instead. This allowed for lighter outer lines that could be easily covered by a light coat of paint. This was definitely a good thing because even after two coats of paint, the vine had a gorgeous almost watercolor effect to it.
Finish Coat
I have quite the collection of sample paints from Sherwin Williams, one of which is what I used to paint the stenciled designs for this project. Unfortunately, because they are samples they don’t have any kind of sealant or hardener in them. This makes the paint great for details and small areas, as long as you top your project with a finish coat.
I didn’t want to seal the entire piece, however, because a lot of clear topcoats will cause a yellowing effect over white paint. Even amazing topcoat products such as MinWax Polycrilic and General Finishes. In this case, it was necessary to at least seal the areas with the stenciled details.
When I brushed on the first coat of Polycrilic, I back brushed a little bit and it actually began lifting the paint! Gulp! I quickly cleaned up the little bits of paint that I had accidentally dragged over the piece and pushed the smeared paint back into place with the tip of the brush before leaving it to dry.
Once the first coat dried, (a minimum of 2 hours or overnight) I lightly sanded with 1000 grit sandpaper, wiped with a tack cloth, and then brushed on a second coat. I repeated this process for a total of three topcoats.
The Makeover Reveal
What a beautiful fresh look for this sweet crib as it starts its next life with a new family!

While this makeover did require more sanding prep work than I would have liked, it was worth it to ensure that the paint had a chance to thoroughly adhere to the surface. Next time, I’ll be sure to apply a couple more coats of primer before I start painting the final coats, and I’ll stick to the roller for a smoother finish.
Although, I have to admit that sometimes I like brush strokes. They help to remind me that a piece is truly hand-painted, with lots of love.
Also, while I’m glad I found an alternative method for using my stencils, it is so much easier (and smoother) when you can just roll the paint right on. Finally, I’m glad I didn’t completely ruin the painted vines when I back brushed the Polycrilic. Another important lesson learned.
And now, this little person is ready to enjoy her new crib!

Isn’t it wonderful when something that we don’t need or want any longer can become a blessing to someone? I love giving new life and purpose to pre-loved items.

If you enjoy seeing DIY makeovers like this one, be sure to subscribe so that you receive an email when new misadventures are posted. If you like this sweet painted and stenciled crib makeover, then you may also enjoy seeing this dresser makeover. It has stencils, fabric drawer liners, AND a DIY transfer. Enjoy!
Thank you so much for stopping by! Check out the other amazing projects at the link parties below. I know the hostesses will appreciate your visit and comments.
Until next time, have a beautiful and blessed day!


Linked up to these lovely link party hostesses at:
Don’t forget to sign up so you hear all about the next misadventure! Until then, you may also like this Magazine Rack makeover or this Dresser upcycle.
Becky thank you so much for linking up at my weekly link party! I’m happy to be featuring you this week! https://www.ourtinynest.com/2023/02/22/weekly-link-party-336/
I hope you have a wonderful Wednesday!
Becky this is so precious!!! My sister is due with her first babe in June and she may be using our crib. And it would be so special to do something like this for her! I hope you will come share your idea at my weekly link party my friend <3
https://www.ourtinynest.com/2023/02/15/weekly-link-party-335/
I’m so excited about your new niece or nephew! It’s so special to share pieces that you’ve created memories in with loved ones who will then add to the stories by making their own. I’m honored to receive your invitation, Nicolle. I’ll definitely link up! Thank you so much for visiting!
Thank you for sharing this informative article! All the information provided by you is really very helpful for all. I would like to say that we should use tack cloth for removing small dust particles from the surface because it gives you the perfect finishing. Keep posting! Keep sharing!
That’s a great tip, thank you for sharing!