Easy 2-Step Headboard Makeover
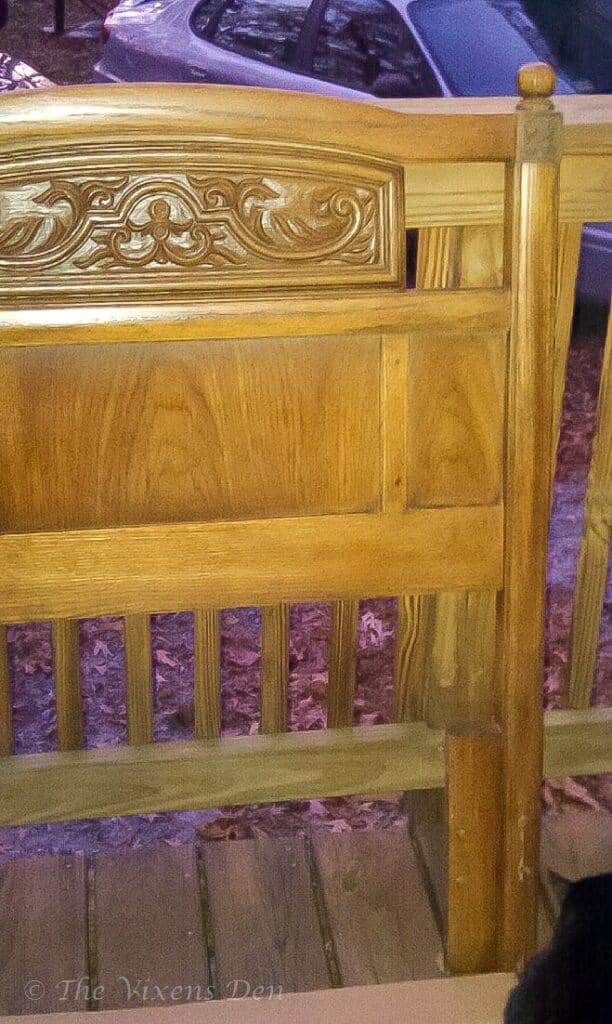
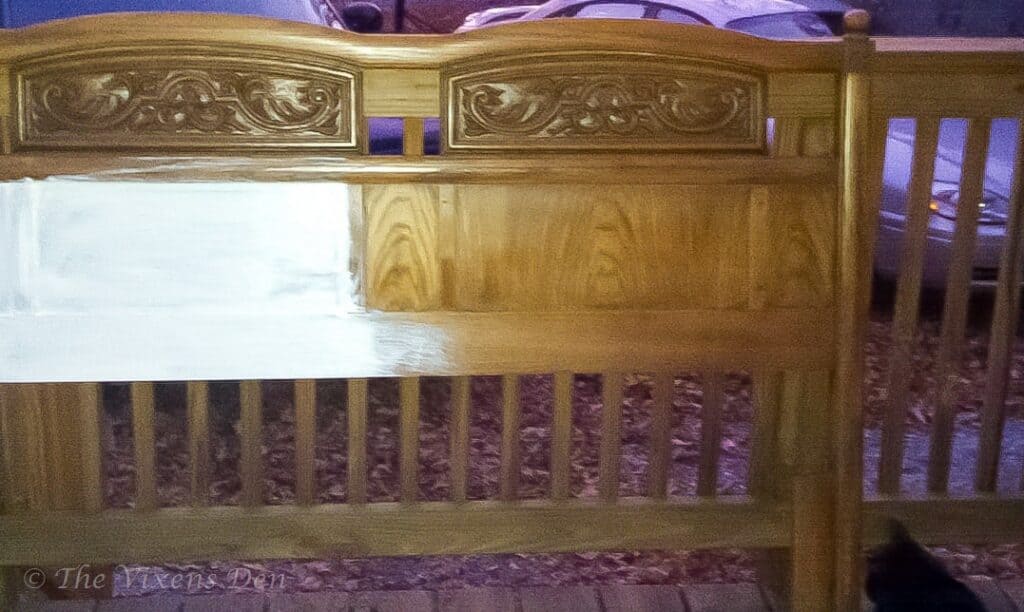
Do you have an old headboard, like this 80’s throwback just waiting for a new lease on life?
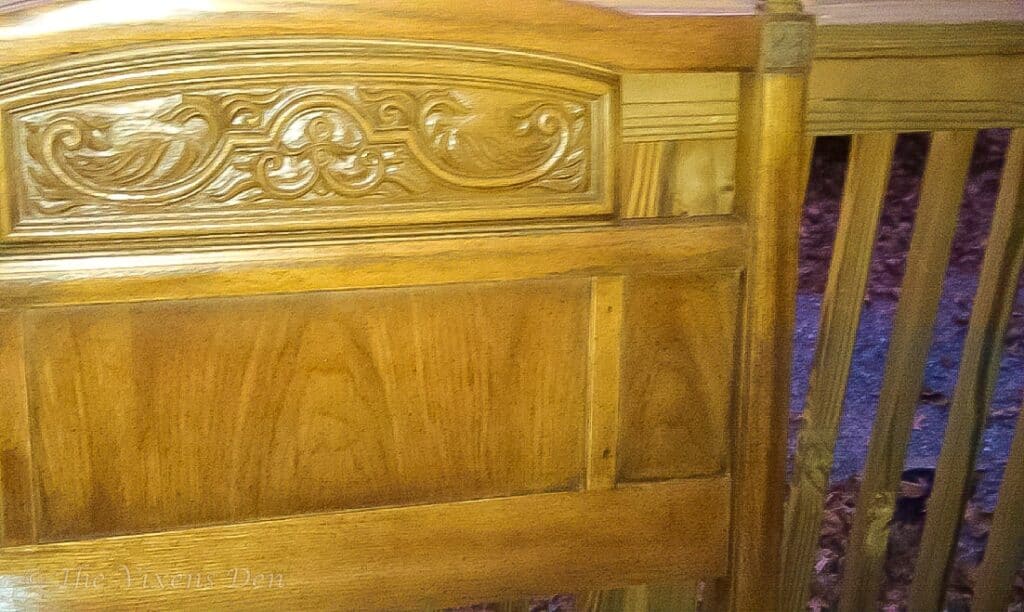
I know, the blur is awesome isn’t it? Stick with me. It gets better, I promise.
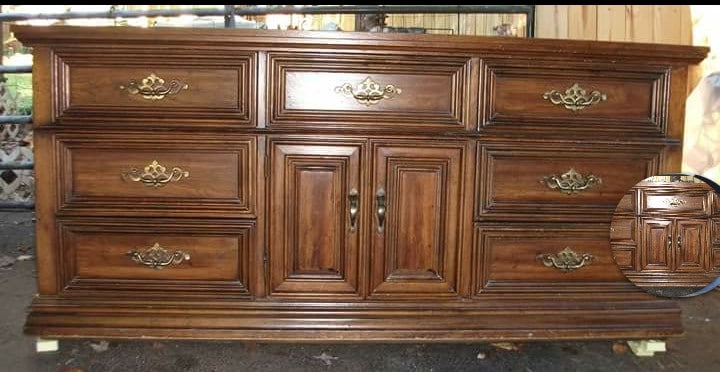
This headboard was a freebie from a family member. While I’m pretty sure it isn’t a solid wood piece, it was structurally sound and it had some really nice details. However, I was at the point where I was NOT ready to tackle a full-fledged refinishing project like this dresser. So, I decided to go with a quick and easy headboard makeover, instead.
It helped that I was moving into the Farmhouse decor phase. I really loved the look of distressed wood, a little bit of chippiness, and just a hint of real wood peeking through.
With this plan in mind, I decided to give the headboard a quick pick-me-up with only two, yes that’s right, TWO steps!
- Step 1 – clean with a damp cloth
- Step 2 – dry brush with white paint
Here’s how it all came together…
AS AN AMAZON ASSOCIATE I EARN FROM QUALIFYING PURCHASES AT NO COST TO YOU.
YOU CAN SEE MY FULL DISCLOSURE HERE.
Tools and Materials
Materials
- Enamel paint – white satin (similar)
This piece was mainly covered in cobwebs and a bit of dust. If it had been extremely dirty (as in, sitting in the back of an old garage covered in heaven only knows what dirty) then I would definitely have taken the time to pull out a toothbrush and bucket of warm water with a bit of dish detergent. Luckily for me, this wasn’t the case.
After a simple wipe-down with a damp rag, and a little time to dry, the headboard was ready to become amazing!
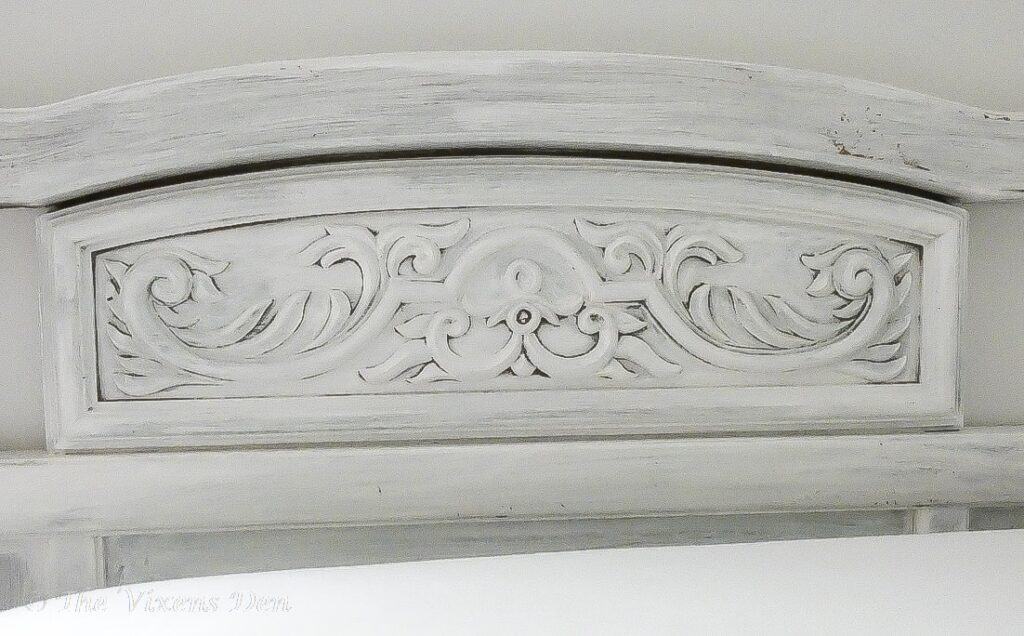
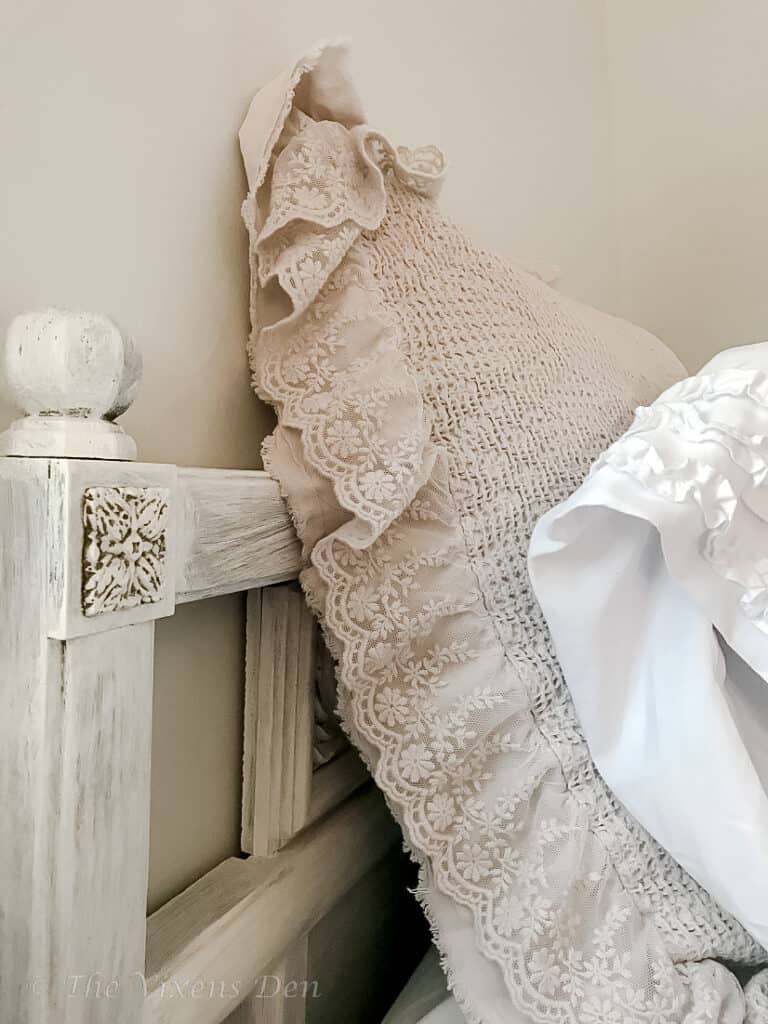
For this makeover, I wanted brush strokes. Remember, this piece is not made from real wood, so I wanted to create the look of wood using brush marks in the paint. So I added a little bit of paint onto the brush, wiped most of it off on the inside of the can, and then dragged it along the wood to mimic grain.
What’s important here is to not overbrush the paint. If you do, then you end up losing all of those beautiful brush strokes. It takes some practice, so start on the back until you perfect your dip, wipe, and drag technique.
The detailed parts are handled a little bit differently. I didn’t want to lose all of the pretty dips and curls, so I was careful to sweep the brush along the curls and dab it into the corners. Remember, this is a quick and easy makeover, so I wasn’t going to go back over the details with glaze or another color. I wiped a few spots here, added a few more strokes there, and then finally considered it done.
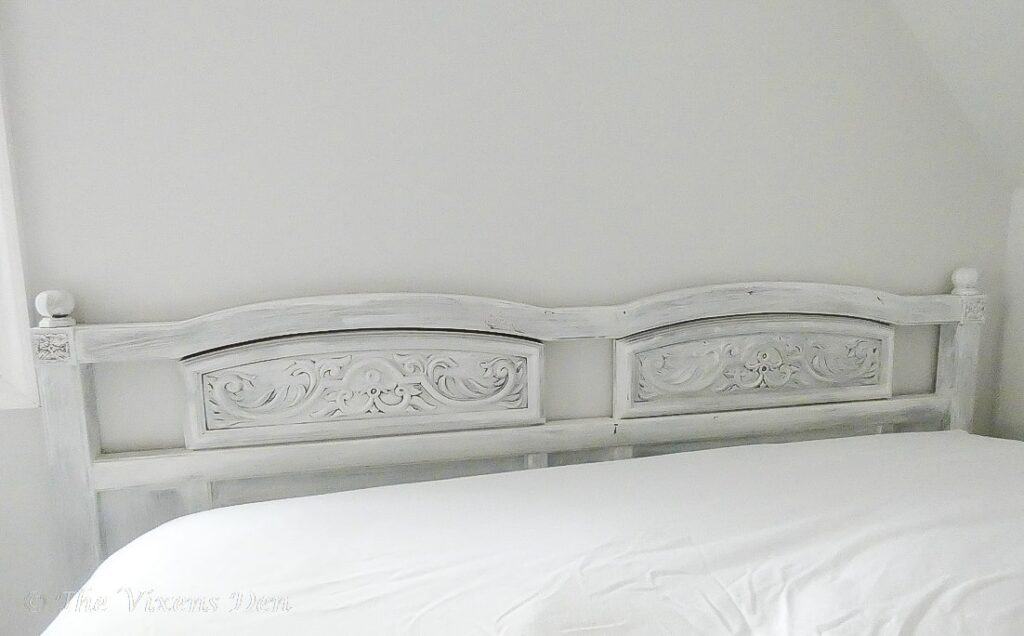
I allowed the headboard to sit for a few days to cure and then immediately put it into service in the bedroom.
There are a few things to consider here.
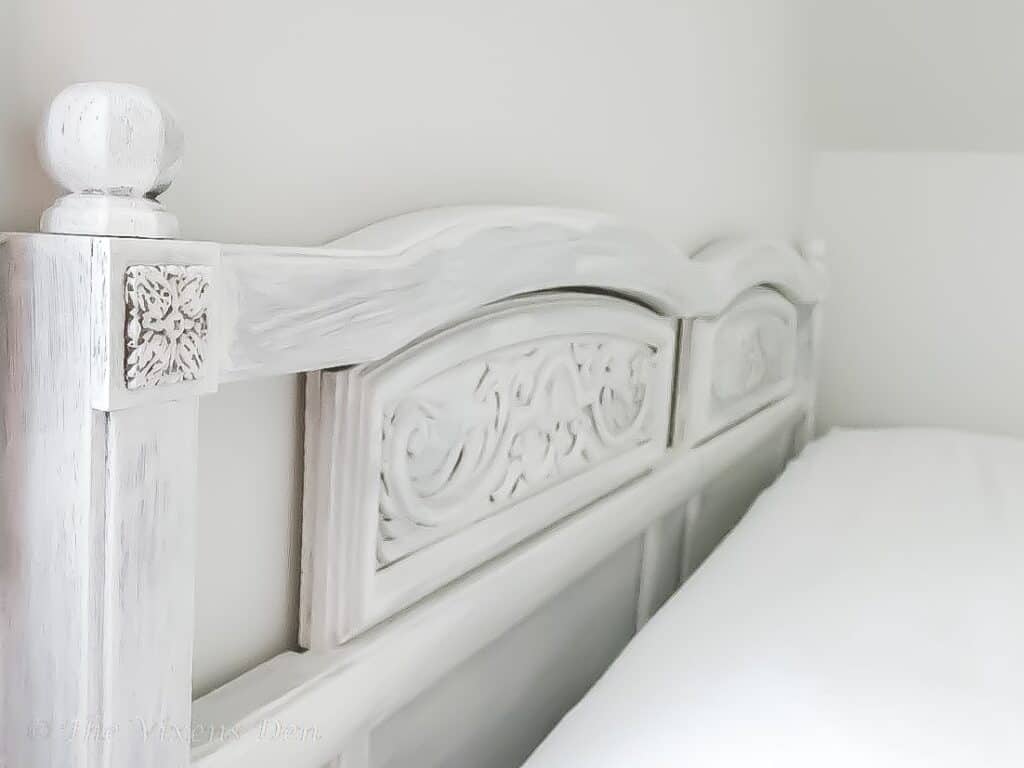
First of all, I was painting with white paint over a dark piece of wood. This worked just fine for me, actually, because it adds a little bit of character to the paint. However, because I did not prime the piece it did also allow a little bit of bleed-through from whatever factory finish product is underneath the paint.
This means that the white does not show up as pure white.
Secondly, I opted not to seal or topcoat this piece. A headboard doesn’t see the same amount of heavy use that a dining room table or end table receives, so I did not feel that a topcoat was needed
So, the final question is, how did this super easy makeover hold up? Well, it’s been about 10 years and the paint has barely scratched at all. What’s great about this style, though is that even the little scratches look like they are part of the design.
I still like the look, and feel that it works well with a lot of different decorating styles, especially: Farmhouse, Cottage, French Country, Boho, Eclectic, etc.
Not all makeovers have to be a long, labor-intensive affair, as you can see from this easy 2-step headboard makeover. With just a damp cloth, paintbrush, and the paint I had lying around, I completely transformed this castoff 80’s headboard into a cute vintage piece.
So, what are you waiting for? Grab that dusty old headboard that Aunt Lucille gave you years ago and give it a new look! But before you go, if you enjoy these kinds of transformations then subscribe to my email list so you can be notified when I post new fun makeovers.