Old Wood Trunk Makeover
When I was a kid, every Christmas my brother and I would haul out my grandmother’s Christmas decorations. All that sparkly tinsel was packed up in two green storage trunks. I think this must have started my love for old trunks. Because now whenever I find an old wood trunk like this one, it sets my adrenaline pumping and my mind racing with ideas to give it the perfect makeover!

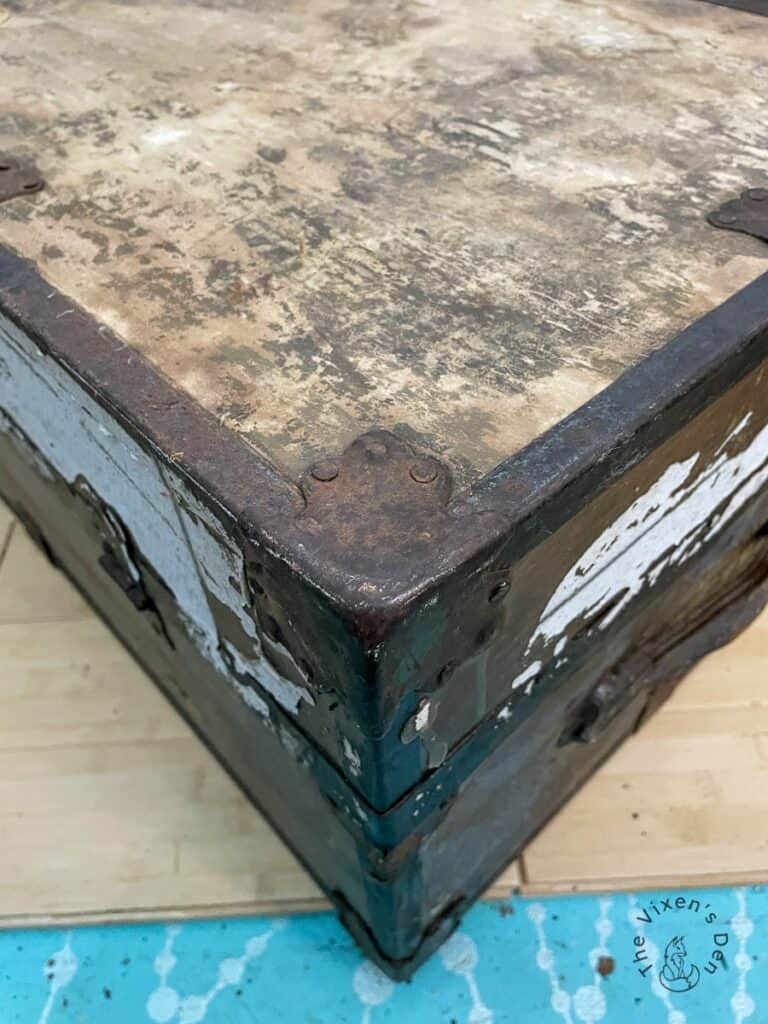
This particular trunk had seen a lot in its lifetime! It was covered in white splotches that might have been latex paint or some type of glue. I’m just not sure what it was. Underneath the paint splotches were years of mildew, rust, and peeling veneer that turned out to be cardboard instead of wood! This trunk was definitely a project!
Before we roll up our sleeves and jump into this makeover, let’s take care of some legalese:
This post is sponsored by Dixie Belle Paint Company. While they provided some of the products for this project, all of the opinions are my own. Follow this affiliate link to see all of their amazing products!
AS AN AMAZON ASSOCIATE I EARN FROM QUALIFYING PURCHASES AT NO COST TO YOU.
YOU CAN SEE MY FULL DISCLOSURE HERE.
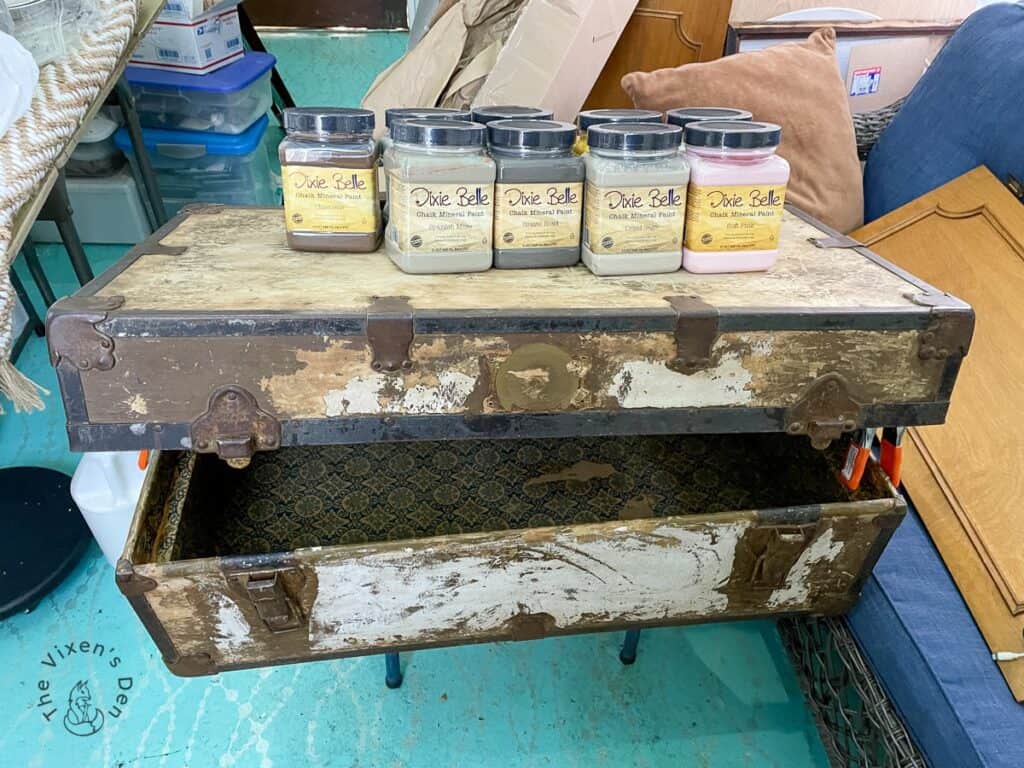
Now let’s get started with all of the tools and materials that I used to give this trunk a new look and a new lease on life!
Tools and Materials
Tools
- Trim Removal Tool
- Flat edged Screwdriver
- Metal scraper
- Hammer
- Spring Clamps
- Battery Drill
- 14 Gauge Glue syringe
- Mini Angle Paintbrush
- Artists paintbrush
- Continuous Mist Spray Bottle
Materials
- White Lightning
- 220 Grit Sanding Sponge
- Titebond Wood Glue
- Mod Podge
- Boss
- Silk Paint: Hampton Olive
- Silk Paint: Anchor
- Moonshine Metallics Paint: Gold Digger
- Gilding Wax: Gold
- Gilding Wax: Bronze
- Trunk lid support
- Leather trunk handle straps
- Leather handle caps
- Trunk lock
- 1/2 inch screws (for replacement hardware)
- 3/4 inch screws (for replacement leather straps)
- Washers
- Replacement nails
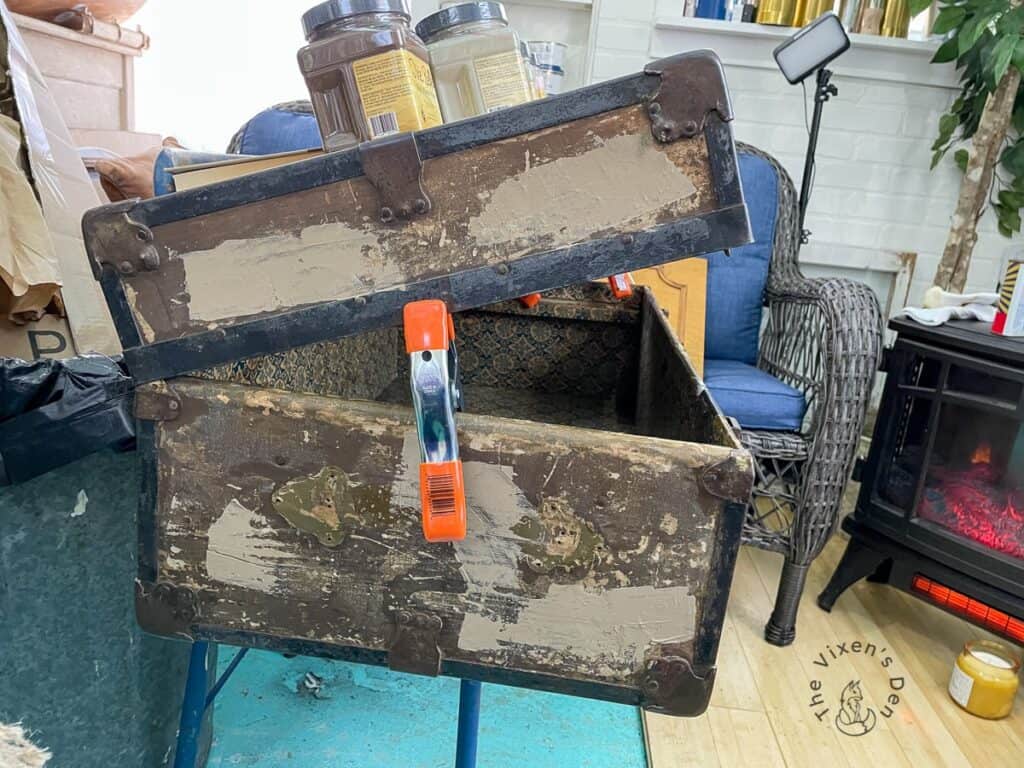
Removing and Repairing Damage
Before I could get started on prepping the surface, I had to remove all of the damaged hardware. I found this nifty little automotive trim removal tool wiggled underneath the edges of the leather strap handle caps very nicely.
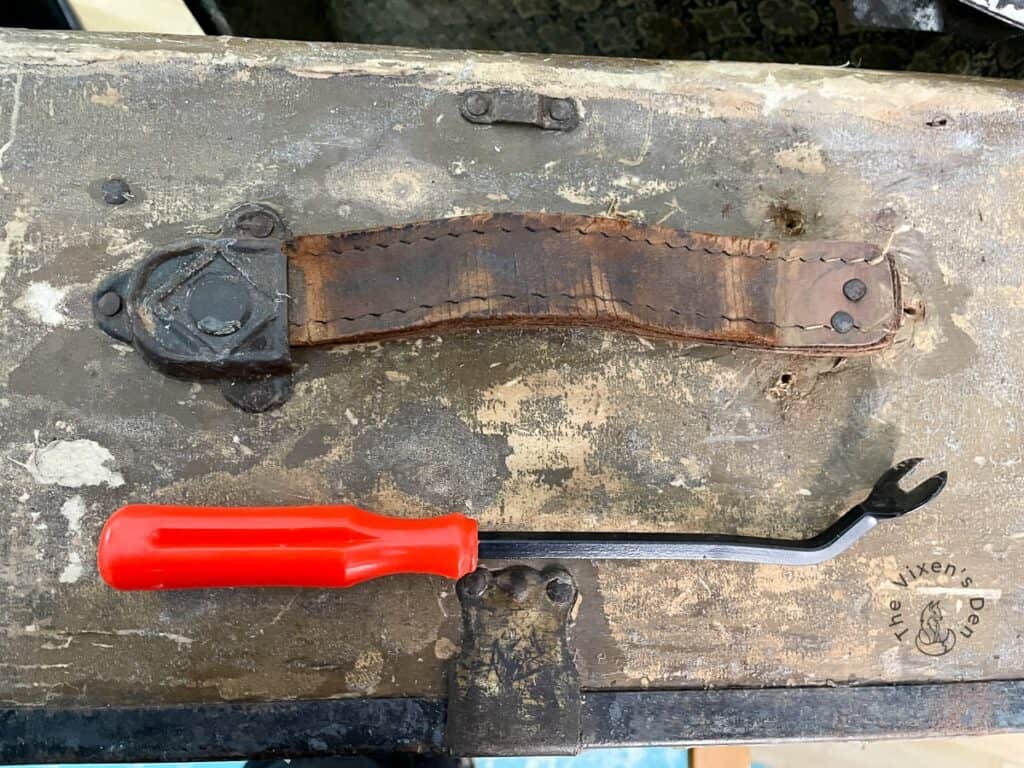
I alternated between the pry bar, a flat-edged screwdriver, and my hammer (because every project can use a little help from a hammer, right?) I did not remove the hardware that was still in good condition, just what was damaged.
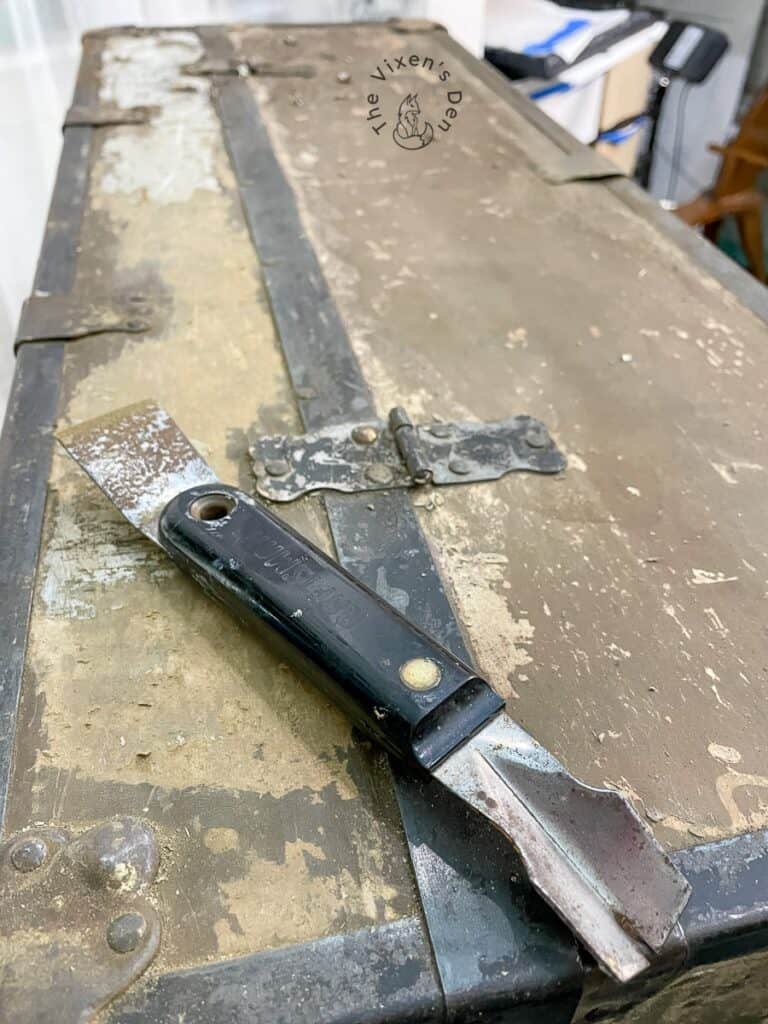
As I mentioned before, this trunk needed a lot of cleanup before I could start the makeover. Using a metal scraper, I scraped off as much of the latex paint or contact paper residue (not sure which) as possible. As I was scraping, I discovered that the metal bands on the trunk were also painted. Black metal paint flakes were flying everywhere! It was a process and my hands positively ached by the time I felt it was ready for the next step.
Perhaps a heat gun would have helped with that step, but I was concerned about loosening the glue under the veneer. The veneer was pulling away from the inner wooden surface, and it was during the scraping process that I discovered that the veneer was actually cardboard and not wood.
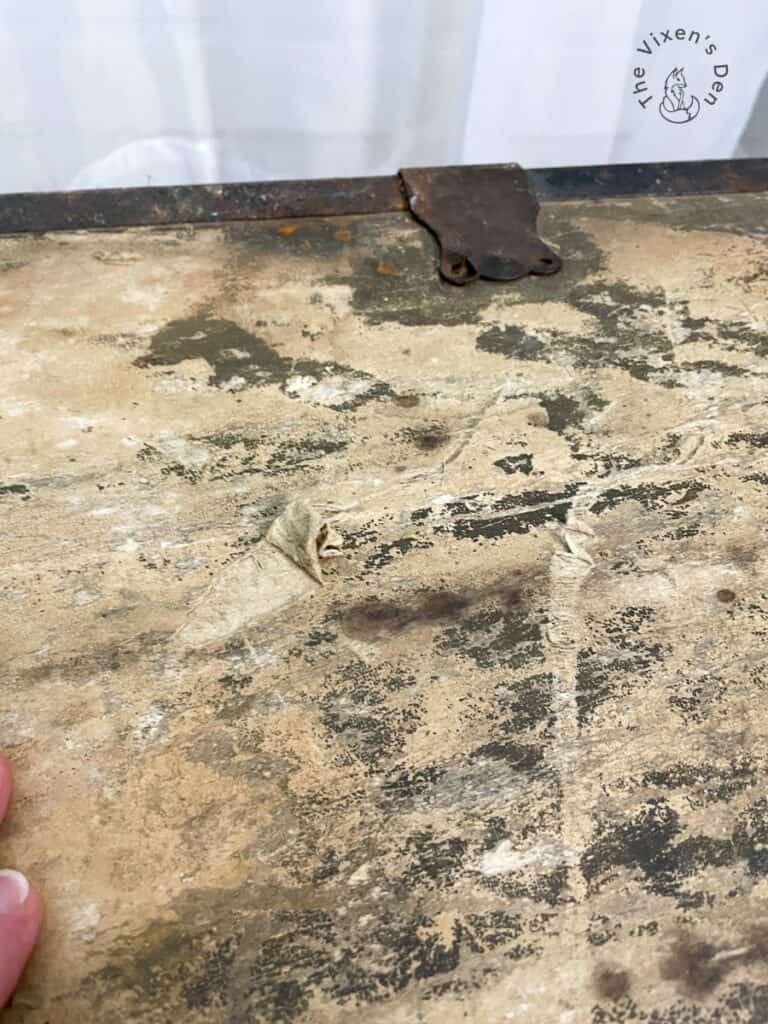
Rather than try to completely remove the cardboard, I decided to try to glue it back to the wood. I poked a hole in the surface of the cardboard and inserted a crafting syringe filled with Titebond Wood Glue into the hole. I used slow and steady pressure to push out the glue as I moved the point of the syringe around under the cardboard. Once the syringe was empty, I pressed down and away from the entry point in an effort to disperse the glue evenly. Finally, I wiped away any excess glue and lay heavy objects (namely my Dixie Belle paint collection) on top to weigh down the veneer.
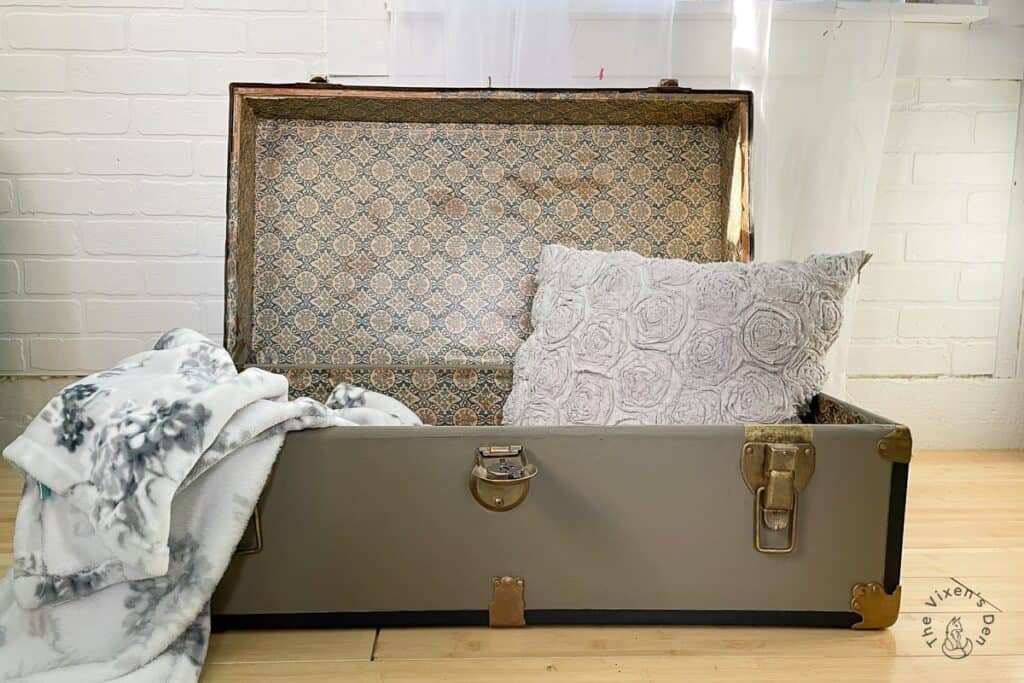
The interior cardboard was also pulling away from the wood surface. Otherwise, the paper itself was in great shape! It had an interesting pattern, no funky smells, and only a few stained spots. Since I was already having to make so many changes to the exterior of the trunk, I decided to repair and preserve the interior. I applied wood glue to the interior panels, clamped them down, and allowed them to dry overnight.
Cleaning and Prepping
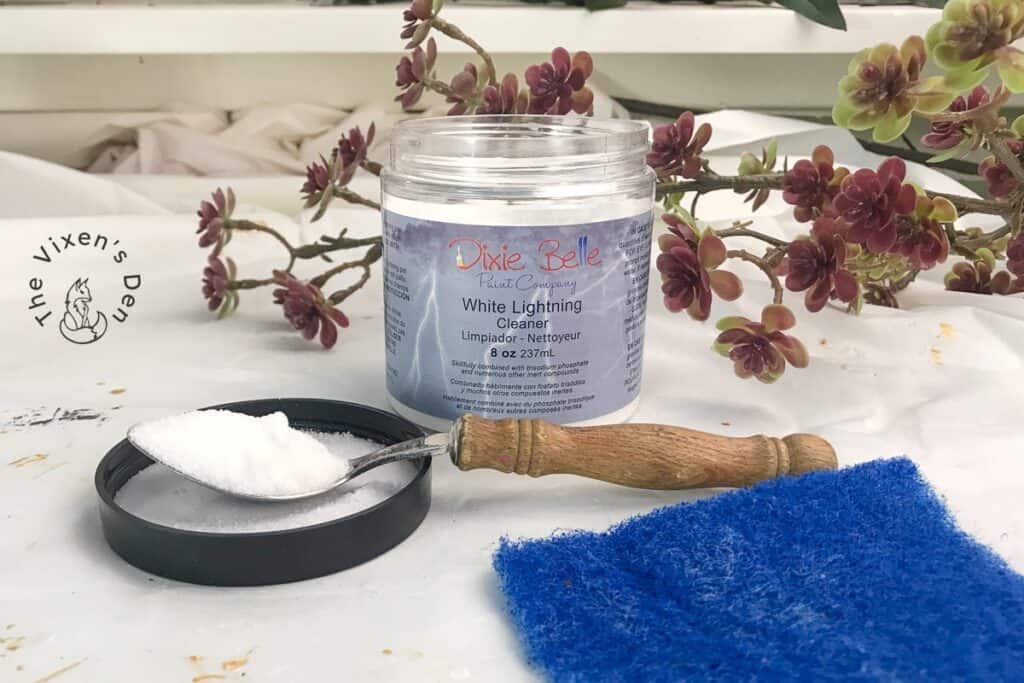
With the surface repaired, it was finally time to start cleaning! I vacuumed out the interior of the trunk and wiped everything down several times with a mixture of White Lightning. This trunk had a lot of mildew on it, so it took several cleaning and rinsing wipe-downs before it was finally clean. I did this in stages, allowing the surface to dry between each wipe and rinse so that the surface wouldn’t become more damaged.
After the surface was clean, I filled in any gouges on the exterior with Dixie Mud. This is a great all-purpose filler that was perfect for this project! Just a light skim coat evened out the surface beautifully. Once it was dry, I lightly sanded the surface with a 220-grit sanding sponge and wiped it with a tack cloth.
To seal out any potential stains and create a good surface for the paint to bond to, I used the Dixie Belle Mini Angle Paintbrush to paint a coat of Boss onto the cardboard veneer. After two hours of drying time, I painted on a second coat and then let it dry overnight.
Preserving the Paper Lining
One of my all-time favorite products for preserving paper is Mod Podge. I’ve used it on craft projects for as long as I can remember. For this project, I used matte Mod Podge, painted it on with a chip brush, and let it dry overnight. The next day, I came back and touched up the corners and any spots that didn’t quite take adhere properly.
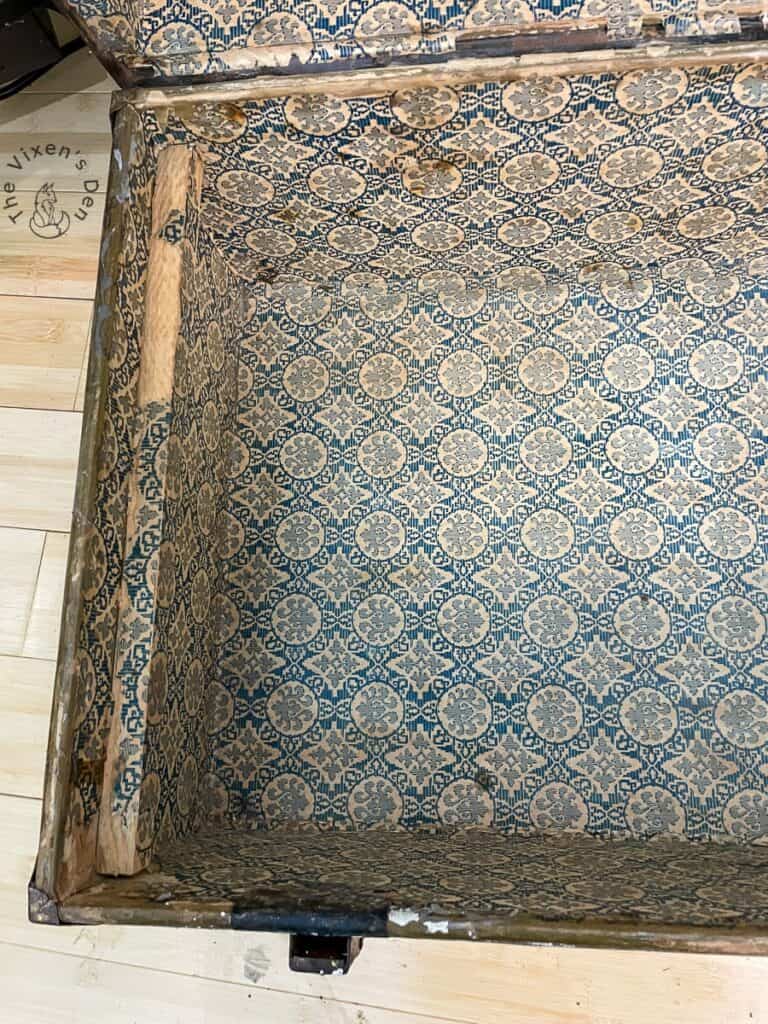
The matte sheen level looks very natural and protects the paper from any future damage while preserving its unique history.
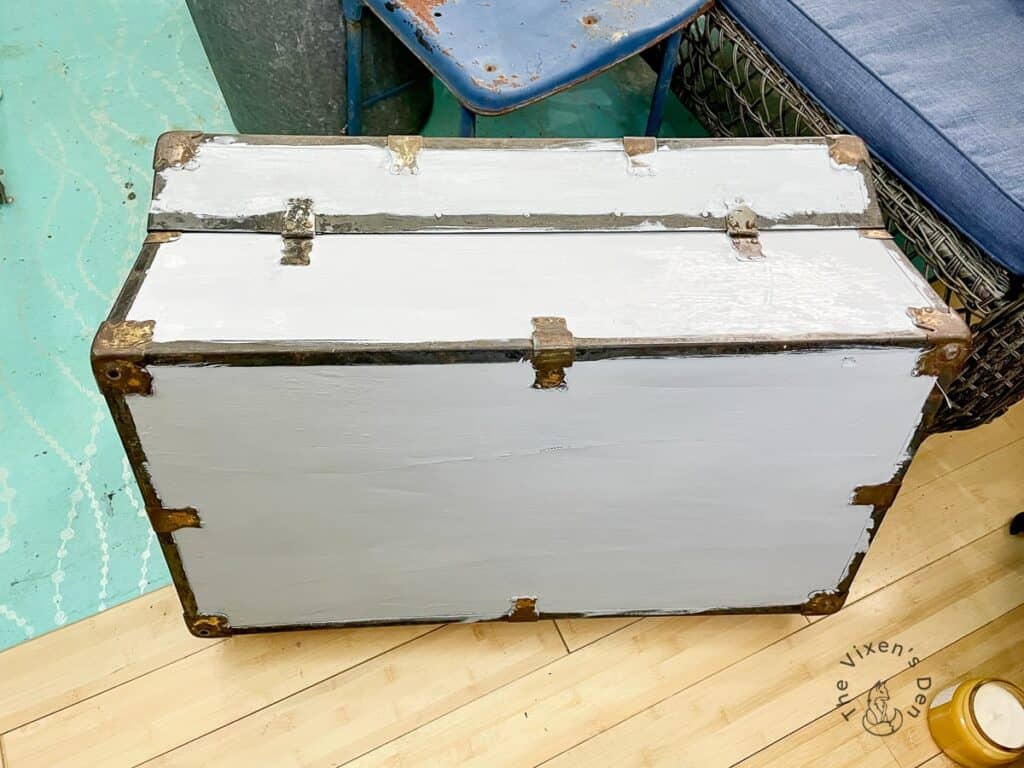
Painting the Trunk Exterior
Finally, it was time to start painting! To create a masculine look for the exterior of this trunk, I chose Hampton Olive from the Dixie Belle Silk line. Dixie Belle Silk paints are great for quick projects because they have the primer and top coat built in. These paints flow smoothly with the help of a Continuous Mist Spray Bottle, and they dry very quickly.
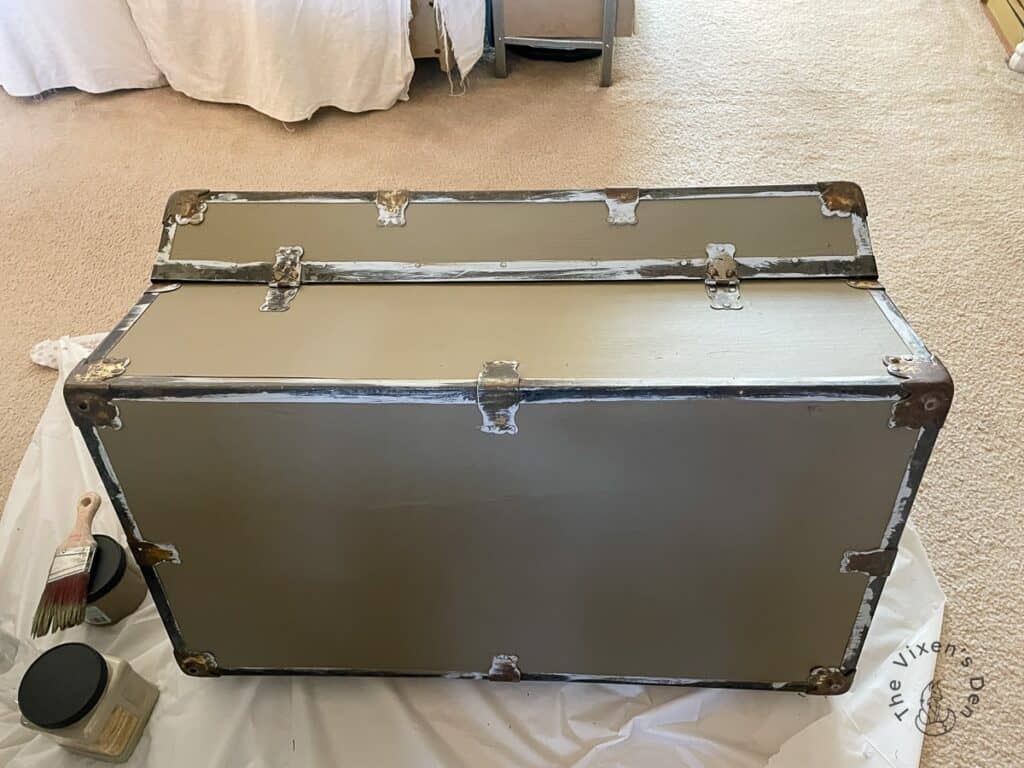
Hampton Olive is a wonderfully deep, almost Army green, paint color with rich grey and brown undertones. I applied two coats of Hampton Olive to the veneer of the trunk. The paint dries to a wonderful matte, yet durable, finish that looks very classic!
Painting the Metal Bands and Hardware
To paint the metal bands, I painted on two coats of Dixie Belle Silk in Anchor. This is a rich, pure black paint color that contrasts nicely against Hampton Olive. I decided to go back with black paint since that was the original color, but it also provided a lovely contrast for the hardware.
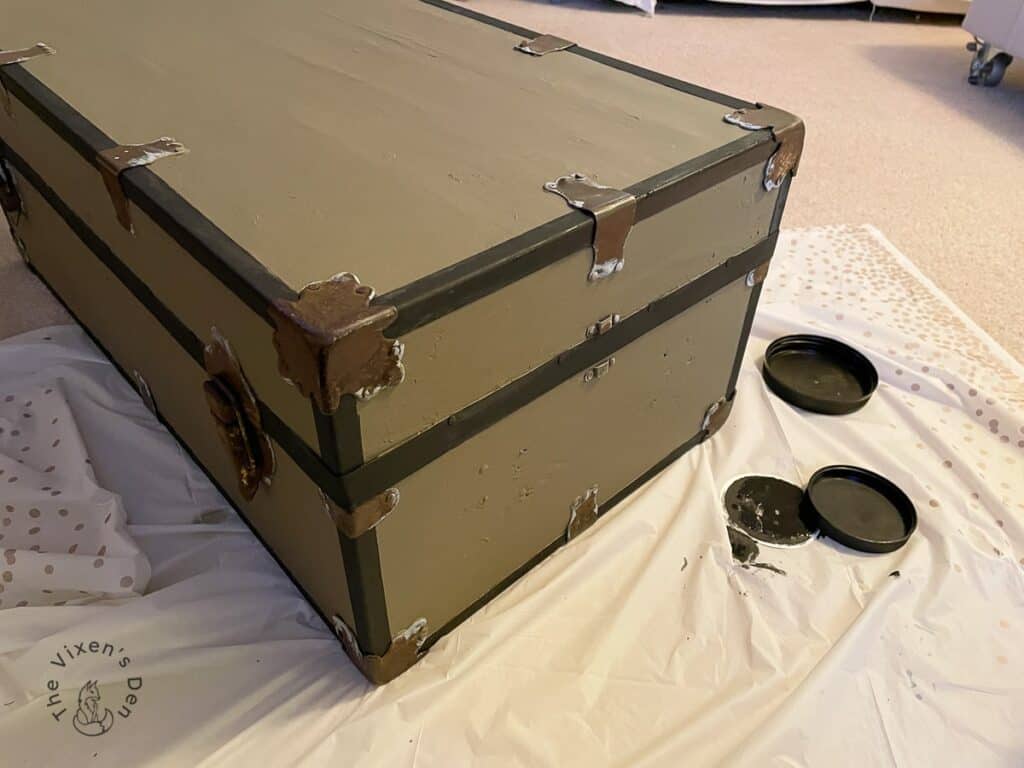
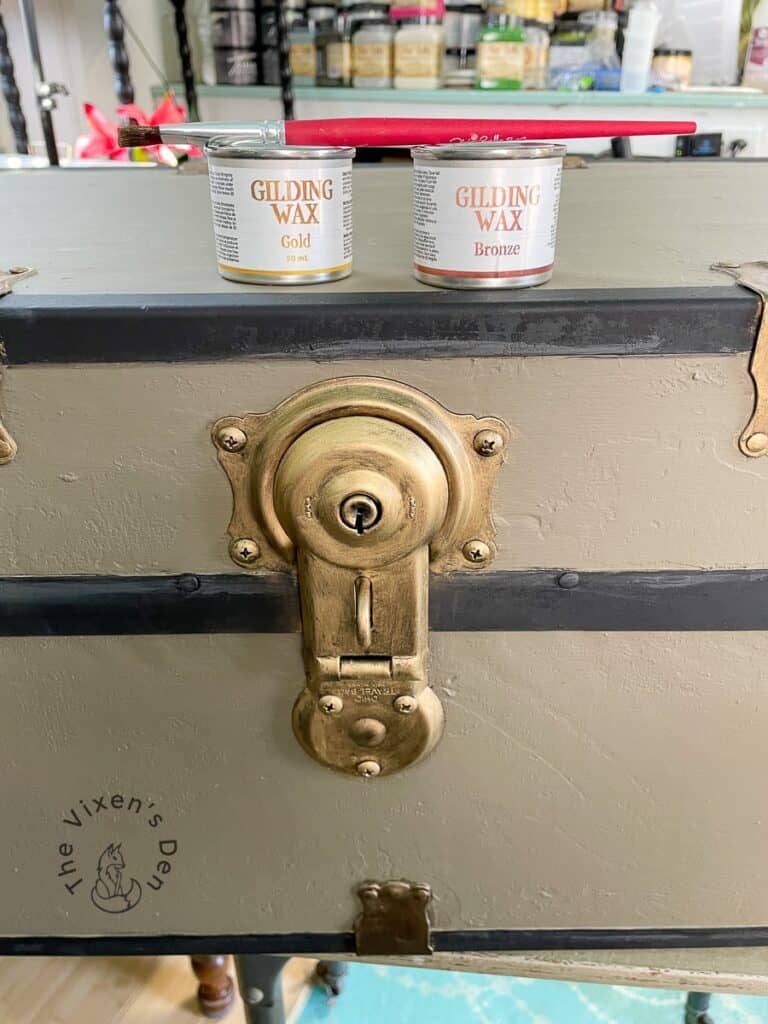
For the hardware, I first painted in Dixie Belle Moonshine Metallics because I was looking for bright gold.
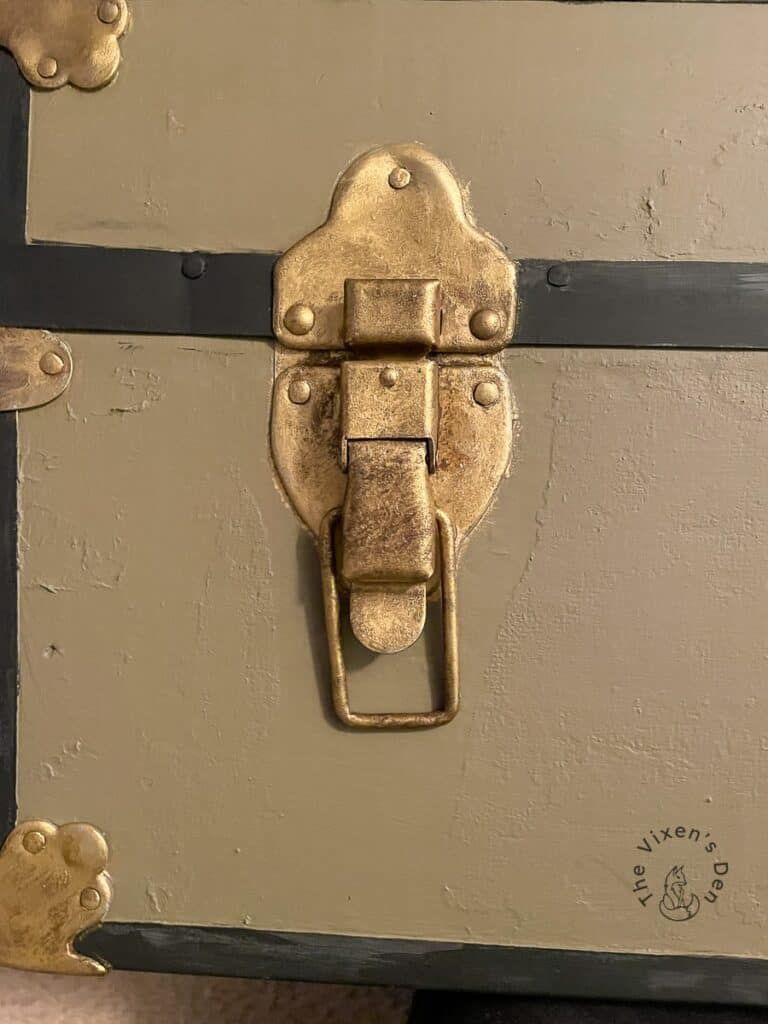
But after looking at it, I decided to tone down the gold color. Dixie Belle Gilding Wax in Bronze was the perfect solution!
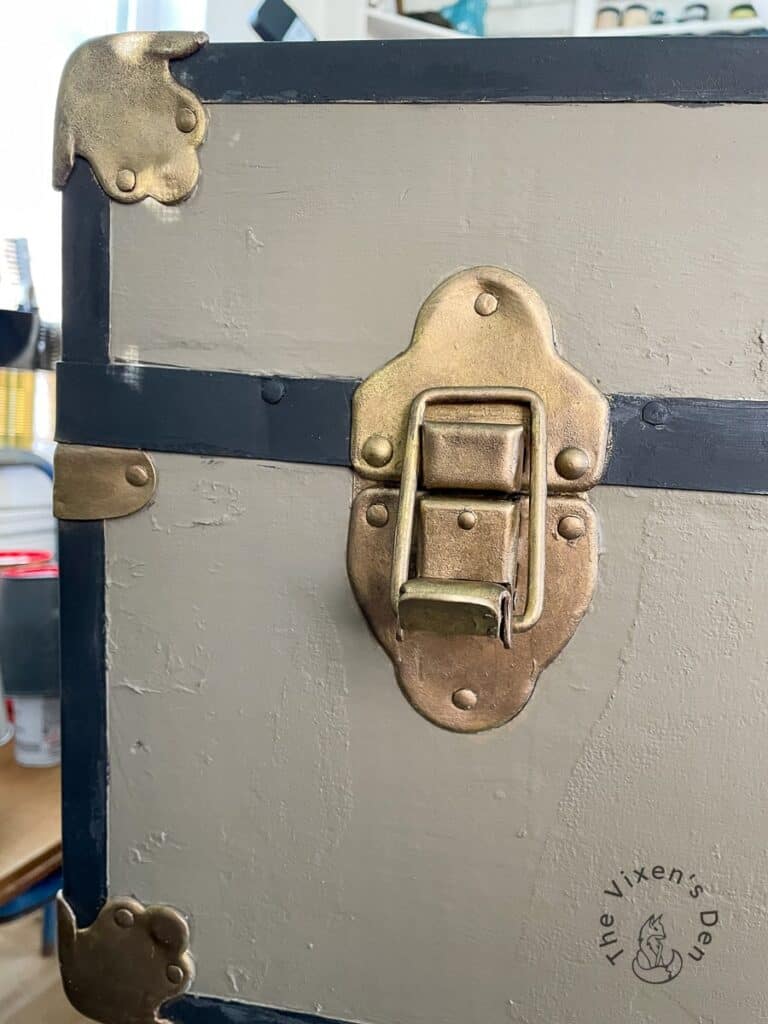
Using an artist’s brush, I painted on a coat of Gilding Wax. I let it dry overnight and then the next day I buffed it and touched it up. Buffing the wax brought out a bit more shine, and also revealed any spots that didn’t adhere quite properly. I left some of those spots for the character that they created, but large areas were touched up.
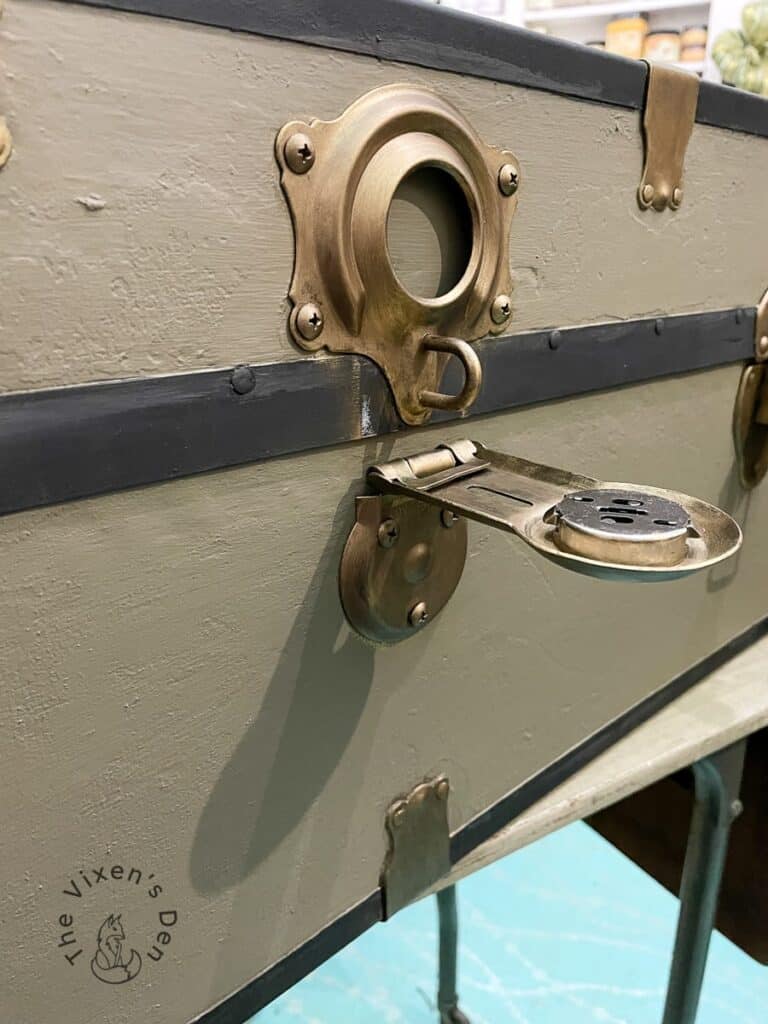
Replacing Damaged and Missing Hardware
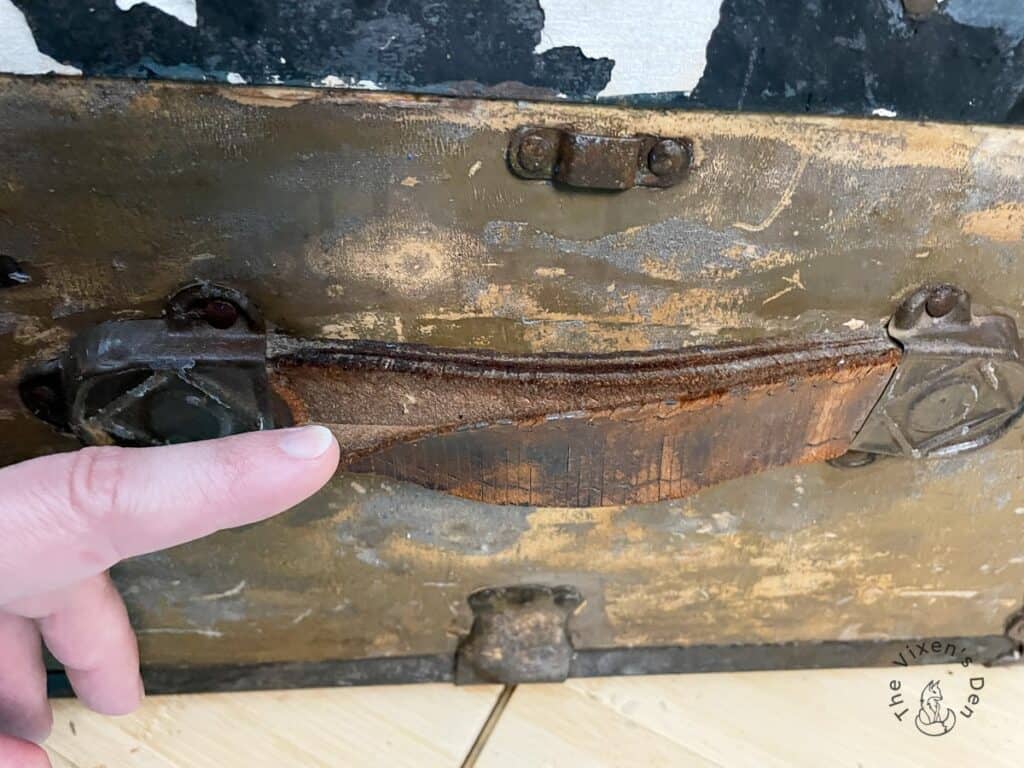
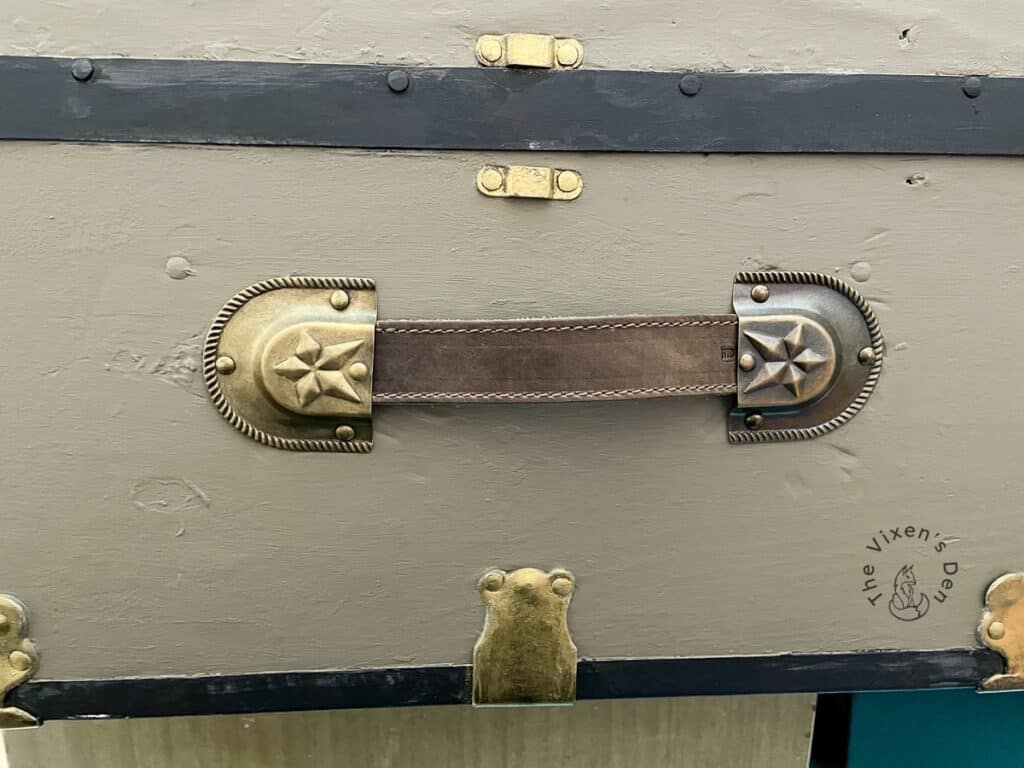
As much as I would have loved to keep all of the existing hardware, I didn’t feel that it would be safe to do so. The leather handles on the sides were coming apart and I was concerned about what they might look like underneath the caps. It turned out that I was right. When I removed the caps off of the old leather handles, I found that the leather was already torn.
To replace the leather straps, I measured in from the top and side of the trunk, trying to center the straps around the area where they were originally installed. I allowed about an inch to an inch and a half of slack, so that a hand will easily fit between the trunk and the strap. Using the battery drill, I installed a screw with a washer in the premade holes of the leather straps.
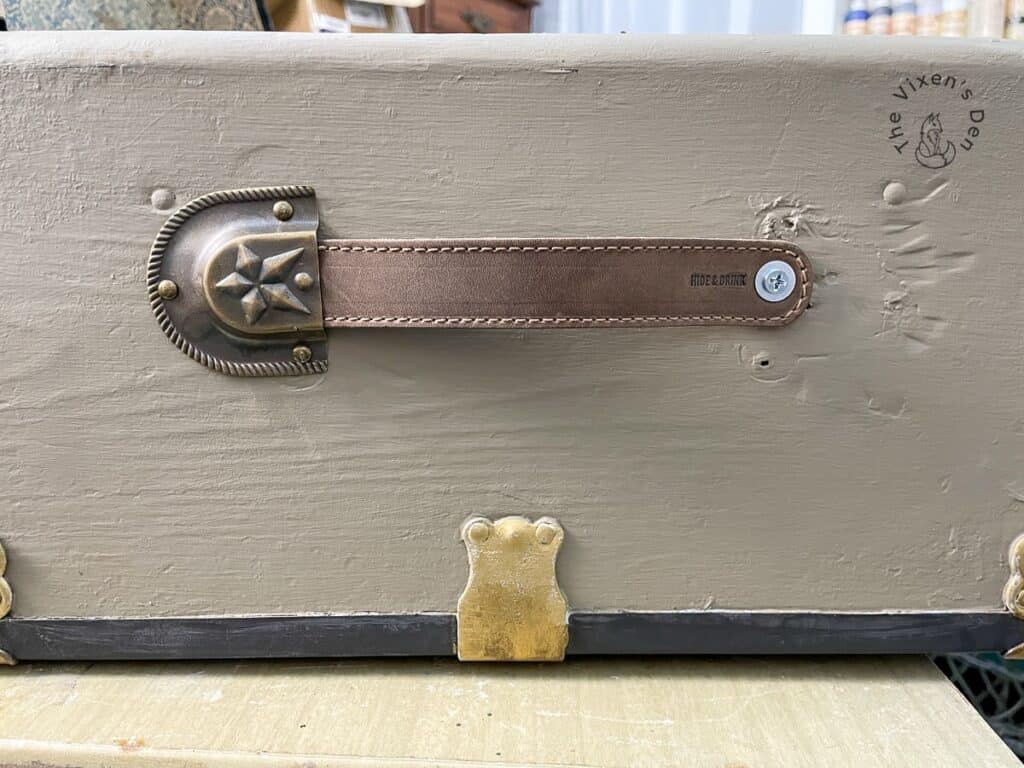
Once the handles were installed, I used the same method to install the star leather handle strap caps. These were installed using small replacement nails.
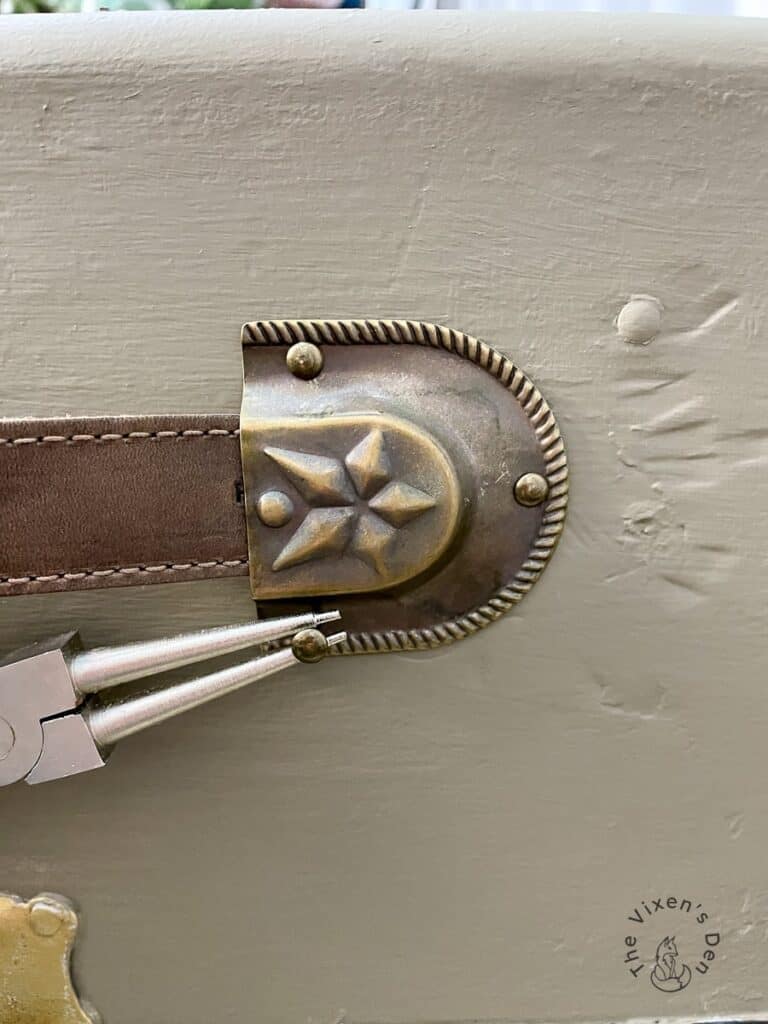
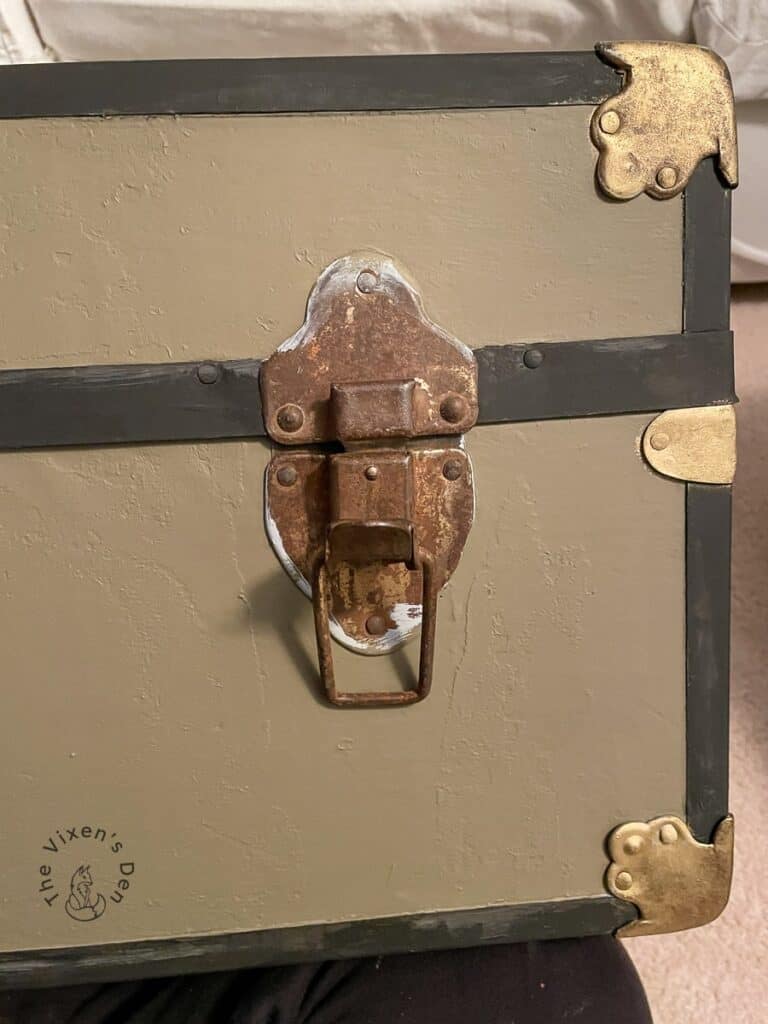
The caps were a lovely bronze, but the color didn’t quite match the rest of the hardware. A bit of Gilding Wax in gold solved that problem easily! I painted it on with an artists paintbrush and buffed it the next day.
With the handles in place, I next installed a replacement trunk support. This was a bit trickier to do by myself because I had to position the lid at the correct angle and install the screws all at the same time. I pushed the trunk against the wall, fastened down one end, and then installed the screws in the other end.
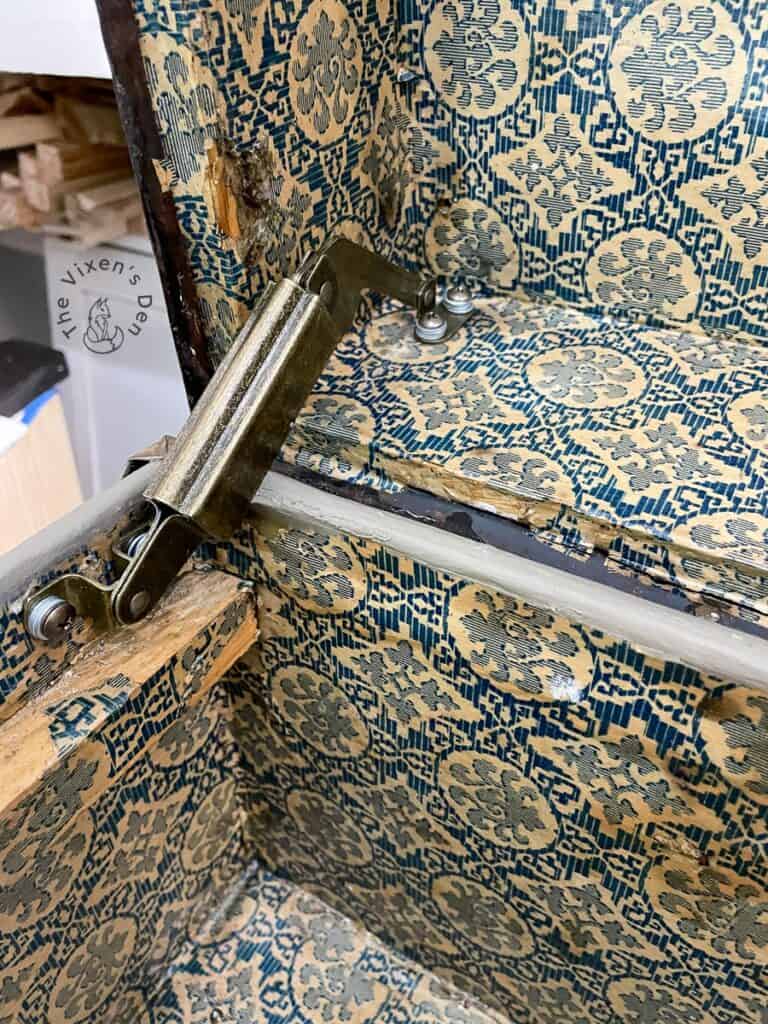
Hindsight is 20/20 tip: The picture above shows where I used washers as spacers to keep the screw tip from poking all the way through the wood. I ended up removing those and replacing them with the 1/2″ screws. To stabilize the replacement screws, I squeezed a little Titebond Wood Glue into the hole created by the screw. It’s always easier to just use the proper material from the start.
Finally, I replaced the missing trunk lock. I wanted to make the trunk fully functional, and what trunk is complete without a lock? This lock came in a black powder-coated finish. In order to match up the finishes on all of the hardware, I sanded the metal to scuff up the surface.
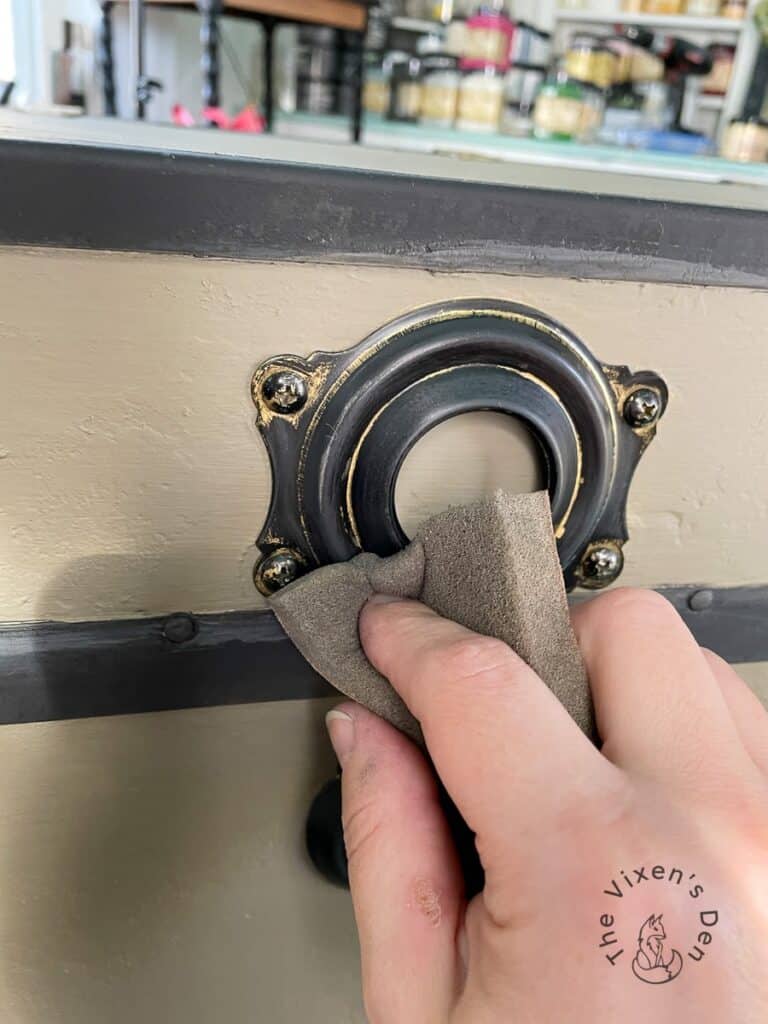
Hindsight is 20/20 tip: Don’t skip the scuff sanding step. I did it the first time and the water-based material that I used just wiped right off. I scuff sanded and switched to Dixie Belle’s Gilding Wax and the finish stayed on beautifully!
I used an artists brush to paint on two coats of Gilding Wax in gold.
I followed that up with one full coat and a touchup coat in Bronze.
Hindsight is 20/20 tip: The drying time is a very important step. When I tried to rush the process, I ended up removing the previous layer of wax while trying to build the next layer.
Final Reveal
From rusty to masculine chic, this piece received quite a makeover!
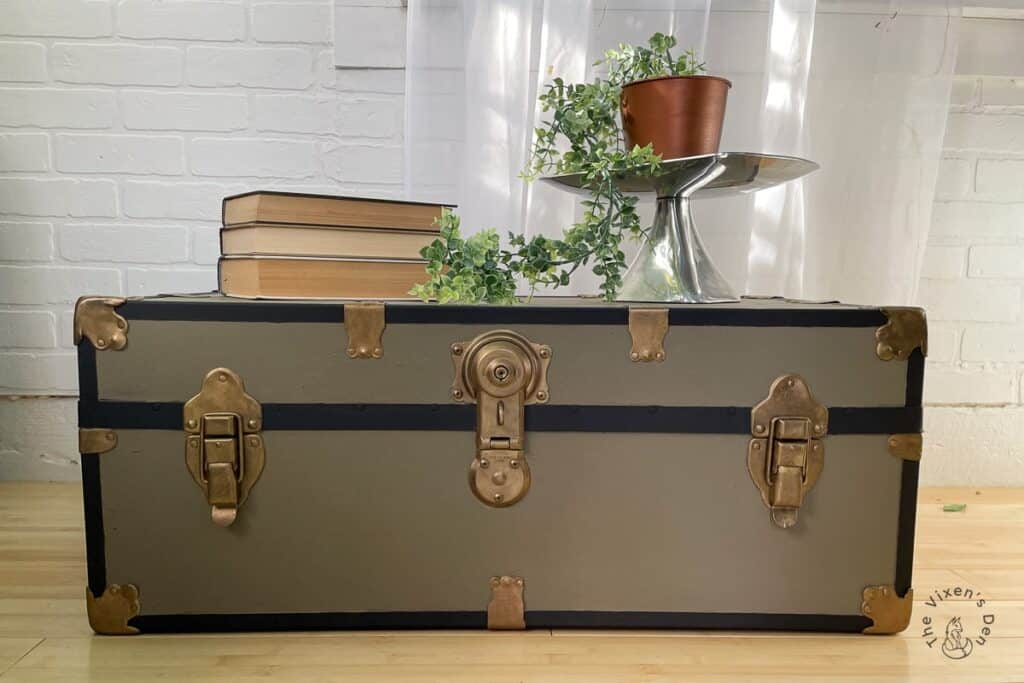
I’m so happy that I was able to stay preserve most of its original features while making it functional once again.
Trunks can be used for so many different things (besides Christmas decorations.) A few of my favorite ideas that come to mind are: Coffee table to store extra blankets or decor-friendly toy storage, blanket or momento storage in a bedroom or closet, or in an entryway for extra shoes. The possibilities are endless! How would you use this trunk? I’d love it if you’d share your ideas in the comments below.
Thank you so much for stopping by! Check out the other amazing projects at the link parties below. I know the hostesses will appreciate your visit and comments.
Until next time, have a beautiful and blessed day!


Linked up to these lovely link party hostesses at:
Don’t forget to sign up so you hear all about the next misadventure! Until then, you may also like this Magazine Rack makeover or this Dresser upcycle.
Oh how sad. Ruined the character!
I just bought new handles on Etsy.
The original ones were very dry and time-worn. I love the sturdiness of these for my dad’s old army footlocker. This Etsy vendor is out of Malaysia and she is very professional and reliable. https://www.etsy.com/listing/1017701617/leather-door-handle-drawer-pulls-leather?ref=yr_purchases
I have this exact same trunk! I’m working on it now. I was so happy to run across this post. I decided to leave the cardboard surface intact too. I cleaned it, sanded it lightly and then sprayed it lightly with a sealer so that paint wouldn’t bubble up the cardboard??? I have hairpin legs that I’m going to attempt to attach today. The inside is stripped down to wood as was the outside bottom. I’m not sure weather to paint the interior or put contact paper on it. I’m painting mine Cream color with black straps and I have some cool decopage paper I’m going to try and use ( I have never decoupaged before) I hope mine comes out as nice as yours! Where do you get the leather handles? I was thinking of using an old leather belt( for added character) but I wasn’t sure how to attach . Mine doesn’t have any handles currently, they were already missing. I also have antique gold for the corners and lock. My lock is there, a little bent, but I’m leaving it as is ( more character ha) Wish me luck!!
Hi Cheryl! I’m so glad this post was helpful! Either painting or adding contact paper will be great options. It sounds as if it’s going to be absolutely stunning!
You could use a leather belt for the handles for sure. The handles are nailed into the side of the trunk and then caps cover the nails. I used these leather trunk handle straps from Amazon: https://www.amazon.com/gp/product/B07XGCPMXS?ie=UTF8&psc=1&linkCode=ll1&tag=thevixensde03-20&linkId=17197e19efb027e36da691f0767263f5&language=en_US&ref_=as_li_ss_tl and then covered them with these metal leather handle caps: https://www.amazon.com/gp/product/B0821HTRYR?ie=UTF8&psc=1&linkCode=ll1&tag=thevixensde03-20&linkId=6b2ee3236cfabb28927ea2256507fa75&language=en_US&ref_=as_li_ss_tl.
I hope you will visit again and let us know how your project goes!
Have a wonderful day!
Becky
I am in the process of making over my dad’s old army footlocker. I made the decision to get rid of the cardboard and go down to the wood. I am planning to cover the the wood with self-stick wallpaper so that in the event the new owner(a grandchild?) will be able to change it easily. I also framed a piece of sheet metal inside the lid so that it can become a board for magnetic family photos that can be added to down the road(see peartree.com). Hoping this will become a lovely heirloom that will be passed down. I will be putting a polyurethane clear coat on the wood before papering. If you have a moment, can you tell me what kind of hinge you used for this? Since mine is becoming a toy box, I wanted it to be soft close. Also, mine has vulcanized rubber trim, not metal. Do you suggest leaving it alone or repainting? (It is a bit scuffed).Thank you for inspiring all of your readers to take on an old trunk and make it into a beautiful piece.
Hi Patti! What a special project you are creating! I love the magnetic board idea for the inside of the lid! Soft close lids are a must for those little fingers. I used these hinges https://amzn.to/4cdJiFu to keep the lid from slamming shut. As for the rubber trim, if it’s still intact then you could certainly paint it if you want to give it a special look. I would definitely start off with a good grippy primer, though. My favorite is Zinsser BIN 123.
I’m so excited for you and your family and hope you will visit again to share the before and after of your “new” heirloom!
How many trunks have I let go because I resisted doing a makeover on them?! Countless! But you’ve convinced me otherwise, because your vintage trunk makeover is a complete stunner! Love the tones you chose!
I, too, love trunks! So happy with your step by step info!!!!! I am about to start my second make-over truck and intend to follow your directions! Wish me luck and thank you for the tutorial!
Wow, this was truly a labor of love. Amazing transformation! I’d like to invite you to the Home Matters Party every Thursday 9pm est through Monday. Hope to see you there! Allyson @ Southern Sunflowers . com
Thank you so much for joining us and for the invitation, Alyson! I will definitely pop over to join up.
Becky,
I am kicking myself now after seeing this post…I had my Dad’s army trunk from WWII and it was in perfect condition and looked exactly like this one..I used it as a toy chest when my boys were young. I did not have room for it so I passed it on to my nephew. At least it is still in the family…You did a fantastic job at restoring this one!! It is a true beauty!! Thanks for sharing!!
Hugs,
Deb
Being able to keep pieces like this in the family is a blessing! I wish I could hear some of the stories that these trunks have seen in their lives.
Kudos on all your hard work. You’re becoming quite the expert craftsman in restoring pieces.
Thank you so much, Trishia! It was a lot of work, but my son-in-law really seemed happy to have it, so it was definitely worth it.