Painting with Toddlers – DIY Upcycled Cardboard Sunshade
What’s better than an opportunity to try a new paint product?
Testing it out with this cute little artist!
This post is sponsored by Dixie Belle Paint Company. While they provided some of the products for this project, all of the opinions are my own. Follow this affiliate link to see all of their amazing products!
Dixie Belle Terra Clay paint, the “No Rules” mineral paint, was the perfect product to introduce my granddaughter to painting. She had been practicing on her water paint mat, so she had the mechanics down. Now we just needed an easy first project for her.
I’ve had a metallic-coated accordion sunshade for years. The metallic coating was crumbling and the sunshade had become floppy, so it was time to replace it.
As I was trying to decide what I was going to buy to replace my old sunshade, I remembered seeing some cardboard sunshades when I was at the auto parts store. At that moment, inspiration struck!
As is typical, I made my project a little more complicated than it needed to be. However, you get to benefit from my misadventures. Win, win!
THIS POST CONTAINS AFFILIATE LINKS TO PRODUCTS. IF YOU PURCHASE PRODUCTS THROUGH THESE LINKS, THEN I MAY RECEIVE A SMALL COMMISSION AT NO COST TO YOU.
I ONLY RECOMMEND PRODUCTS THAT I USE AND/OR HAVE RESEARCHED AND WOULD USE.
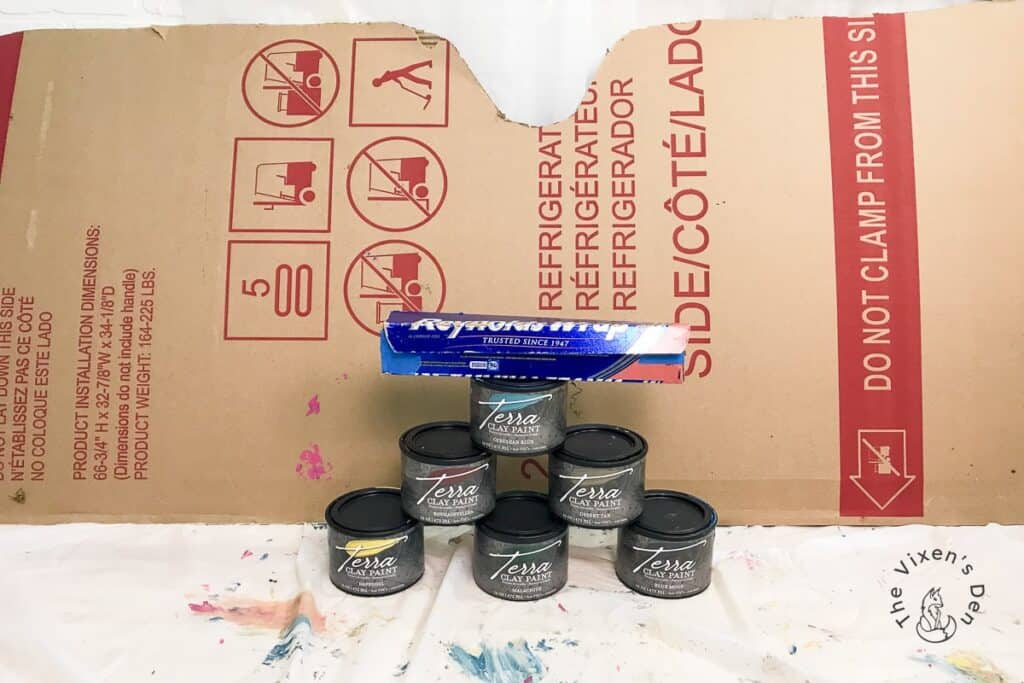
Tools and Materials
Tools
- Old Sunshade
Scissors - Water-filled paint brushes
- Pie pan
- Paper towels or wet wipes
- Utility knife
Paintbrush Chip brush
Materials
- Cardboard or an accordion sunshade
Terra Clay Paint Terra Seal Aluminum foil - Elmer’s Glue
- Decorative tape
Prepping the Sunshade
This is where things became more complicated than they needed to be. Instead of just buying a cardboard sunshade, I decided to create my own from the cardboard mountain living in my garage. So, if you’re interested in going that route, then here are the steps that I took:
Using the old sunshade as a template, I traced around it and then cut out the shape of the new cardboard sunshade.
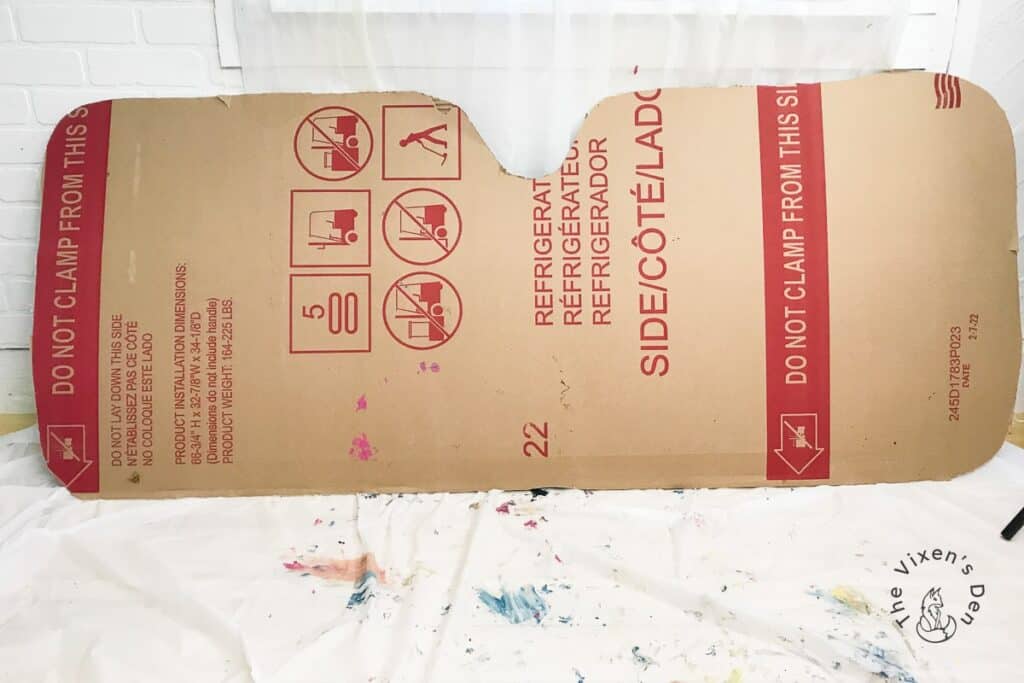
Hindsight is 20/20: My old sunshade was so worn out that I had to clip it to the cardboard in order to trace around it. Binder clips work great for this, as clothespins or chip clips tend to slide.
Create a Cardboard Canvas
To create a canvas for my little artist, I painted one side of the cardboard with two coats of Terra Clay Paint in Moonbeam. I wet the end of my two-inch angle mini brush before dipping it into the paint and I also misted the cardboard using a spray mister.
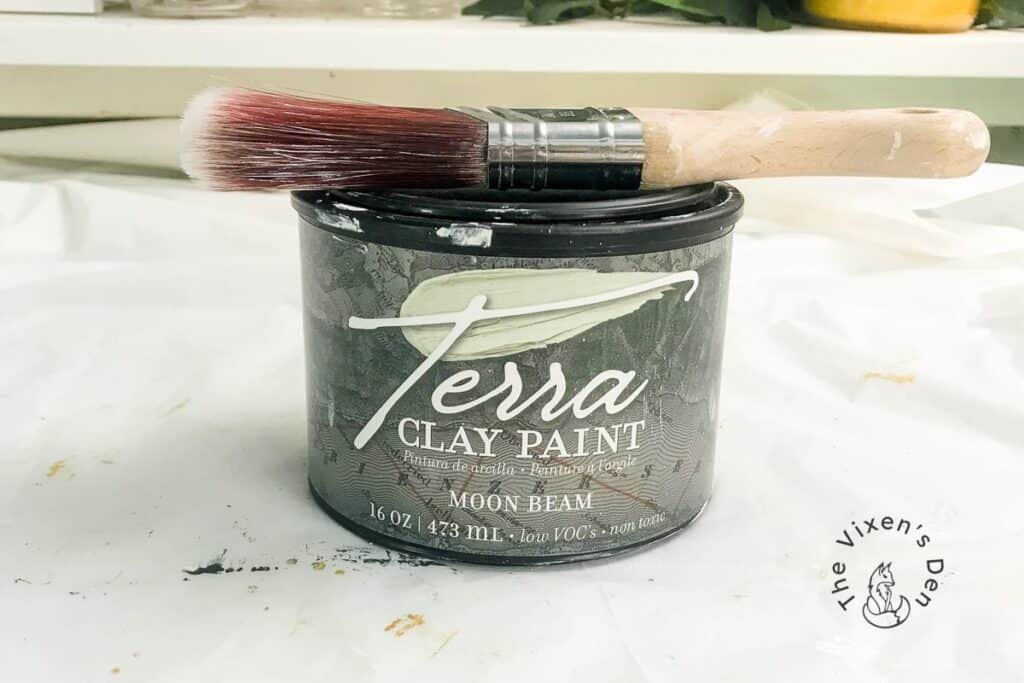
Terra Clay Paint is even thicker than Dixie Belle’s Chalk Mineral Paint. This is great because it provides good coverage without using a lot of paint. However, it also means that you need to add water to help the paint move across the surface of your project.
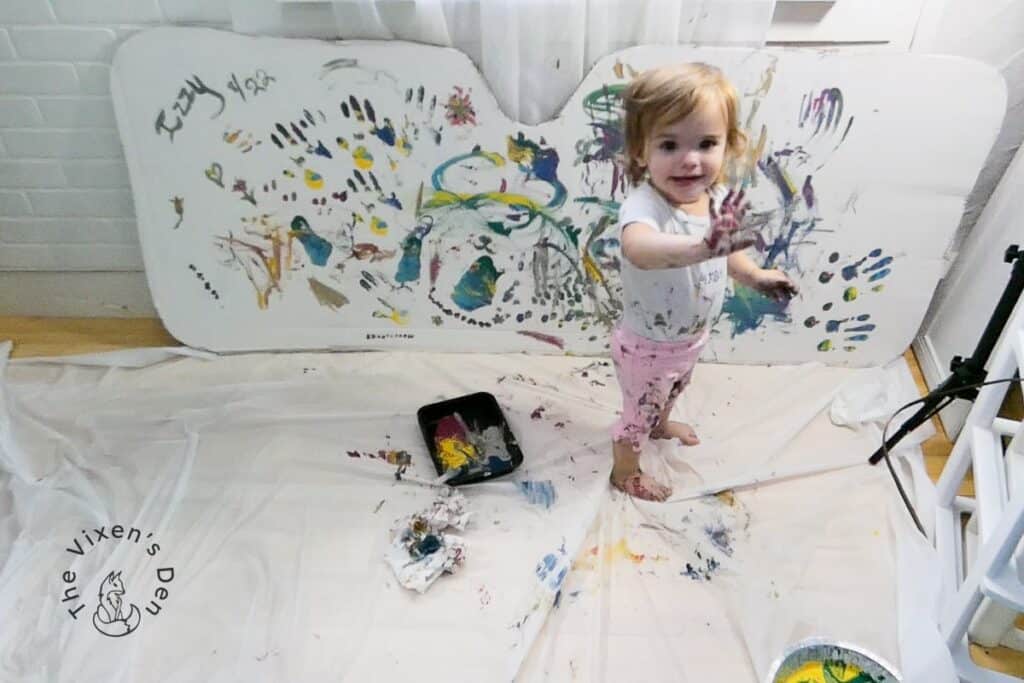
Painting with Toddlers
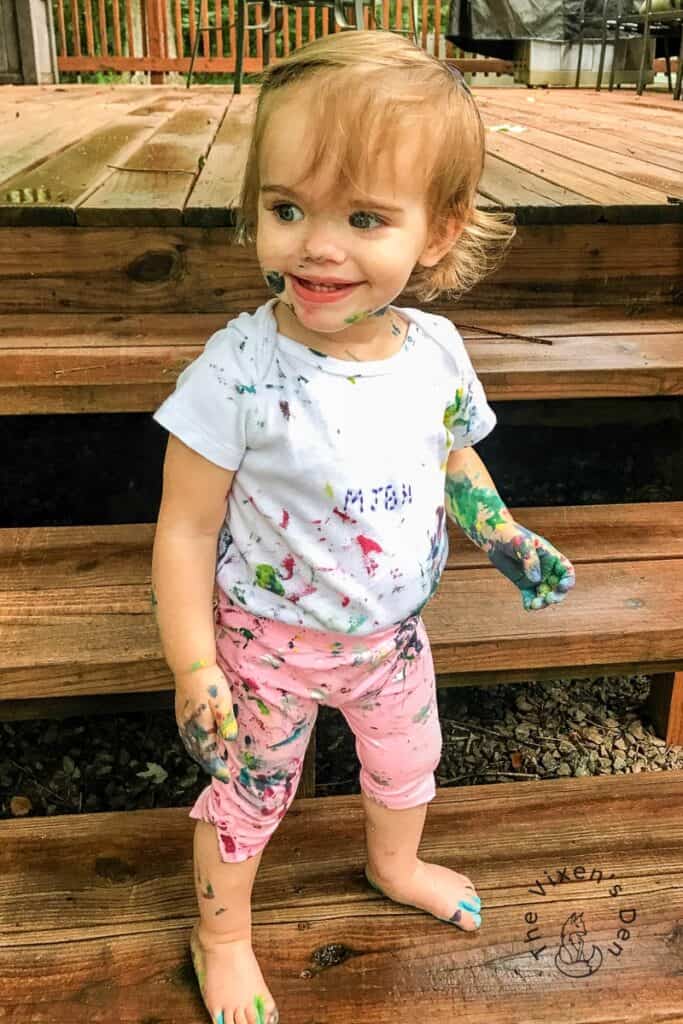
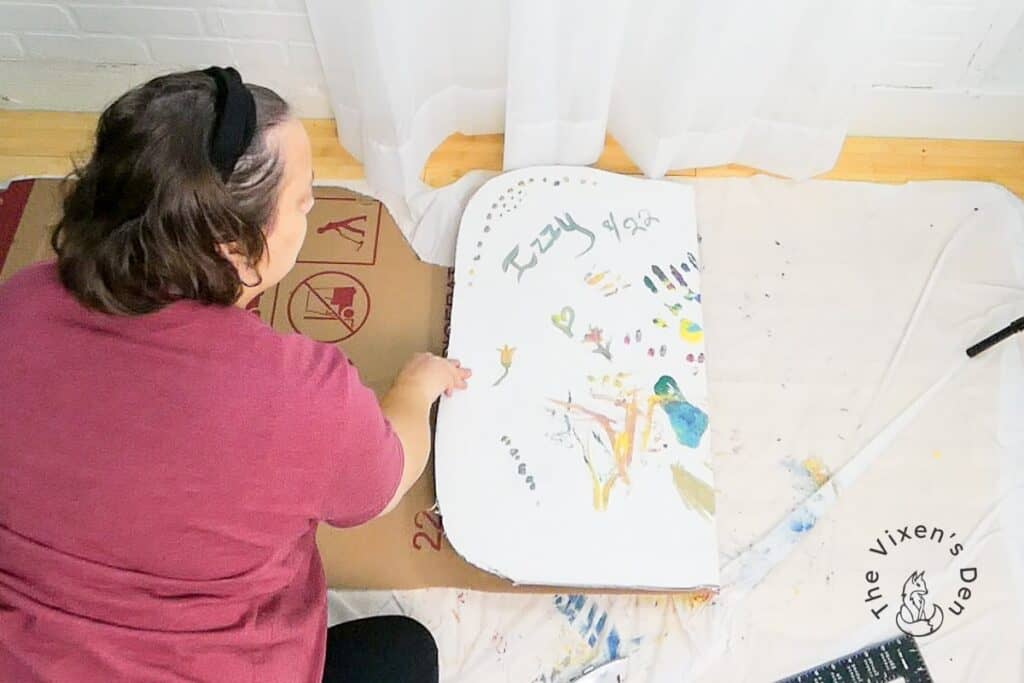
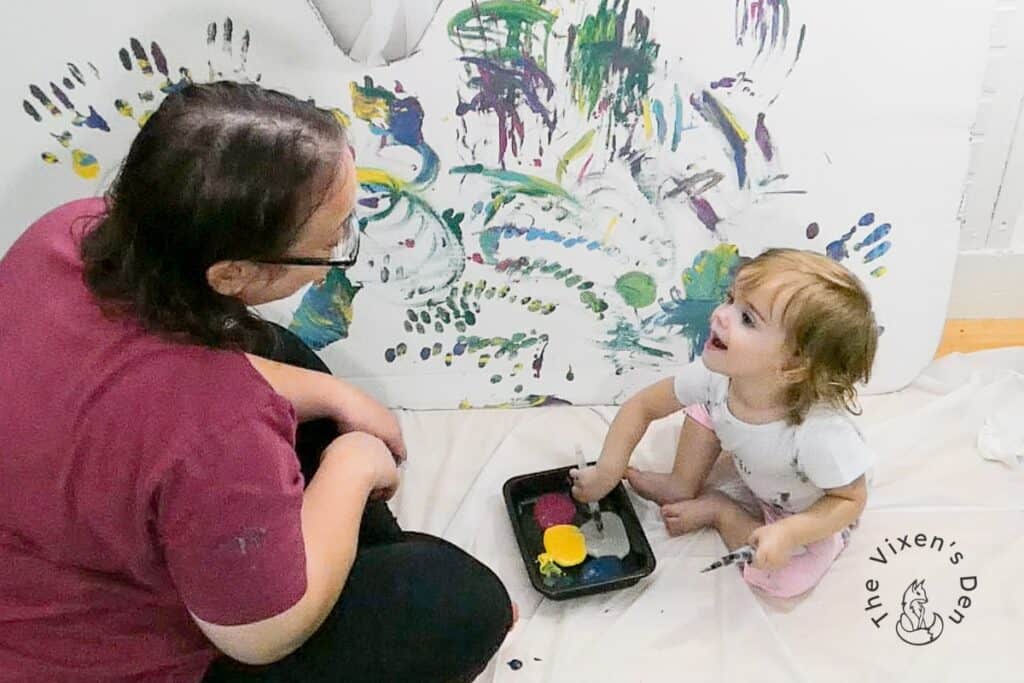
This was my granddaughter, Izzy’s project so I let her pick the paint colors.
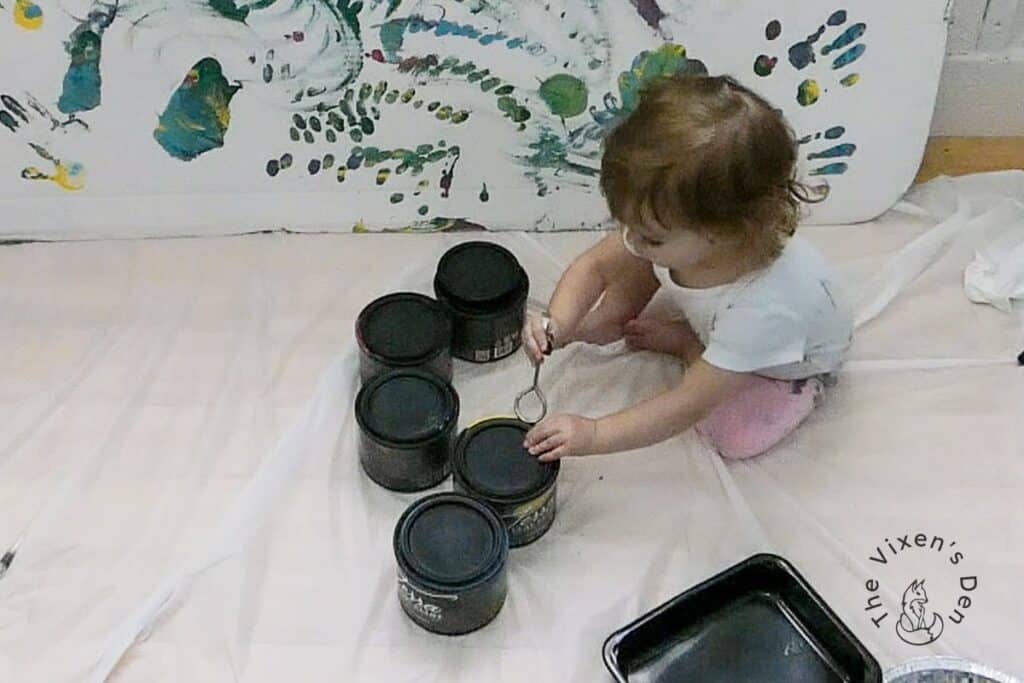
The Terra Clay paint colors are deeply pigmented with bright rich colors that grab the attention of little ones. After she selected her colors, I scooped a spoonful of each paint color into a pie pan. Then it was time for her first painting adventure!
We started with finger painting. She enjoyed smearing her hands around in the pie pan and wiping them on the canvas. She was definitely NOT thrilled, however, when I stuck her foot in the paint and tried to press it against the cardboard.
Hindsight is 20/20 Tip: This kiddo is VERY picky about her feet!
Izzy was over this whole painting thing after the foot incident, so we wrapped it up for that day. And because we were painting with a toddler and richly pigmented paints, we immediately grabbed a shower.
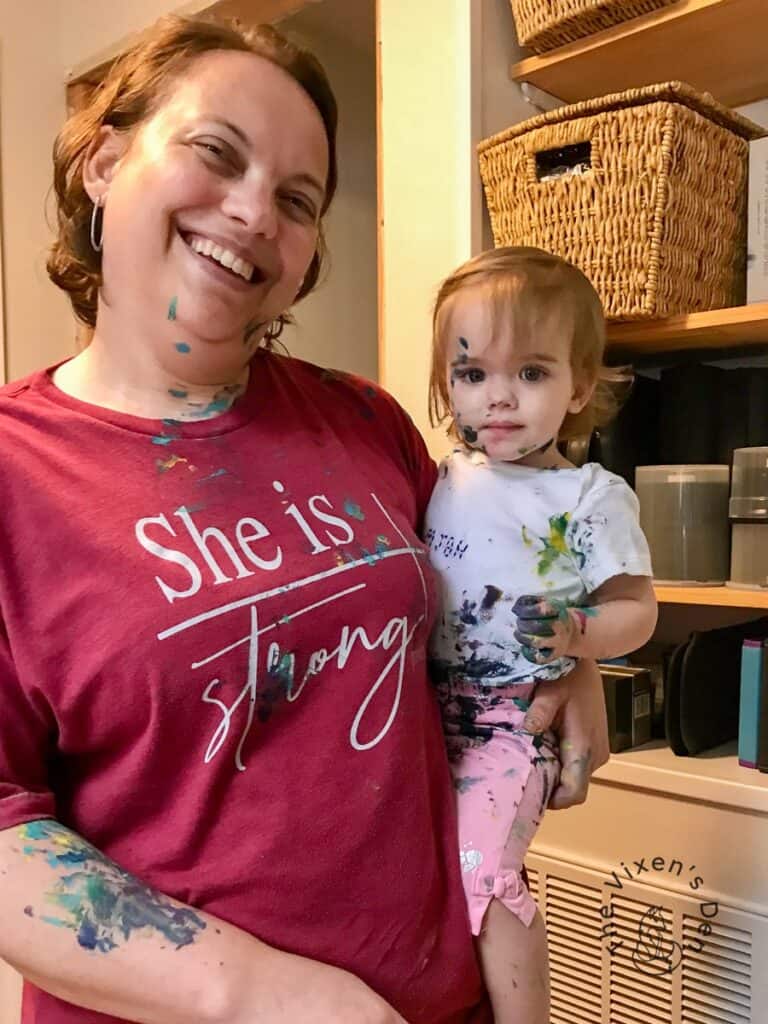
Hindsight is 20/20 Tip: Make sure you are both dressed appropriately and that you have a shower at the ready!
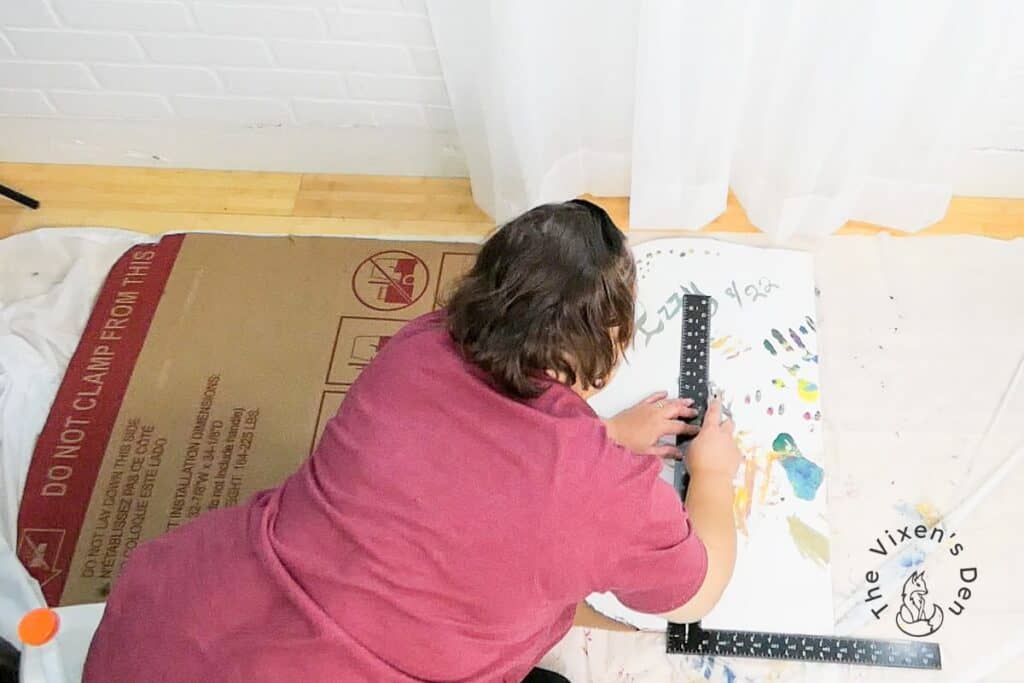
For our next painting session, we transitioned to water-filled brushes. She liked this option very much, scrubbing her brushes in the paint and happily slapping them onto the cardboard canvas. We had found her happy spot!
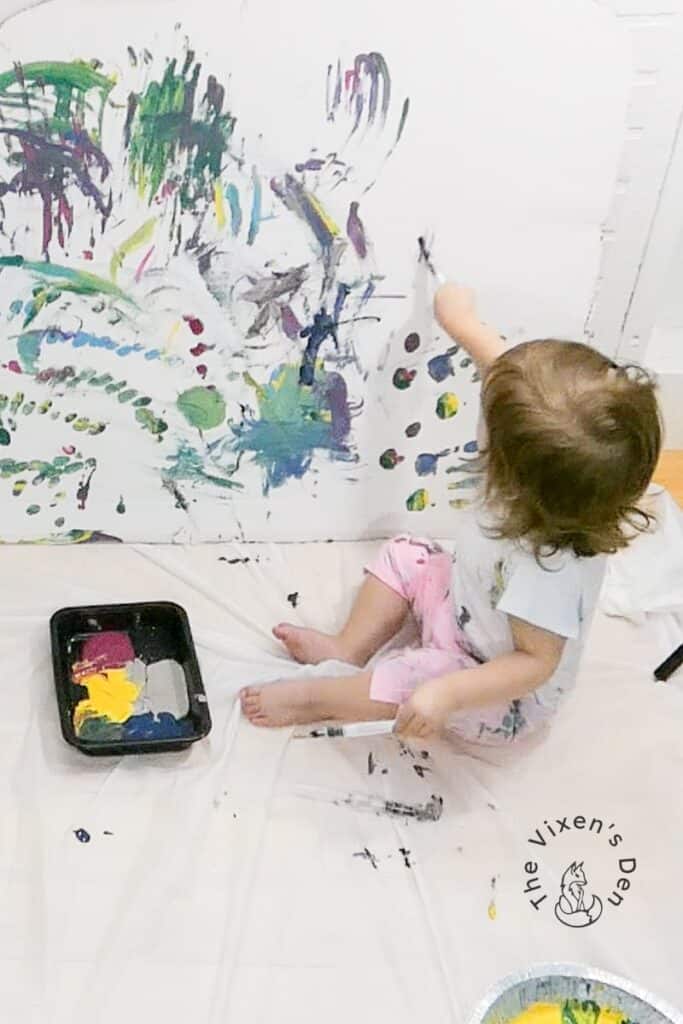
Izzy and I painted together for about 15 minutes before she was ready to call it quits and move on to something else. That’s a pretty good attention span for a 15-month-old!
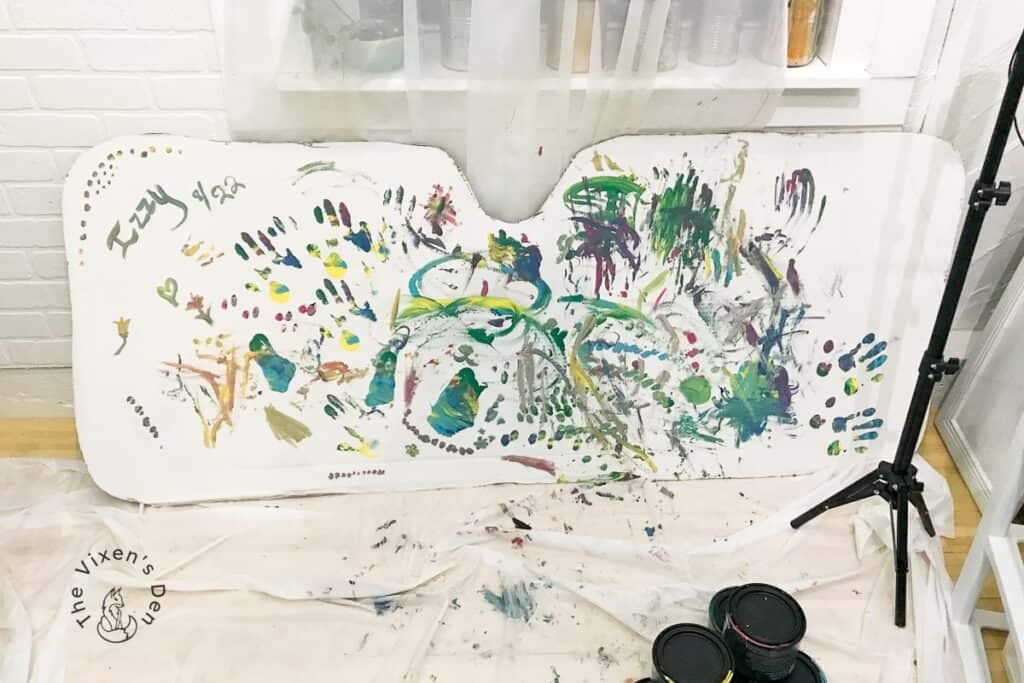
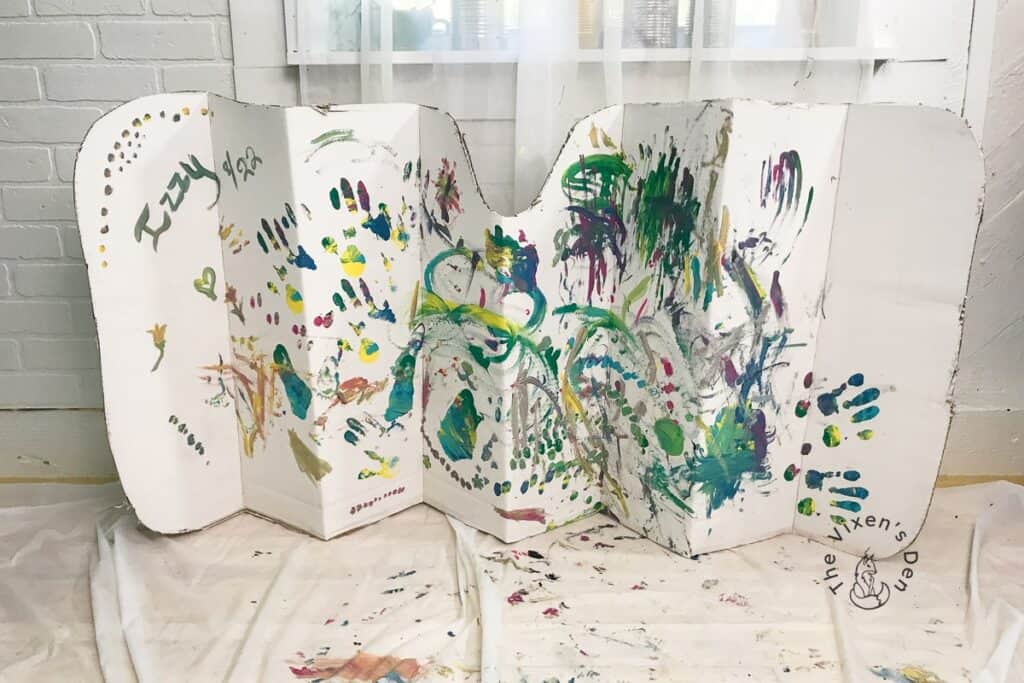
After one final painting session, we decided that her first masterpiece was complete.
Seal the Project
To seal in Izzy’s first masterpiece, I used a mini angle brush to apply two coats of Terra Seal. This sealer provides a water-resistant matte finish to protect the underlying artwork. I waited 30 minutes between coats and then allowed two days of drying time before moving on to the next step.
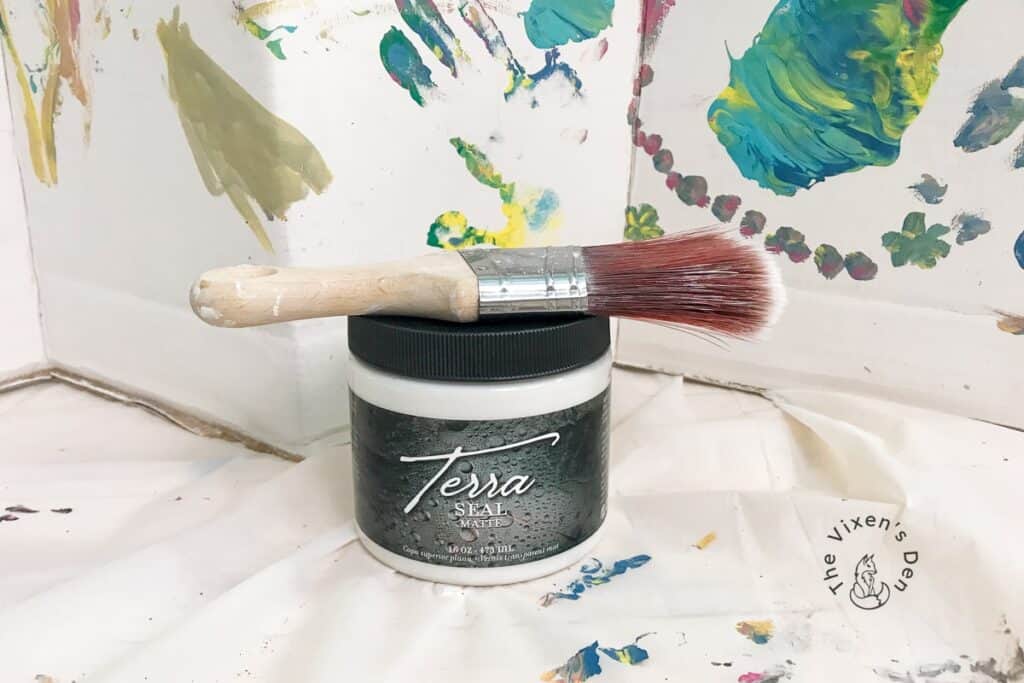
After 21-30 days, Terra Seal is fully cured and water resistant.
Fold the Cardboard Sunshade
If you took my advice and bought a premade cardboard sunshade, then you can skip this part. For those of you who stick around for the misadventures part of these posts, this section is for you:
It started off pretty well. I measured and marked the center of the cardboard, striking a line using a straight edge.
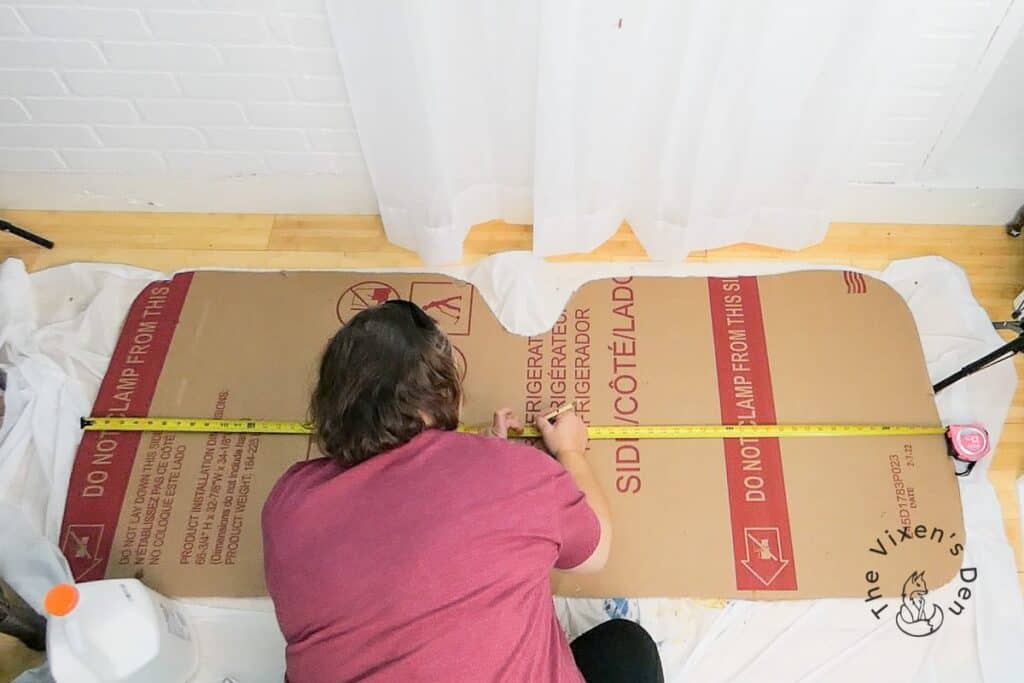
Then I scored the cardboard along the straight edge with a box blade. “Scoring” means that I just lightly cut through the surface of the top layer of cardboard. I did not cut all the way through to the other side. In fact, I didn’t even cut halfway through. The goal here is just to create a defined line to allow the cardboard to bend cleanly.
With the cardboard scored, I folded it in half.
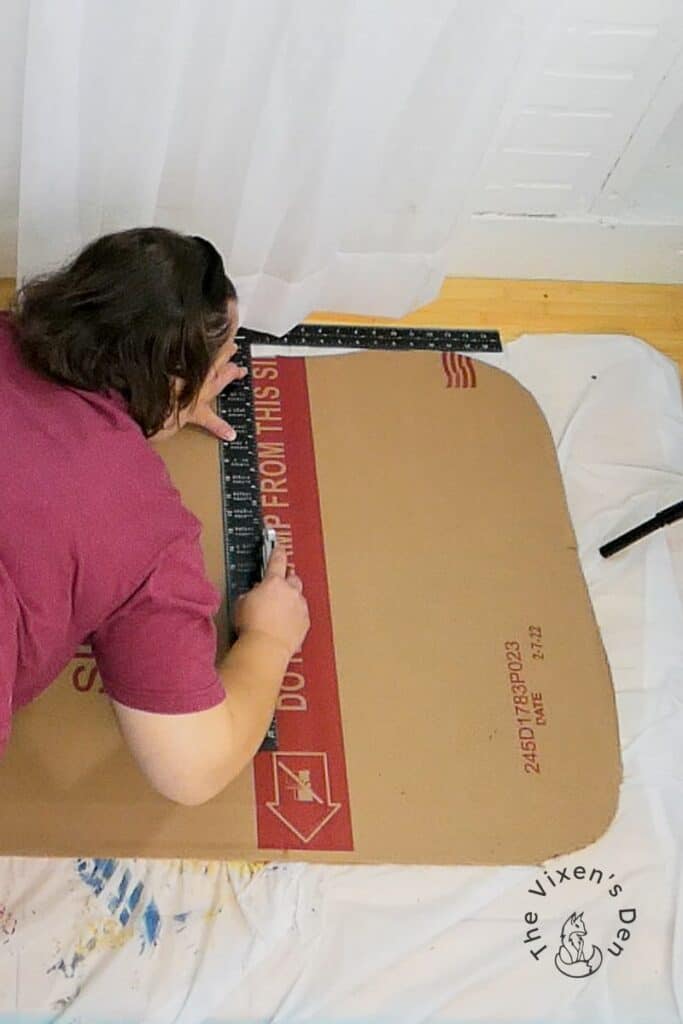
This is where things started to go a little sideways.
Instead of measuring from the center (you know, where I know that I have a straight line), I began measuring from the edge. Yes, the edge that curves downward.
Then I lined up my right angle straight edge against the wonky bottom.
I know. I’m shaking my head too.
So, I measured from the edge and struck some lines at about 18-inch intervals. I then lined up my straight edge and began scoring one side of the cardboard to create the fold lines.
Next, I folded all of those score lines and discovered that I had created the wonkiest, most misaligned accordion folds ever.
Happily, I learned from this mistake and measured the second half of the folds from the center outward, marking two spots on the same line and lining up the straight edge against the measurements. Following the same scoring and folding process as above, the final product was one half-lopsided sunshade.
A lovely representation of how some of these projects go.
Hindsight is 20/20 Tip: Always identify and measure from the straight edge, mark two spots, and use those lines to create your straight line or cut.
Create a Reflective Backing
Here’s another step that you can skip if you like. Since my previous sunshade was reflective (and I have a fascination with shiny things) it seemed appropriate to add a reflective backing to the new sunshade. What better way to do this than with aluminum foil?
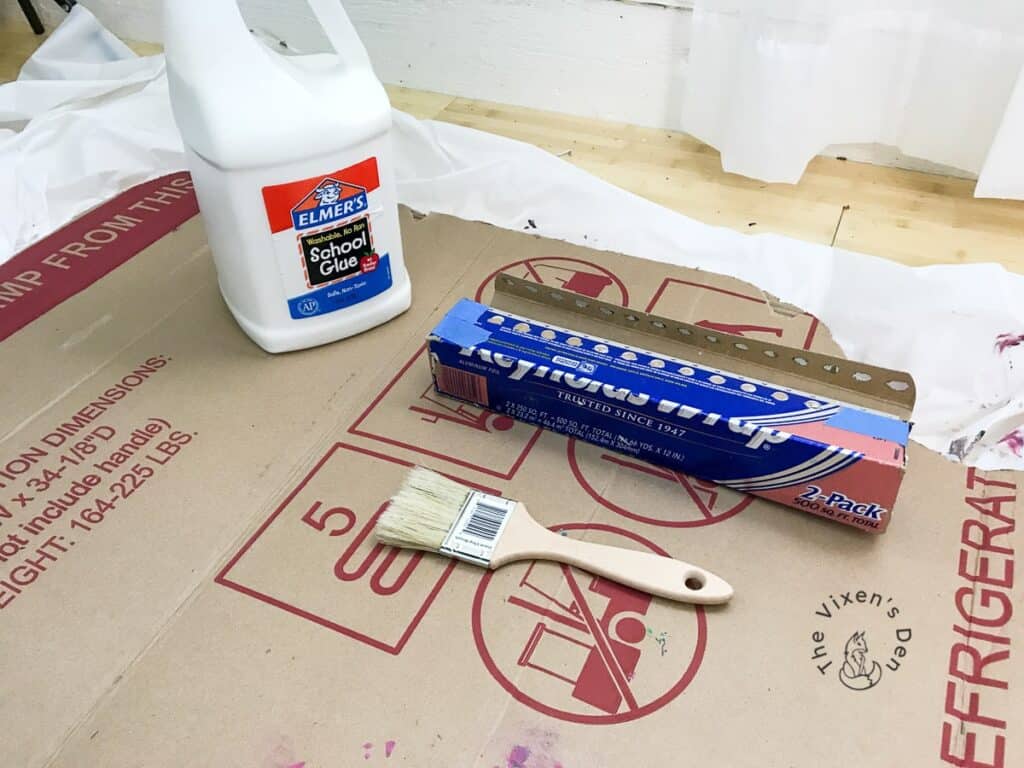
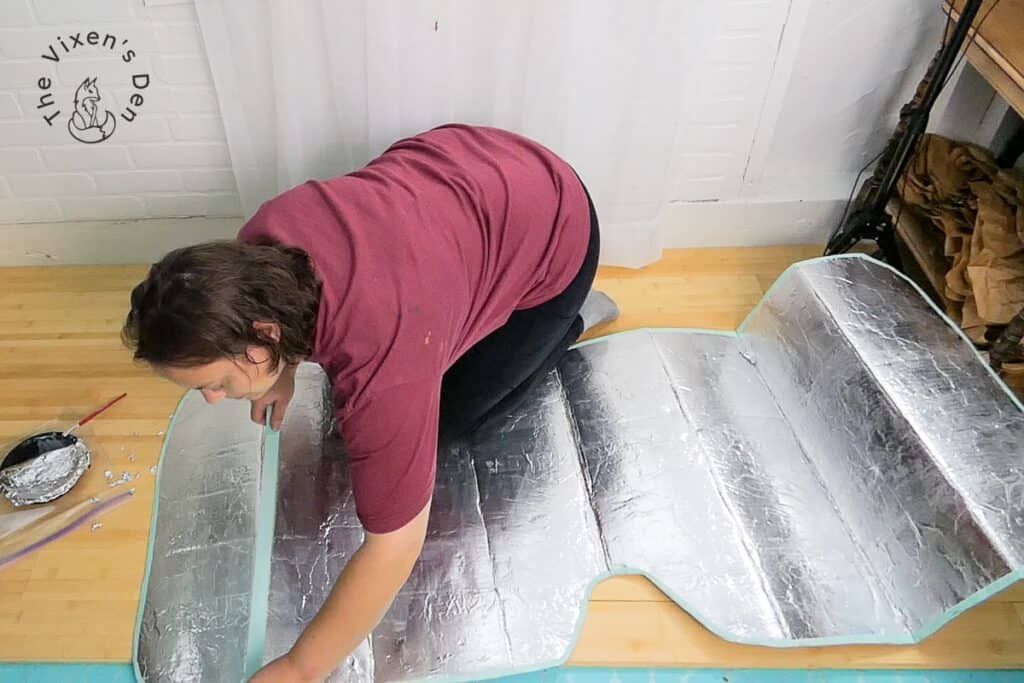
To the unpainted side of the cardboard, I applied Elmer’s School Glue using a chip brush and then pressed the aluminum foil into the glue, smoothing it out with my fingers. I left the aluminum in one long strip, folding it back on itself as I prepared the next section. I worked in sections of about 18″ by the width of the aluminum foil.
At the beginning of each new row, I overlapped the foil over the previous row. Once all of the rows were glued down, I trimmed the edges of the foil flush with the cardboard.
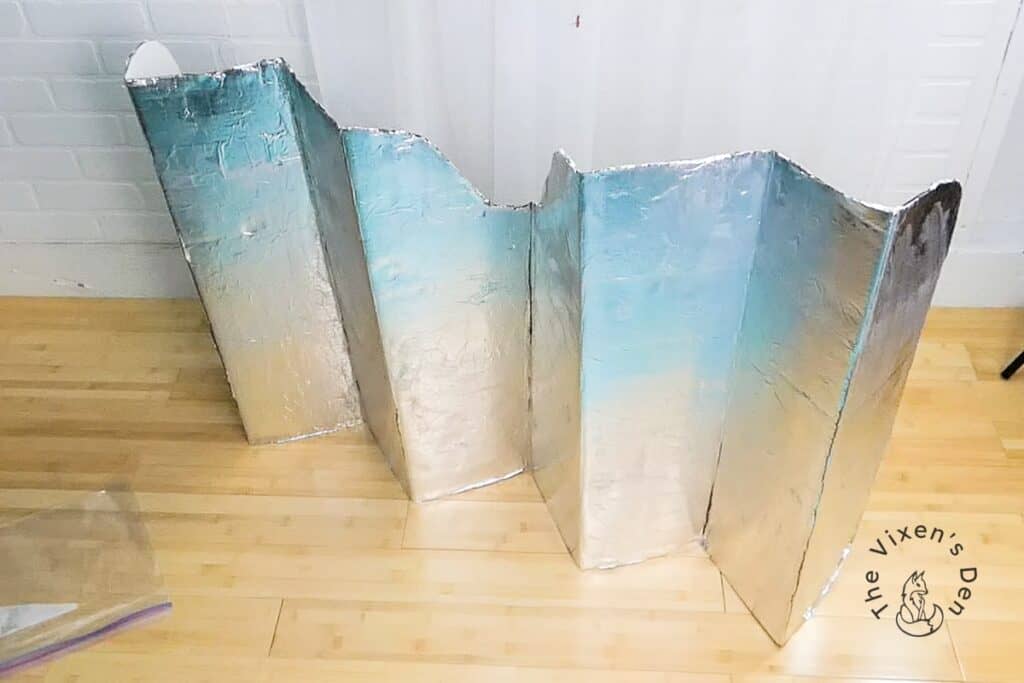
Hindsight is 20/20 Tip: The final product would have looked nicer if I had run the aluminum foil vertically instead of horizontally.
Finish the Sunshade Edges
The edges of the cardboard and foil looked a little rough with some straggly edges, so I grabbed some decorative Scotch tape to tidy them up.
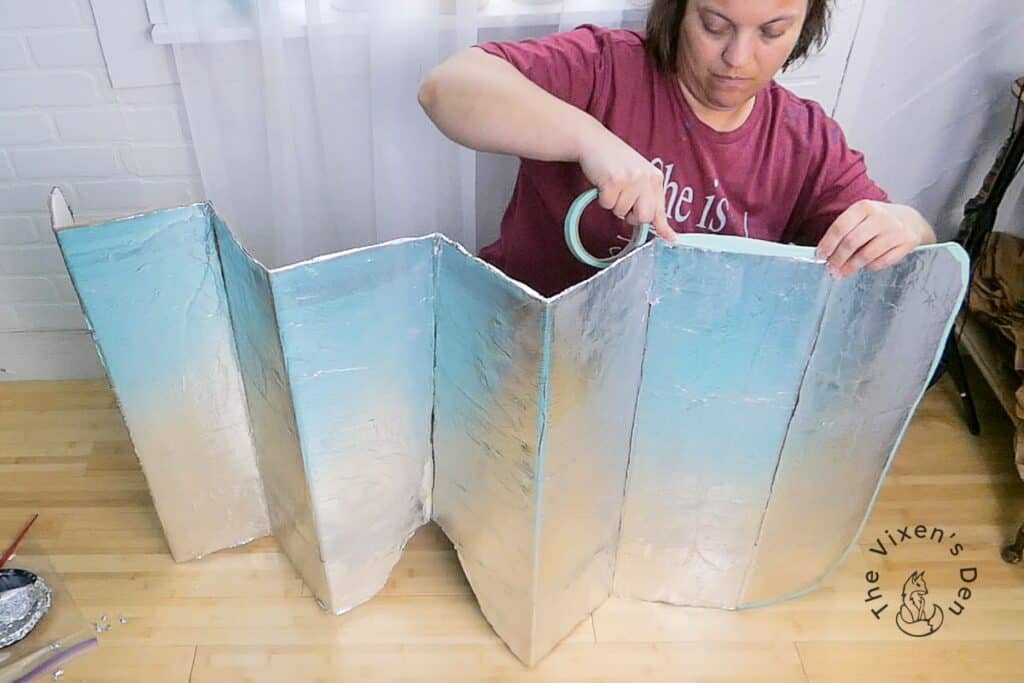
I centered the length of the tape straddling the edge of the cardboard. Pressing down firmly on either side, I covered the edge and both sides of the cardboard, creating a clean decorative frame. I wrapped the tape all around the edge of the cardboard, creasing the tape into triangles in the corners.
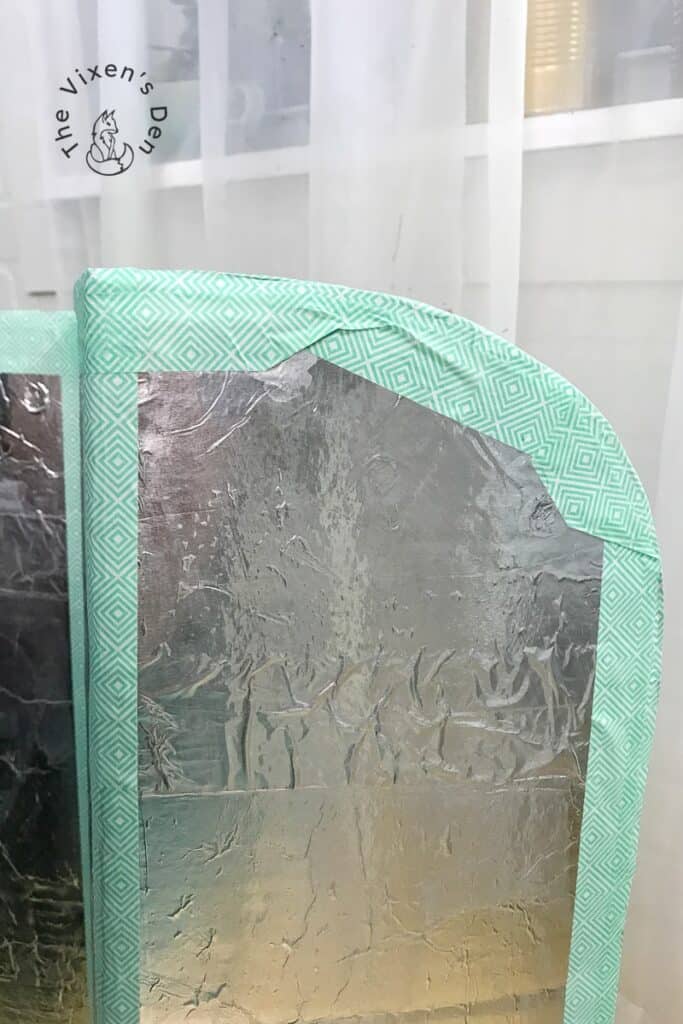
Once the edges were complete, I covered up some of the tears in the aluminum foil and reinforced the folds. To do this, I ran a strip of tape along the fold from one edge to the other, pressing the tape firmly against the foil.
This step probably wasn’t necessary, but it was certainly cute!
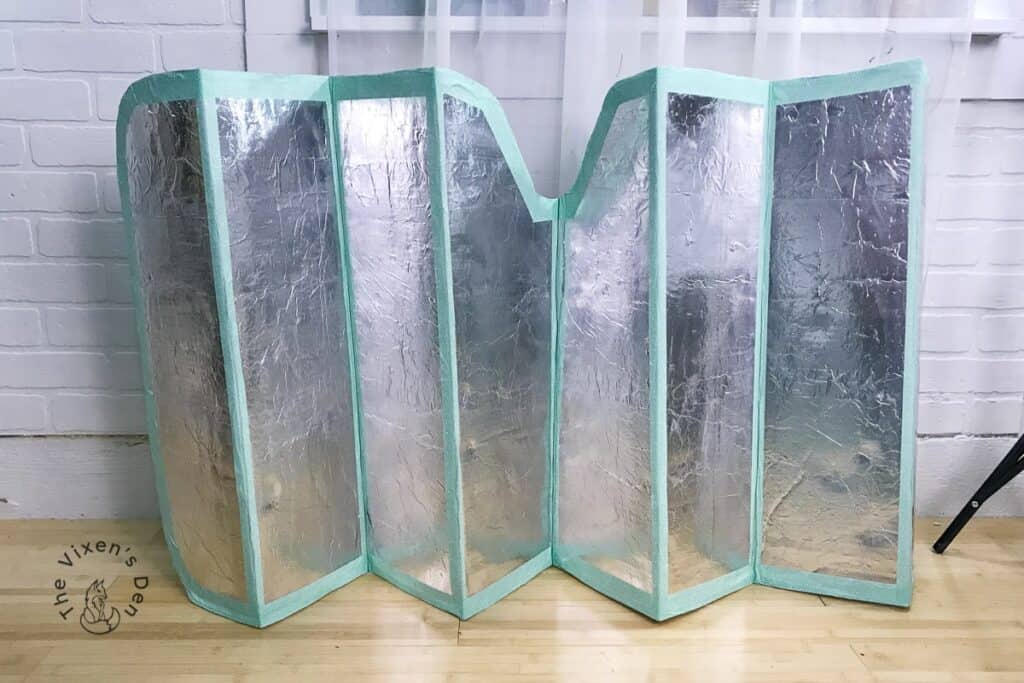
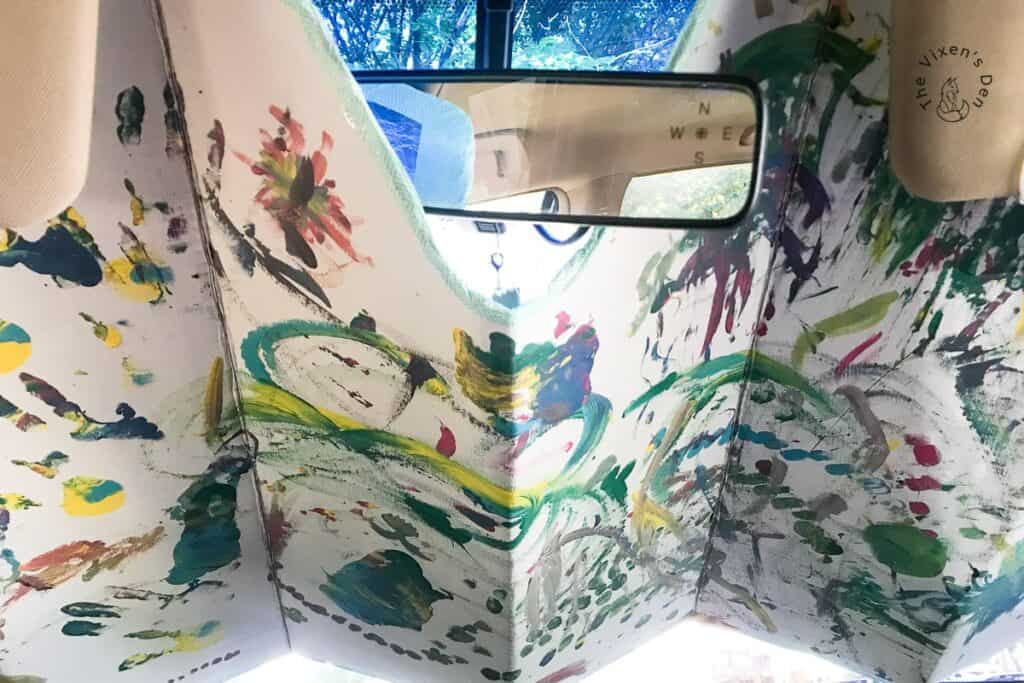
Final Reveal
Here is the final result of Izzy’s first painting job!
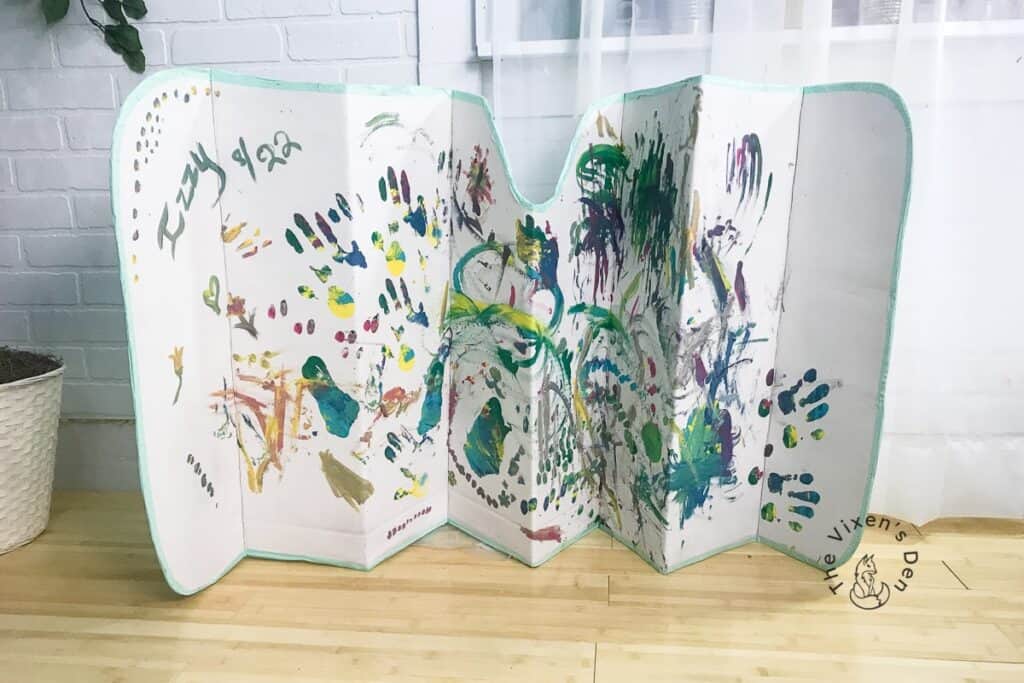
Unfortunately, this cardboard is a bit stiffer than I imagine a purchased cardboard sunshade would be, but I did manage to get it to fit. Whew!
Hindsight is 20/20 Recap: So, would I create this project again?
Absolutely! But, I would purchase a premade sunshade and then customize it with paint. I still think it’s a great way to create functional artwork, and that it would make a great gift for a parent or grandparent.
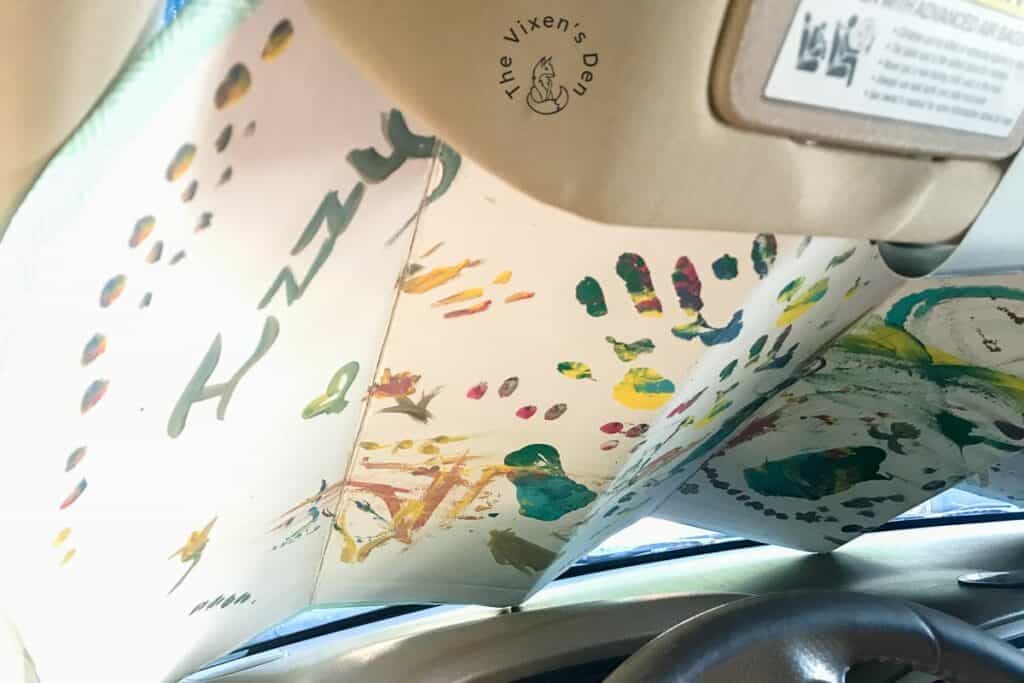
What a cheerful way to start and end each day!
Dixie Belle’s Terra Clay Paint was the perfect paint for Izzy’s first project. With bright richly pigmented colors and a thick texture, it was easy for her to use.
We had so much fun painting together. I can’t wait to get her started on her next project! What is your favorite creative activity to share with your toddlers? Share in the comments below.
Thank you so much for stopping by! Check out the other amazing projects at the link parties below. I know the hostesses will appreciate your visit and comments.
Until next time, have a beautiful and blessed day!


Linked up to these lovely link party hostesses at:
Don’t forget to sign up so you hear all about the next misadventure! Until then, you may also enjoy this Baby Mobile makeover or this Dresser upcycle.
Firstly, Babe, it was so nice to see pics of you AND Izzy! 🤗 (messy or not)
What a fun painting project for her.
In a few years, she’ll probably be helping you with ALL your crafts!!
As far as the auto sunscreen goes, I’m glad you made it reflective.
Those are supposedly the most effective.
I’ve never had a sunscreen. Most of the time now, my car has tree shade in the driveway. And it stays there a lot.
Thanks, Beck, for your misadventure project❣️❣️