Cabinet Door Upcycle to a Hat Rack
I love a good upcycle! Transforming something unwanted into a piece that is both beautiful and functional is definitely my jam. So when I had an opportunity to join this Cabinet Door Challenge with a group of talented Dixie Belle bloggers, I was all in! This collaboration also helped solve the problem of where my guy could hang his hats without taking up all of the hooks on the coat rack. Talk about a win-win!
This post is sponsored by Dixie Belle Paint Company. While they provided some of the products for this project, all of the opinions are my own. Follow this affiliate link to see all of their amazing products!
Keep reading to see how I upcycled one of these orphaned cabinet doors into a functional hat rack. Then visit the links at the end of this post to check out the other amazing cabinet door transformations!
THIS POST CONTAINS AFFILIATE LINKS TO PRODUCTS THAT I HAVE OR WOULD USE.
AS AN AMAZON ASSOCIATE, I EARN FROM QUALIFYING PURCHASES AT NO COST TO YOU.
YOU CAN SEE MY FULL DISCLOSURE HERE.
Tools and Materials
Tools
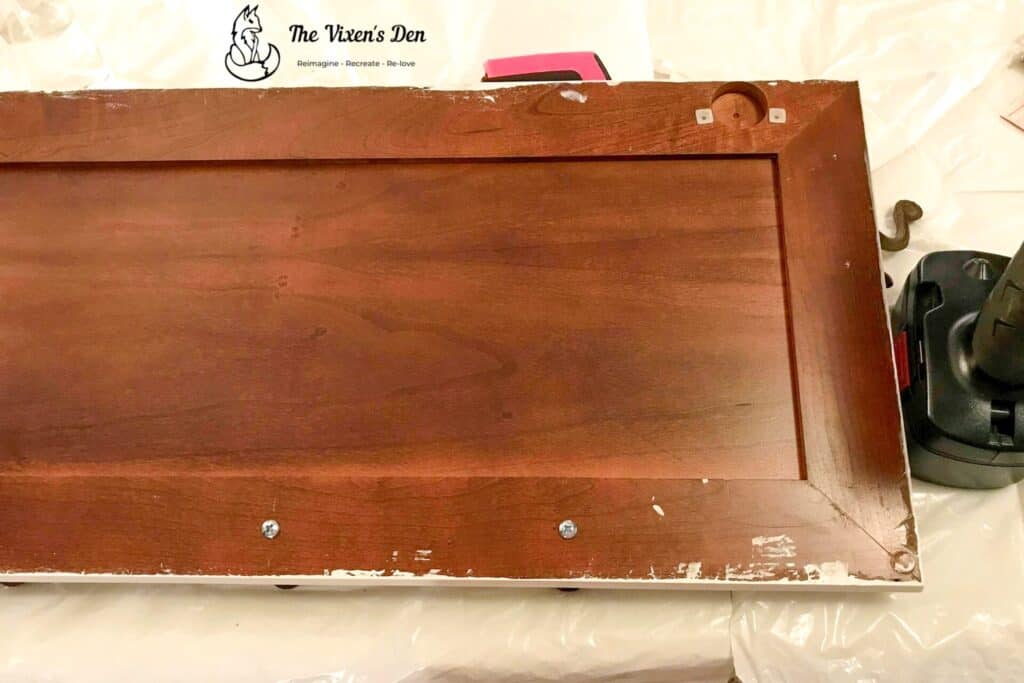
Cleaning and Prepping
Every successful project starts with a thorough prep. A thorough cleaning is the first step in that process. I like to give all of my pieces a thorough scrubbing with
I always thoroughly rinse my pieces in the bathtub or with a hose to make certain that all of the White Lightning is removed. Finally, I dry the project with a towel and then allow it to air dry for a few hours to overnight, depending on how much water has soaked into the piece.
Ever since I experienced bleed through on the Alice Table, I begin every dark wood project with a coat of
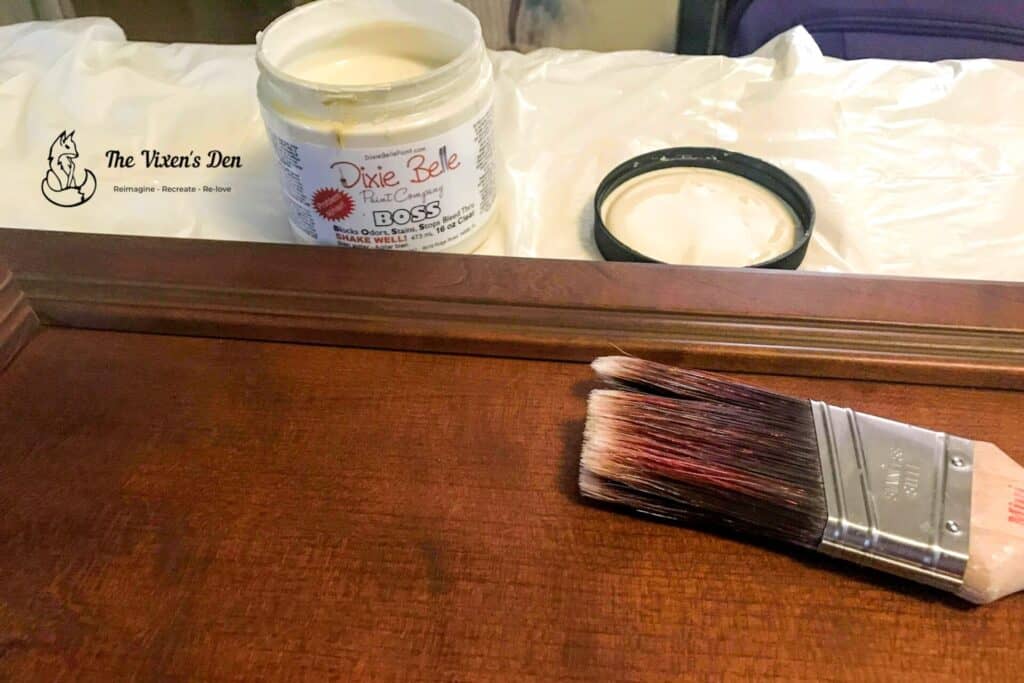
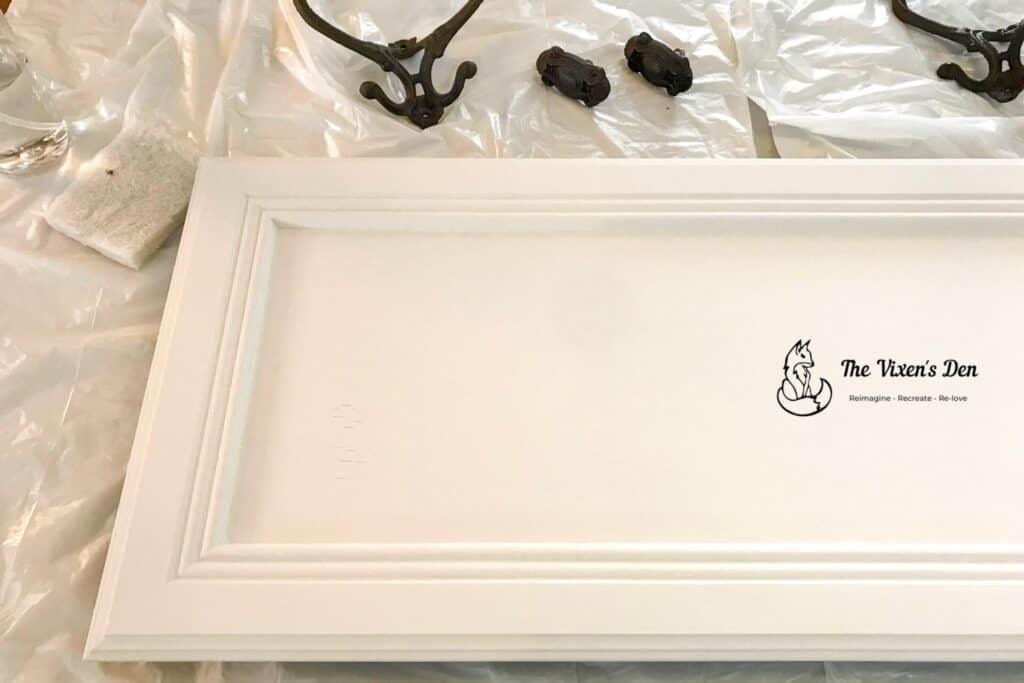
For this project, I only had Boss in clear on hand. I applied it with the Dixie Belle mini-angle brush. You can see the nice matte sheen from the primer. It’s the perfect foundation for paint!
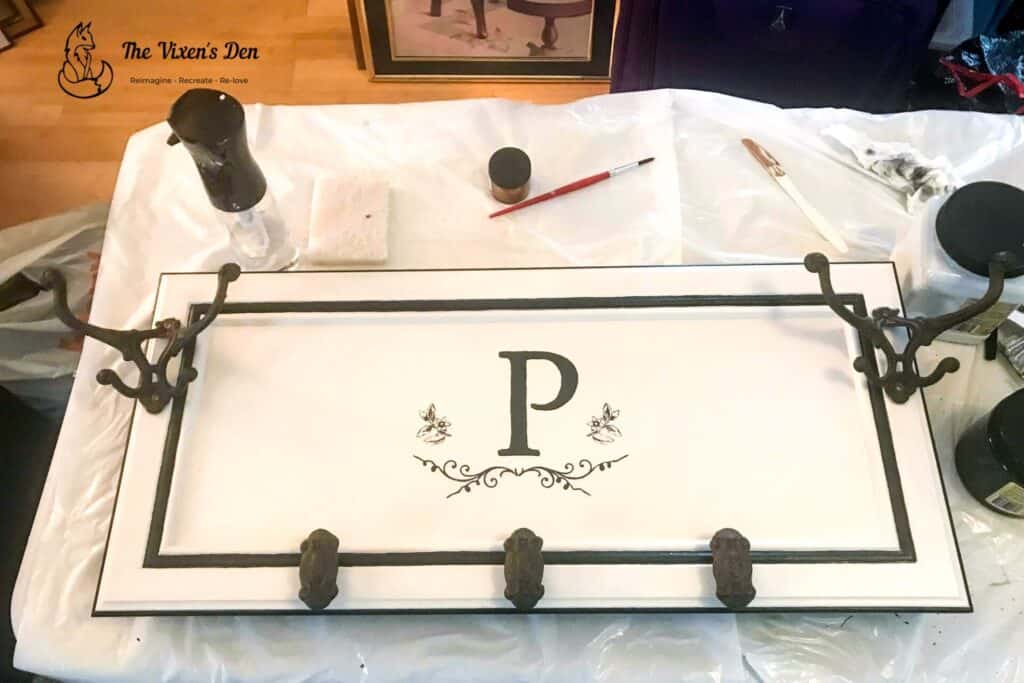
Painting the Cabinet Door Hat Rack
One of my favorite Dixie Belle Chalk Mineral Paint colors is
Pro tip: Chalk paint is a completely different beast from latex or acrylic paint. The best way that I can describe it is that it’s “drier.” In order to apply chalk paint smoothly, I always mist water onto the surface of the project and the paintbrush. The best misting bottle that I’ve used is
Adding Details
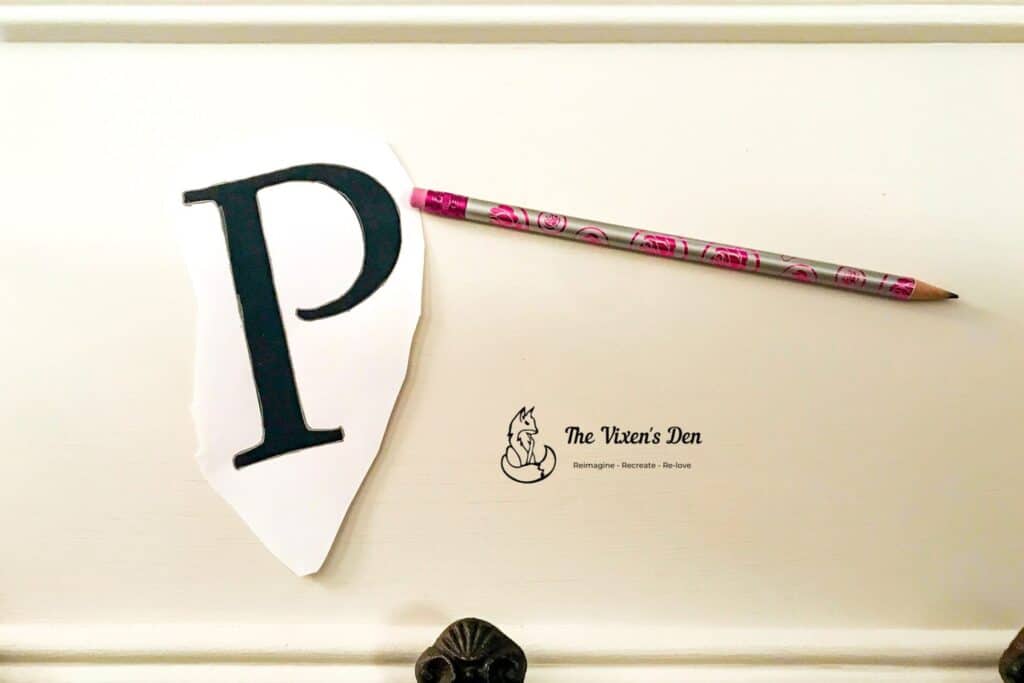
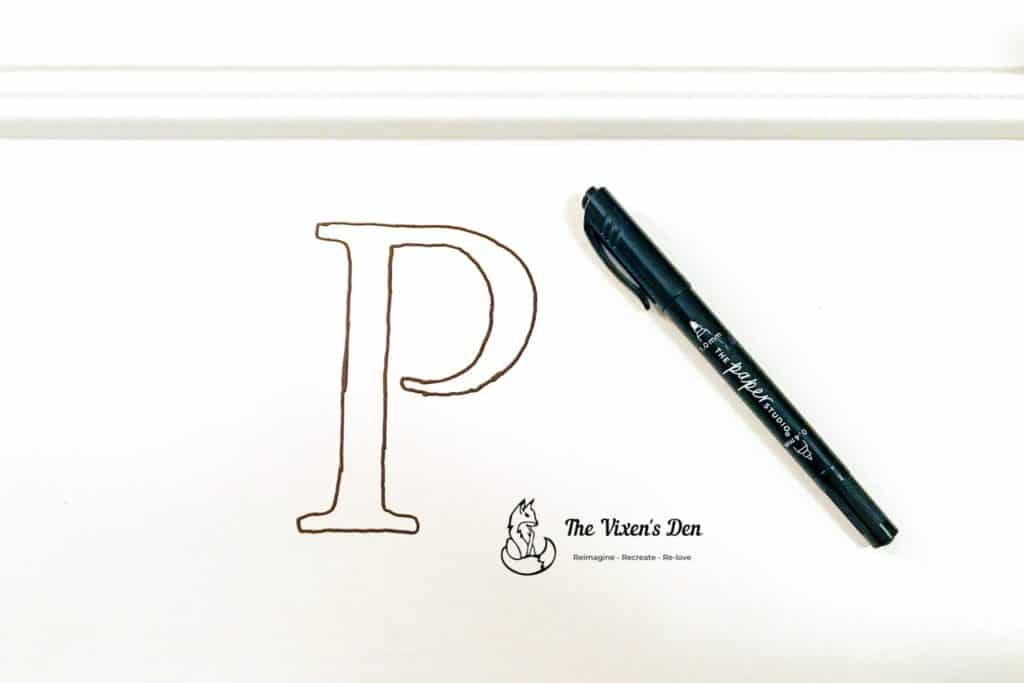
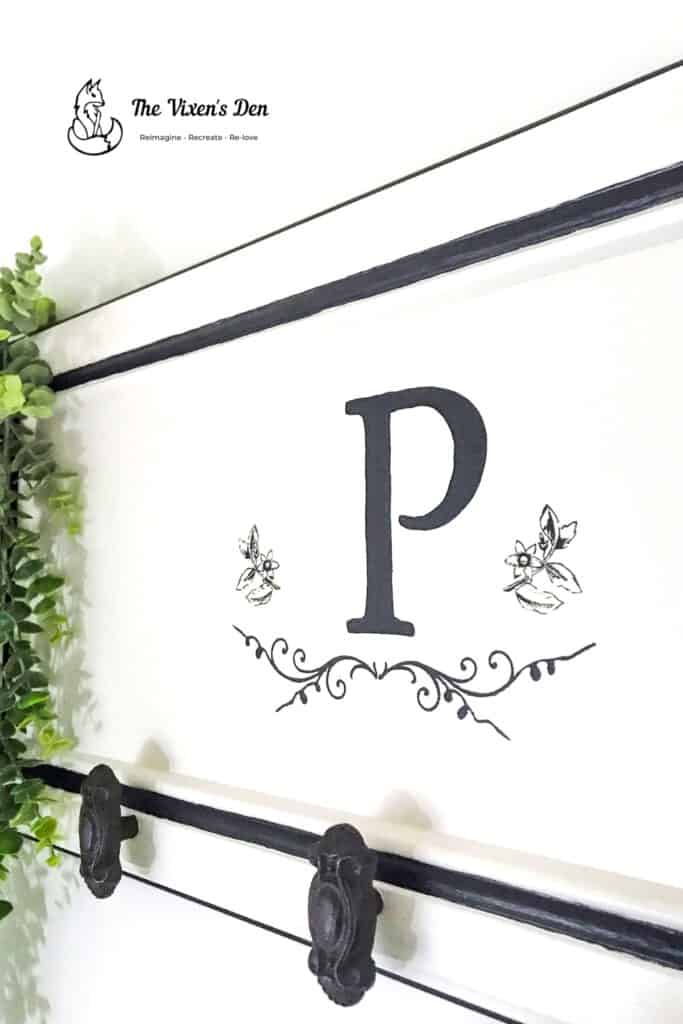
Once dried, the cabinet door was a blank canvas just waiting to be personalized! First, I visited Canva to select a font for the monogram. I printed out the monogram, lined it up with the center of the panel, and then traced the edges with a pencil. It’s a little hard to see, but it left enough of an impression that I could then trace the indentation with a permanent pen.
Once the monogram was in place, I found a silkscreen or adhesive mesh stencil from my stash that had some interesting details. I painted the stencil in
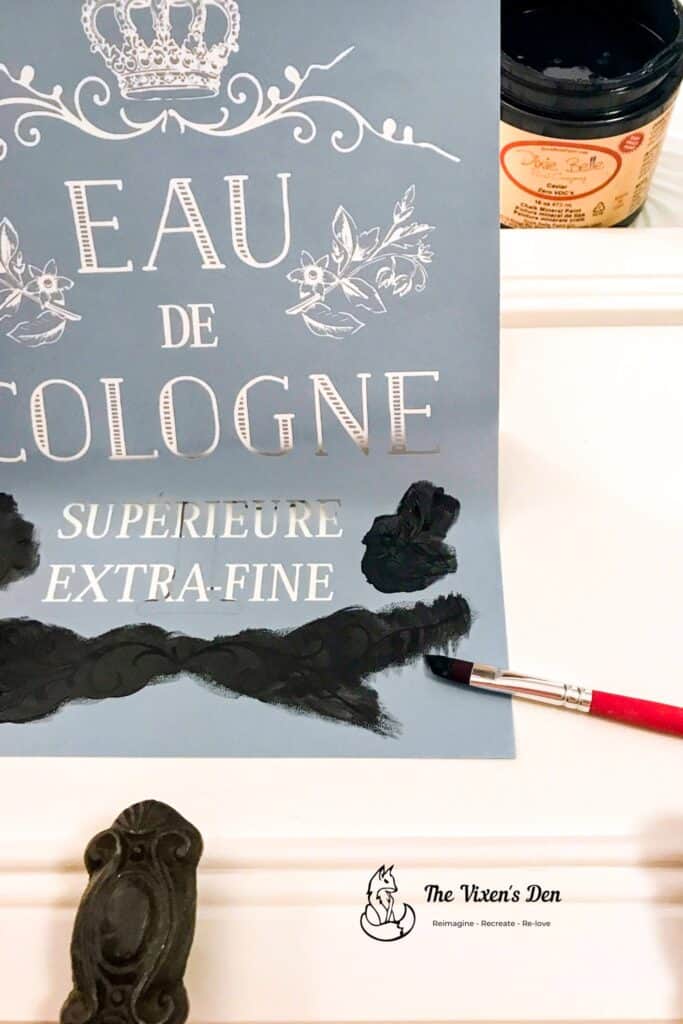
Pro tip: Unfortunately, this stencil is now discontinued, but Dixie Belle has a lovely collection of
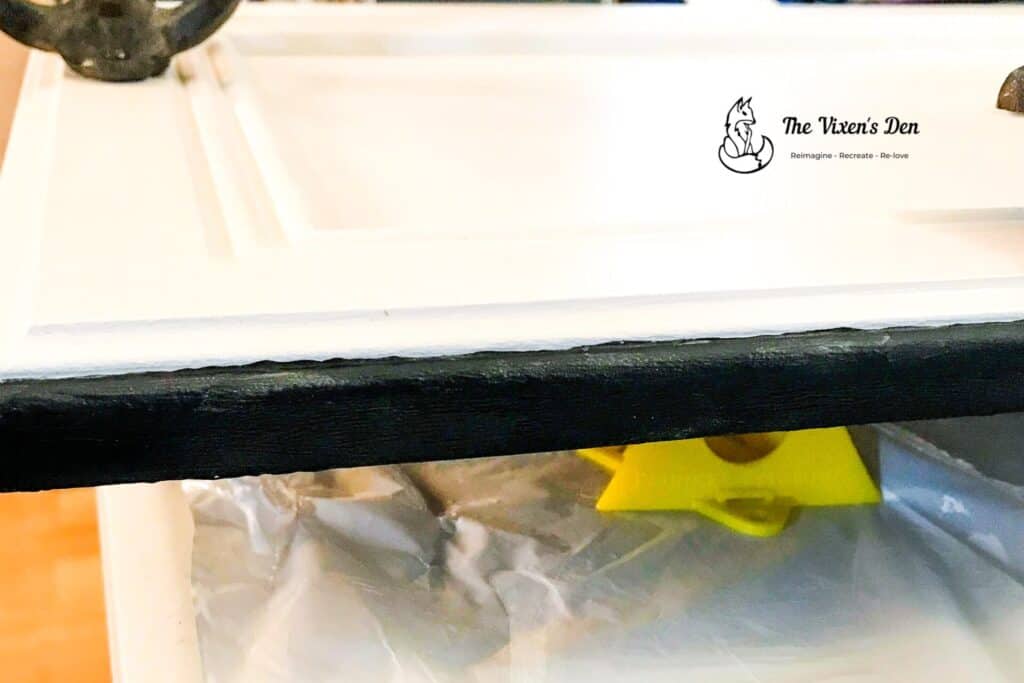
Once the details were added, I finished painting the monogram in Caviar using the angled artist brush. Then I painted the outer edge of the cabinet door as well as one of the inner ridges.

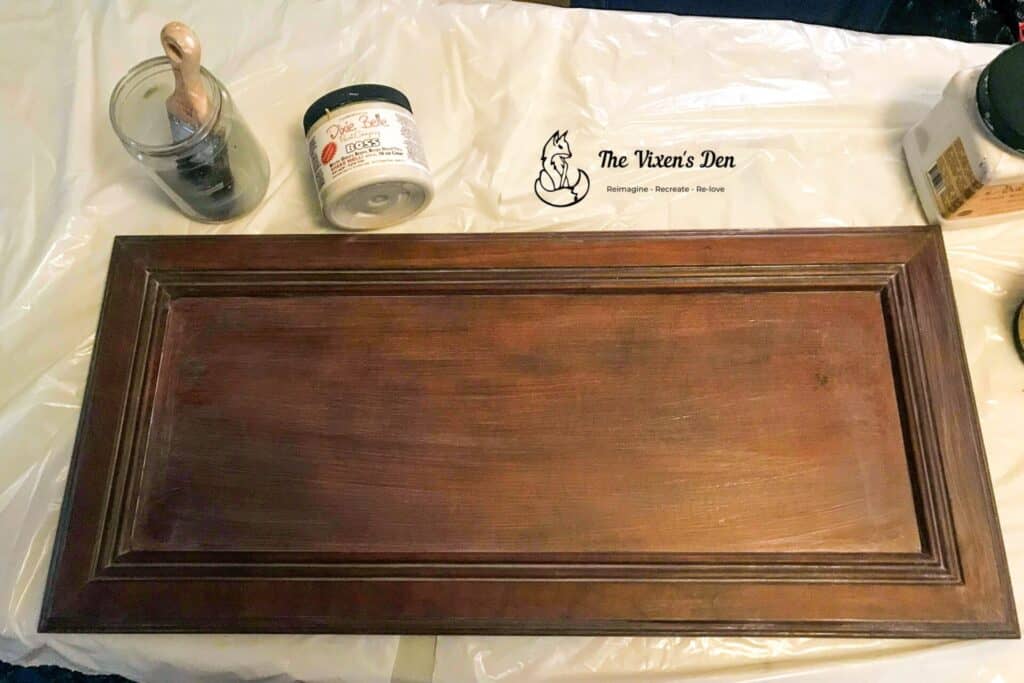
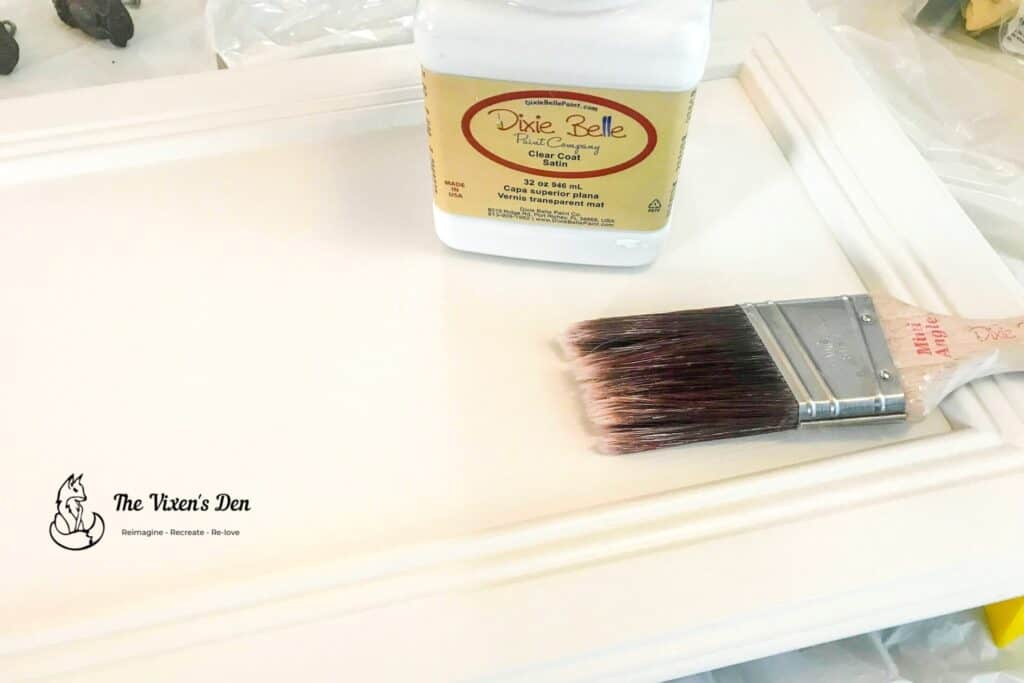
The project dried overnight and then I applied
Adding Hardware
Adding Hooks and Knobs
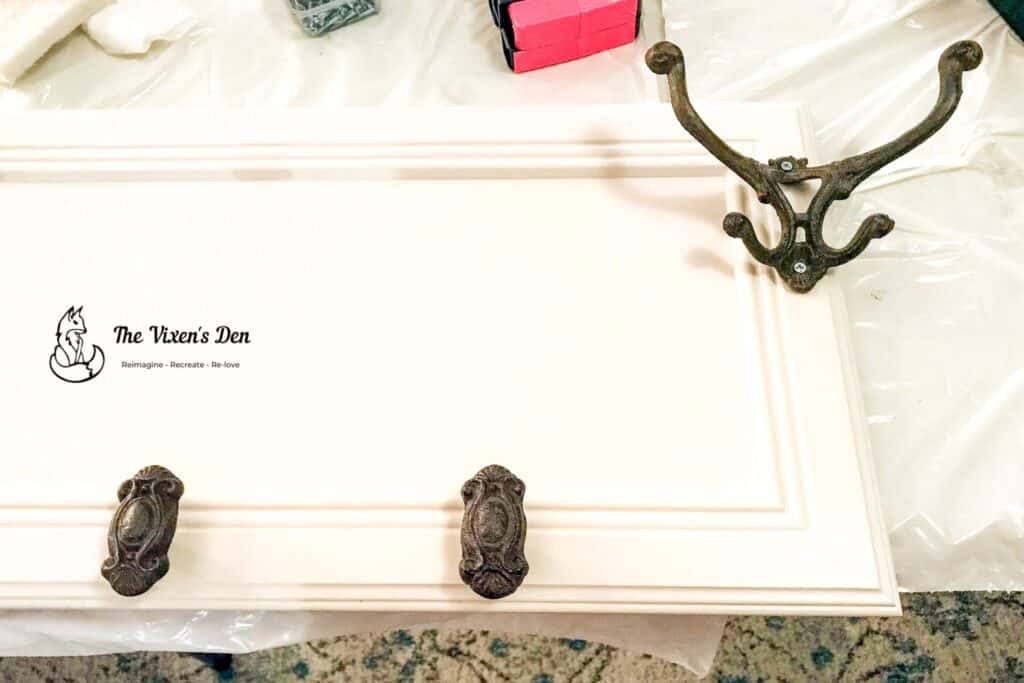
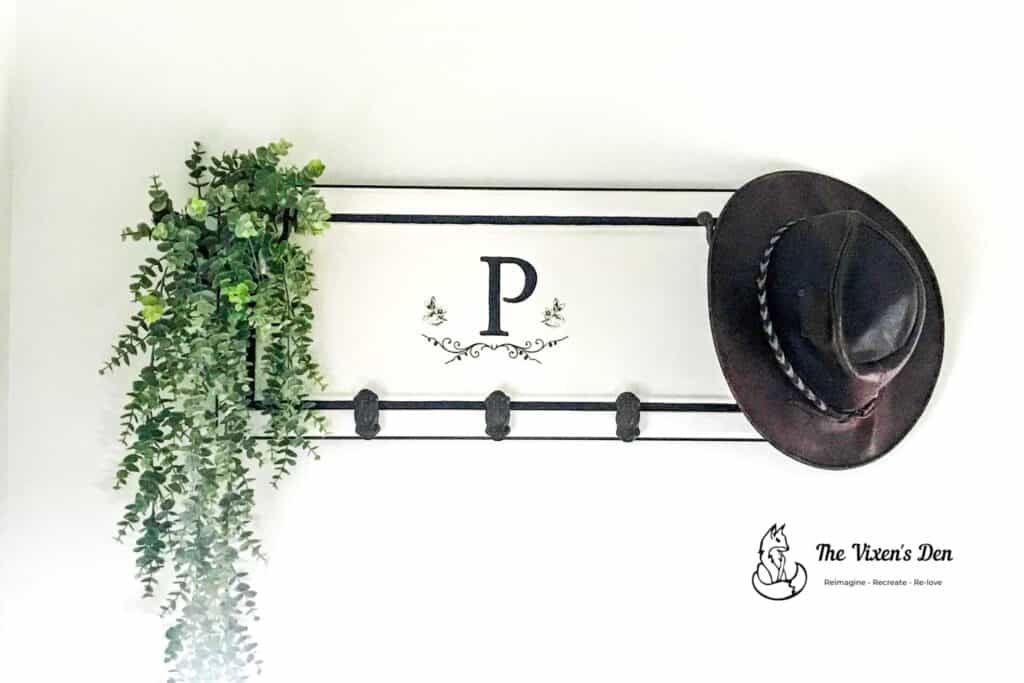
These beautiful hooks were a Hobby Lobby find. I love their rotating 50% off sales! We chose two long hooks for the sides and three cabinet knobs for the bottom. Hardware was not provided with the long hooks, and I had to purchase new hardware for the knobs.
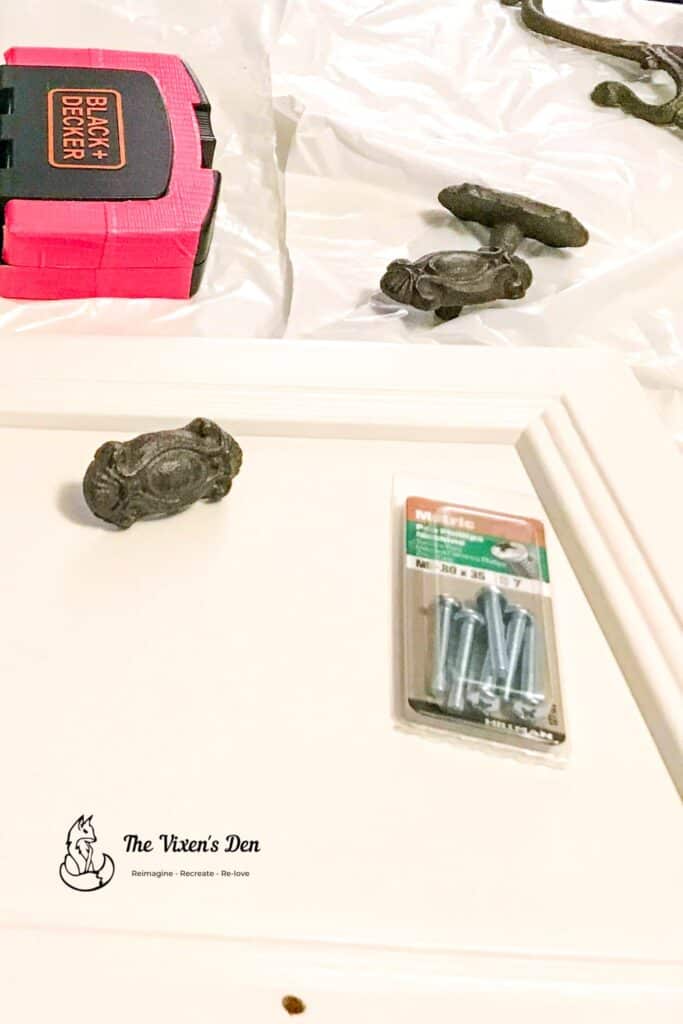
Pro tip: Take your hardware with you so that you can test the screws to make certain they will screw into the hole before purchasing.
The long hooks were simple to attach. I measured to center and offset the hooks from the top, then used the drill to install them using four 1-inch #6 wood screws. The knobs, on the other hand, required a bit more prep.
For this step, I grabbed my trusty battery-powered drill and drilled a hole with a 3/16″ drill bit to accommodate the M5-0.8 x 30 machine screws. The hole was snug, so I used the drill with a phillips drill bit and driver guide to install the machine screw from the back of the cabinet door until it was just flush with the front. Then I placed the knob in the position that I wanted it to stay on the front of the door and held it in place while I finished installing the machine screw from the back.
Pro tip: Set the drill to a low power setting so that it doesn’t twist the hardware and/or strip the screw during the installation.
With the hooks and knobs attached, it was time to add the hanging hardware!
Adding Hanging Hardware
To hang the cabinet door turned hat rack, I chose a simple french cleat system. It does create more holes in the wall, so this would not be a renter-friendly solution, but it is great for hanging heavy pieces securely and evenly. It’s also very easy to take a piece down and rehang it. This is helpful when you’re deep cleaning, repainting, or even swapping out seasonal decor.
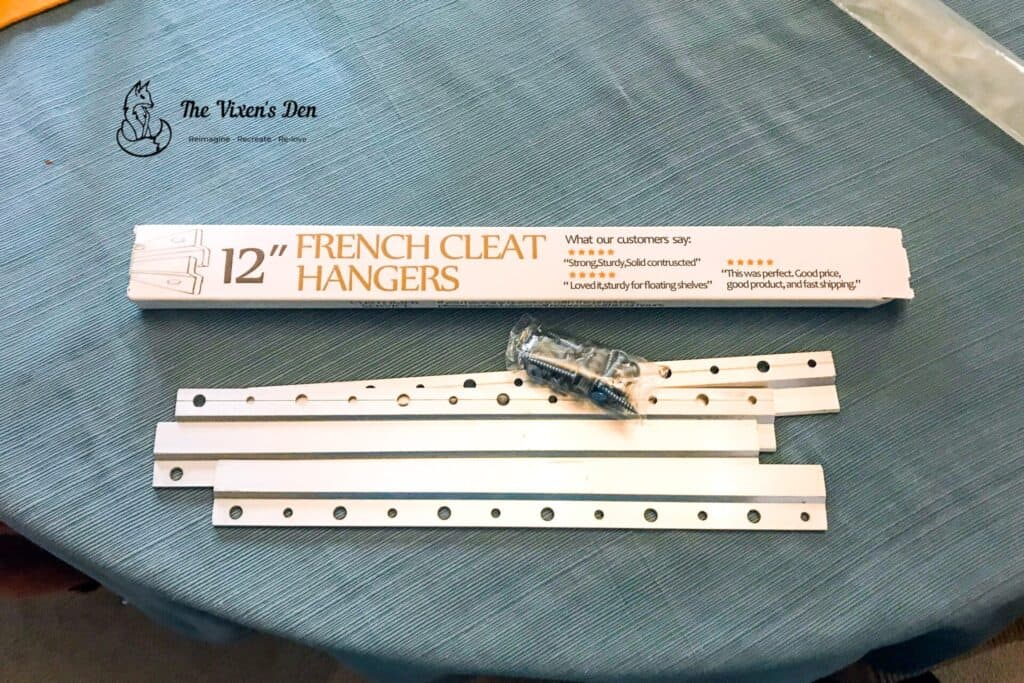
To install the hardware, I simply used the drill and driver to mount the french cleat to the wall with the cleat opening pointed upward. I used a small level to ensure that it was level. Then I mounted the opposing cleat to the back of the cabinet door with the cleat opening pointing downward.
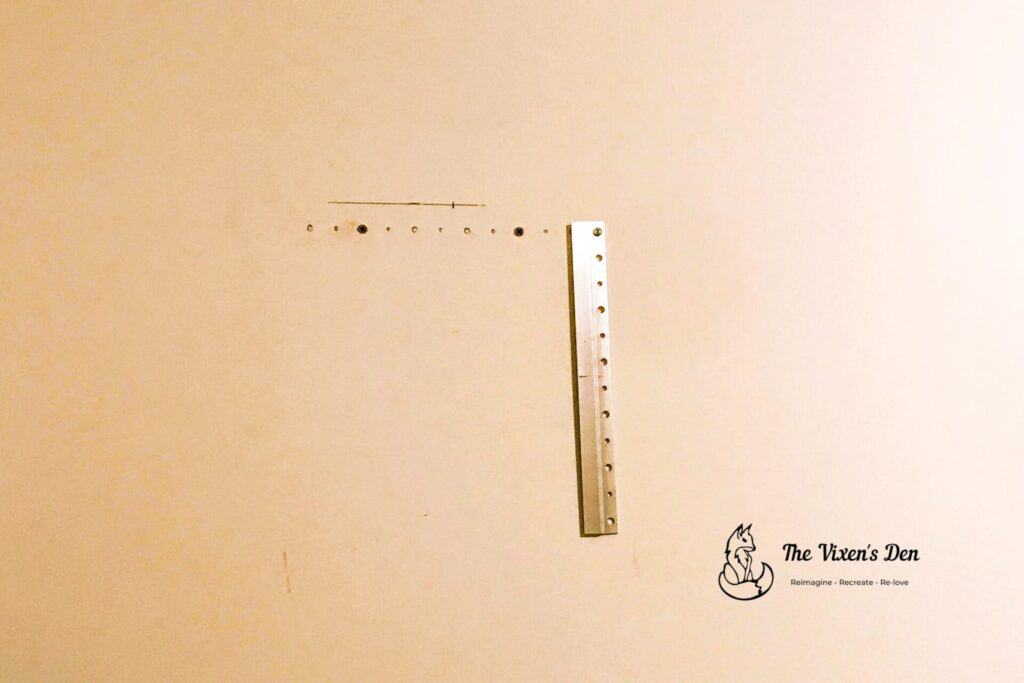
To hang the piece, I hooked the cleat on the cabinet door onto the cleat on the wall. Easy peasy! I love how secure the cleats make the project feel. I also love that I don’t have to straighten it if it is bumped.
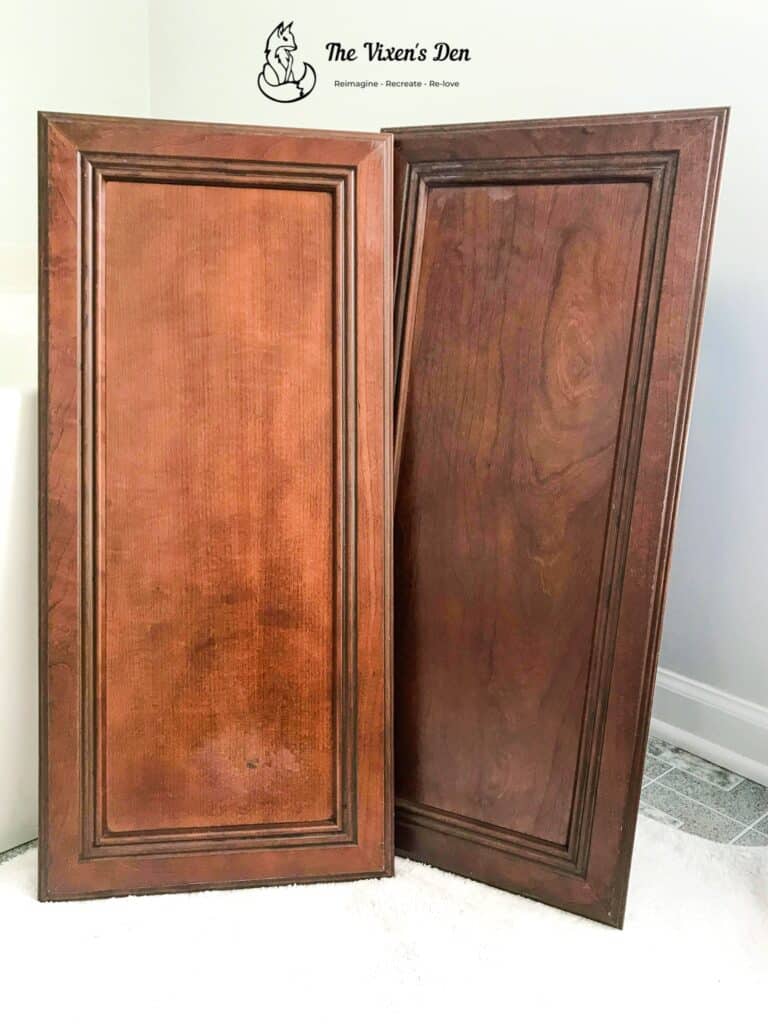
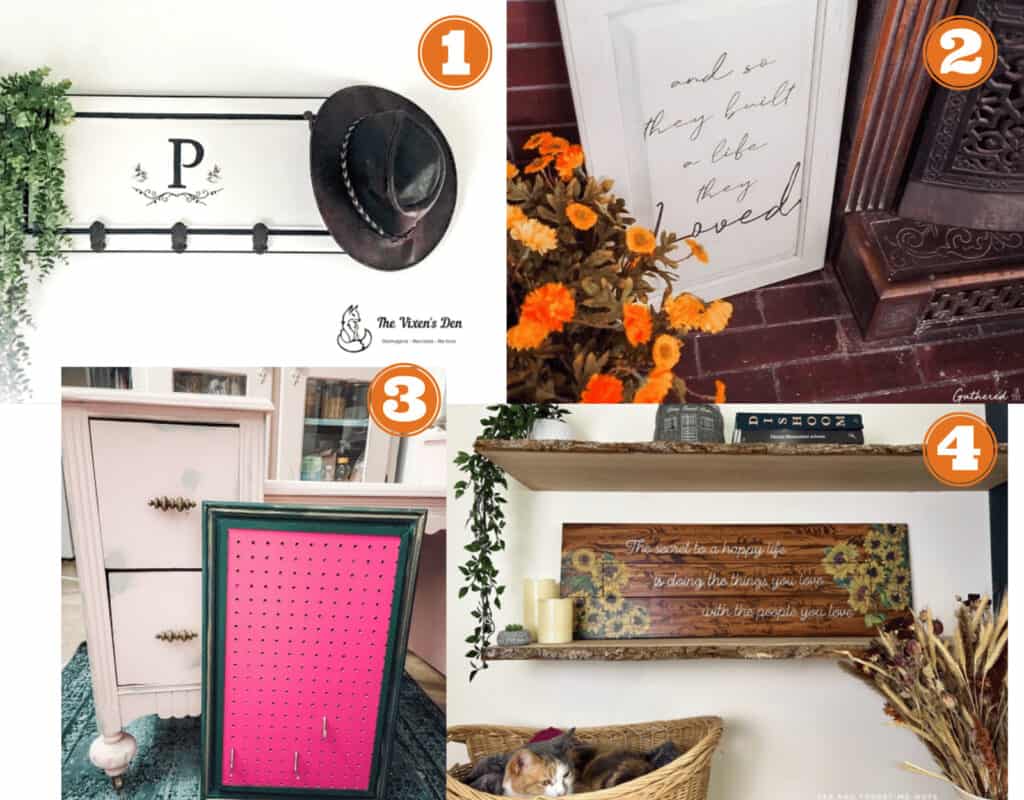
Upcycled Cabinet Door to Hat Rack Final Reveal
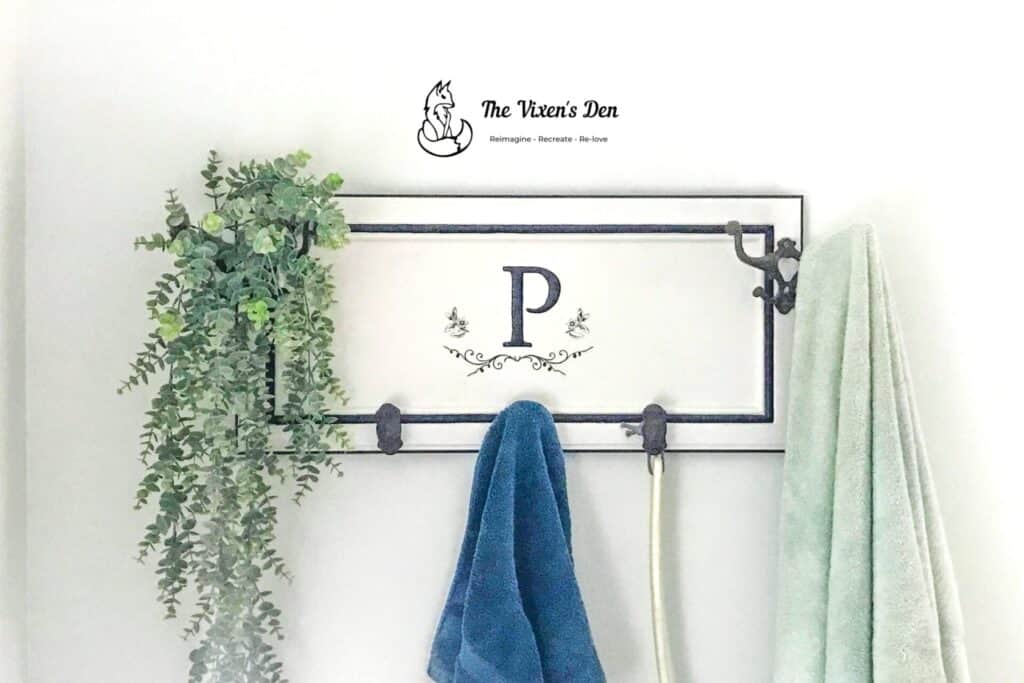
Here’s a look at the cabinet door before and its new purpose as a beautiful and functional hat rack!
But it doesn’t just have to be a hat rack…
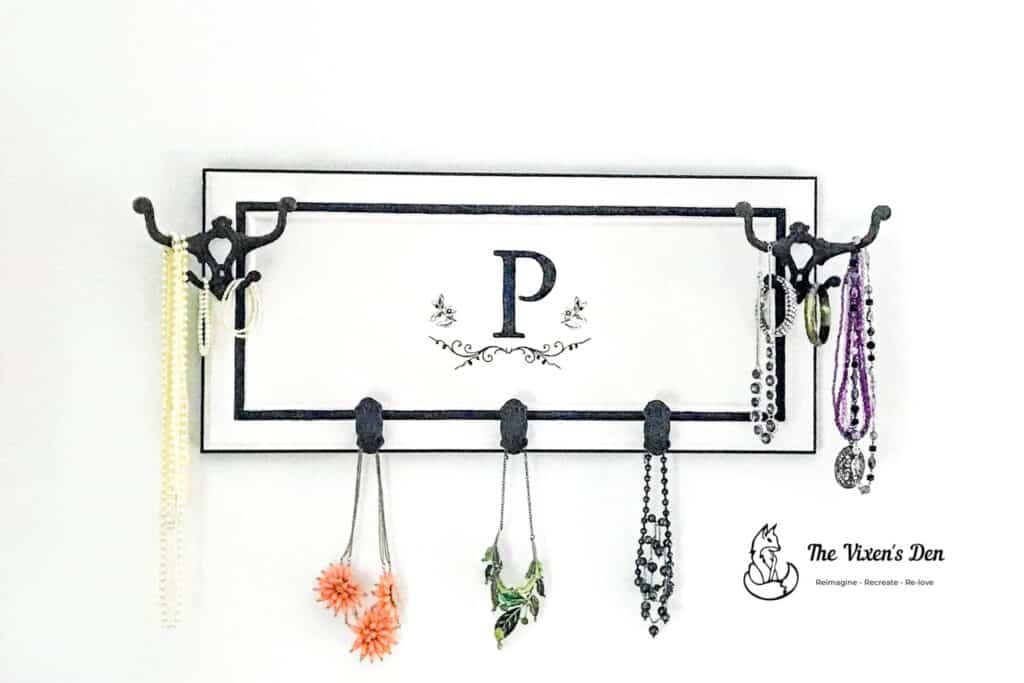
This upcycled cabinet door could organize jewelry…
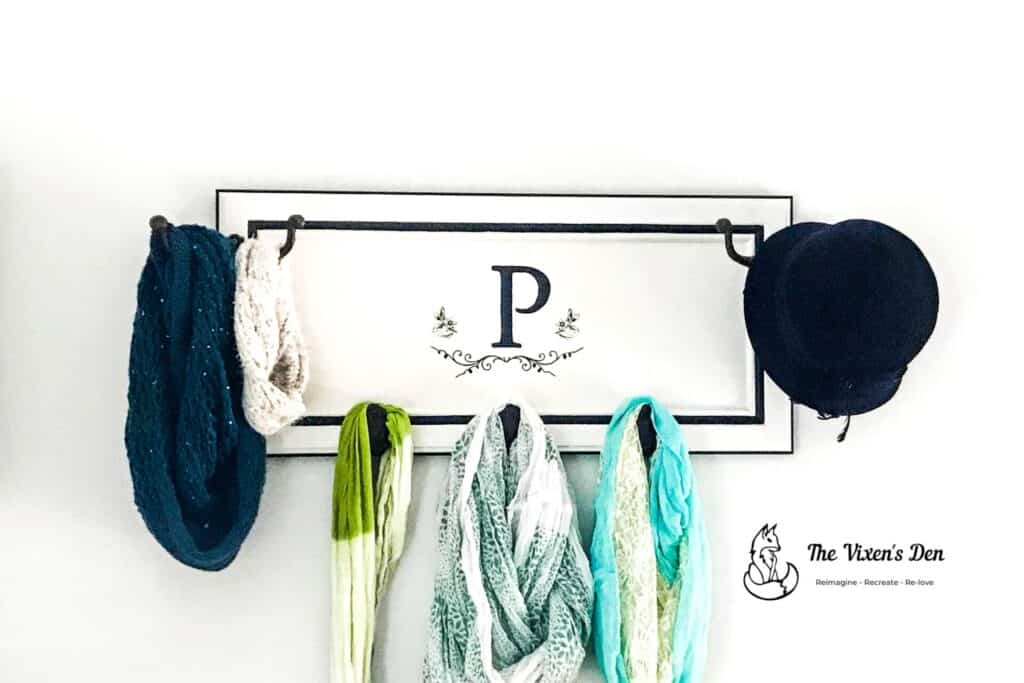
or scarves…
…or it would also look lovely in the bathroom as a towel rack.
I love giving new life and purpose to cast-off items. What other uses can you think of to repurpose this cabinet door? Let me know in the comments below.
And here are the cabinet door upcycles from some of my fellow Dixie Belle bloggers and creative cabinet door collaborators. Be sure to visit them and leave a comment. I know they’d love to hear from you!
- The Vixen’s Den (you’re here!)
- Gathered in the Kitchen
- Fifth Sparrow No More
- Tea and Forget-Me-Knots

Linked up to these lovely link party hostesses at:
Don’t forget to sign up so you hear all about the next misadventure! Until then, you may also like this Magazine Rack makeover or this Dresser upcycle.
Oh my goodness- I love this! I’m going to feature it on tomorrow’s Crafty Creators Link Party, where you can grab your “I was featured” button. I’m now on the lookout for a cabinet door!
XOXO,
Niki
Thank you so much, Niki!
I like all the recycled cabinet door choices!! It’s a lot of fun seeing these repurposed items for me- like going into a funky shop right from my home! And even though I may never regenerate any pieces myself, it’s still encouraging to see them & think I can! And you never know, I may surprise myself one day. And I will see if I could come over, Becky, to show you my project & check out all your Dixie Belle goodies.
What an awesome transformation! Great idea to create your transfer and use pieces from another!
Thank you!
Becky!! Your hardware is gorgeous!!! I absolutely love the way it made your hat rack turn out! Such a beautiful transformation!!! Thanks for joining the cabinet door makeover challenge!
Thank you so much, Stephanie! I appreciate the opportunity!
Love your makeover! It’s such a beautiful and functional piece. Perfect!
Thank you so much!