How to Stain with a Stencil
Have you ever looked at inlaid wood or wood burned wood and wished you could achieve a similar look? How about staining with stencils to create a similar effect?
I love using stencils to create beautiful designs in a matter of minutes. All it takes is a little planning and a couple of key products to give you a custom design look.
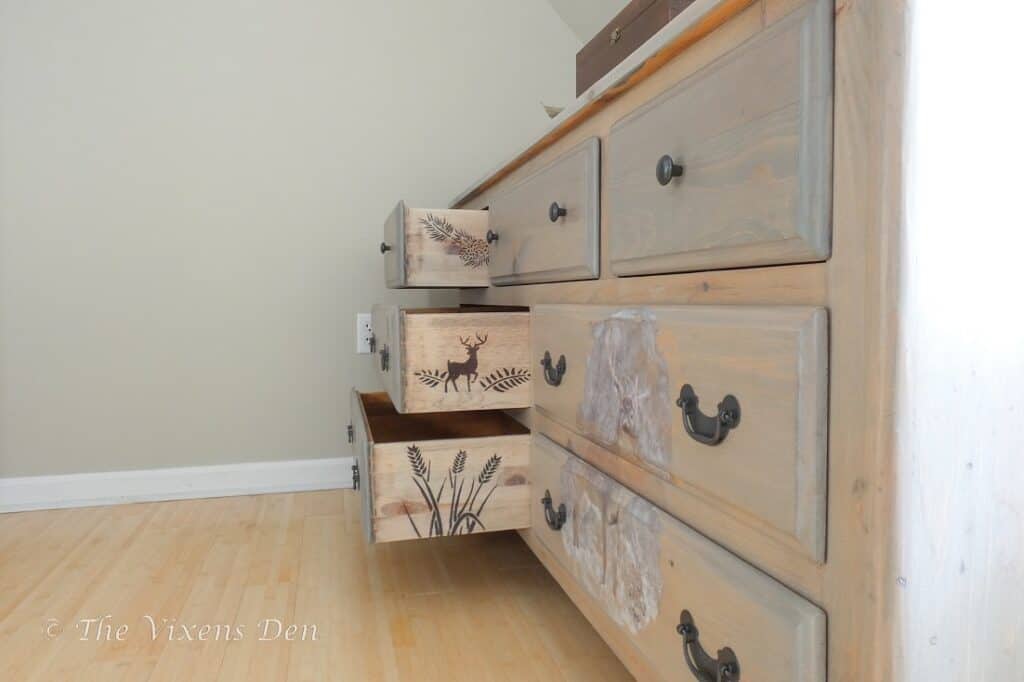
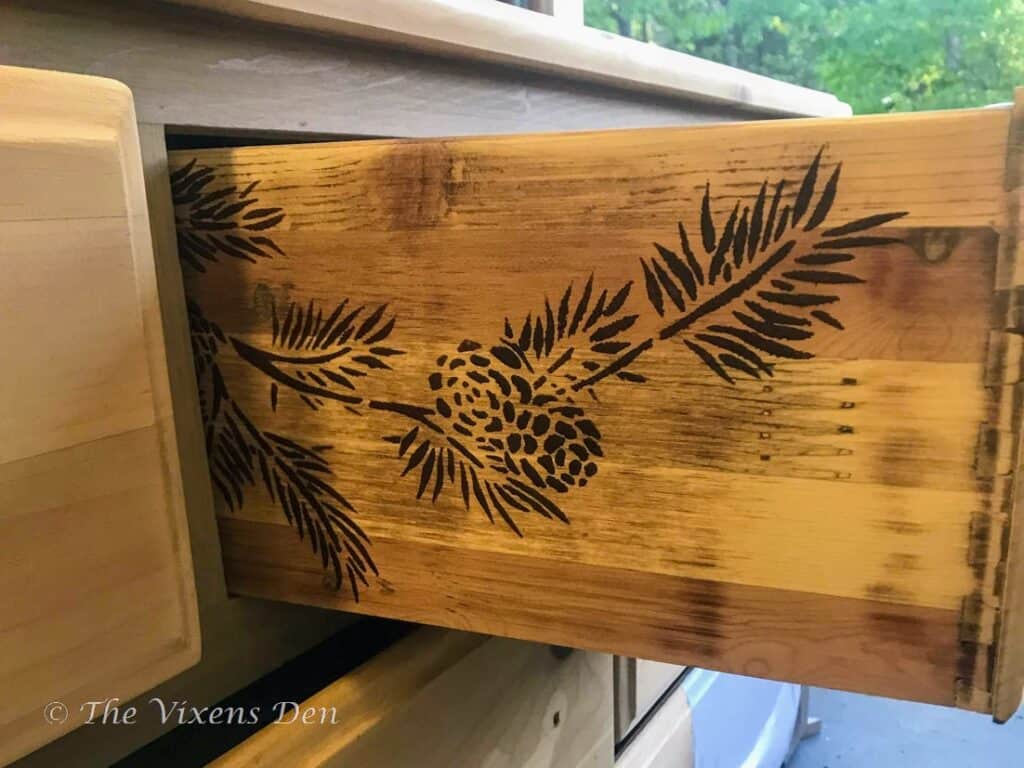
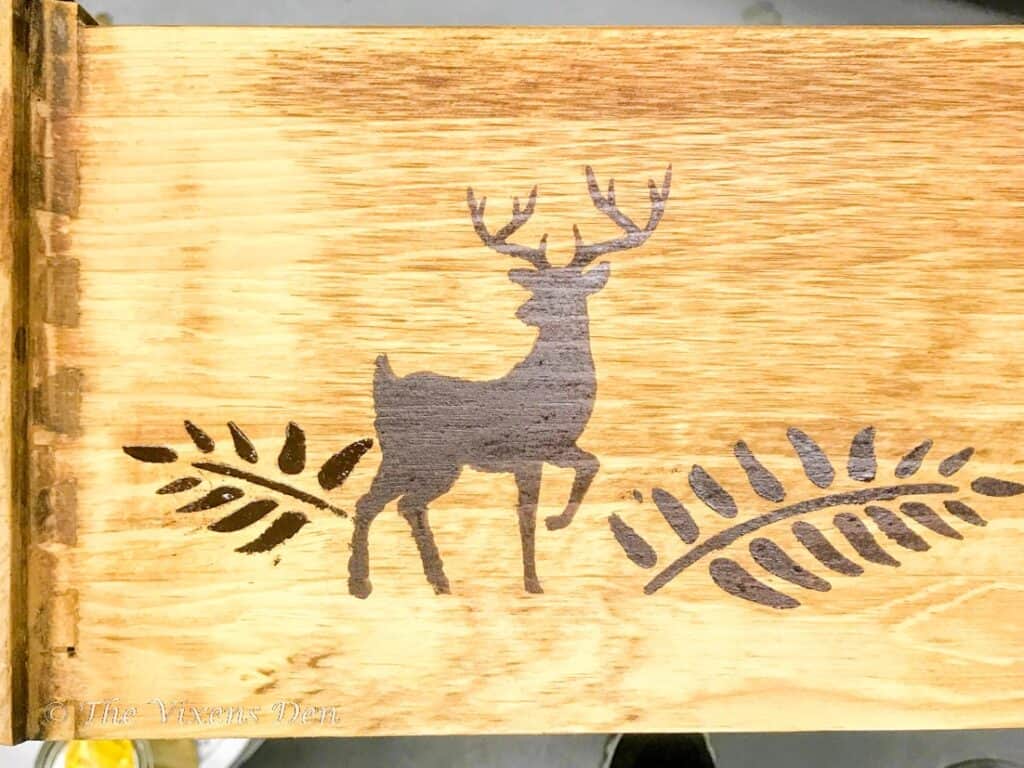
In this design, I used different stencils to create a scene on the side of this Whitetail Buck-inspired dresser. The edges of the stencil are nicely crisp, without any bleedthrough.
Stain is actually a perfect medium for stencil work because you typically apply it with a sponge applicator or a rag. This helps to prevent the dreaded bleed-through.
So let’s talk supplies! Here is what you need to achieve a perfect stained stencil:
THIS POST CONTAINS AFFILIATE LINKS TO PRODUCTS. I ONLY RECOMMEND PRODUCTS THAT I HAVE OR WOULD USE.
AS AN AMAZON ASSOCIATE I EARN FROM QUALIFYING PURCHASES AT NO COST TO YOU. YOU CAN SEE MY FULL DISCLOSURE HERE.
Tools and Materials
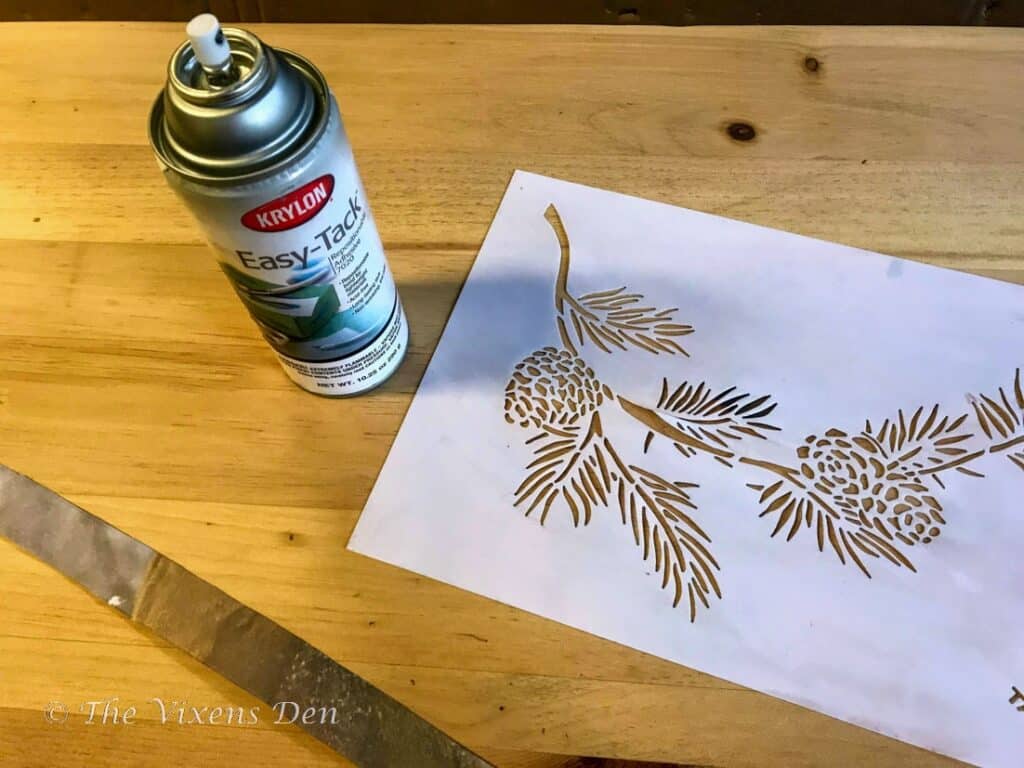
Stencil ( Stencils in this post include: Acid Tactical – 8 Pack Camouflage and Deer *similar)
Stain: (I like the Dixie Belle
Oil/Stain Remover: (Goo Gone, Goof Off, or
Degreasing Dish Detergent: Dawn
Preparing the Stencil
I’m working off of the assumption that you have already prepped your piece, whether it be a simple cleaning with a product like White Lightning, or a full stripping and sanding. But just in case, here’s your official public service announcement: your final piece will only be as good as your prep work. Take the time to start off on the right foot, and you won’t regret it.
Now that we have that out of the way, on to the fun part.
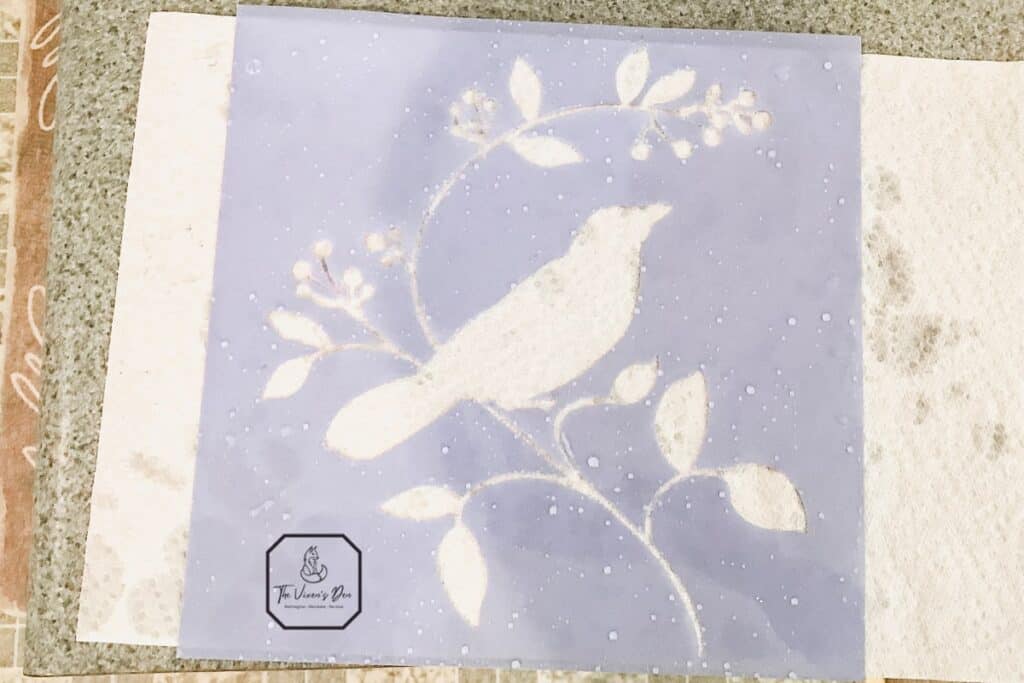
Any stencil will work for this project. However, if you happen to have chosen a silkscreen or mesh style stencil with a sticky back, then half of your work is already done for you. Just slap that sucker into place, gently press it firmly with a scraper or smooth-edged tool to ensure that everything has firmly adhered to the surface, and you’re ready for the next step.
If, however, you are rocking the old-school mylar stencils, then this part is for you. Grab your can of spray adhesive and slowly mist an even coat onto the backside of the stencil. Give it a second to get its grippiness on, align it to your project and smooth it into place. I still recommend using a flat-edged tool to firmly press down the stencil. This helps to ensure that you don’t have any gaps that can promote bleedthrough.
Tip: You can get extra creative with your stencils simply by taping off sections that you don’t want to use. The benefit of doing this is that you also ensure that you don’t accidentally stain a nearby open section.
Staining the Stencil
Now it’s time to rock some amazing stain work! Whether you decide to use a liquid, gel, water, or oil-based stain, the application process is the same.
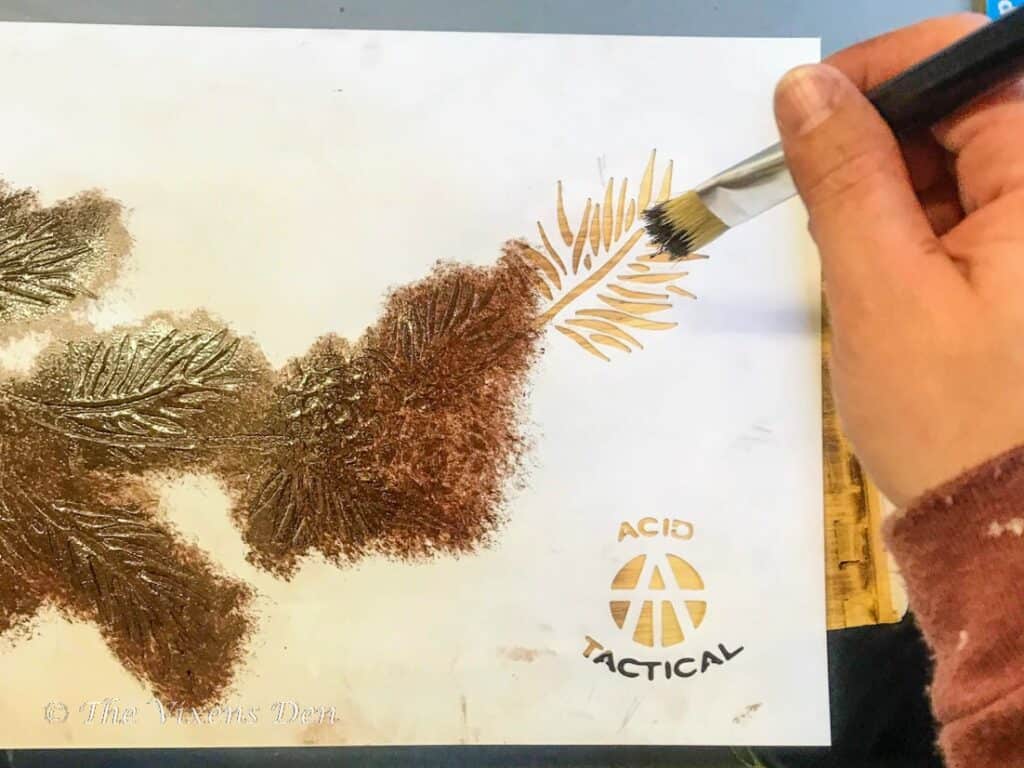
Staining with an artist’s brush:
Very lightly dip the tip of your small artist’s/stencil/chip brush in the stain. Then dab any excess off onto a paper towel. As with any stenciling technique, it’s very important not to overload your brush, or you are guaranteed to experience seepage. Then dab the tip of the brush against the stencil, tapping it gently until you cover the stencil.
Staining with a rag:
Grip your rag with just a small tuft exposed. Dip your tuft into the stain, and then begin dabbing the tuft against the stencil. Repeat these steps until the image is completely covered.
Hindsight is 20/20Tip: I recommend staining from the center out if you’re staining a large open area. This way, if you have a little too much stain on your rag/brush, it will be wiped off before you get to the edges, which can also help prevent bleedthrough.
Once you have covered the stencil with stain, choose another (or new, if you’re using an artist’s brush) clean tuft of rag, and gently dab away any excess stain. This ensures that you have even coverage. If you don’t remove excess stain, then your stain can soak in at different rates and even sit on top of the wood, causing blotchiness and an uneven sheen.
Give the stain a few moments to dry, then decide if it needs another coat. If you’re happy with the color tones, then go ahead and gently remove your stencil.
You can continue to reuse the stencil as long as you don’t have any seepage. If there is seepage, or if you need to flip your stencil over to use the other side (which I did on both the dresser and armoire project and is also one reason that I love mylar stencils) then you’ll need to clean it first.
Cleaning the Stencil
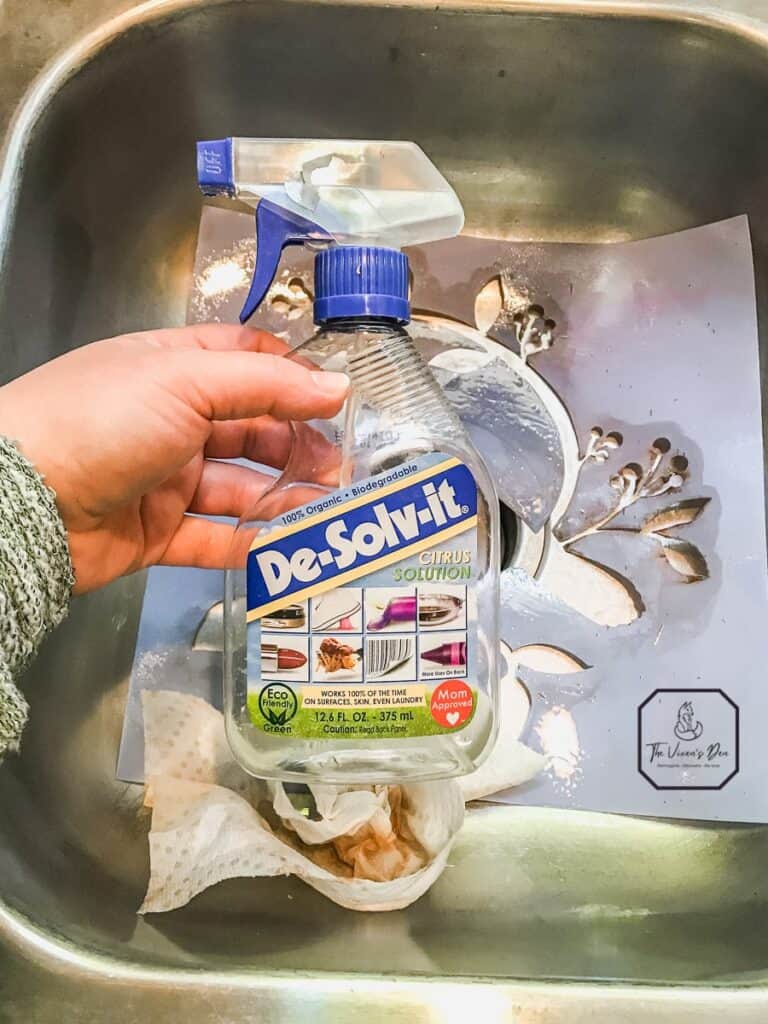
Here is where the oil-removing cleaner comes into play. I have used both De-Solv-It and Goop with excellent results. I tried scrubbing with Dawn alone, but it didn’t work for me. Here is what did work:
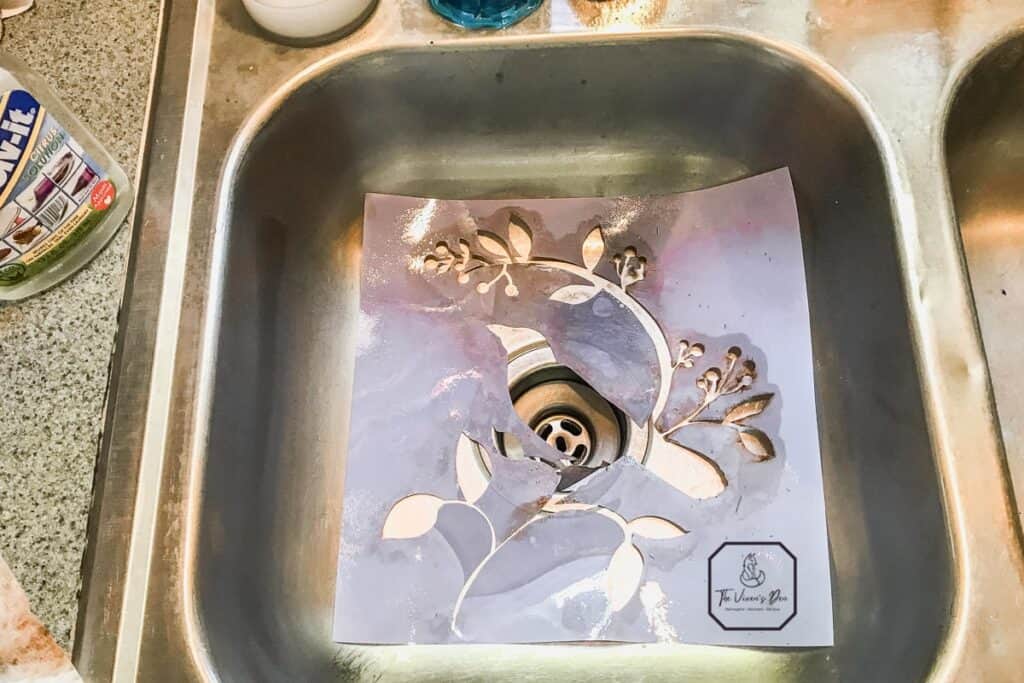
- Lay the stencil down in the sink or bathtub.
- Spritz the stencil with an oil-removing cleaner.
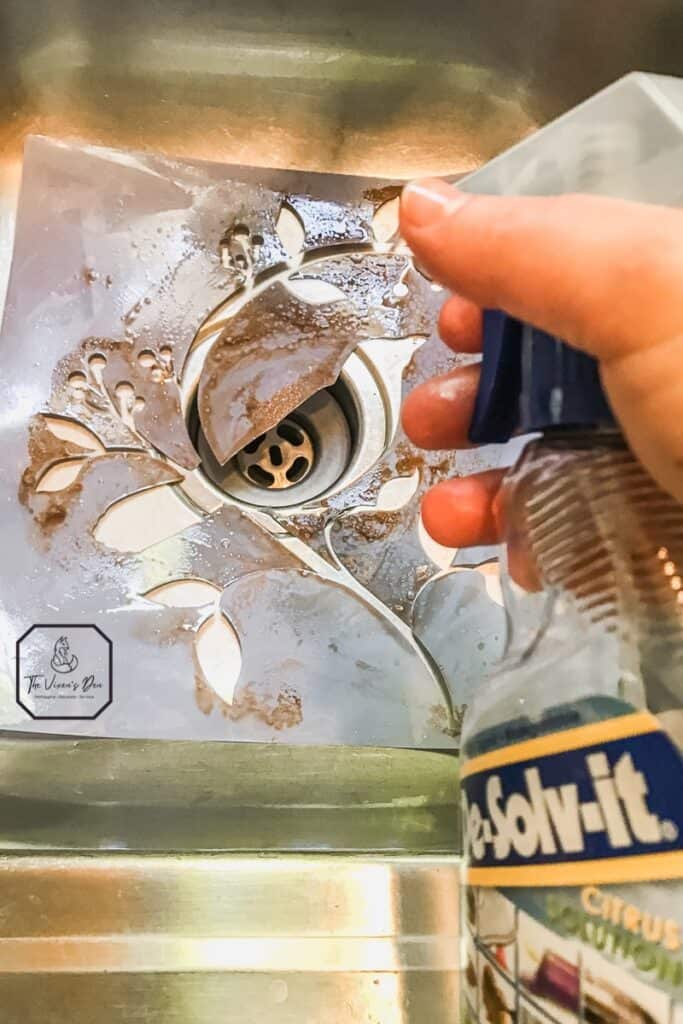
- Gently wipe your stencil. Make sure you wipe in the direction of any curves or special designs so that you don’t accidentally lift and curve or even bend the designs.
- The stain should release easily onto the paper towel. If you let it dry a little longer than you’d intended, then you might have to spray the stencil directly and let it soak for a bit before wiping.
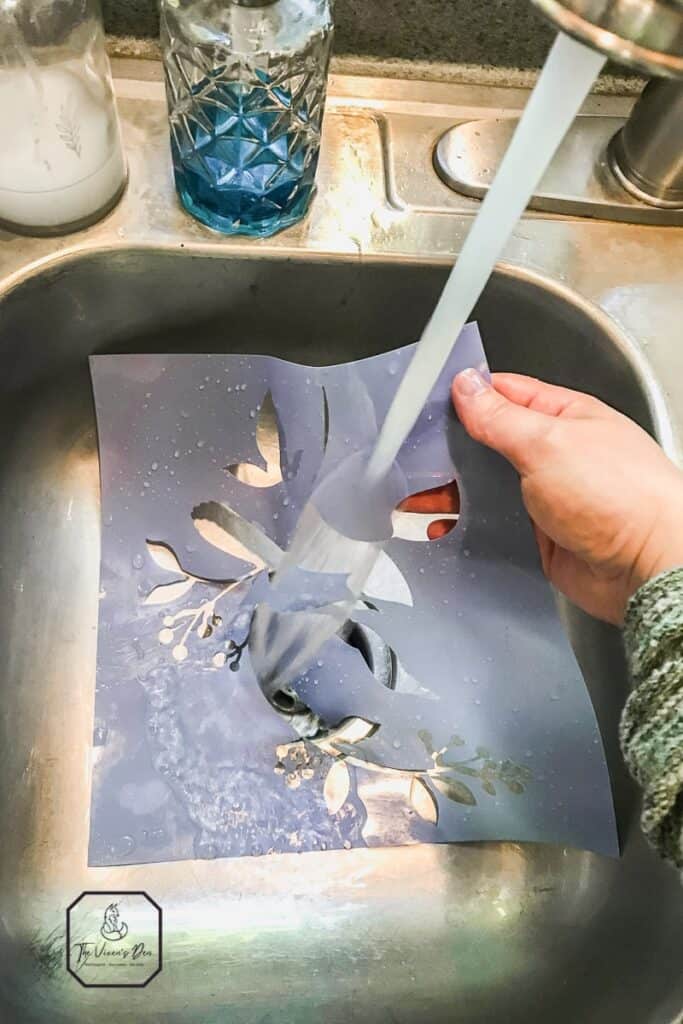
- Flip the stencil over and clean the other side. This ensures that you don’t have any stain left on the stencil.
- Now gently wash the stencil with a good grease-removing dish soap, such as Dawn, and thoroughly rinse it.
- Lay your stencil flat on a paper towel to dry and it’s ready for your next project!
Tip: If you are using an adhesive or silkscreen style stencil, it’s pretty much guaranteed that the oil-based cleaner will remove your stick backing. The good news is that you can always use the spray adhesive to re-adhere the stencil if that happens.
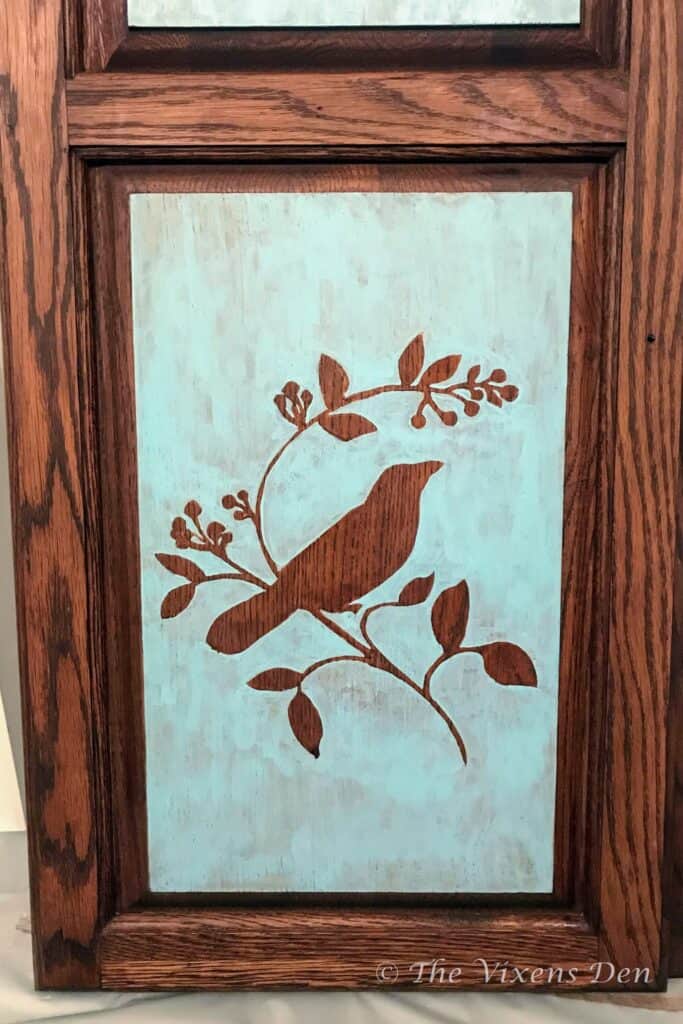
Creating Custom Designs with Stencils
I love the flexibility that stencils provide. They allow me to create beautiful designs quickly. To finish the doors on the craft cabinet, I used a combination of layering stains and paint together:
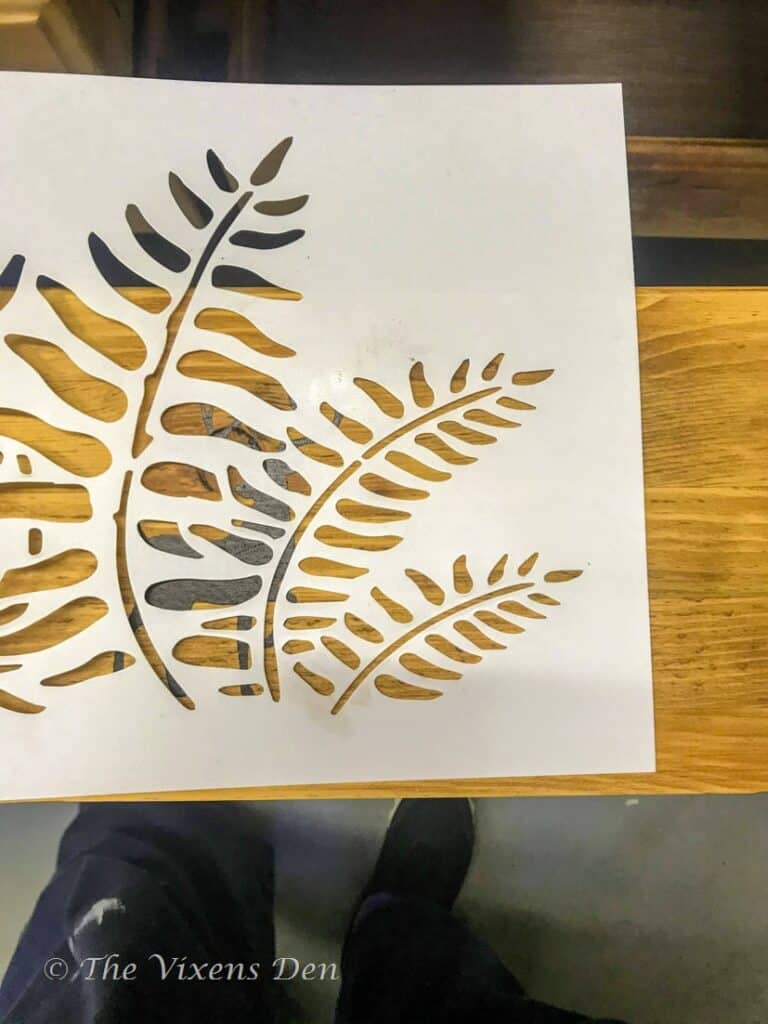
The deer dresser drawer sides design was a combination of two different stencils that were layered together, the deer and the ferns.
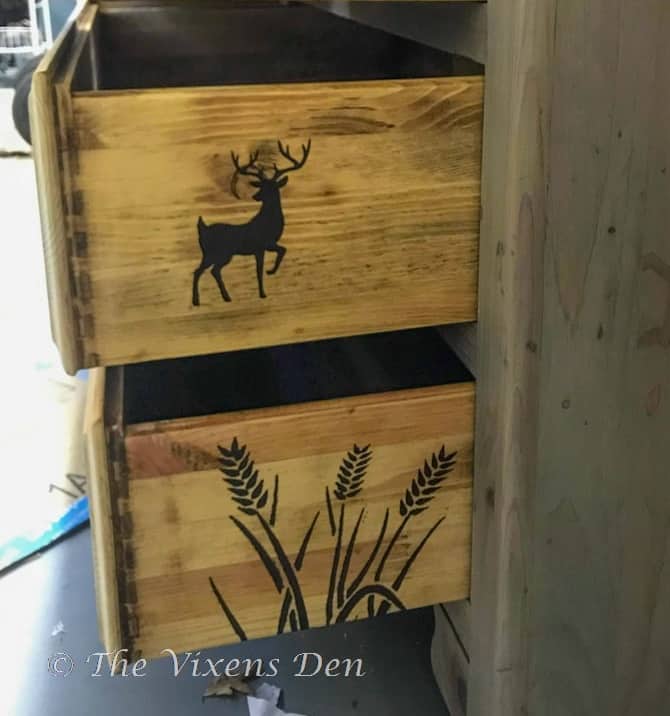
It created a beautiful unique design.
Final Thoughts on Staining with Stencils
Having the ability to create detailed designs with stain allows a whole another level of creativity. There were some interesting challenges with lining up the layered stencils so that they all created the same effect, but I think the project turned out beautifully.
Have you ever stained with stencils before? What tips do you have? Share in the comments below and then sign up to receive an email when new posts drop.

I love the stencil work, Becky!! Especially on the hidden side of the drawers. I have never used stencils but have thought about using them. Now that I think about it, I did make my own…letters spelling out my grandson’s name on a bedroom wall. OR DID I? Hmmm…I think I did the lettering freehand.
Anyway..,your handiwork is beautiful!!
Thank you so much, Donna! I’m so impressed that you were able to freehand your grandson’s name. I usually need a stencil to at least trace out the letters. Thank you so much for commenting!