Paint Washed and Stained Armoire
Do you have the problem of not having enough storage space? I do. Especially when it comes to craft supplies. Admittedly, I may have a hoarding problem but we’re not discussing that today. So what’s the solution to this problem? More storage of course!
I found this lovely armoire at a yard sale. The young lady who sold it to me was exhausted from a weekend of selling and just didn’t want to have to pack it back up and haul it home again. She said she had purchased it as a project cabinet but never got around to working on it.

The armoire was solid wood, sturdy, and had the perfect transitional style that I love. Best of all, because she just wanted to get rid of it, the seller only asked $50 for it.
I love a good win-win, don’t you?
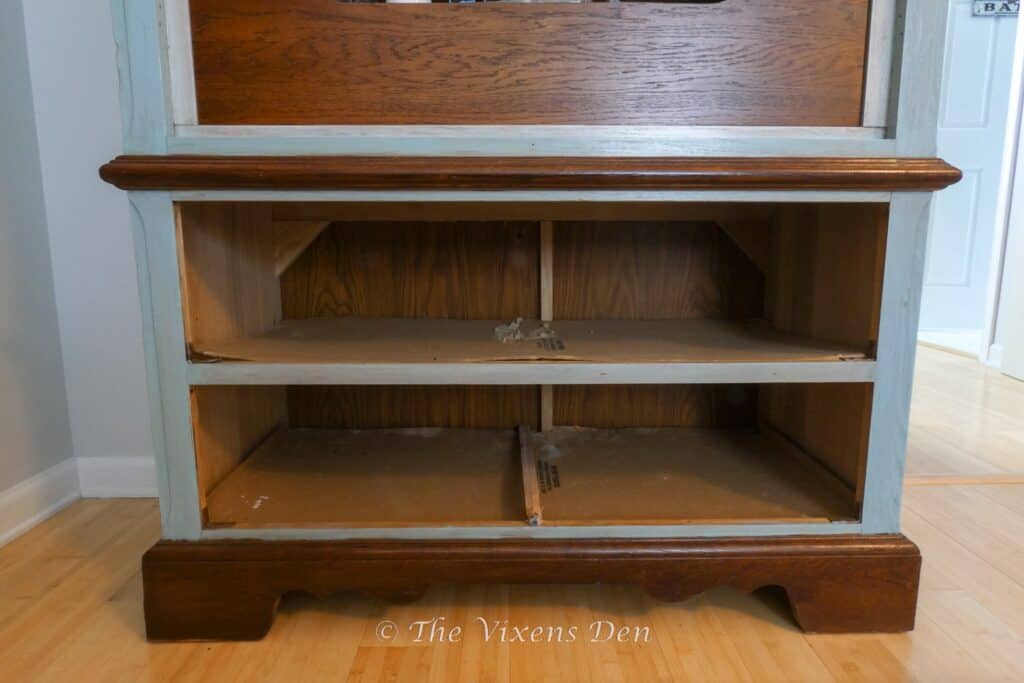
As you can see, it did have a few issues. A drawer slide guide was missing and the sagging drawer partition caused the drawers to hang. So, it needed some TLC.
Unfortunately, I did not take pictures before I started the refinishing process, so I’m afraid you’re stuck with only the in-between and after pictures of the cabinet. However, I never finished the doors, so pictures of those and the repairs, are what I have for you today, my friend!
The Makeover Plan
Tools
- Measuring tape
- Pencil
- Nail gun
- Staple gun
- Plastic scraper
- Chip brush or old paintbrush
- Paintbrush
- Nail set
- Hammer
- Scissors
Materials
- Drawer slide
- 1 x 1 wood trim
- 1 1/2″ brad nails
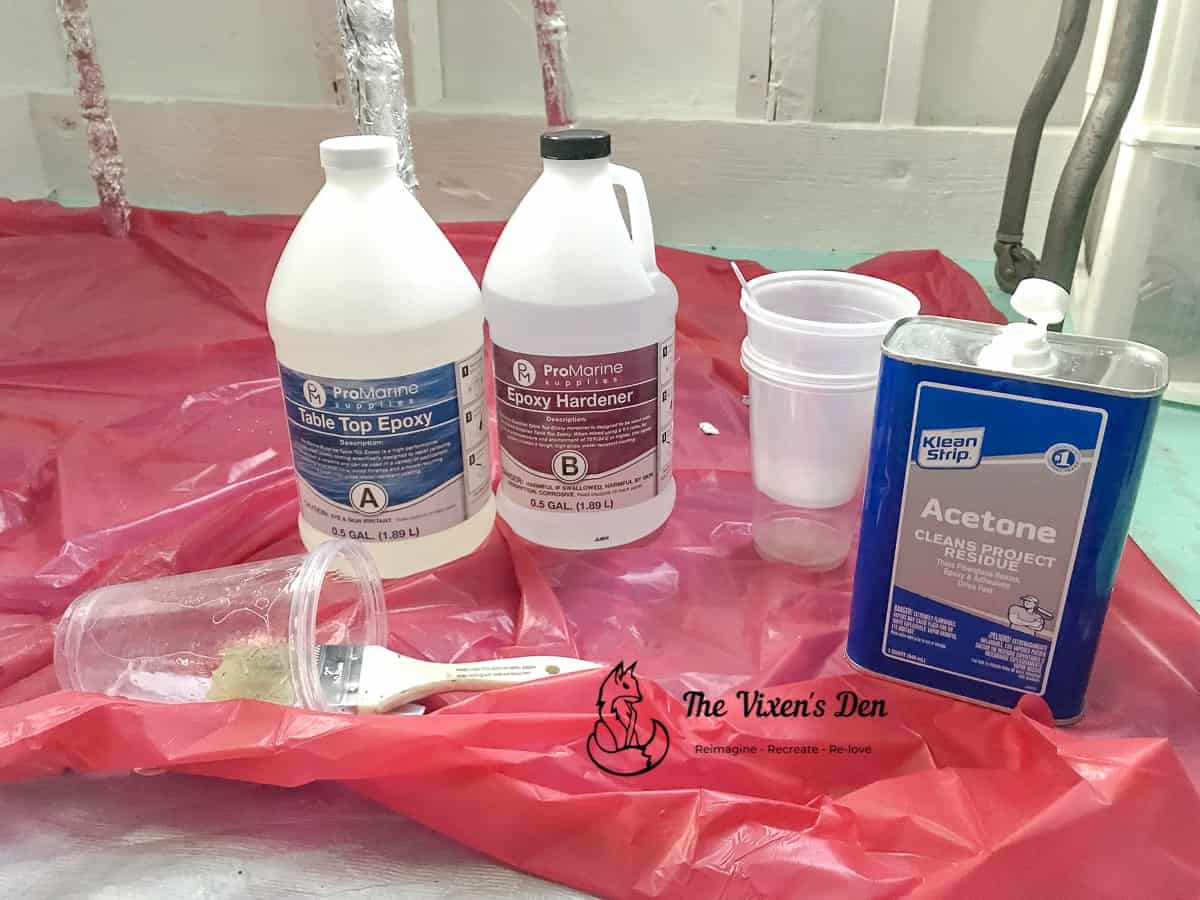
- Furniture paint and finish stripper – Citristrip
- Steel wool – medium and fine grade
- Sandpaper – #100, #220 and #1000 grit
- Vinyl gloves
- Mineral spirits
- Stain – Minwax English Chestnut
- Paint – white
- Paint – aqua
- Painter’s tape
- Fabric – Hobby Lobby’s
- Mod Podge – matte
- 1″ brad nails
- Lumber stick
- Sealer – Minwax Polycrylic in matte
Making the Repairs
The Dust Panel
The first step in the makeover process was to repair the drawer partition, also known as the “dust panel” which was hanging down into the drawer below. These panels are great for keeping spilled materials like glitter or seed beads from falling into the drawer below. But they’re only helpful when they actually work and aren’t dragging against the drawer or its contents.
The panel slides into a groove that is routed to the inside of the cabinet drawer frame. Over time, the cardboard begins to sag and buckle and no longer stays in place.
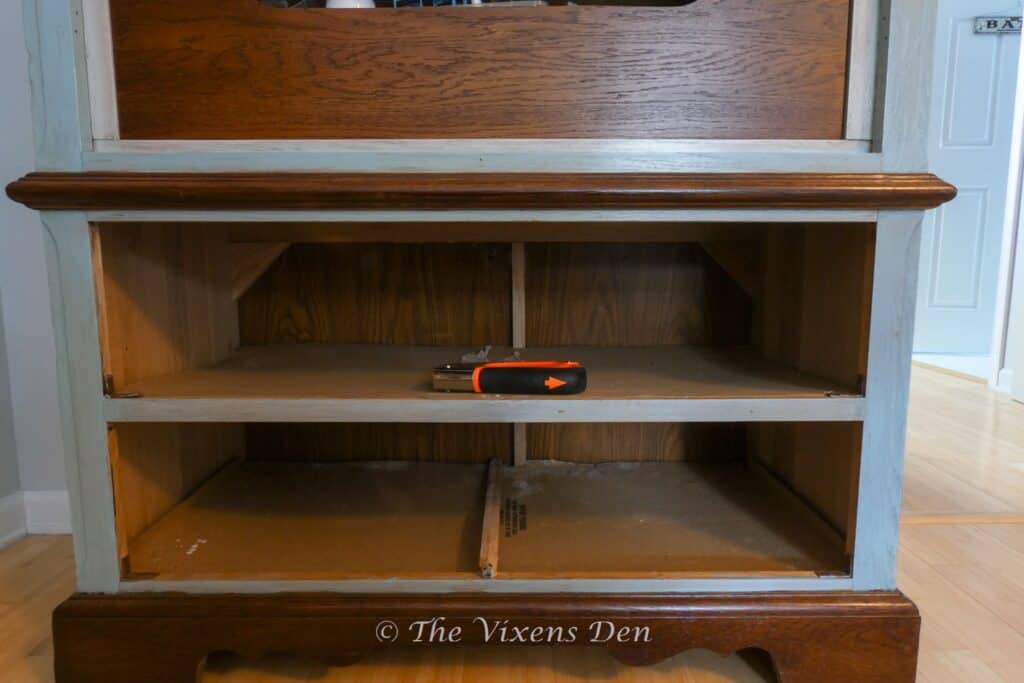
For this repair, I first cut a thin strip of 1×1/2 scrap trim material to the length of the inside of the drawer frame. I then installed the trim to the inside of the drawer frame or the “bearer”, just under the hanging dust panel.
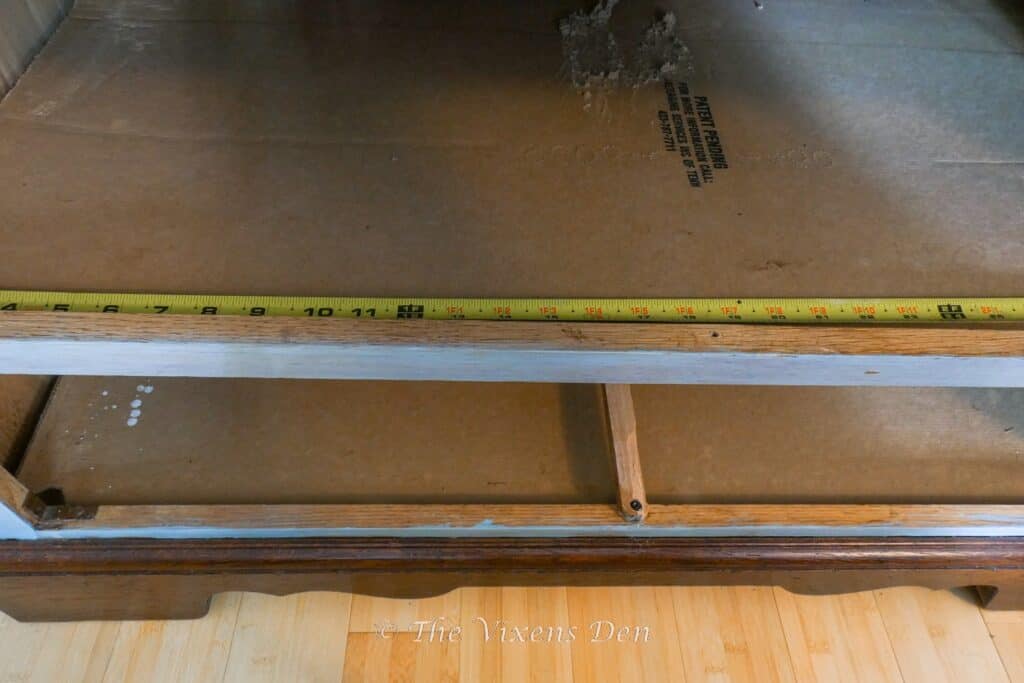
The dust panel was now completely supported and no longer hung down past the bearer rail. Unfortunately, fixing this problem created another problem. The cardboard was so warped that it refused to lay flat.
I tried using my poster putty trick from this post to secure the cardboard to the trim piece, but that wasn’t working. Then I tried to use the nailgun, but ended up with a misfire and had to pull a nail out of the side of the cabinet. (facepalm)
The secret sauce was my hand dandy staple gun. I stapled the cardboard to the newly installed trim piece and now it’s snug as can be. Success!
The Drawer Guide
The next step was replacing the drawer guide. A drawer that just hangs and drags all over the place is a real pain. I found a pack of wood drawer guides on Amazon that contained both pieces. When I tested the guide, it fit perfectly!
Well, almost.
I did have to cut off a little bit to make it fit.
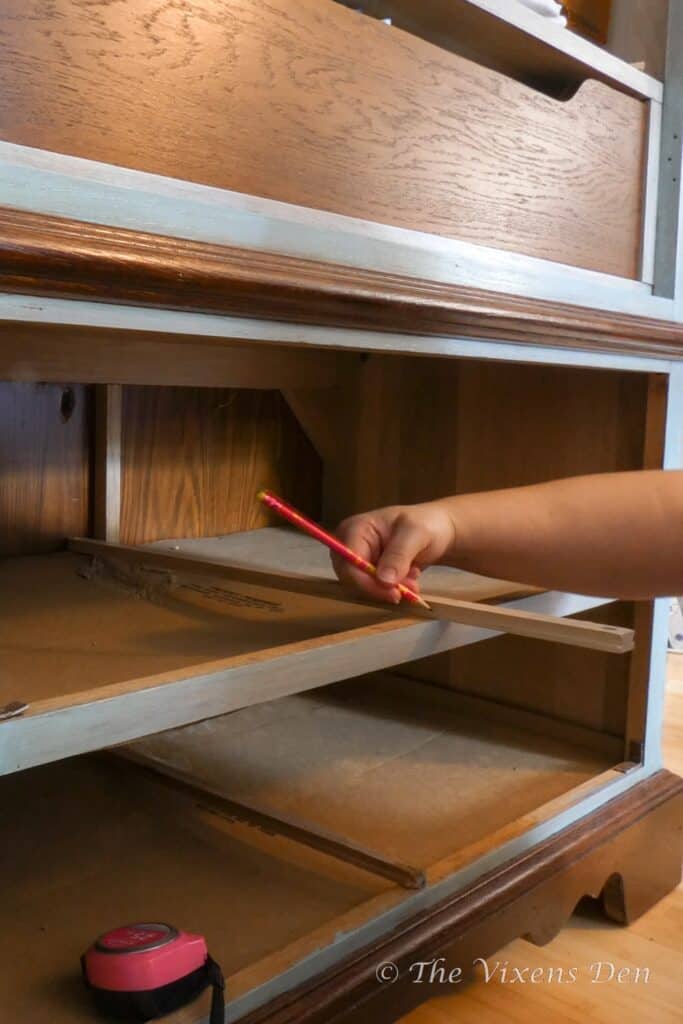
Once the guide was the right length, I used the existing holes to install the guide with wood screws.
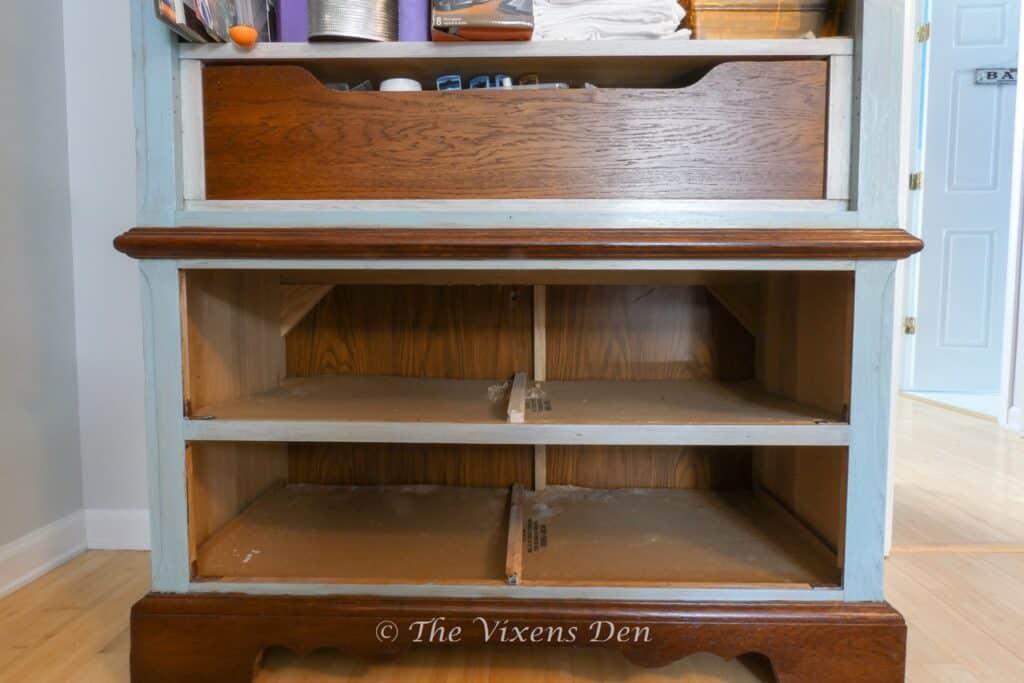
With those two repairs, the cabinet was now completely functional and ready for the rest of its makeover!
Prepping for Painting and Staining
To prep the cabinet and doors for painting, I first applied paint and finish stripper to the wood using an old paintbrush, waited until the stripper took effect, and then scraped the finish off with a plastic scraper. Once the majority of the finish was scraped off, I used heavy-grade steel wool and a wire brush to remove any remaining spots.
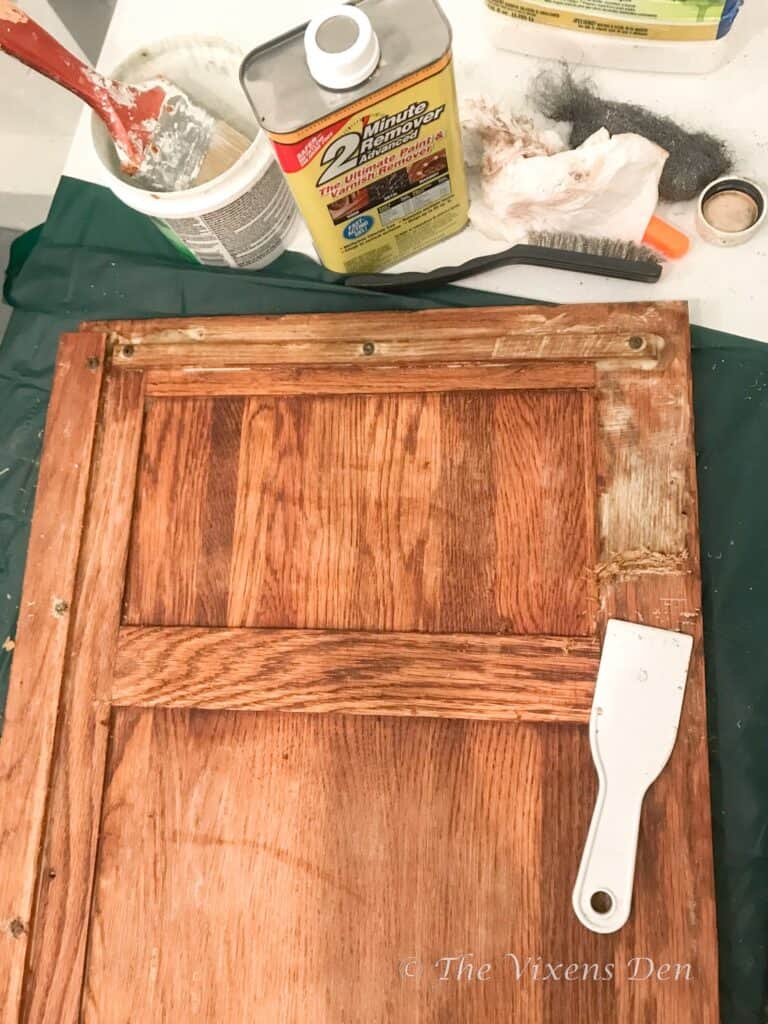
Once the finish was removed, I gave the wood a good cleaning with a fresh medium-grade steel wool pad and mineral spirits. It pulls all of the stuck-on gunk off and gives you a good view of any spots that need a little more work before you start staining or painting.
Once the wood was dry, I gave it a light sanding with 100 grit sandpaper to smooth out any rough spots. Then it was time for staining and painting!
Staining and Painting
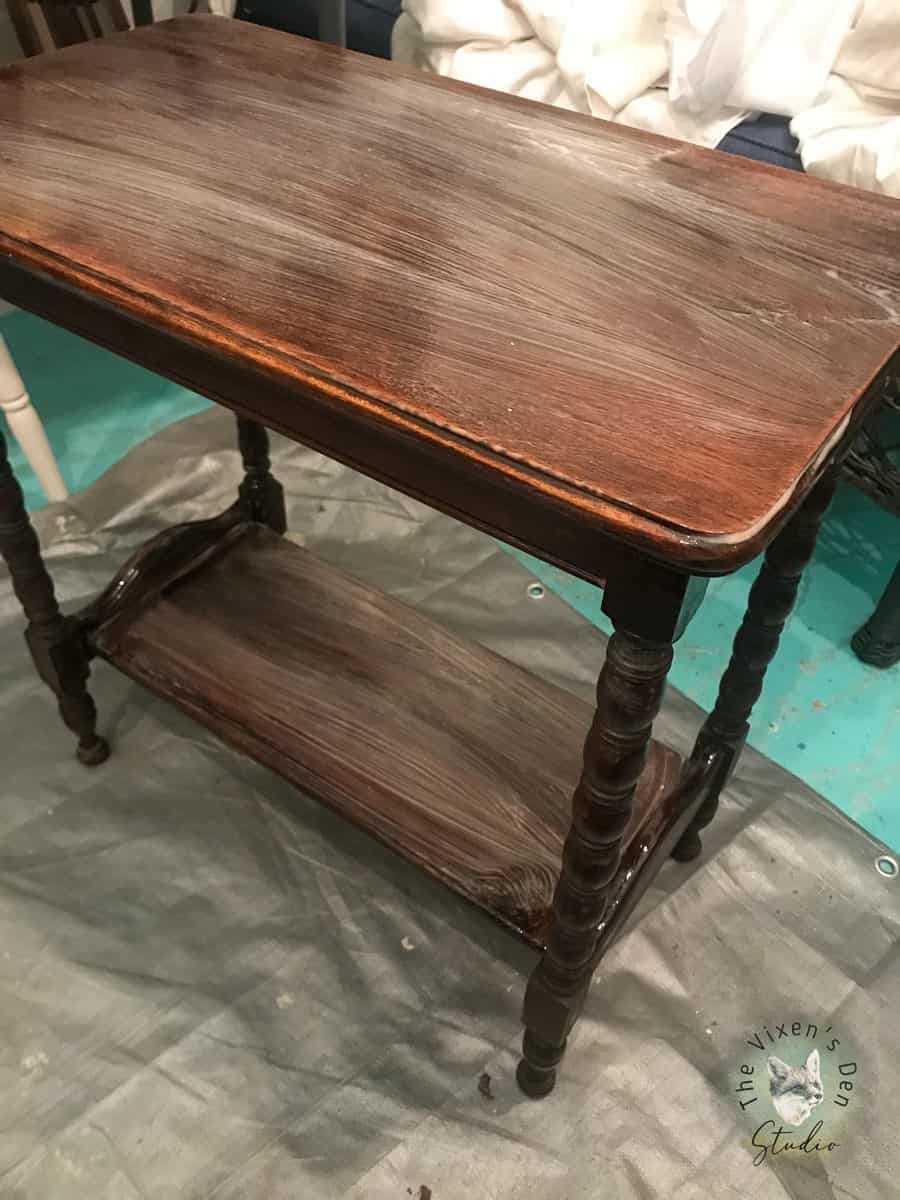
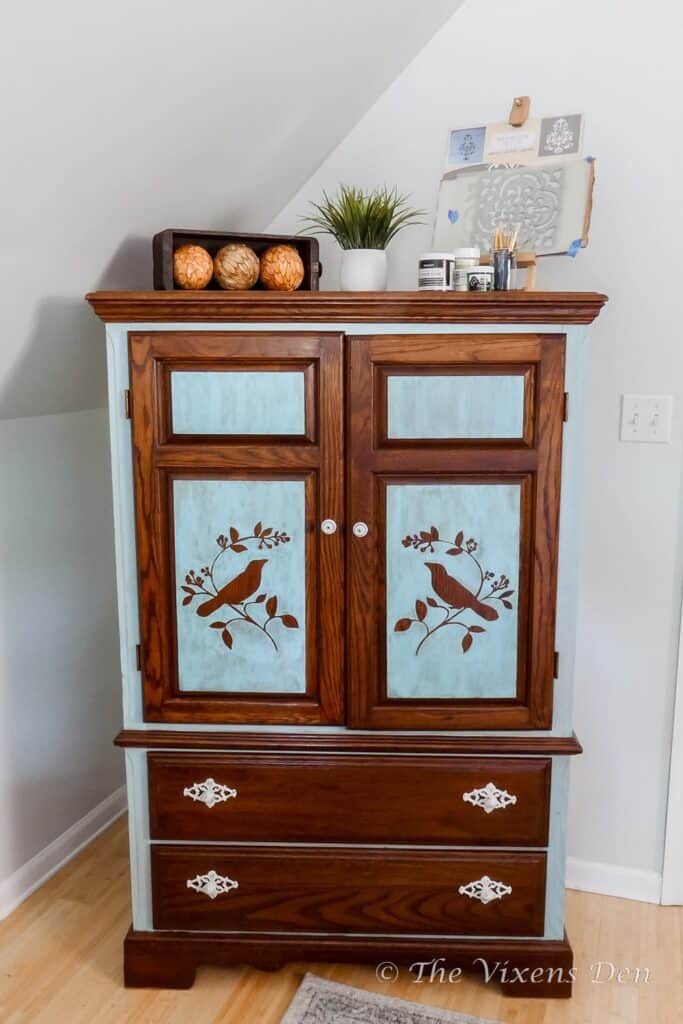
Since I wanted a combination of paint and stain for this piece, I taped off the areas that I wanted to paint wash with painter’s tape or a stencil sprayed with adhesive, then applied stain to the rest. Once the first coat of stain had time to soak in, I applied a second coat and then a third to touch up.
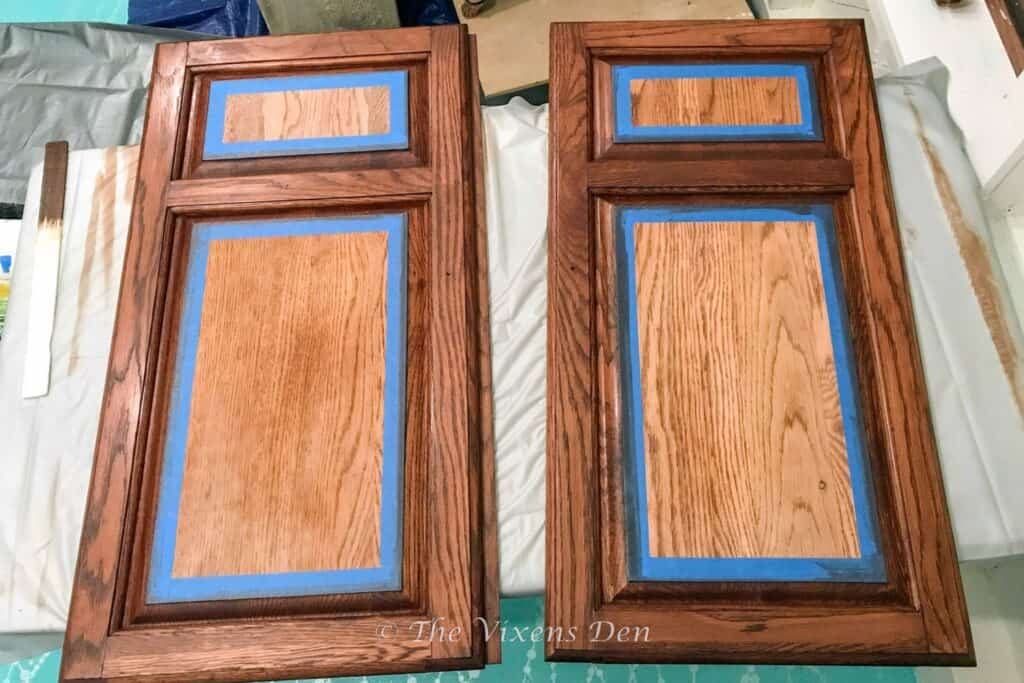
Once the stain was dry, I moved on to painting. I created a custom paint wash using a latex paint that I had leftover from a previous project and mixed it with water.
At first, I tried a 50/50 ratio, but I found that was a little too washed out for what I wanted. I ended up with an approximate 75% paint to 25% water mix. I used this ratio for both the aqua blue and the white paint.
I brushed on the paint wash, wiping any drips or runs. It took a couple of coats to create the effect that I was looking for, where you can just see the grain through the paint, but the color is still quite rich.
The end result is a slightly rustic and hand-painted look, which is exactly what I was hoping to achieve.
I left everything to dry for several days and then brushed on a coat of polycrylic. After the first coat was dry, I gave it a light sanding with 1000 grit sandpaper, then recoated. I followed this process for a total of three coats and did not sand after the last coat.
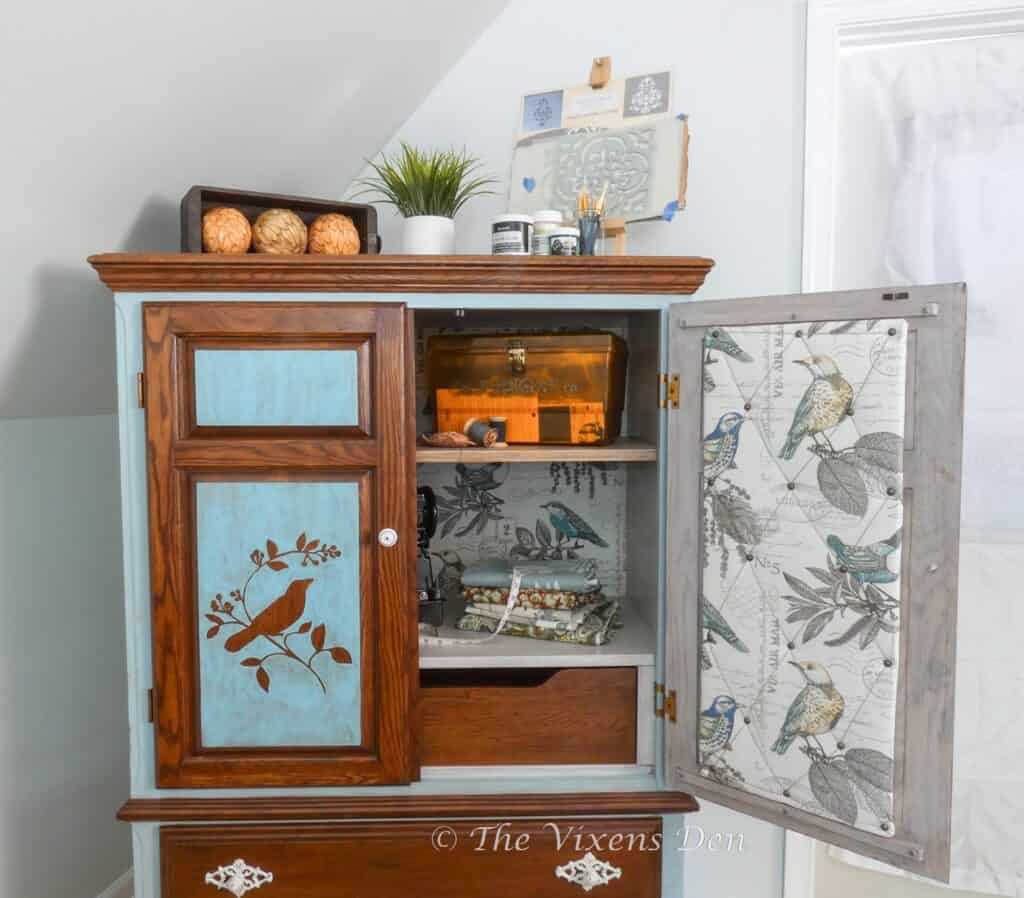
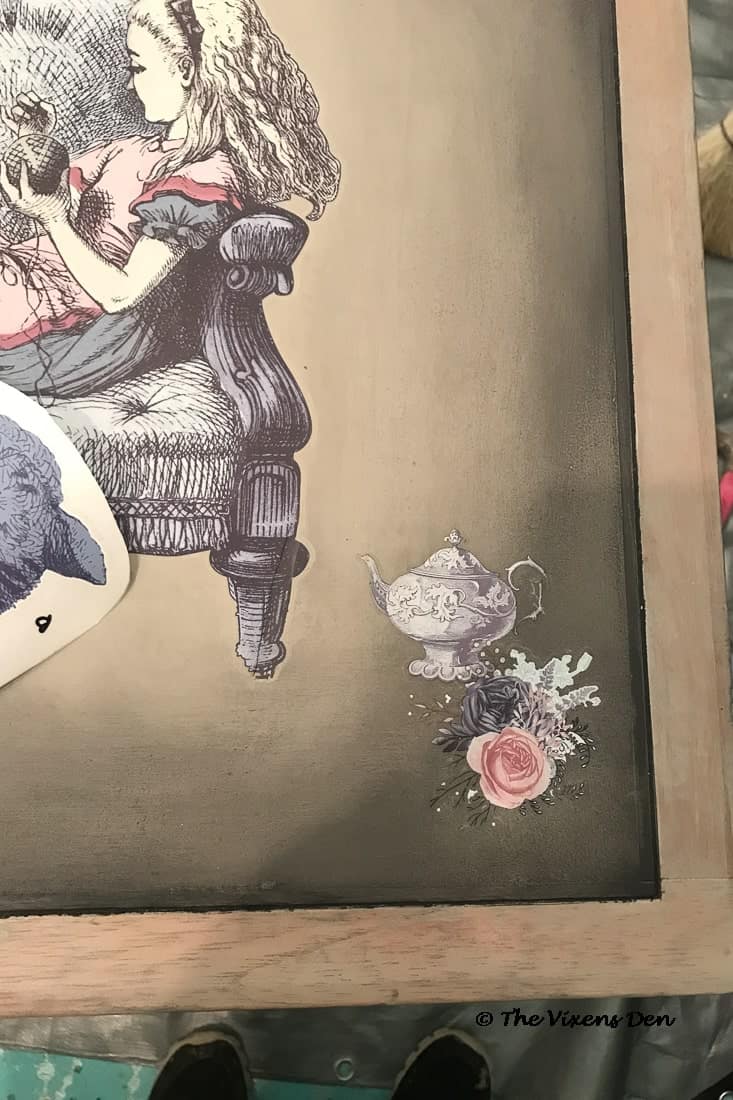
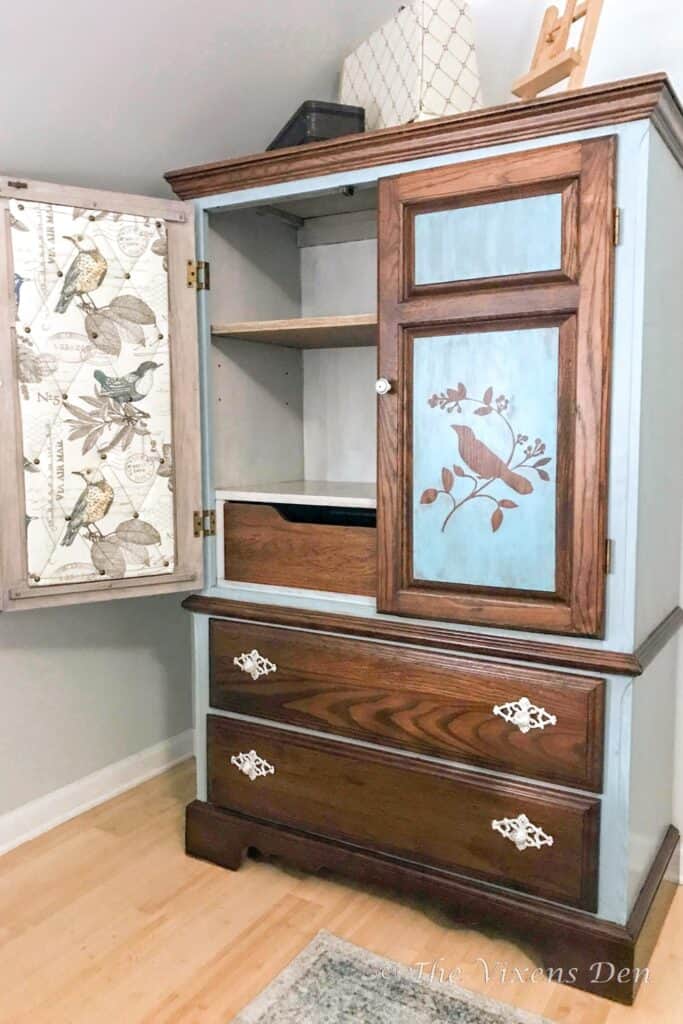
Pretty Details
The little details are what pull a piece together and help to give it a unique character. It’s also the most fun (and sometimes most challenging) part of a makeover. This piece has great bones, but since it is also my personal craft cabinet, I wanted to make it extra special.
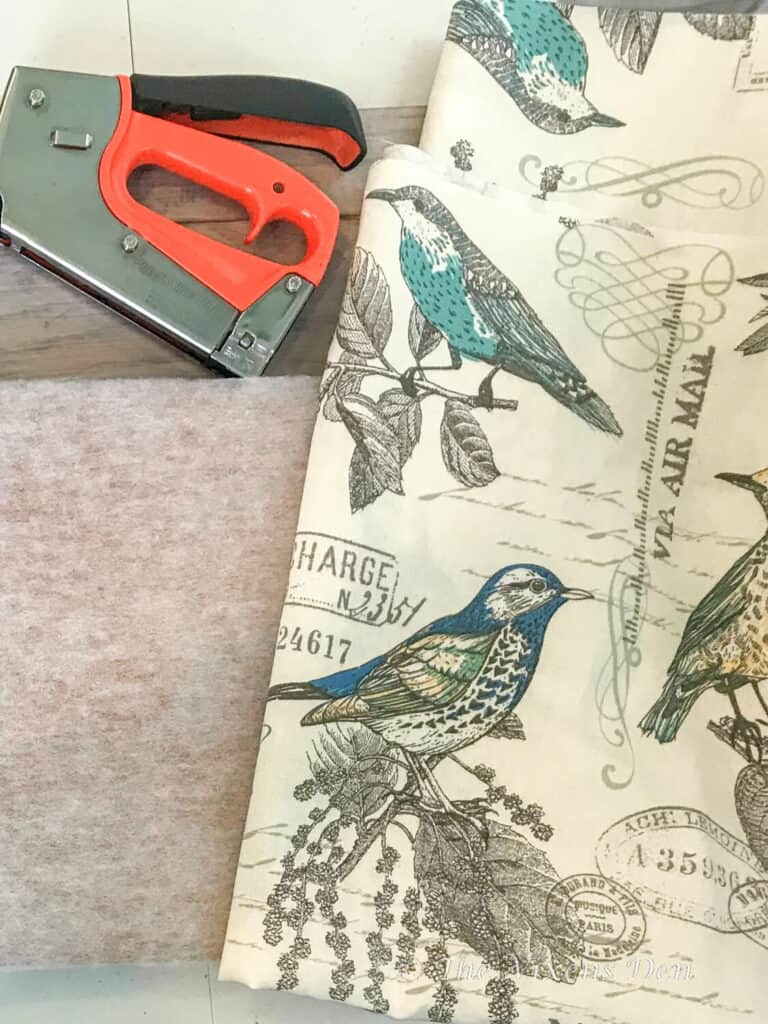
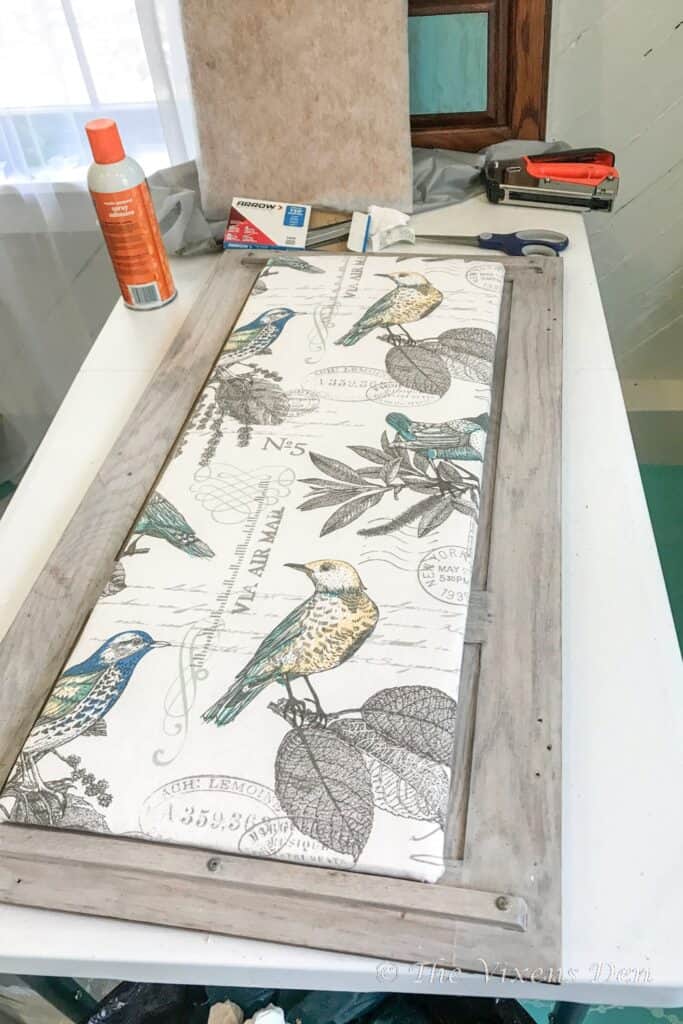
I love to use fabric for makeovers. There are so many beautiful options. When I saw this fabric from Hobby Lobby, my heart just sang. I knew it was perfect for this piece!
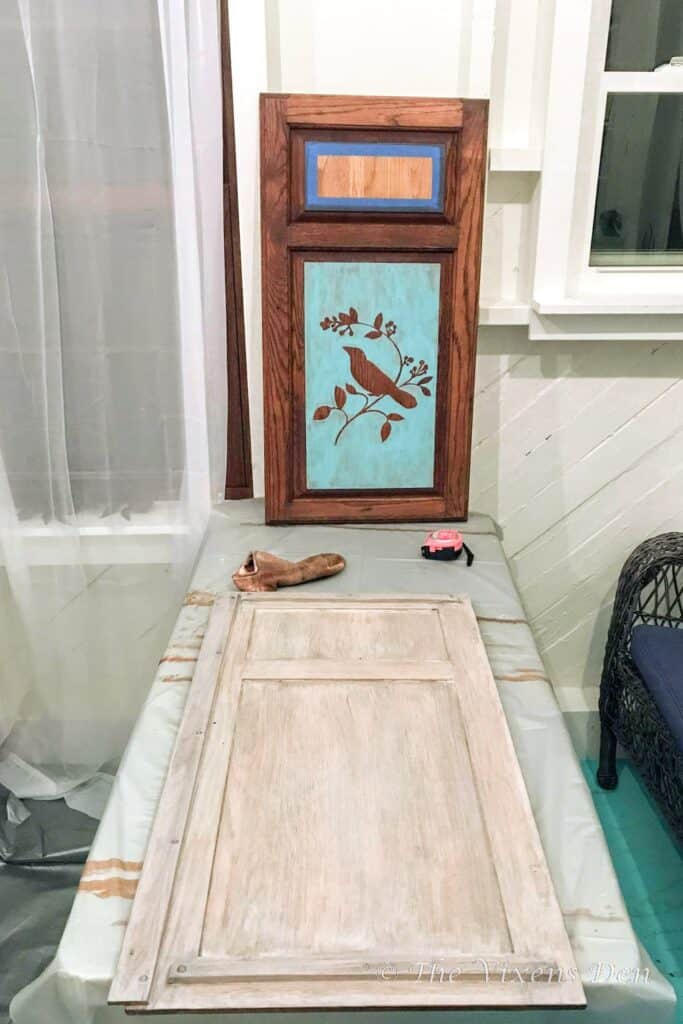
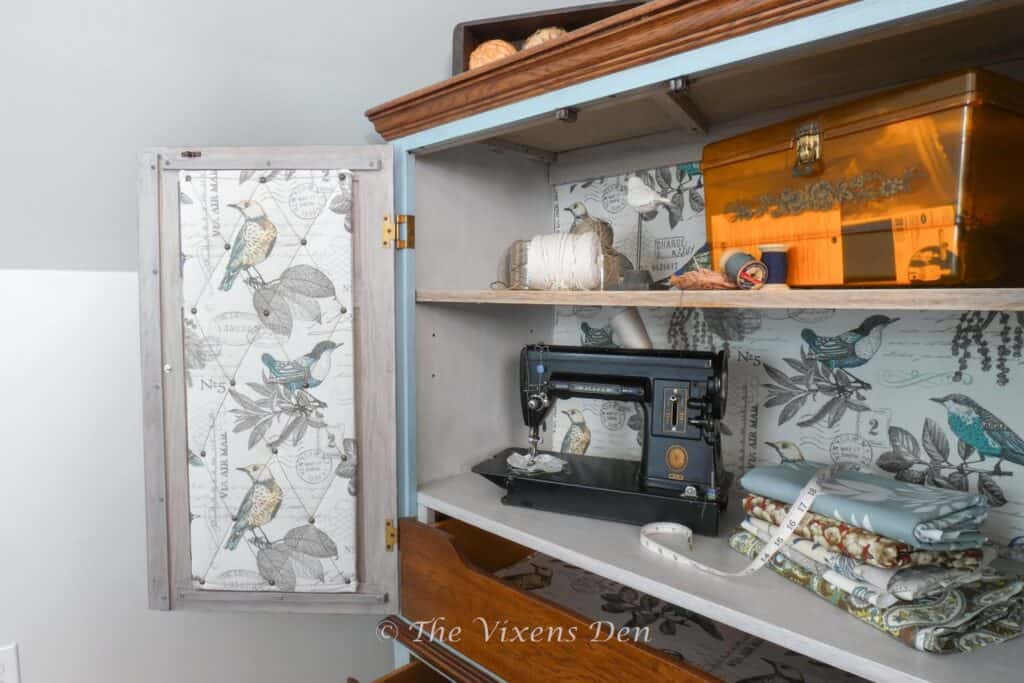
Corkboard
A corkboard is a very useful tool for a maker of things. It’s the perfect place to pin ideas, paint and fabric swatches, etc. The doors for this craft cabinet were practically begging to have a corkboard or whiteboard added to them. Being the obliging person that I am, I agreed completely. You can see that makeover process here.
There were a few bumps along the way of creating and installing these corkboards. Like the moment where I held the nailgun at the completely wrong angle and shot through the trim on the front of the door. (ugh!)
But, this turned into a great opportunity to try out this PC Lumber epoxy wood filler (after hammering the nails below the surface using the nailset.) This is also where I used the 220 grit sandpaper to smooth out the epoxy before staining it.
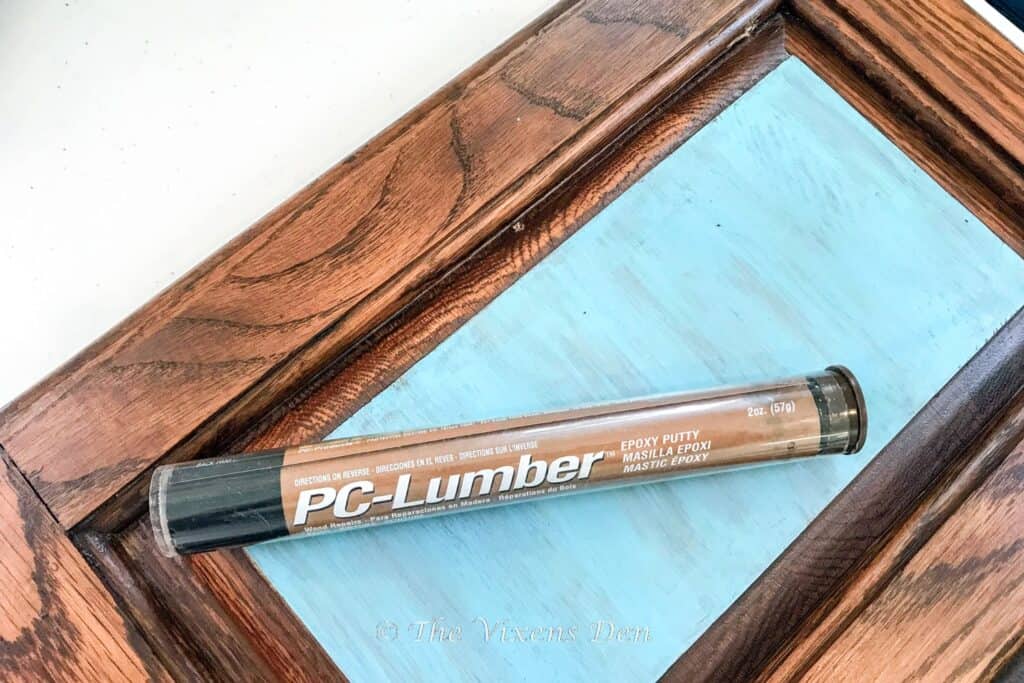
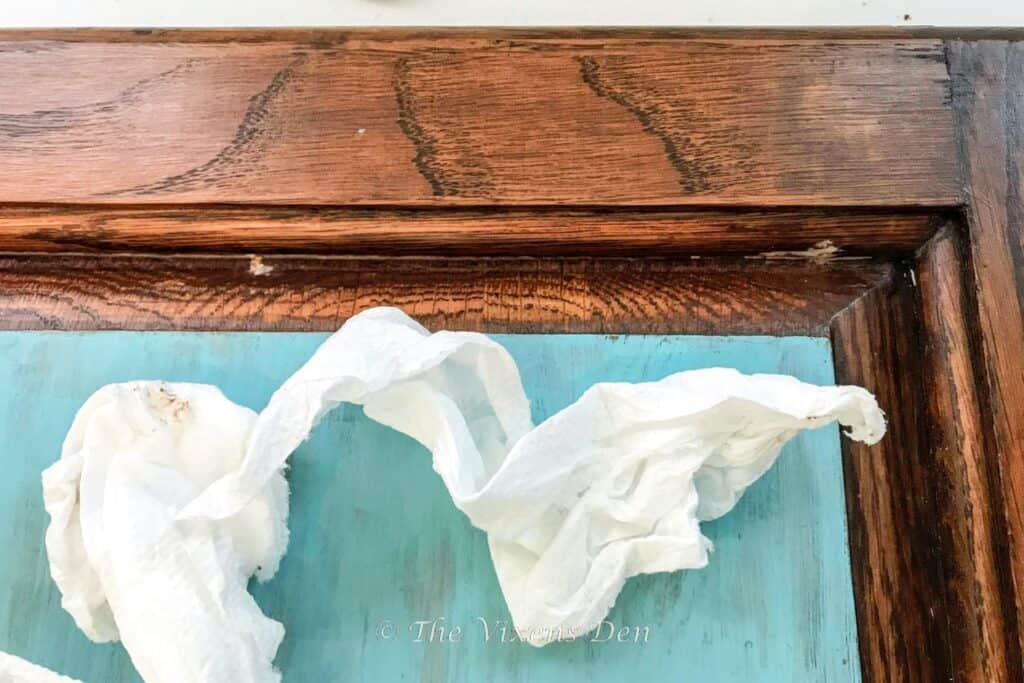
Once the epoxy was set, I stained it following the same process as before. I was finally ready to install the doors!
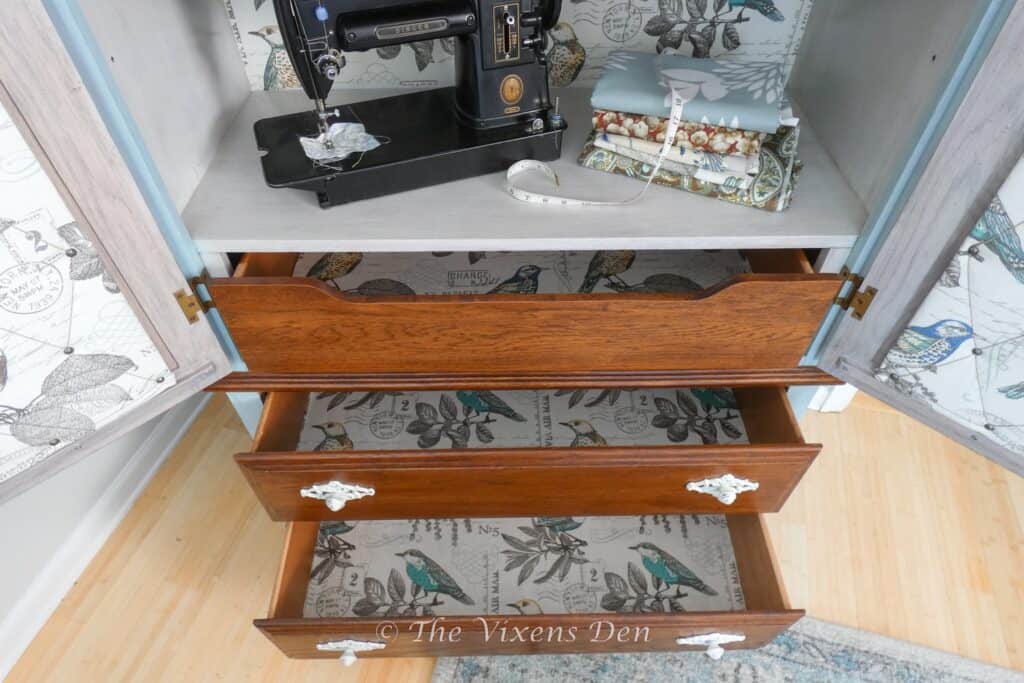
Drawer Liners and Shelf Backing
But wait! There’s more!
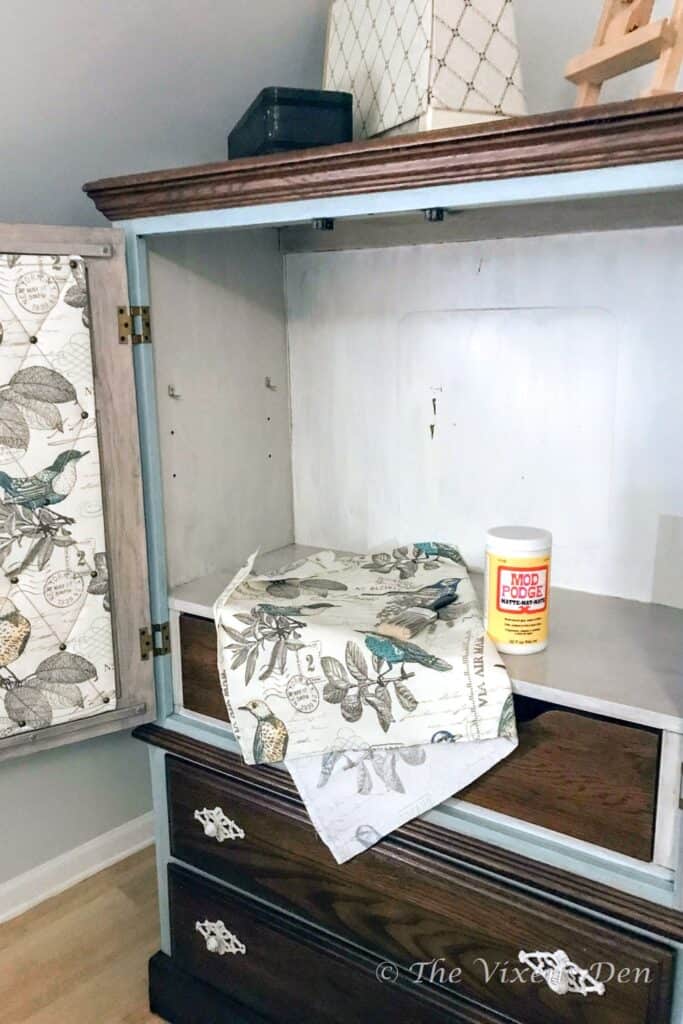
The cabinet was cute just like this, but I felt it could be even cuter. And…I had more fabric! And so, I decided to line all of the drawers AND add fabric backing to the shelves. It was definitely the right decision!
Since I know that I am going to love this fabric until the end of time, I decided to forego the liquid starch technique that I used in the deer dresser post. Instead, I stuck with my trusty Mod Podge in matte. This stuff is awesome!
So, are you ready to see the final makeover in all its beautifulness?
The Final Reveal
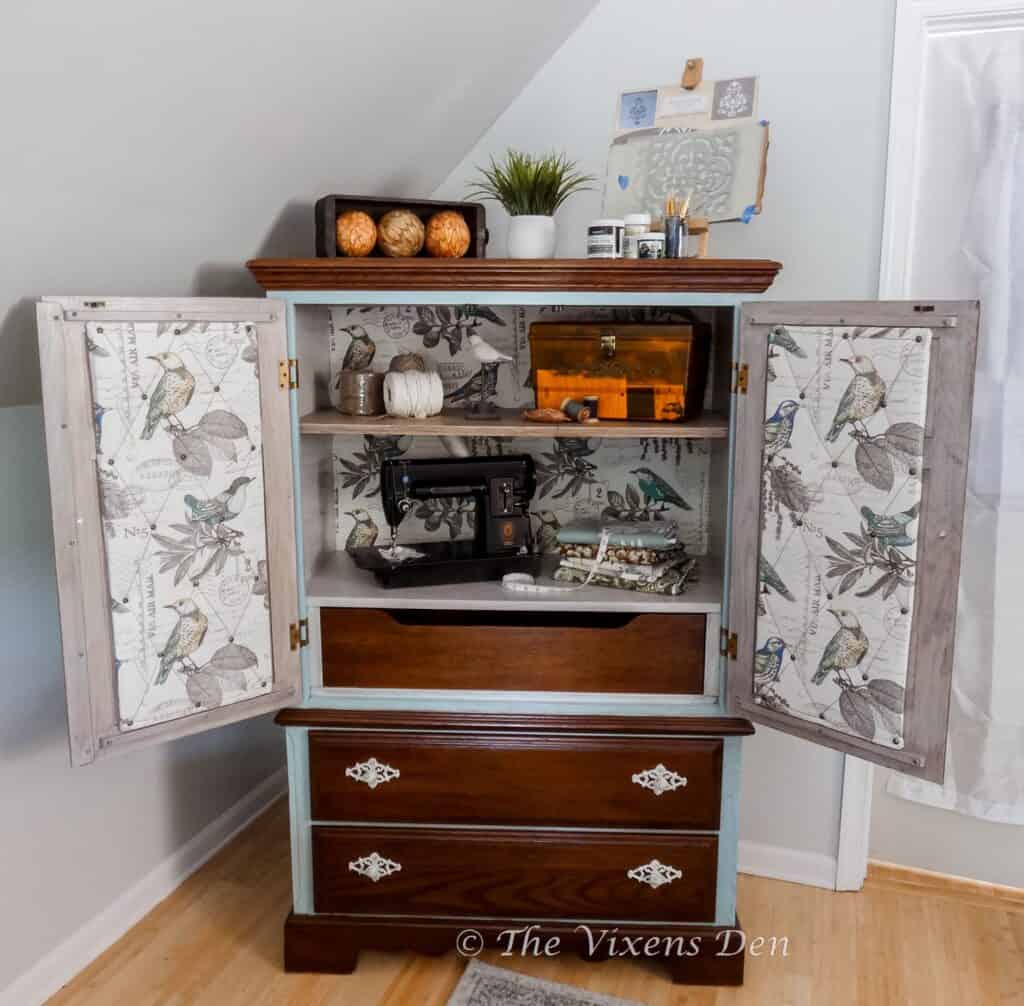
Isn’t it just gorgeous? I love the way the colors are soft and muted on the inside and a bit bold on the outside.
The right door is a little bit wonky, so I’ll have to work on fixing that.
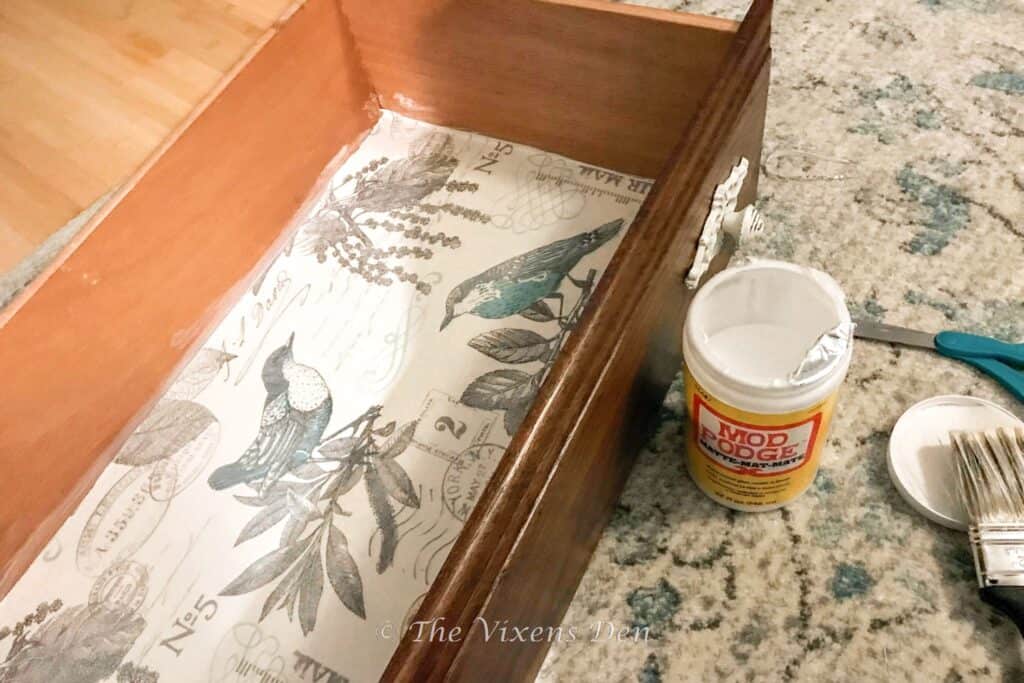
Here’s a peek at the fabric-lined drawers. This duck canvas fabric was SO much easier to work with than the silky polyester fabric that I used in the deer dresser post.
So what do you think? Do you love that fabric as much as I do? It really is just the most gorgeous fabric. And now I have a stunning and unique craft cabinet to store all of my hoarded *ahem* curated craft supplies.
So keep your eyes peeled the next time that you’re out at a yard sale. You never know when you might be the answer to someone’s prayer of “please, Lord, help me sell this thing so that I don’t have to drag it home again!”
If you enjoy seeing DIY makeovers like this one, be sure to subscribe so that you receive an email when new misadventures are posted. If you like this paint-washed and stained armoire makeover, then you may also enjoy seeing this makeover that transforms a dresser into a buffet. Enjoy!