Ladderback Chair Makeover with Voodoo Gel Stain
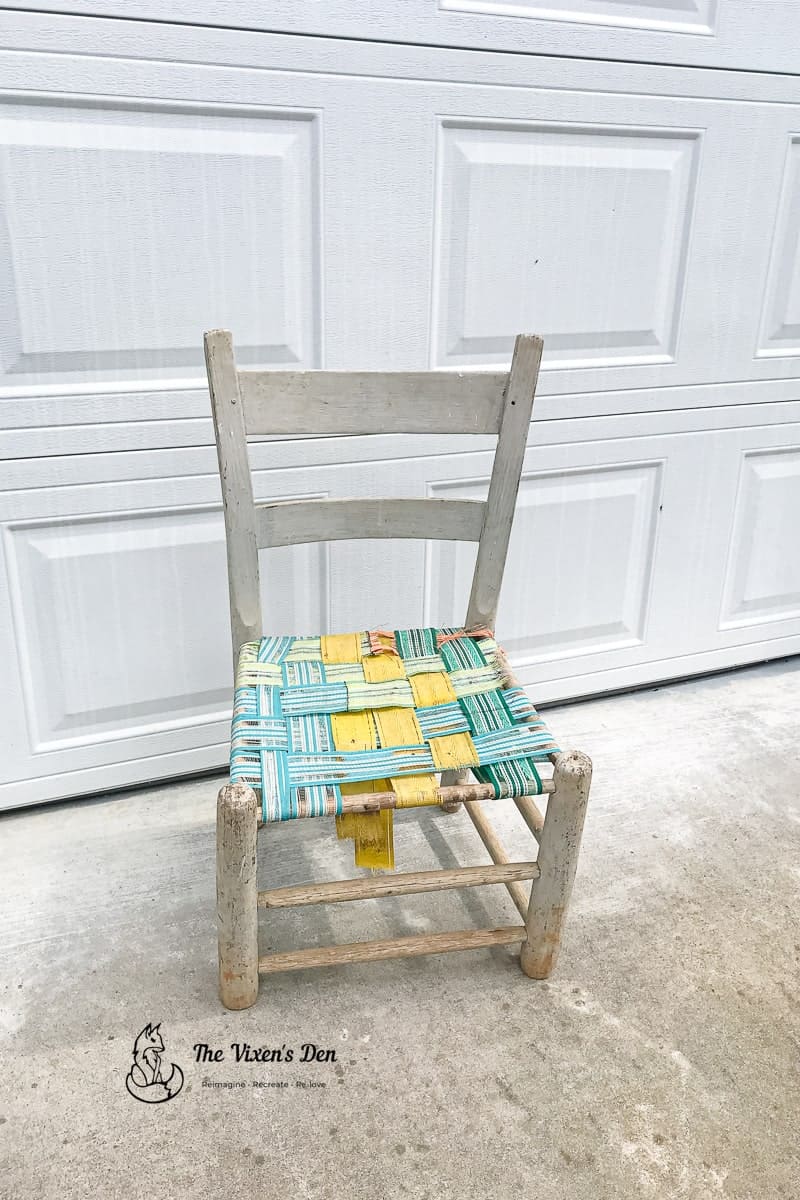
Do you love a good yard sale find as much as I do? This sweet little ladderback chair was picked up at a yard sale for just a dollar! It had obviously already seen one makeover in its lifetime.
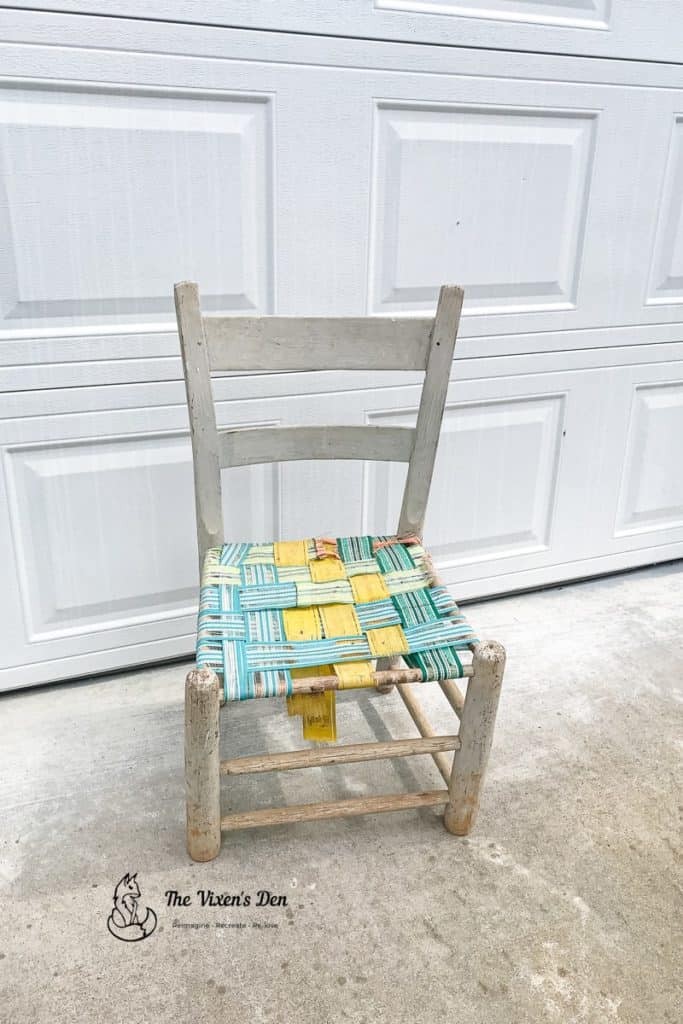
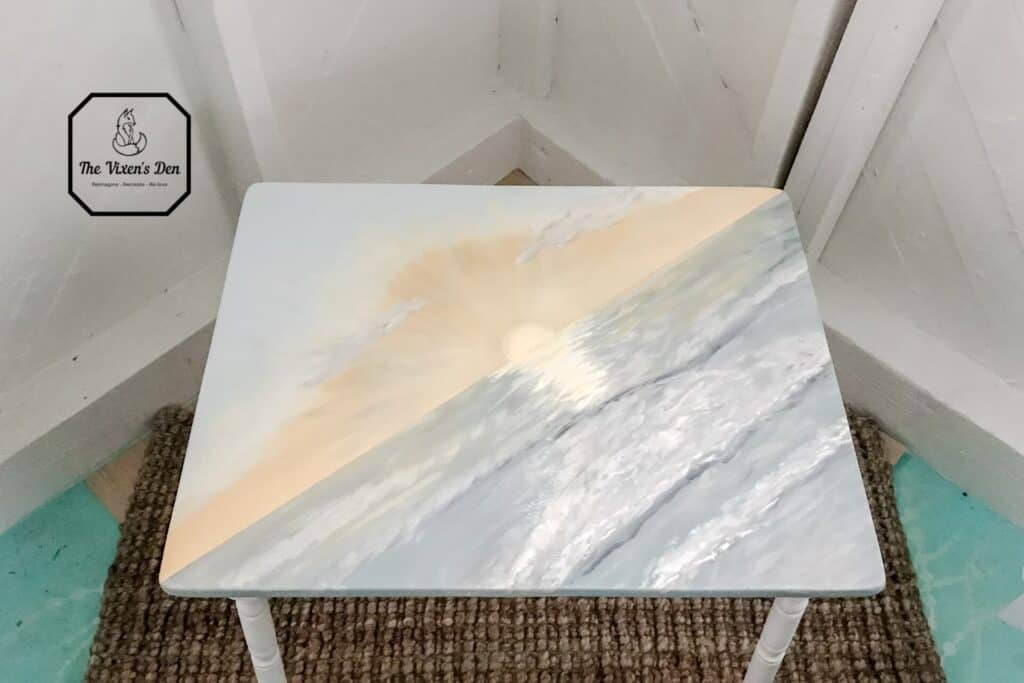
My daughter thought it would be the perfect chair for this children’s table, and it was!

I recently learned that the most likely reason that this chair is the perfect height for a little person, is that the legs were cut short years ago so it could be used to process tobacco. This put the tobacco workers closer to the floor so that they didn’t have to stoop over so far. I love this kind of history! But now it’s time to give this chair a brand new makeover!
This post is sponsored by Dixie Belle Paint Company. While they provided some of the products for this project, all of the opinions are my own. Follow this affiliate link to see all of their amazing products!
AS AN AMAZON ASSOCIATE I EARN FROM QUALIFYING PURCHASES AT NO COST TO YOU.
YOU CAN SEE MY FULL DISCLOSURE HERE.
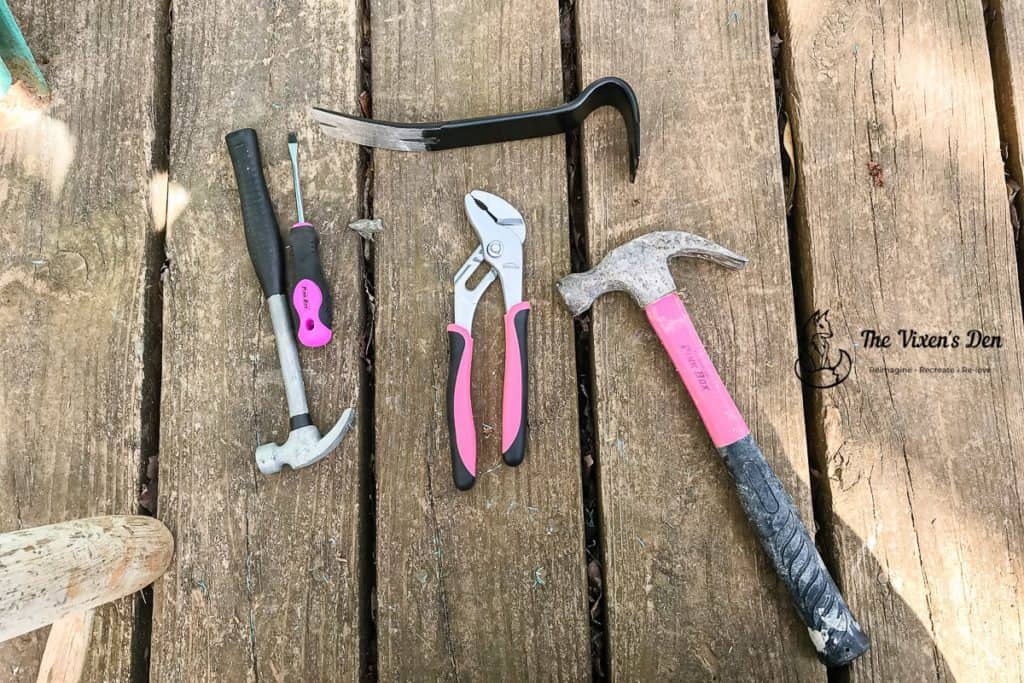
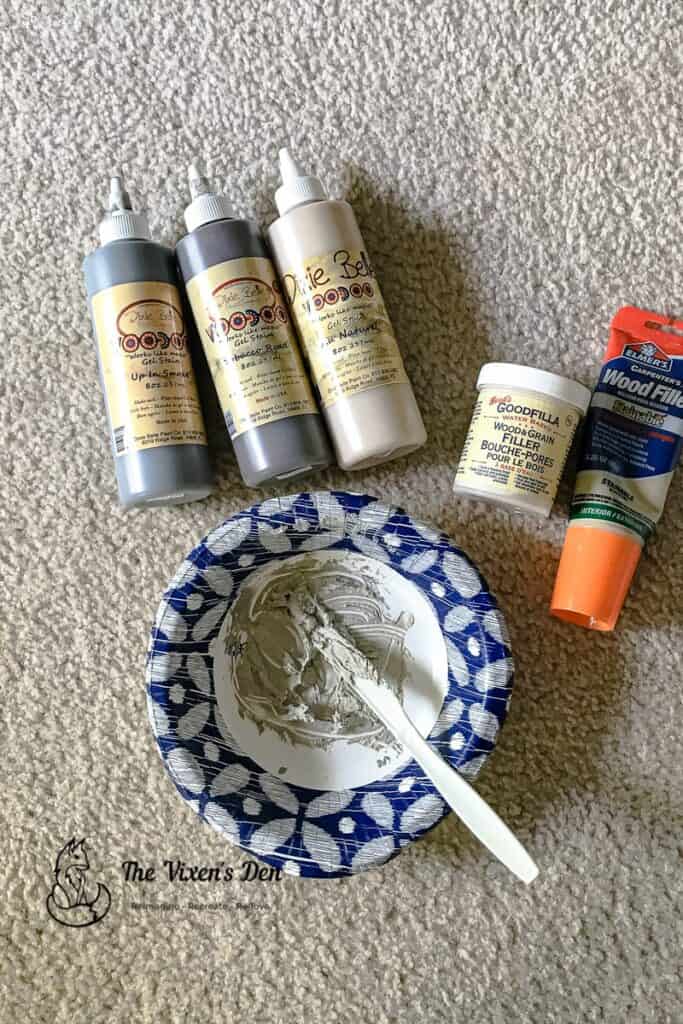
Supplies Used
Tools
Materials
- Mouse Sander Sandpaper Pads
Voodoo Gel Stain – Up in Smoke, Tobacco Barn, and Au Natural Applicator - Wood Filler – Goodfilla and Elmer’s
Howdy Doo Hemp Oil Chip Brush - Plastic Tablecloth (for drop cloth)
- Furniture Touchup Markers
Cleaning & Prepping
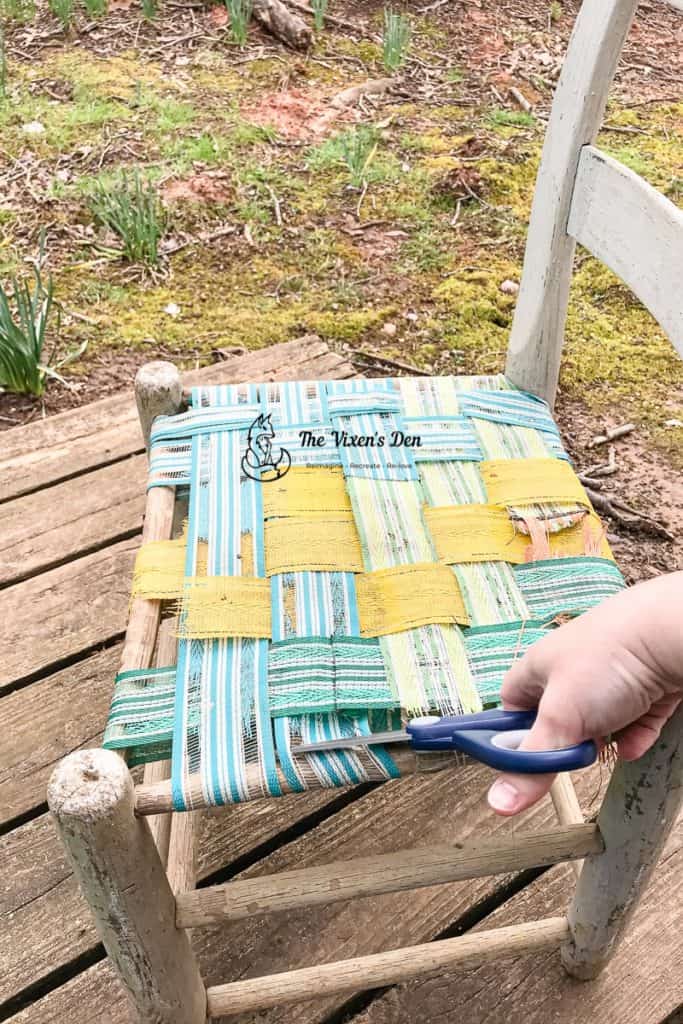
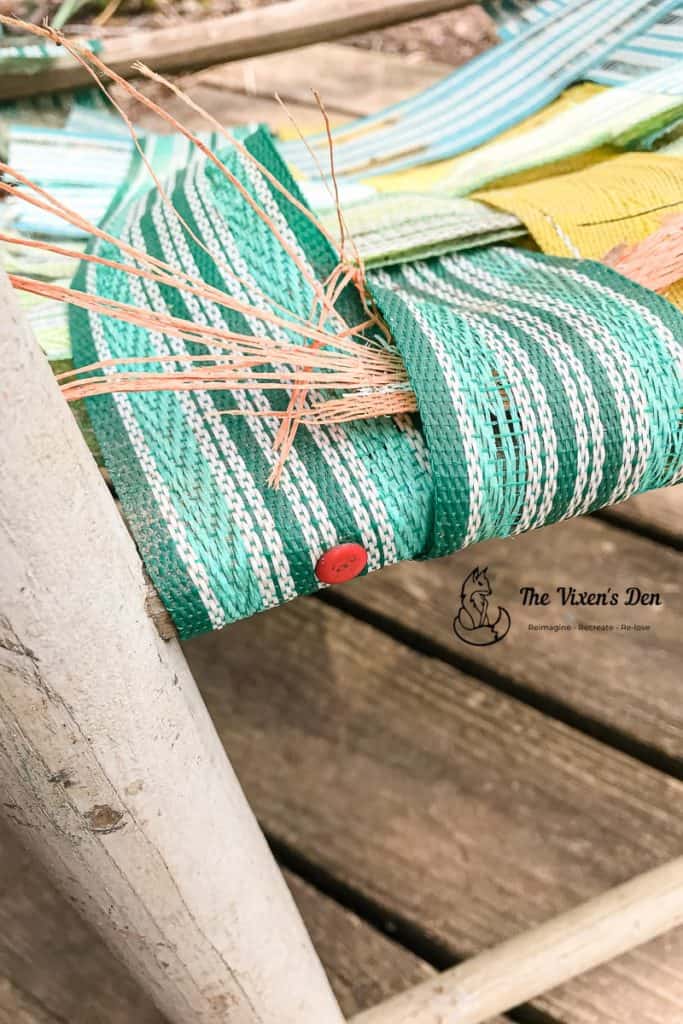
Before I could start getting down to the bottom of things, I had to remove the webbing that the previous owner used to repair the seat. A few snips of the scissors took care of that, but it also left behind a ton of tiny little tacks.
These had to come out, and my regular-sized hammer just wasn’t doing the job, so I grabbed this tiny little tack hammer that I picked up at another yard sale.
My son-in-law teased me when I bought my little hammer, but it was perfect for the job!
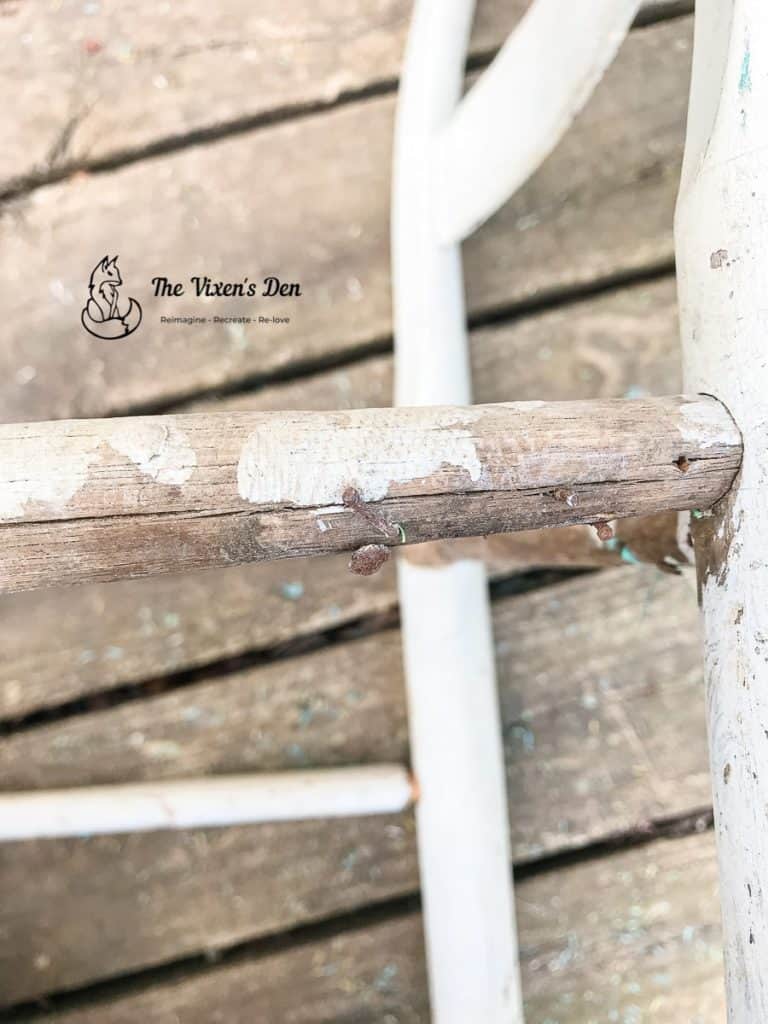
Some of the tacks were so rusted that the heads popped off when I tried to remove them. I tapped those below the surface of the wood with a nail set so that they won’t scratch anyone.
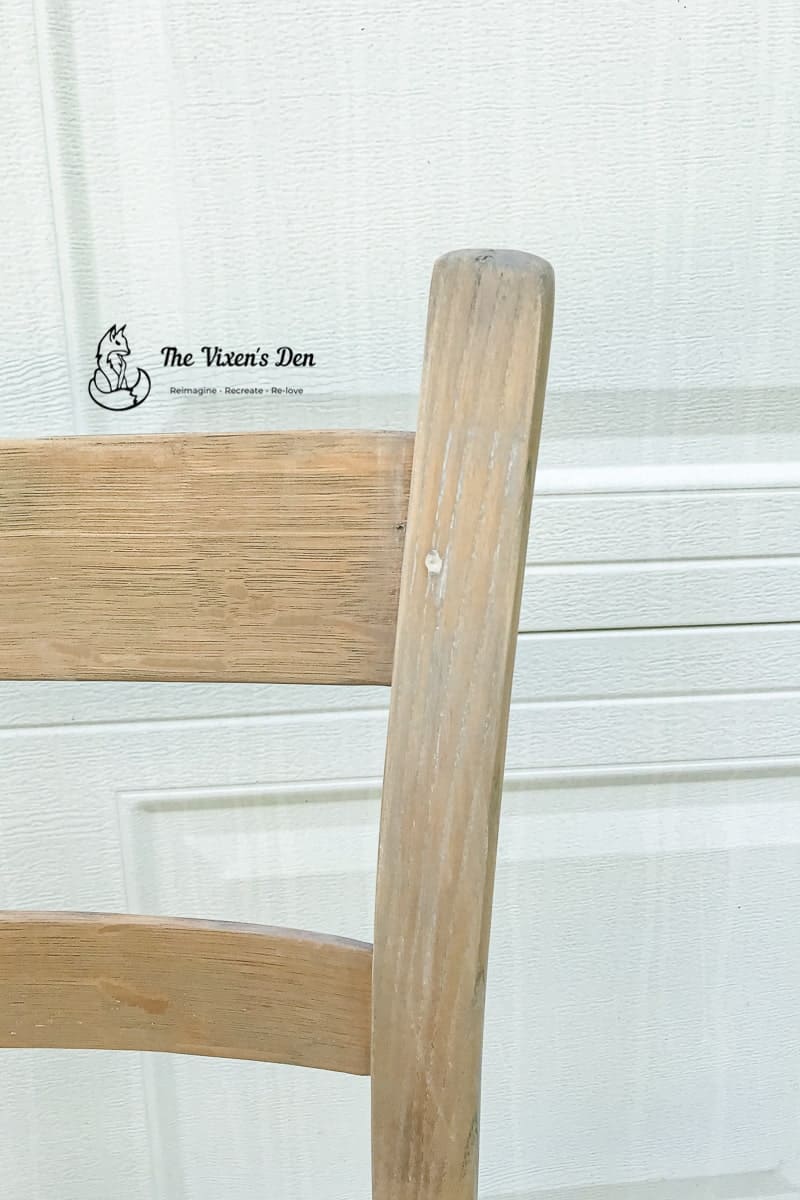
Normally, I scrub a new project with White Lightning before I start sanding. However, this piece was so dry and the finish was so flaky, that I just grabbed my trusty mouse sander and went to town.
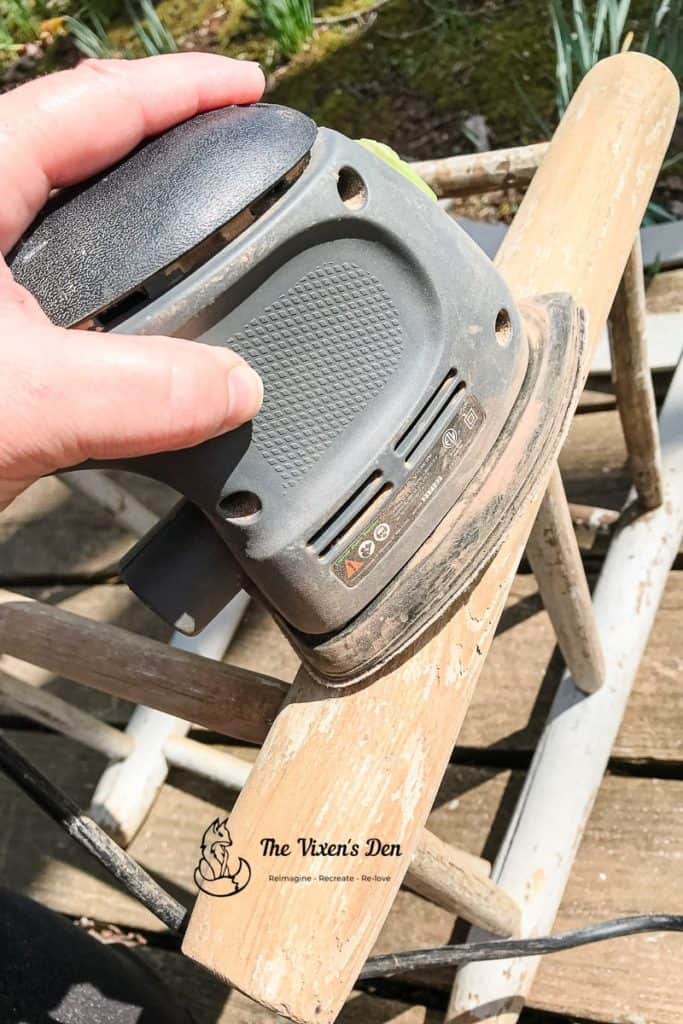
It was quite the sanding adventure, but it was worth it. I found the most beautiful wood grain underneath!

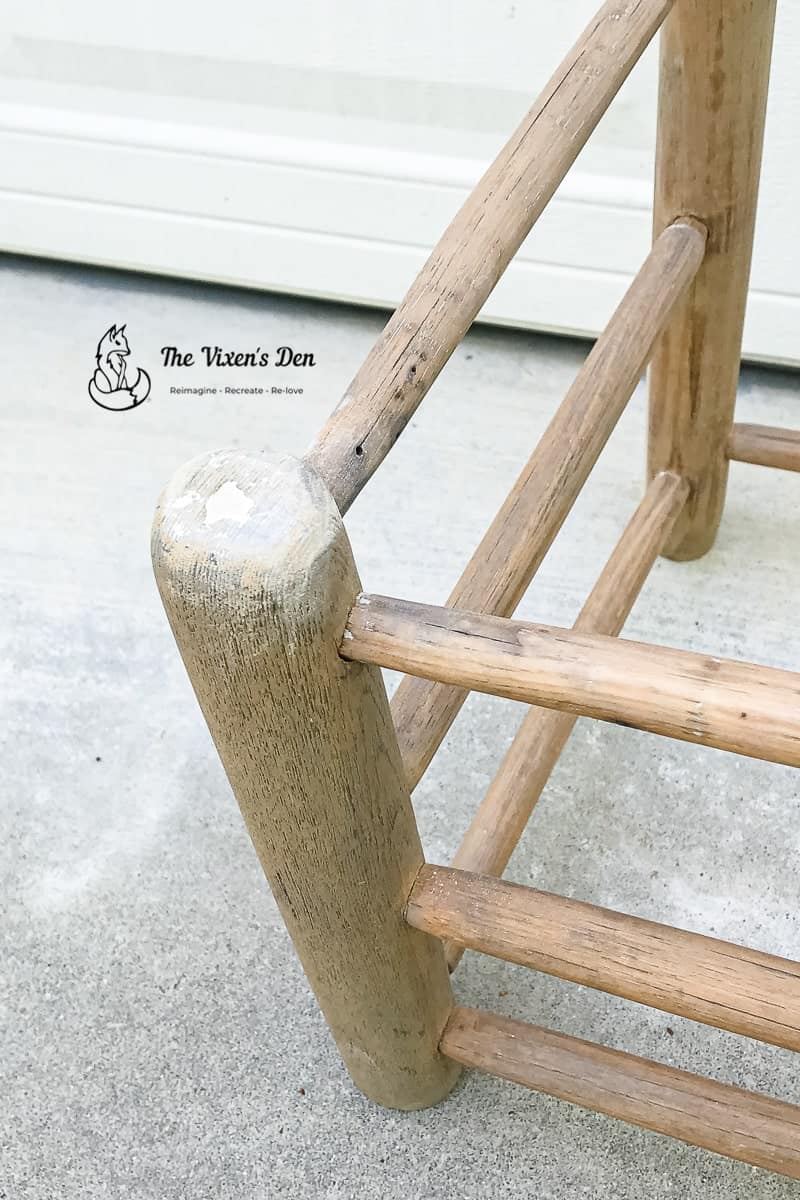
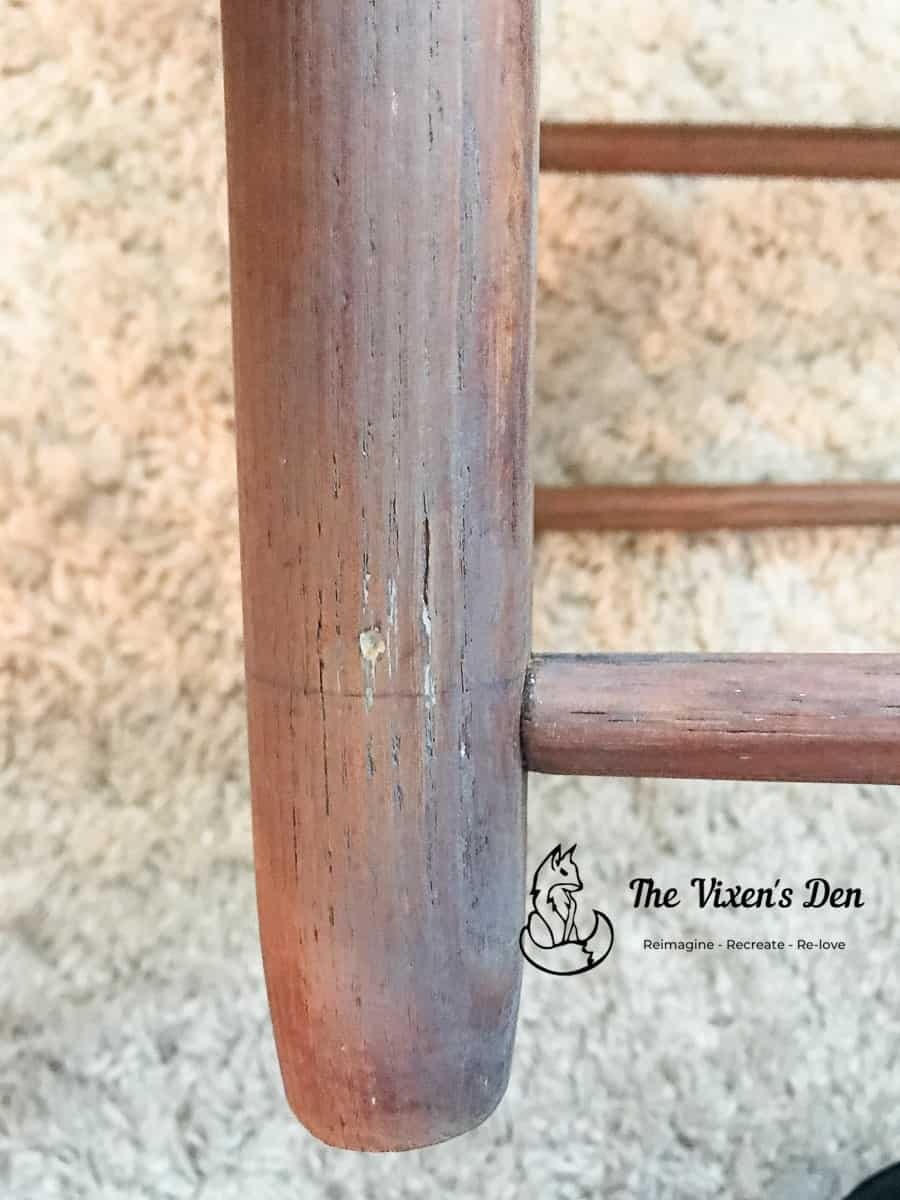
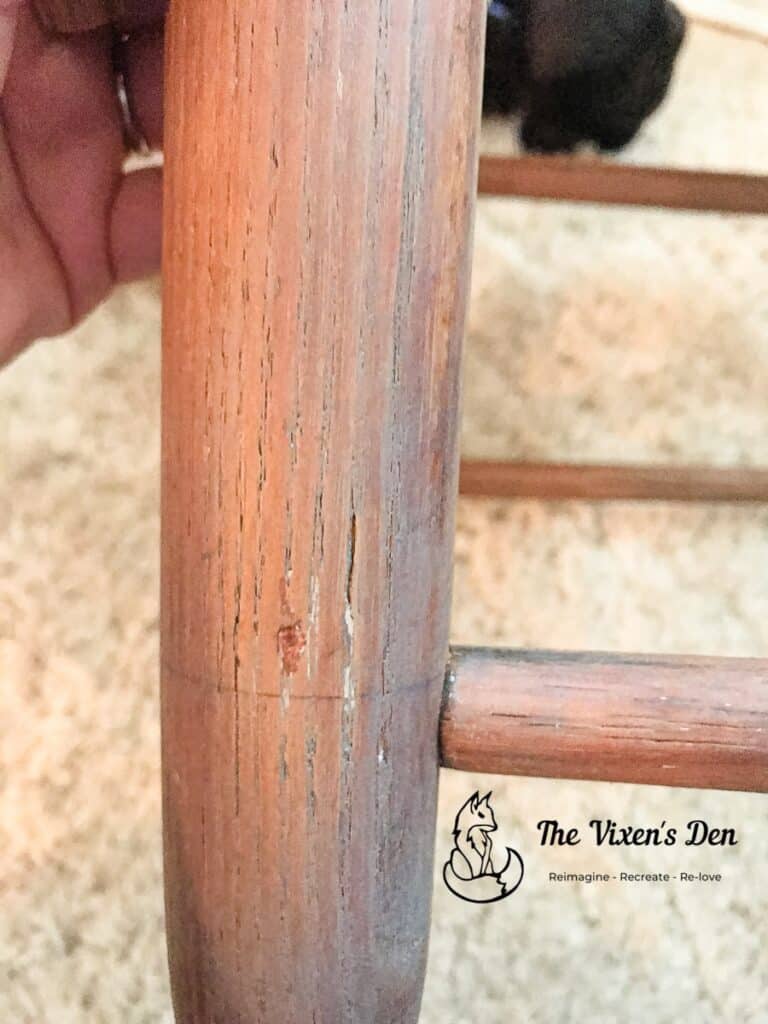
Unfortunately, I also found a few problem areas.
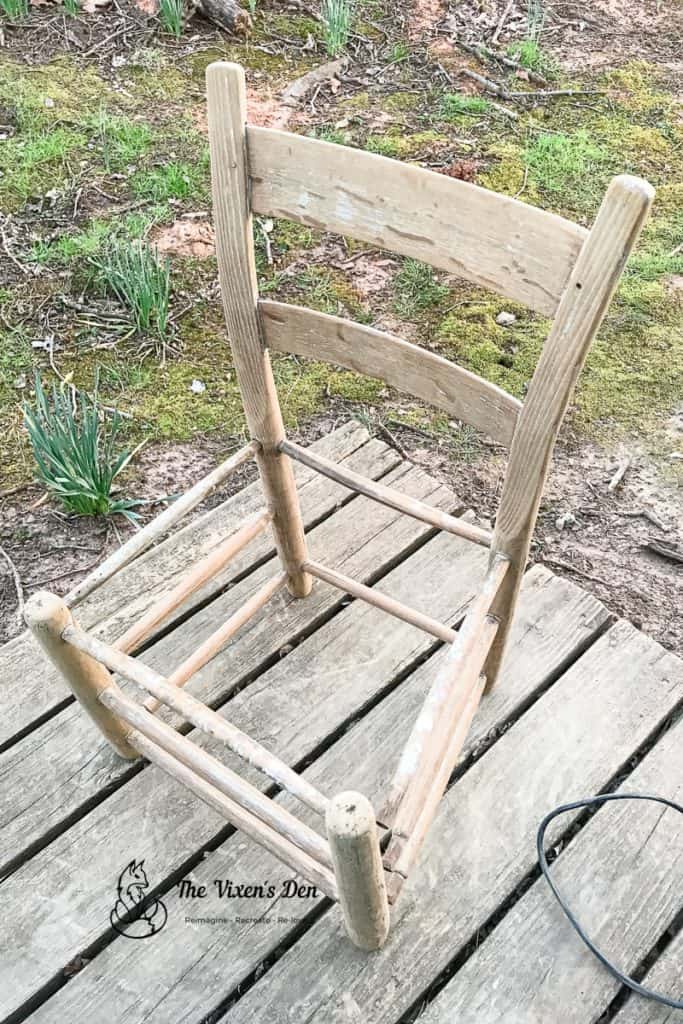
In this case, the rungs aren’t the problem. Those tighten up nicely once the new seat is in place. The problem here was missing nails from the top rail, and large holes in the front legs.
Making Repairs
The missing nails weren’t actually that large of a problem. I managed to find some small nails in the dearest husband’s hardware stash (shhh, don’t tell him!) and they fit the bill perfectly.
The large holes, on the other hand, were another situation altogether. I’ve spent a lot of time working with wood putty, and I’ll need to spend a LOT more time working with it before I’ll be anywhere near proficient.
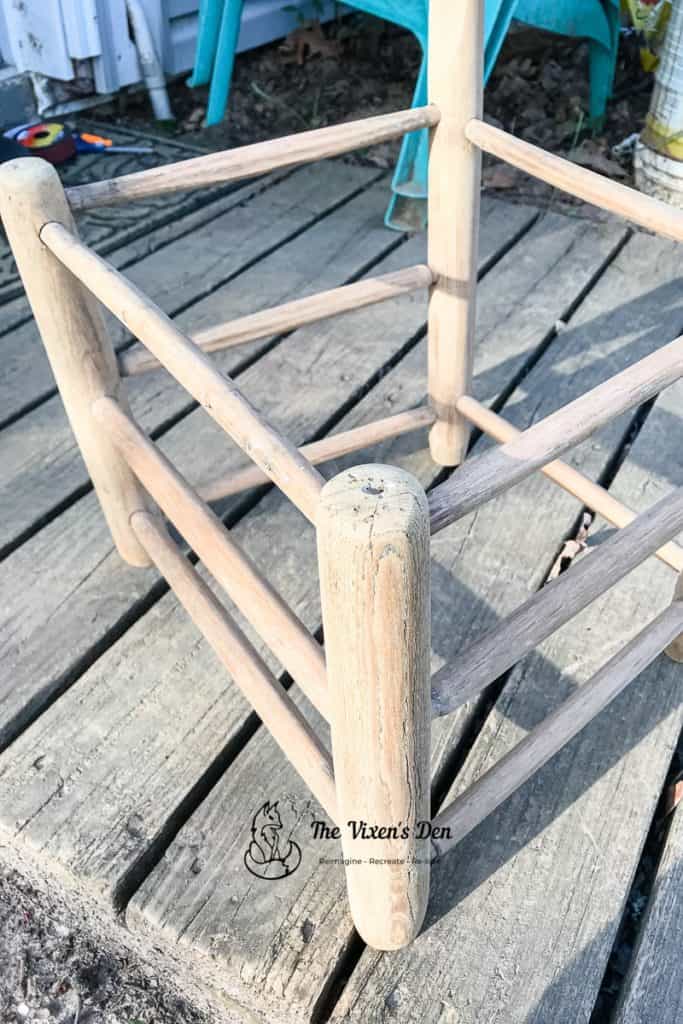
One thing that I have learned for certain is that no matter how hard you try, the repair will never stain to match the surrounding wood. Never. Trust me, I’ve tried. With that in mind, I decided to stain the wood first, and then fill in the holes with wood putty.
Staining with Voodoo Gel Stain
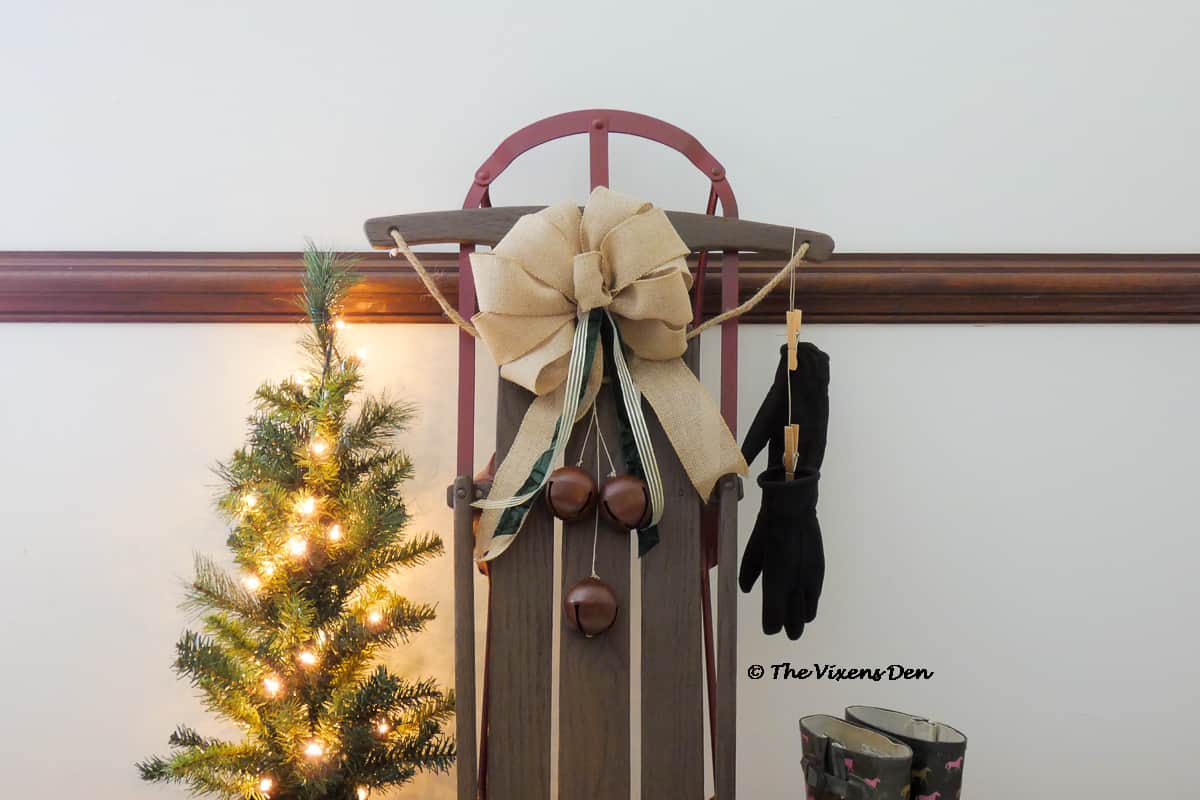
I love the Dixie Belle Voodoo Gel Stains. They are water-based stains that soak nicely into the wood and leave a nice matte color that you can leave as sheer, or add more layers to make as deep, as you like. I was interested to see how the wood would accept this beautiful gray stain called “Up in Smoke”. This wood was so dry, that I figured it would probably soak it up, much the way this sled did.

I knew that we didn’t want to lose any of the woodgrain for this project. Also, my daughter wanted the stain to match the light gray in the ocean scene on the chalk-painted children’s table.
Taking all of this into consideration, I gently rubbed on a thin coat with an applicator, and then added one more coat to even out the tones.
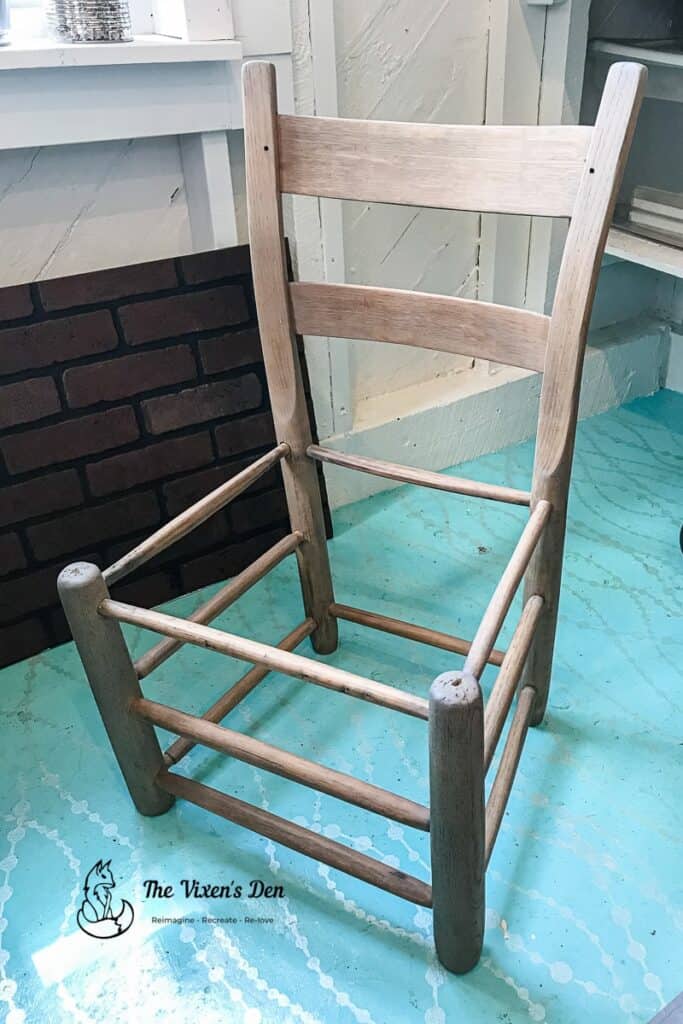
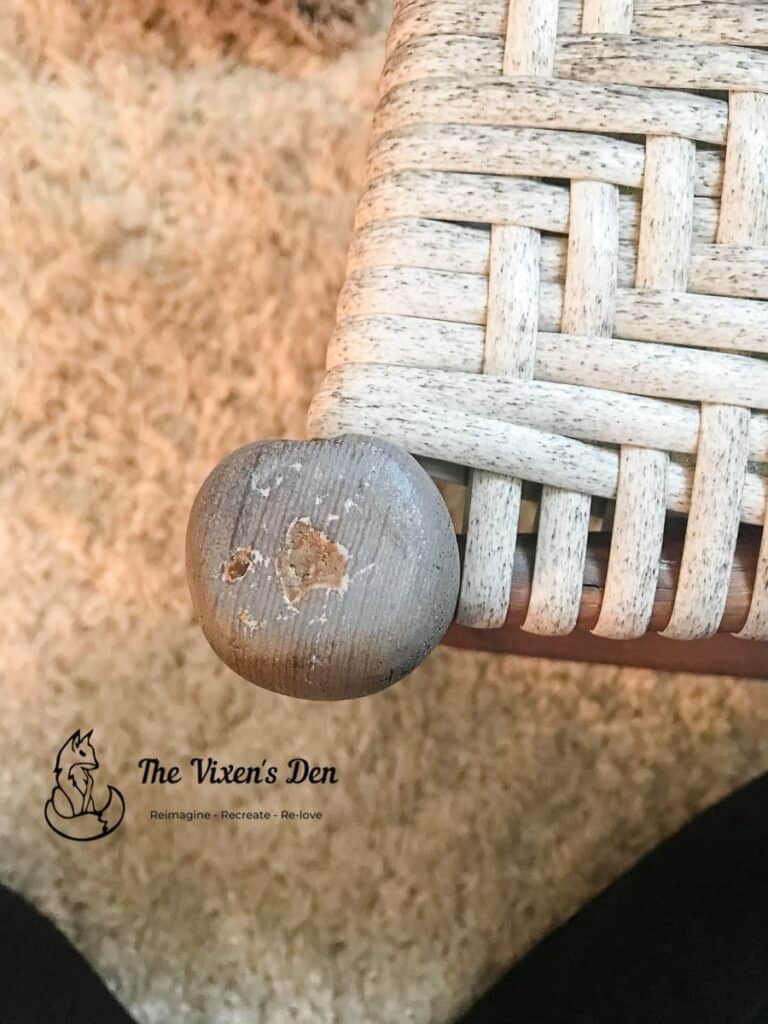
The Dixie Belle Voodoo Gel Stain in Gray really helped to emphasize some of the beautiful wood grain, while toning down any orange undertones. The front legs did turn out a bit deeper than the rest of the chair, but I didn’t want to make it too dark and end up having to sand it down again. So, the next step was patching all of the holes.
Staining Wood Filler
I attempted (once again) to match the wood filler to the wood. Unfortunately, my efforts were in vain based on what happened in the next step. But it was a decent attempt. I combined three different water-based gel stains with two different wood fillers to try to create a color that matched the wood.
It really was a decent try, and it filled the holes.
The wood filler was definitely too light. Especially after this next step…
Sealing with Hemp Oil
I decided to try something different from the usual water-based sealer this time. I was looking for a natural, matte finish for the wood and I had heard some interesting things about hemp oil. According to the instructions, it dries to a matte finish and after 21 days of cure time, it’s waterproof!
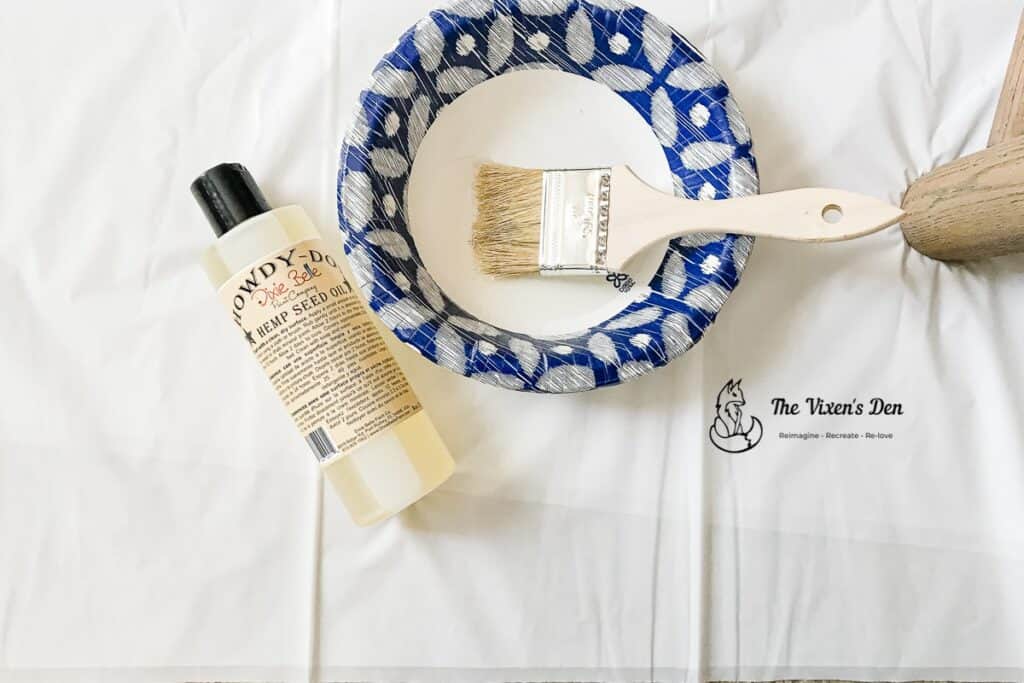
That sounded perfect! I wanted a durable matte finish that could withstand crumbs, spilled juice, and anything else that a toddler might throw on this chair. So, I grabbed a chip brush and brushed on a coat of oil. I let it sit overnight and wiped it down the next day. And that’s when I realized that the color of this piece had completely changed.

I don’t know if you remember, but we were going for a light gray look for this piece. That is definitely not gray. However, my daughter liked it, so we rolled with it. Unfortunately, that made fixing the wood-filled spots even more fun.
Matching Wood Filler
We were past the point of staining the repairs. It was time to bring in a backup secret weapon.

I have used furniture touchup markers for years to cover nicks in finishes, and I’m a fan. I also find this much easier than trying (and failing) to match the wood filler to the wood tones. By layering different markers, I was able to achieve a reasonable match.
Hindsight is 20/20 tip: Make sure that you have a wider range of colors that includes honey and gray tones. This one worked okay, but it could have been better.
Final Reveal
So here we are, at the end of this makeover. Are you ready for the final reveal?

Wait, you think it needs something else?
A seat, you say? Well, I suppose that’s perfectly reasonable. Unfortunately, it won’t be in this post as I have yammered on for long enough. So, you’ll have to check out this post to see how that went down. If you would like a sneak peek, however….
Can you guess what material I chose for the ladderback chair seat, and how I made it? (hint: think “potholders”)
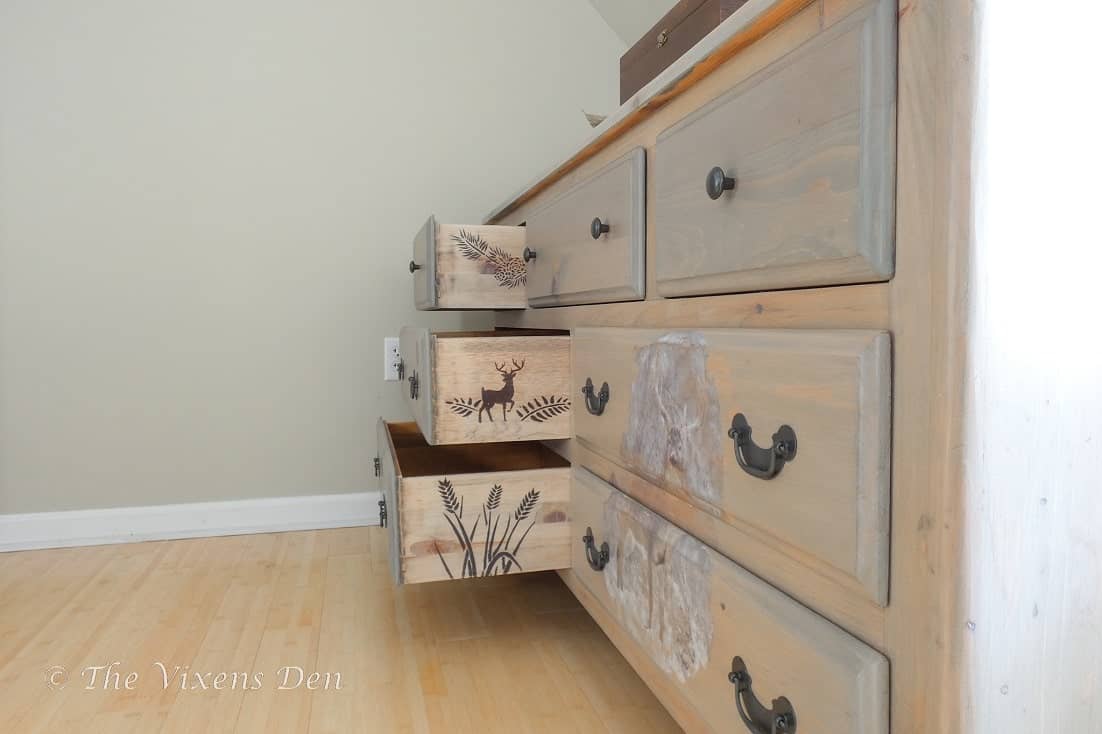
If you would like to see some more stained wood projects, check out this stained dresser makeover, or this dresser to buffet makeover. Both involved some challenges with overcoming orange undertones and matching wood tones.
Finally, I haven’t figured out a good wood conditioner for water-based stains, so if you have any suggestions, please drop them in the comments below. I appreciate all of the tips and feedback!
Thank you so much for stopping by! Be sure to sign up below so that you don’t miss any of the misadventures. Until next time, have a wonderful day!


Linked up to these lovely link party hostesses at: