End Table Makeover with Chalk Paint and Gel Stain
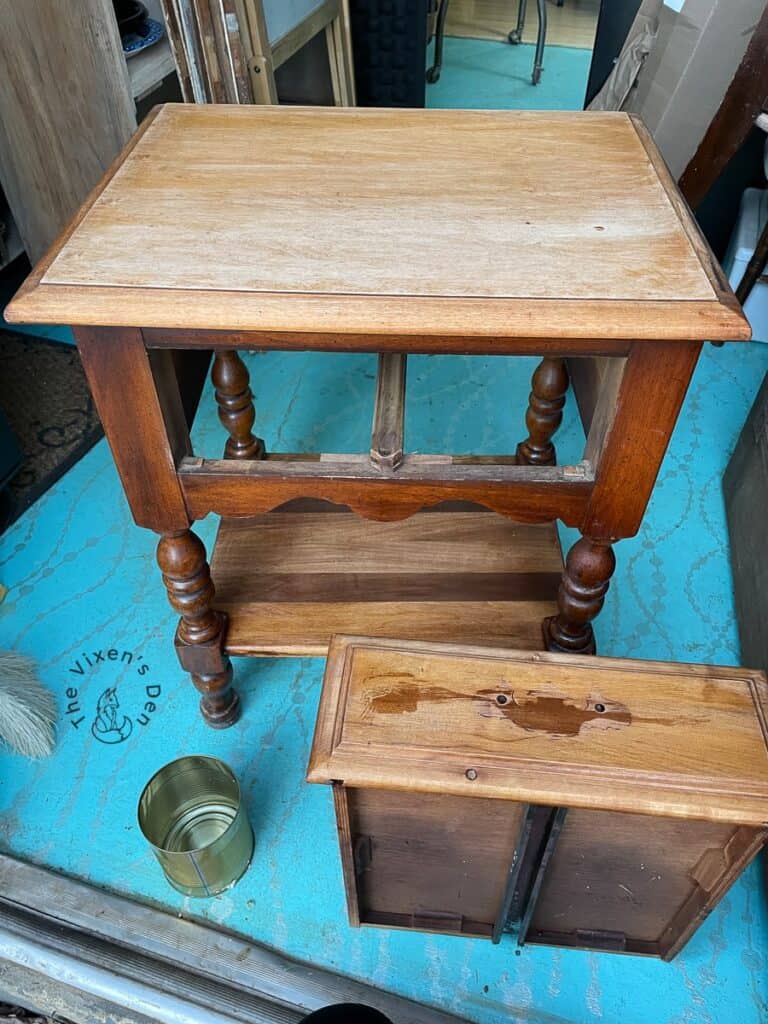
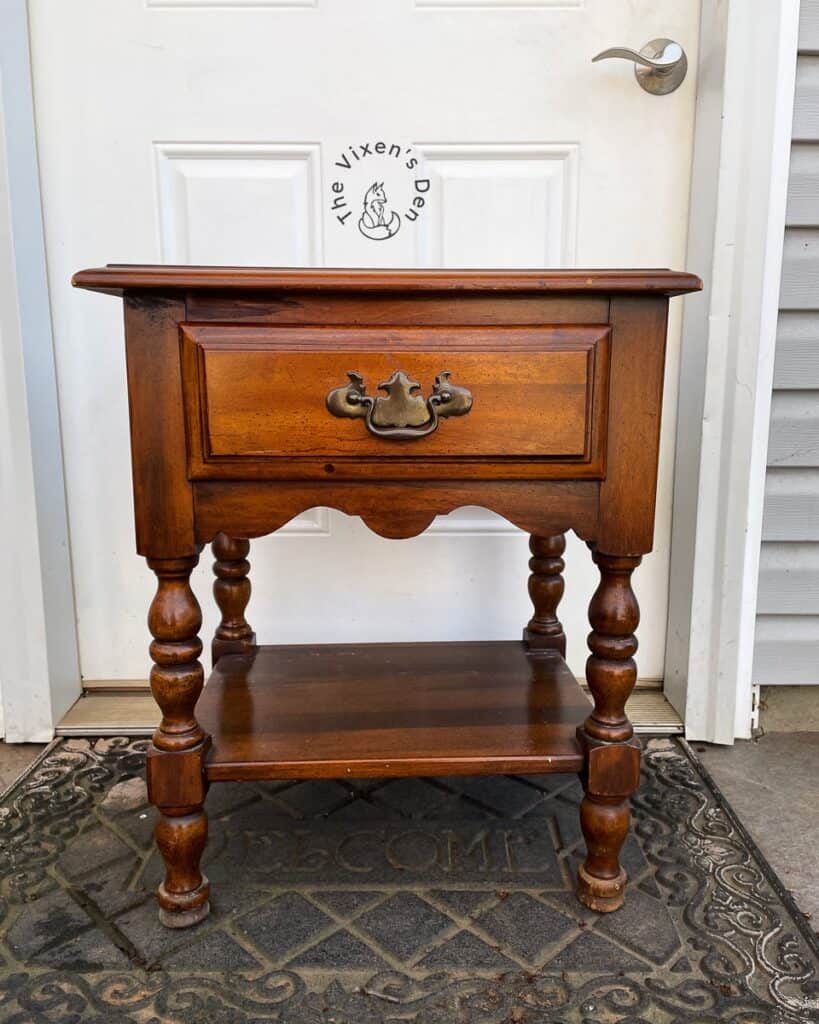
Do you have a sturdy piece of furniture that is so functional that you can’t let it go, but it’s so ugly that you wish you didn’t need it? I bet it’s a piece that’s seen a lot of things in its life. Just like this end table that used to sit in my aunt’s living room, holding her coffee mug and ashtray when she was still with us.
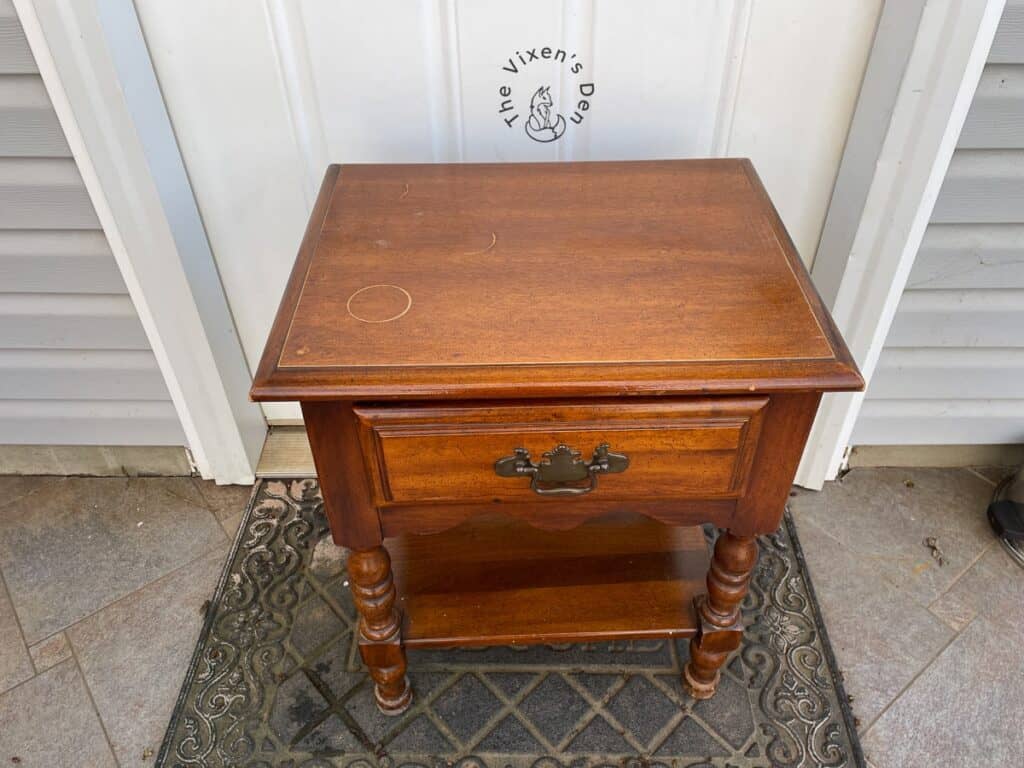
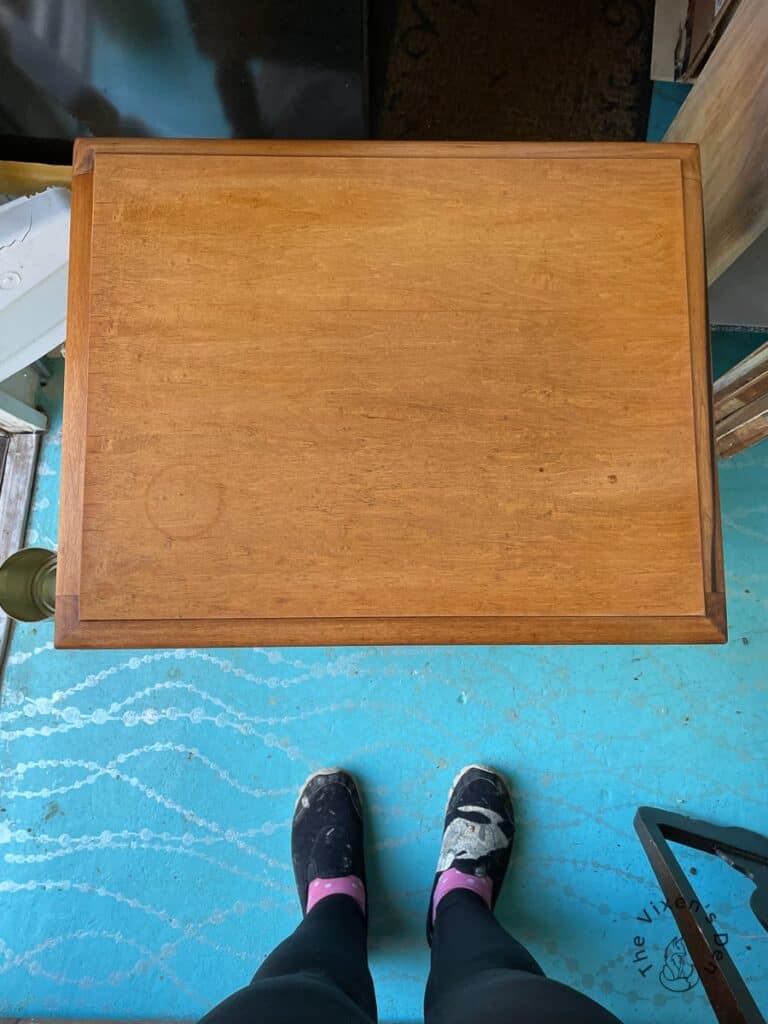
The little table had a few battle scars from its years of service. There were a couple of chips in the veneer, some dings in the legs, and a large water ring, but it was solid wood and otherwise in great condition. All it needed was a new look to transform it from a shy wallflower into a stunning focal point! Let’s see how the magic happened. But first, some legalese…
This post is sponsored by two amazing companies with beautiful products: Dixie Belle Paint Company and Undead Furniture Company! Check them both out today!
AS AN AMAZON ASSOCIATE I EARN FROM QUALIFYING PURCHASES AT NO COST TO YOU.
YOU CAN SEE MY FULL DISCLOSURE HERE.
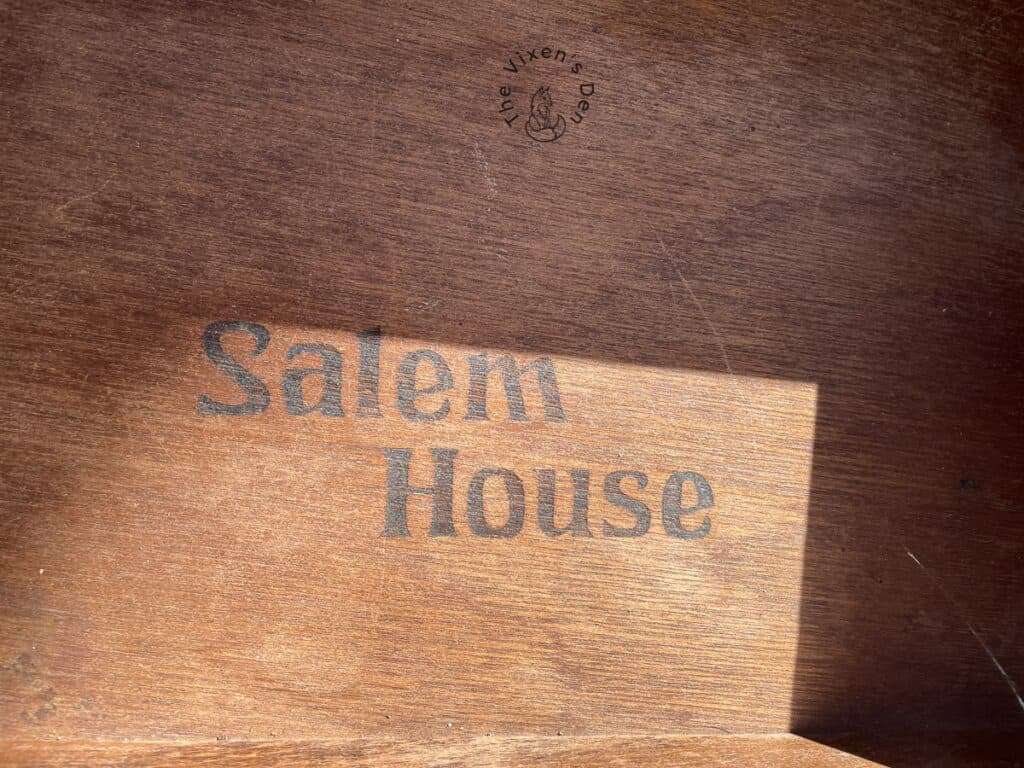
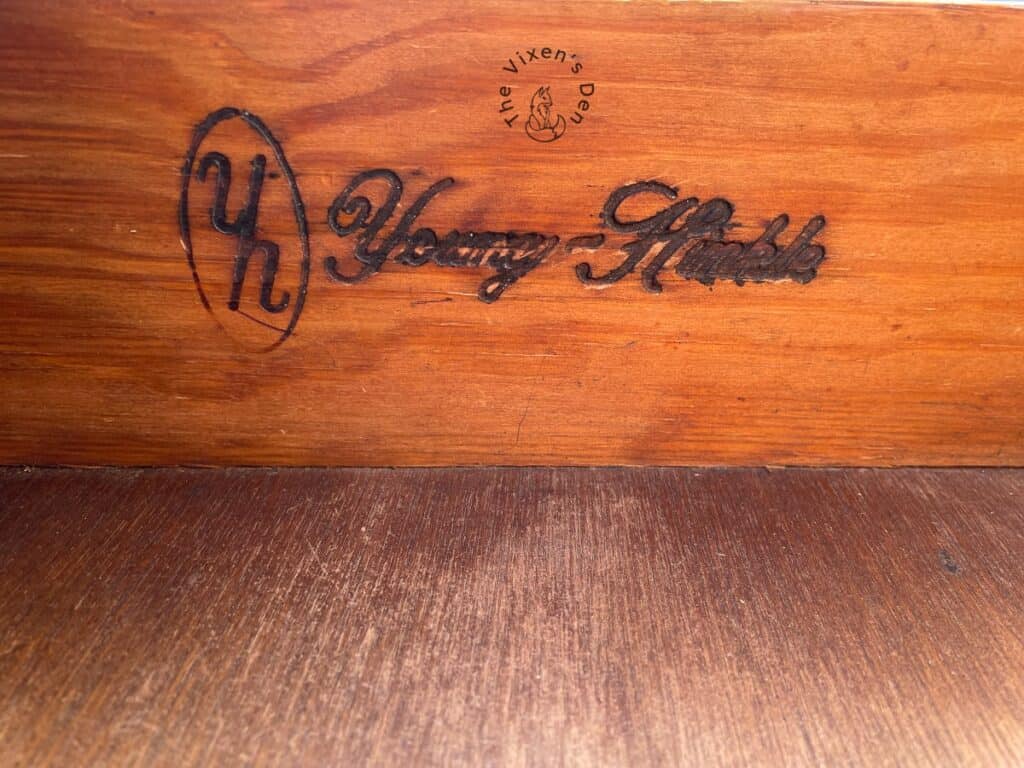
Pro Tip: Before you start a furniture restoration or makeover, it’s a good idea to look it over thoroughly for identifying marks. I researched the maker stamps in the drawer and learned that this piece was part of a line of boys’ furniture from a company in North Carolina. While that line is no longer being made, you can find some pieces of it here and there in antique shops.
Tools and Materials
Tools
- Safety glasses
- Respirator
- Old synthetic paintbrush
- Plastic scraper
- Stripping pad
- Rags
- Orbital sander
- Sanding block
- Dusting brush
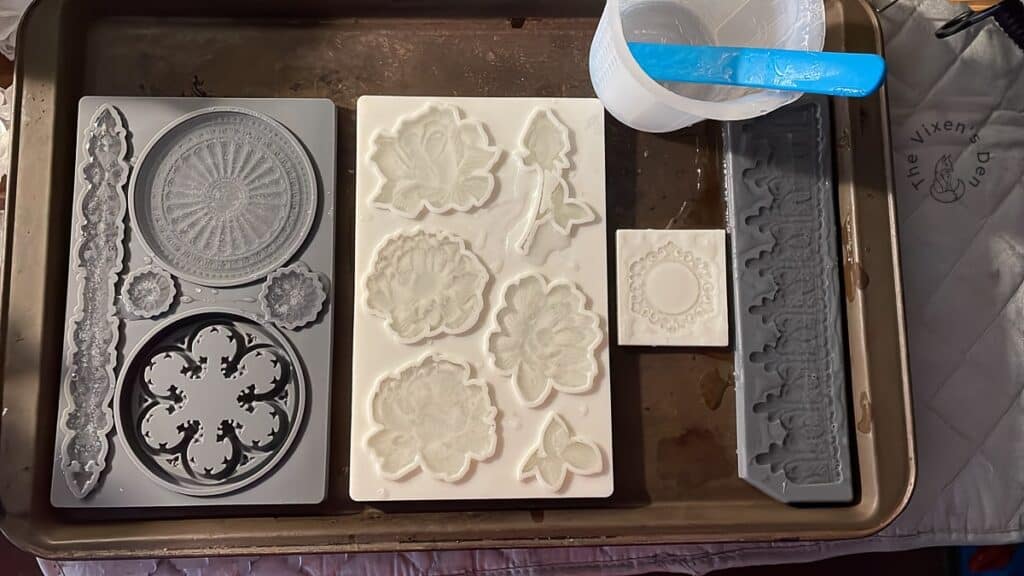
- Undead Furniture Co. Limited Edition Molds: Vintage Lace and Fancy Medallions
- Silicone measuring cup and stir
- Artist brush
- Mini Angle Brush
- Battery drill
Materials
- Disposable gloves
- Zar Paint and Varnish Remover
- Mineral spirits
- Fine steel wool
- Sandpaper
- Tack cloth
- Wood glue
- Wood filler
- 1/4″ wood dowel
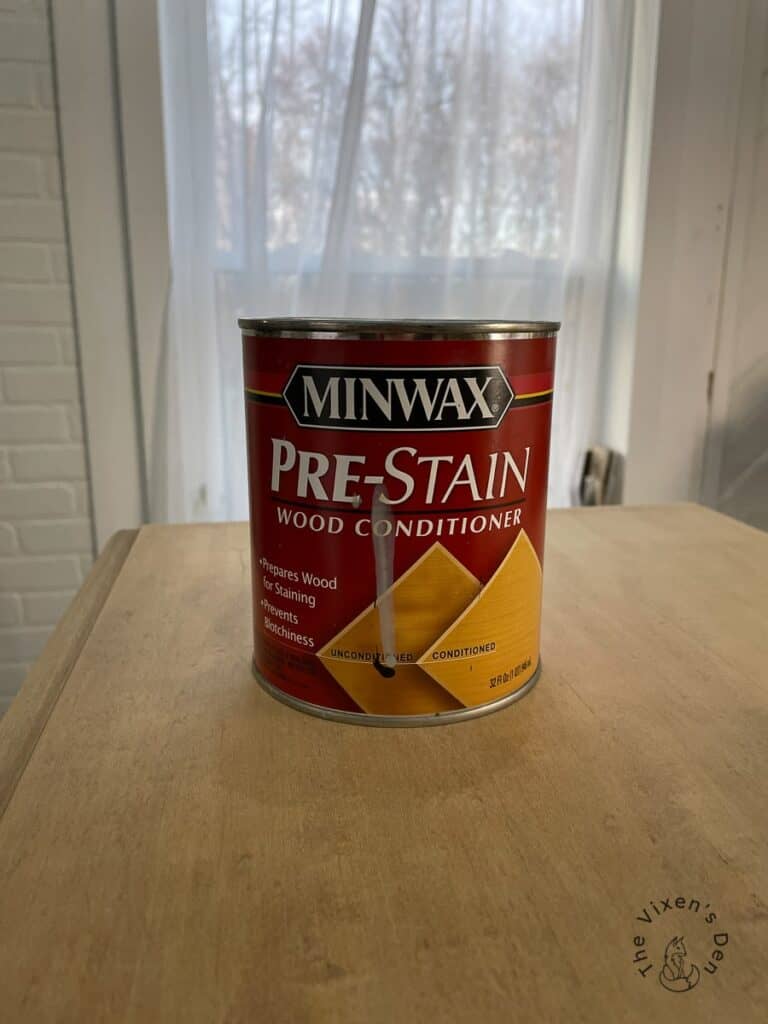
- Minwax Pre-stain Wood Conditioner
- Dixie Belle No Pain Gel Stain: Espresso
- Boss: Gray and White
- 220 Grit Sanding Sponge
- Promise Epoxy Resin
- E6000 glue
- Slick Stick
- Mod Podge
- Undead Furniture Co. Paper: Embroidered Wings
- Undead Furniture Co. Hardware
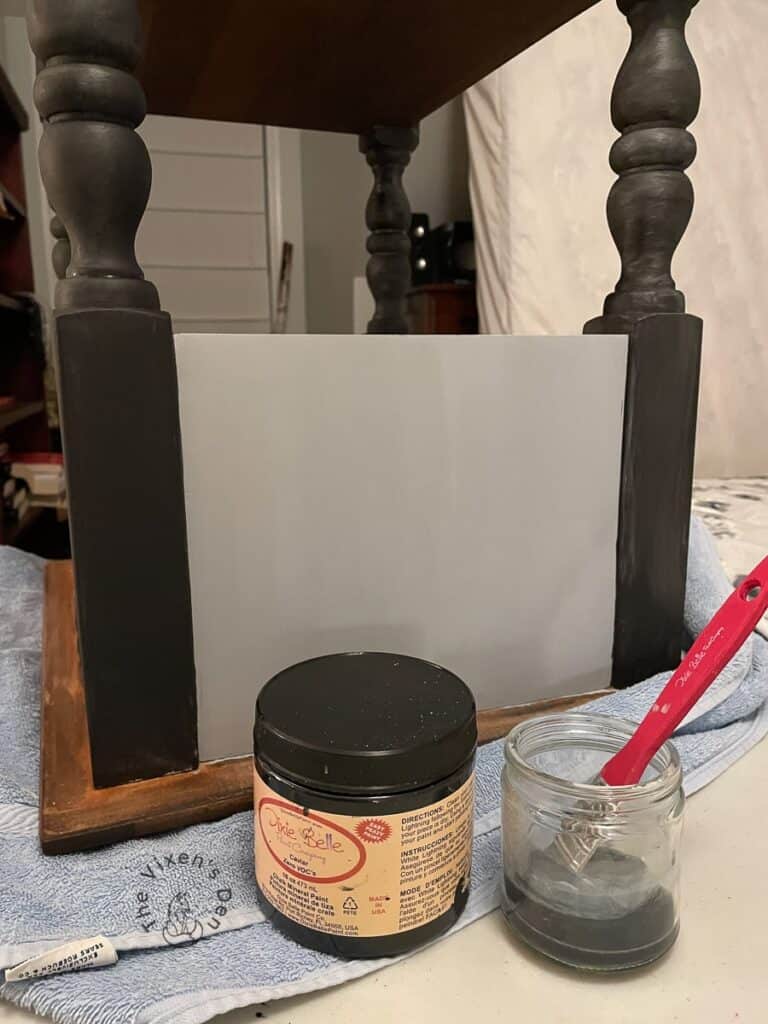
- Dixie Belle Chalk Paint: Caviar, Tea Rose, and Muscadine Wine
- Dixie Belle Clear Coat: Matte
Cleaning & Prepping
Normally, I like to start all of my projects with a good cleaning using some White Lightning to degrease and degloss the surface. However, this time I knew that I was going to strip off the original layer of finish, so I started by painting on a good coat of my favorite finish remover, Zar Paint and Varnish Remover.
After letting it sit for a bit, I scraped the surface varnish off using a plastic scraper and scrubbed off any leftover bits with a stripping pad. I have and still use, fine steel wool to remove the finish, but these stripping pads have been a wonderful find. If you’d like to see the full step-by-step stripping process, I have a full post on it where I also compare the products that I’ve tried over the years.
Once the old finish was scraped off, I wiped the table down with fine steel wool and let it dry. Then I pulled out my Christmas present, a shiny new Makita sander! It’s a lot more powerful than the mouse sander that I’m used to using, so there were some learning curves.
Like, watch out for the edges, and don’t hold it too long on a rounded surface. Little things like that.
I am delighted to report that the new sander made this sanding job a snap! I did go back over all of the flat surfaces with a finer grit on my hand sanding block. This smoothed out any patterns that the orbital sander made due to my novice mistakes. The final result was a smooth tabletop and bottom shelf. Isn’t that so much prettier?
With the tabletop, and shelf sanded down to raw wood, I then focused on the sides and legs. To get into all of those curves and crevices, I used regular sandpaper cut into strips. I held both ends and “flossed” the wood to remove the flaking finish. It’s important to use good quality sandpaper that won’t rip too easily for this process. My sandpaper ripped a little, but overall it held up well.
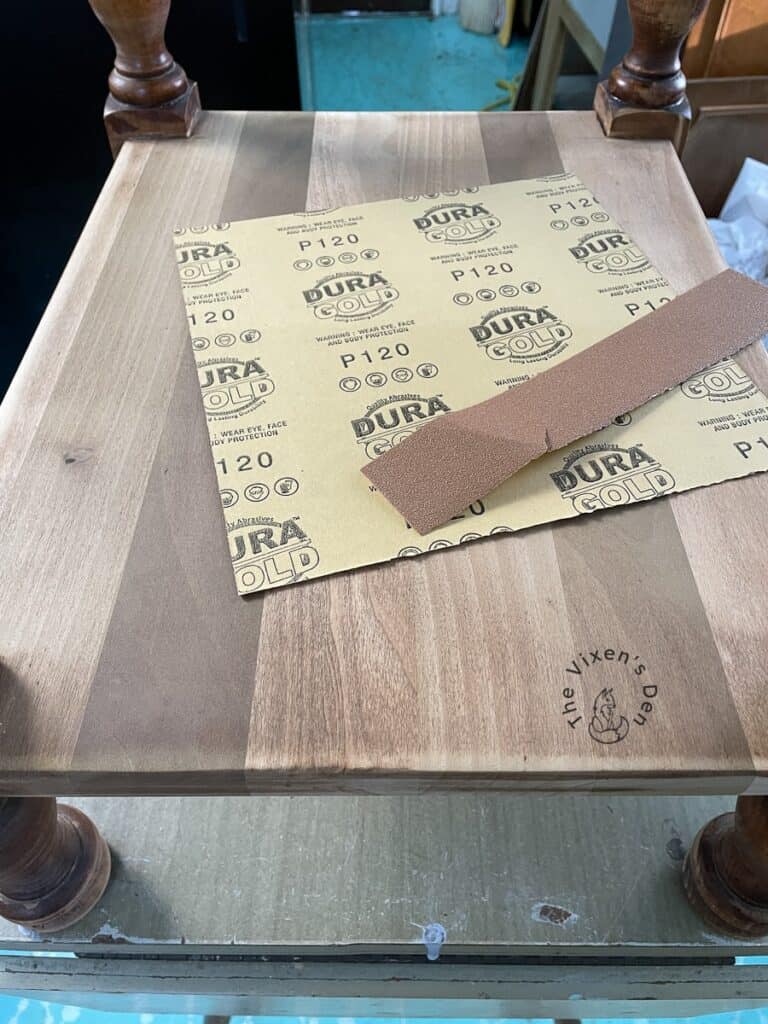
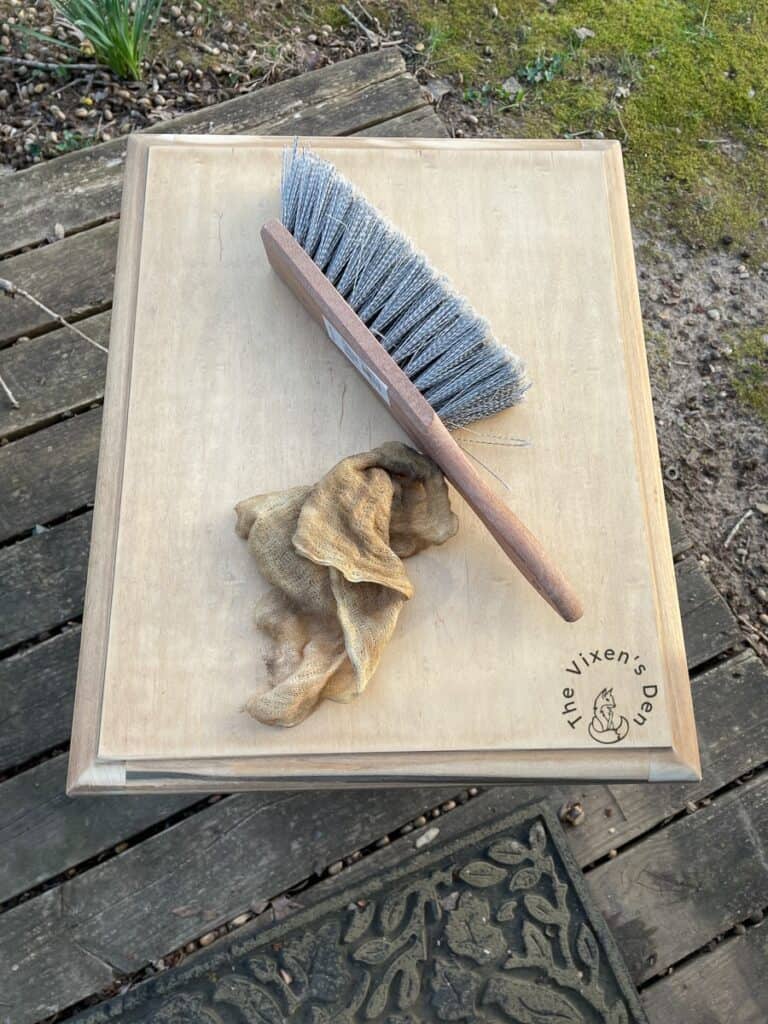
I didn’t remove every bit of finish, because I knew that I was going to paint the legs and sides. It was, however, very important to sand off any areas that were flaking. After the sanding part was over and every inch was smooth and solid, I swept off the table with a soft dusting brush and wiped it down with a tack cloth.
Staining
I learned a long time ago that even the prettiest and hardest wood can be blotchy, so I always start every oil-based staining project with a coat of Minwax Pre-stain Wood Conditioner. This product makes sure that the stain applies evenly and prevents those annoying blotchy finishes.
I brushed on one coat over the top and shelf with a synthetic brush and let it dry for about 15 minutes.

Pro Tip: The Pre-Stain Conditioner is some stinky stuff! I strongly encourage applying it outside and cleaning up your paintbrush with some mineral spirits immediately afterward.
With the Pre-Stain Conditioner nicely soaked in, I wiped away any excess with a clean rag.
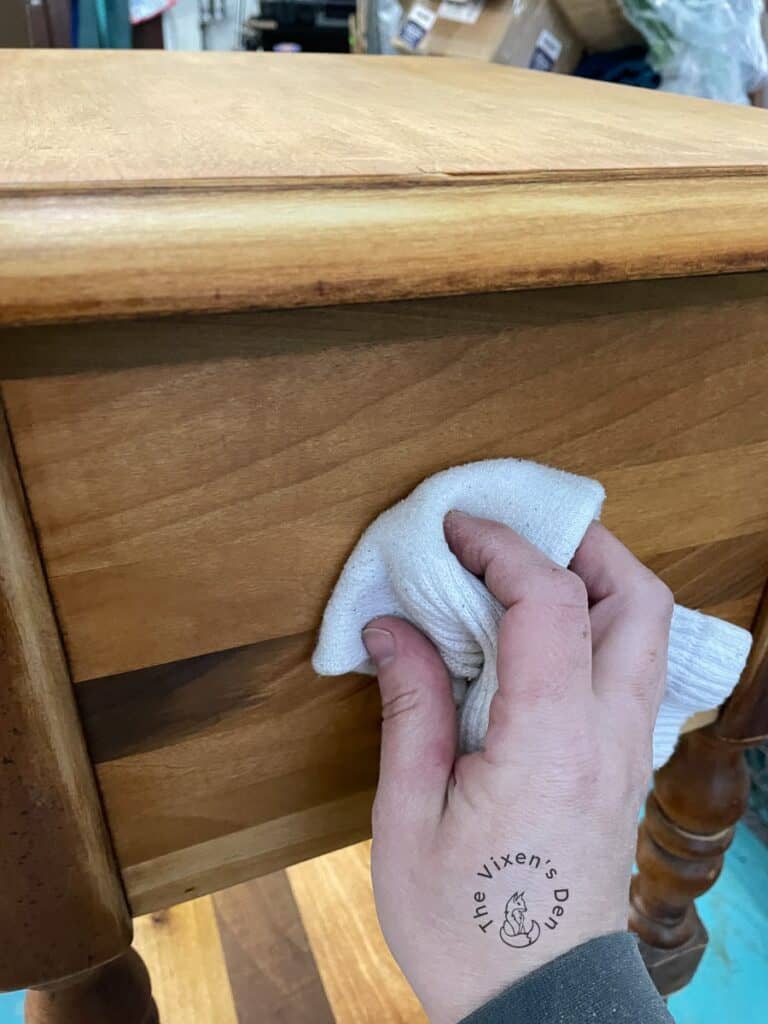
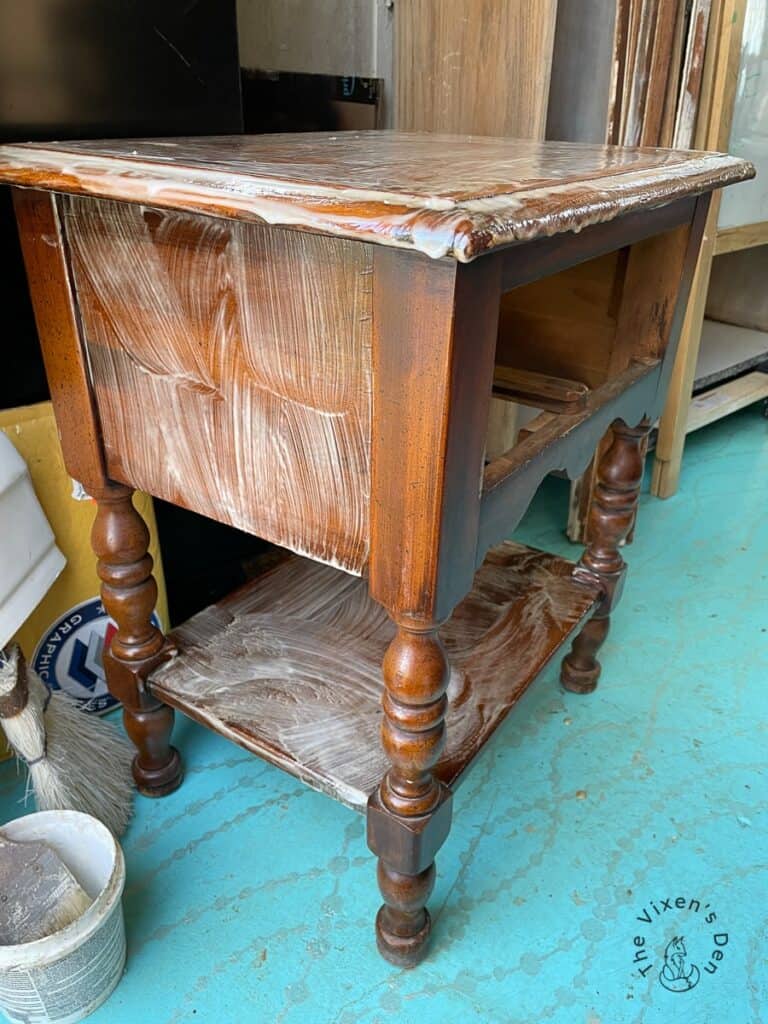
Then I used the same rag to apply a coat of Dixie Belle No Pain Gel Stain in Espresso. This stain applies beautifully! Gel stains are wonderful because they don’t soak into the wood the way that liquid stains do. This allows an opportunity for more control over layering different tones and reversing color mistakes.

Pro Tip: If you happen to get it too dark, you can always lighten it up by wiping down the surface with a rag soaked in mineral spirits!

Painting Wood
While the stain dried, I immediately moved on to the next step, priming the rest of the piece. I know that there are a lot of folks out there who will throw things at me for that step, but after the experience that I had with the Alice in Wonderland Table, I will always prime before I paint. It’s just too heartbreaking to put so much effort into a piece and then have those dirty rotten tannins bleed through.
So, this sweet little end table received two coats of Dixie Belle Boss primer. I allowed the first coat to dry for a couple of hours and then sanded between coats with a 220-grit sanding sponge. After the second coat was applied, I let the piece sit overnight.
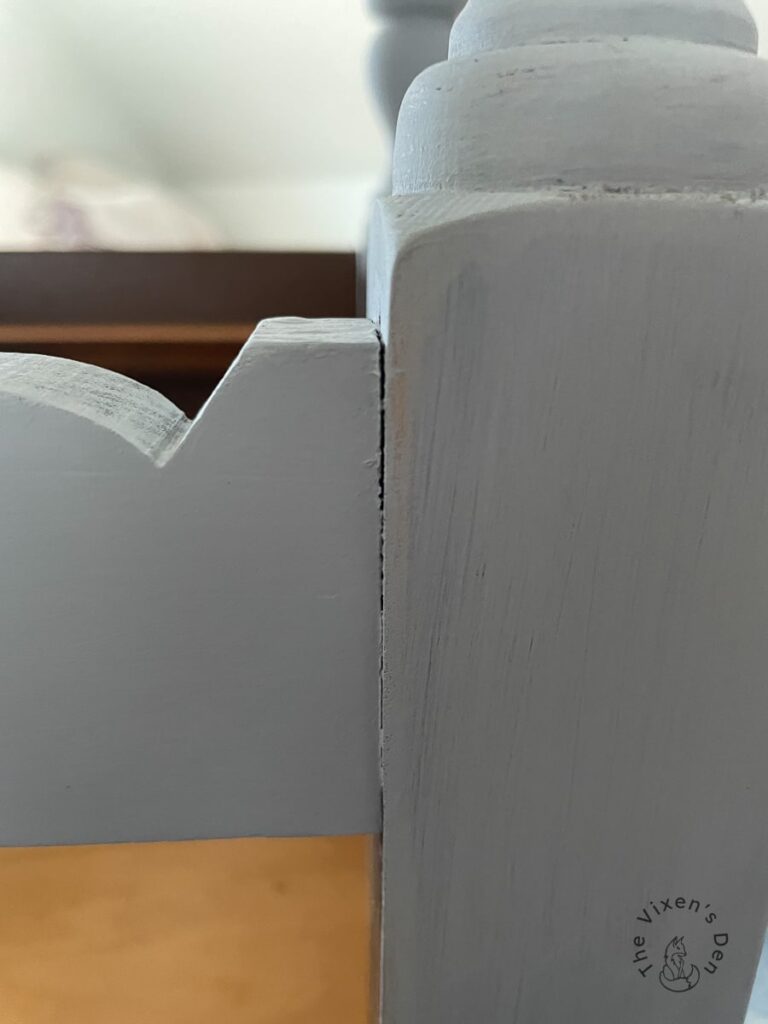
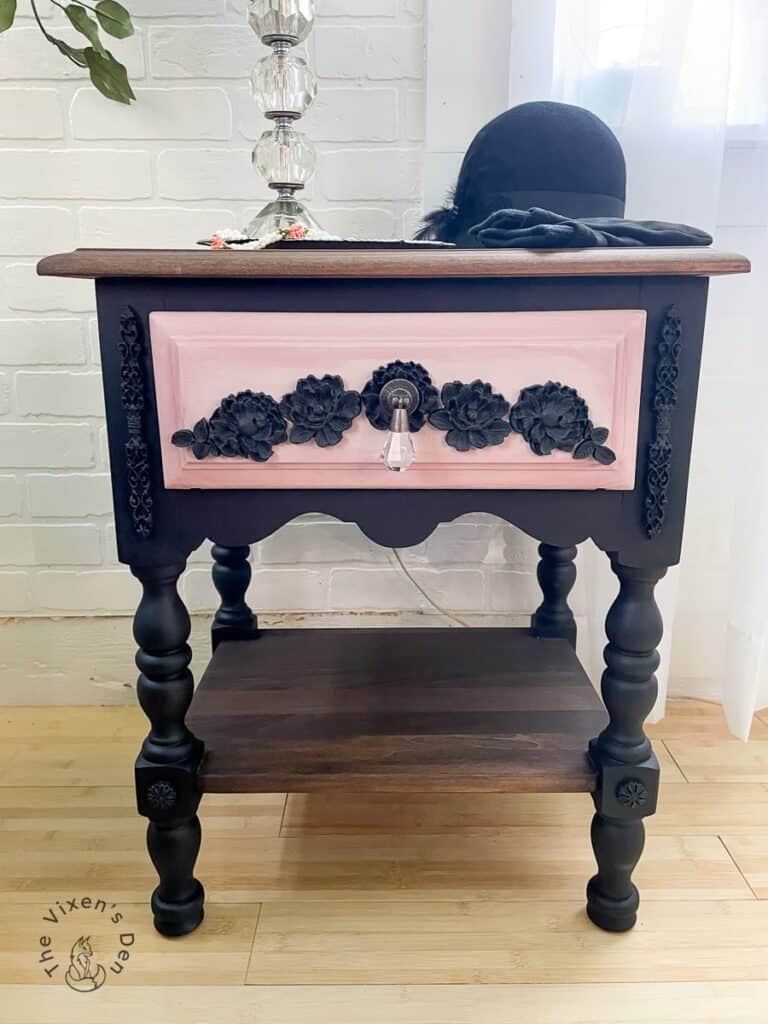
The next day I painted two coats of Dixie Belle Caviar on the legs and bracing, and two coats of Dixie Belle Te Rose on the sides.
There are two primary secrets to a smooth chalk paint finish.
The first secret is to make sure that the brush is damp. There are two ways to do this.
- The first is just to dip the tip of the brush in water. I found that if I dipped the brush in the paint first, and then into my rinse water, it helped the paint glide on more smoothly.
- But I really prefer the second option, which is using the spray misting bottle. This method allows more control over the amount of water that is applied. Using the spray misting bottle, I can spritz the brush or the piece and apply the lightest most even coat of water possible.
The second secret to a smooth chalk paint finish, or any finish really, is to sand between coats and make sure that the surface is completely dust free. I love using the Dixie Belle sanding sponges and a good clean tack cloth for this process.
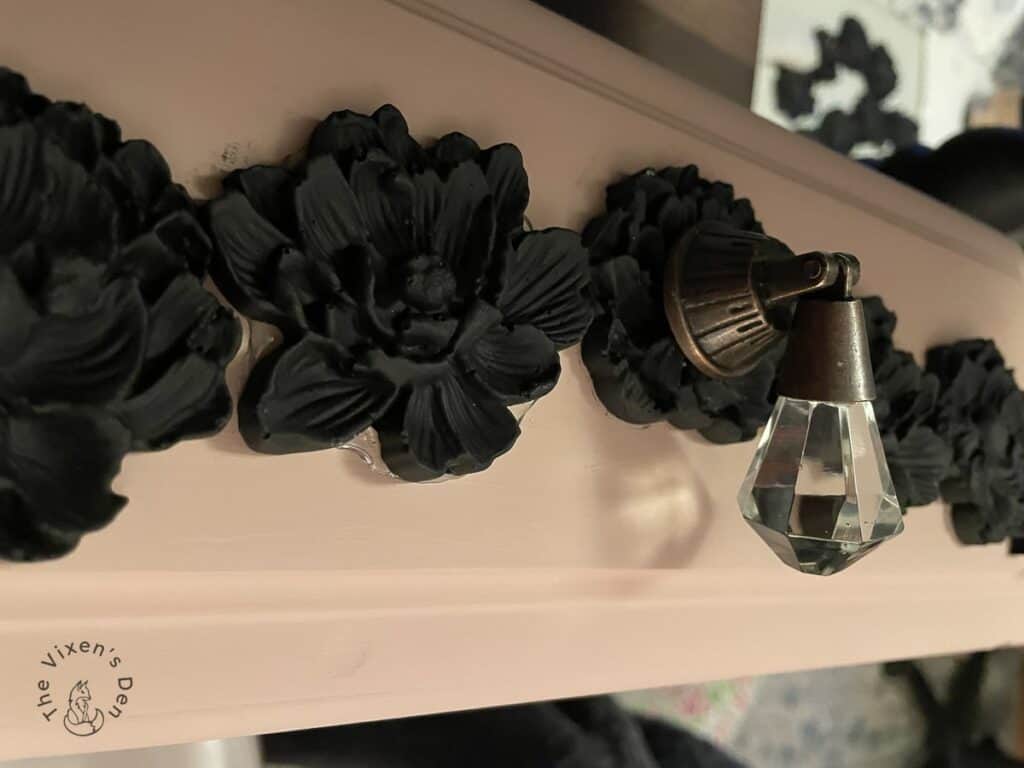
Resin Appliques
The inspiration for this project came from an opportunity to try out some amazing new products from Cassidy at Undead Furniture Co.
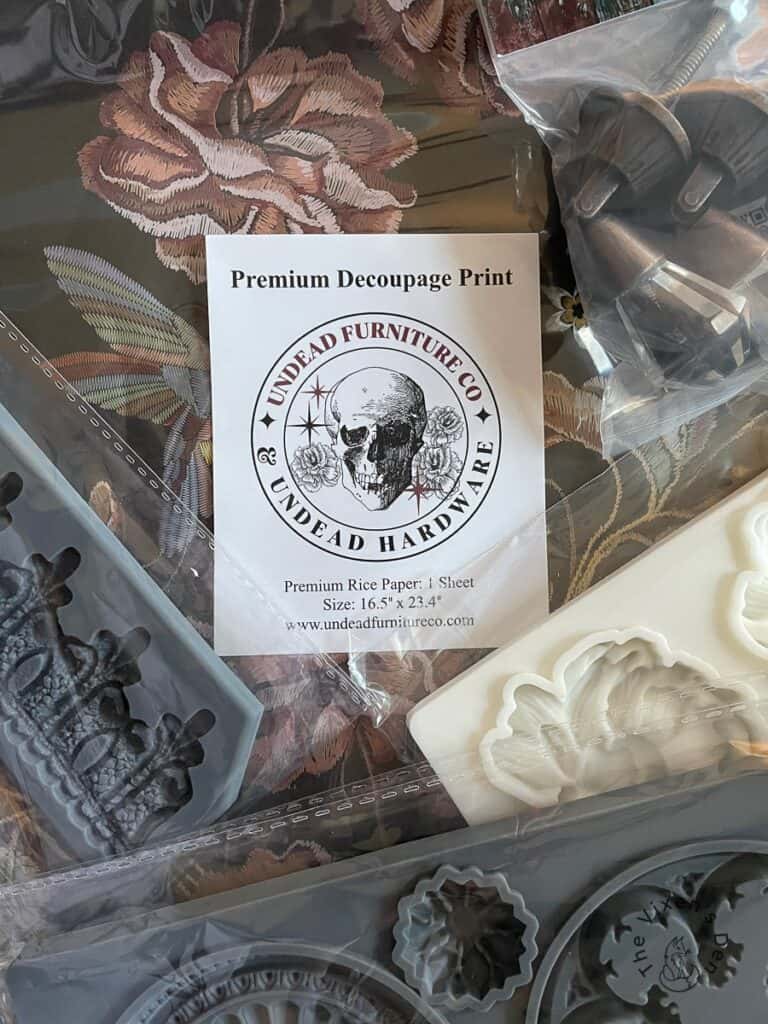
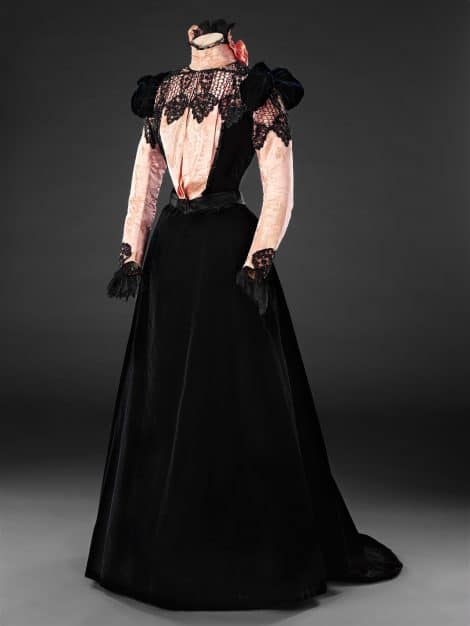
She has the most gorgeous hardware, but she also introduced some beautiful molds. I really fell head over heals with the vintage lace mold, which then led me to find this beautiful vintage dress as the inspiration for this makeover:
I poured several castings using Promise Epoxy Resin. Although the name is different, this is the same resin that I used to seal this table top.
Once they were dry, I applied two coats of Dixie Belle Slick Stick and let them dry overnight.

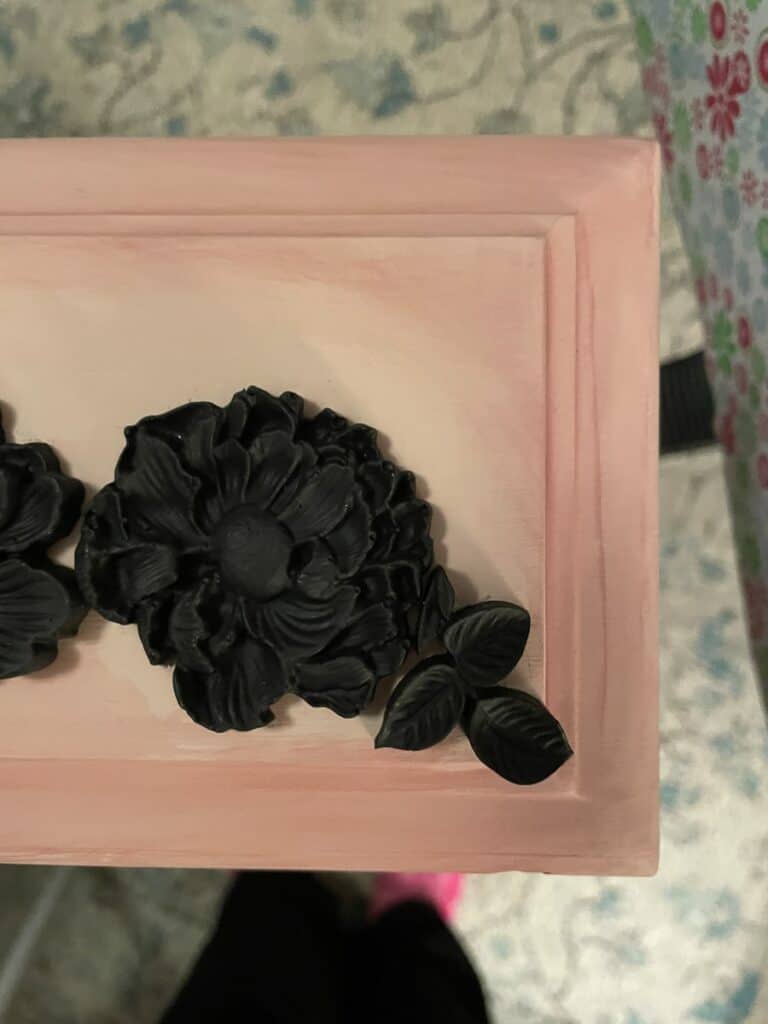
The next day I painted the lace appliques with two coats of Dixie Belle Tea Rose and the rest of the castings were painted with two coats of Dixie Belle Caviar.

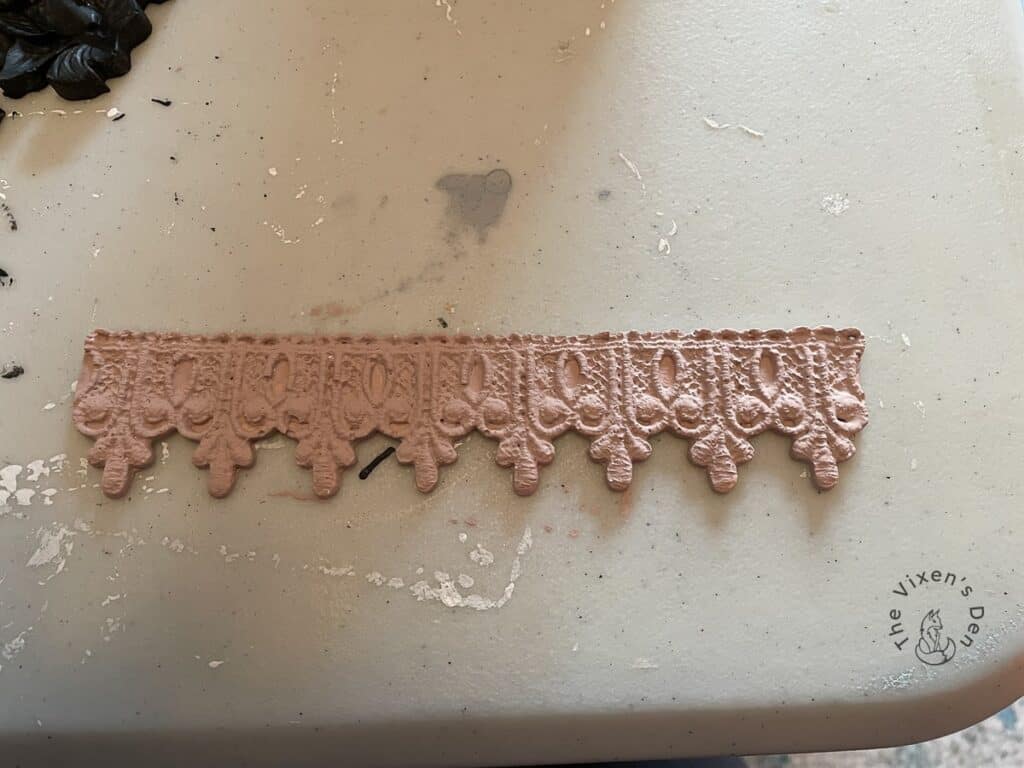
I really wanted the texture of this beautiful lace mold to shine, so I dry brushed Caviar over the Tea Rose using an artist’s brush. I think it came out quite spectacular!

To adhere the appliques, I applied E6000 Glue to the backs and weighed them down with books or jars of paint. Excess glue was wiped away with a rag or scraped away with a craft knife.
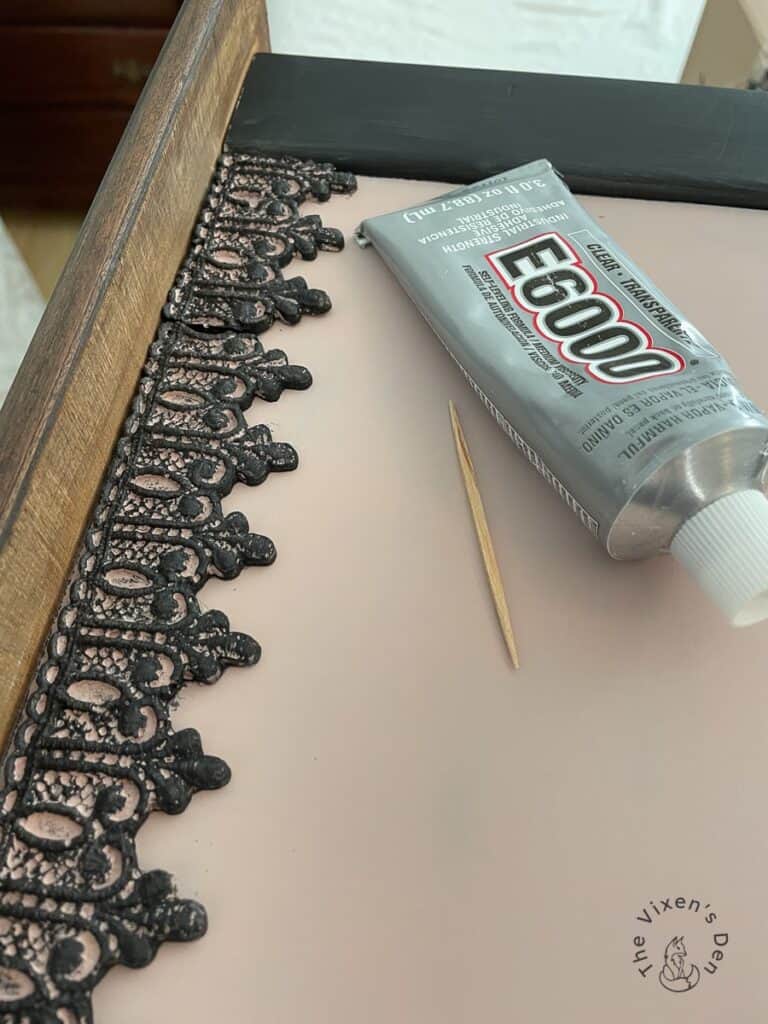
Pro Tip: I strongly recommend scraping or cutting the excess glue away before it cures. It pulled away quite easily unless I had left it overnight and then I would have to cut it, which resulted in some significant touchups.
Gluing Decoupage Paper
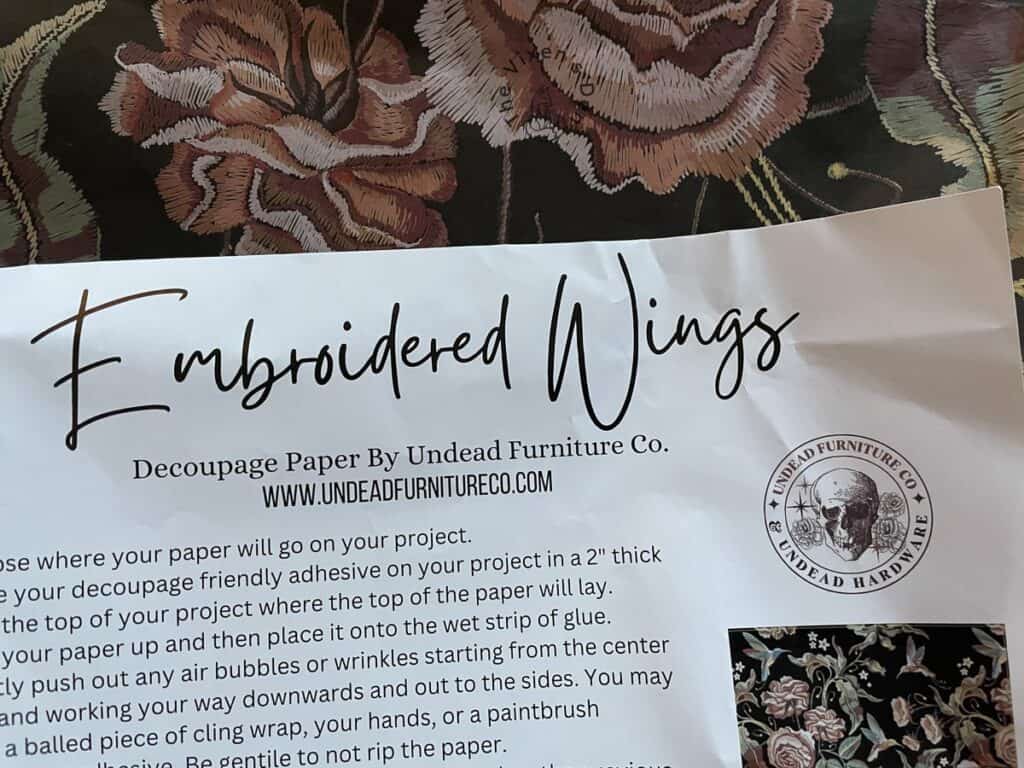
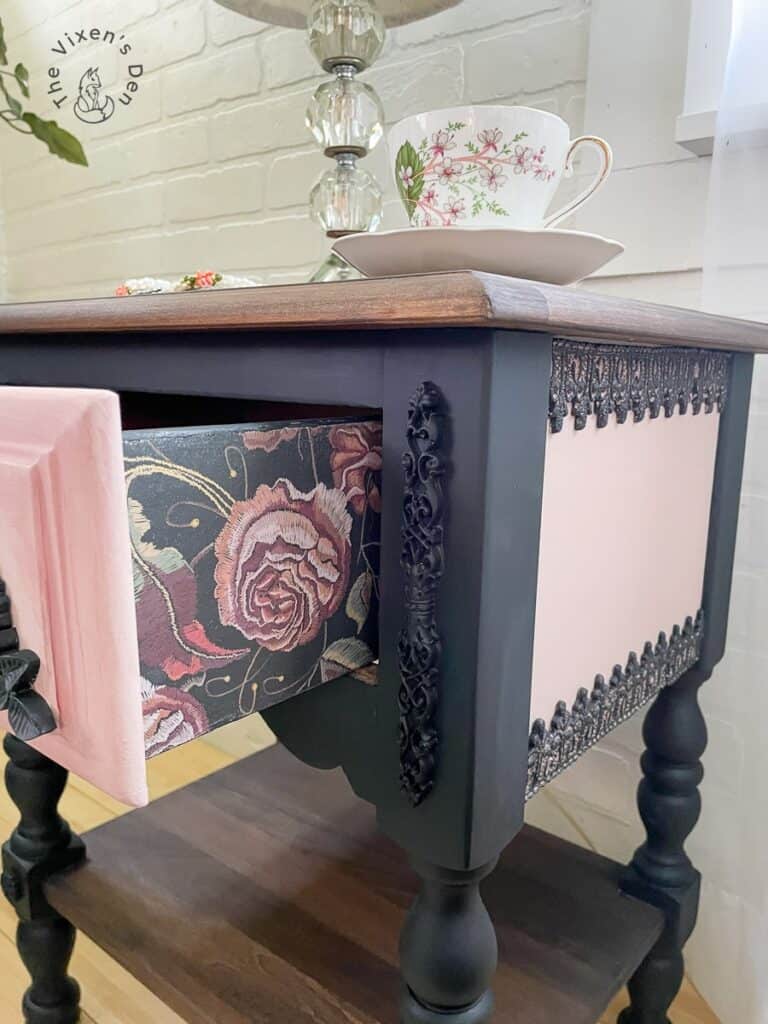
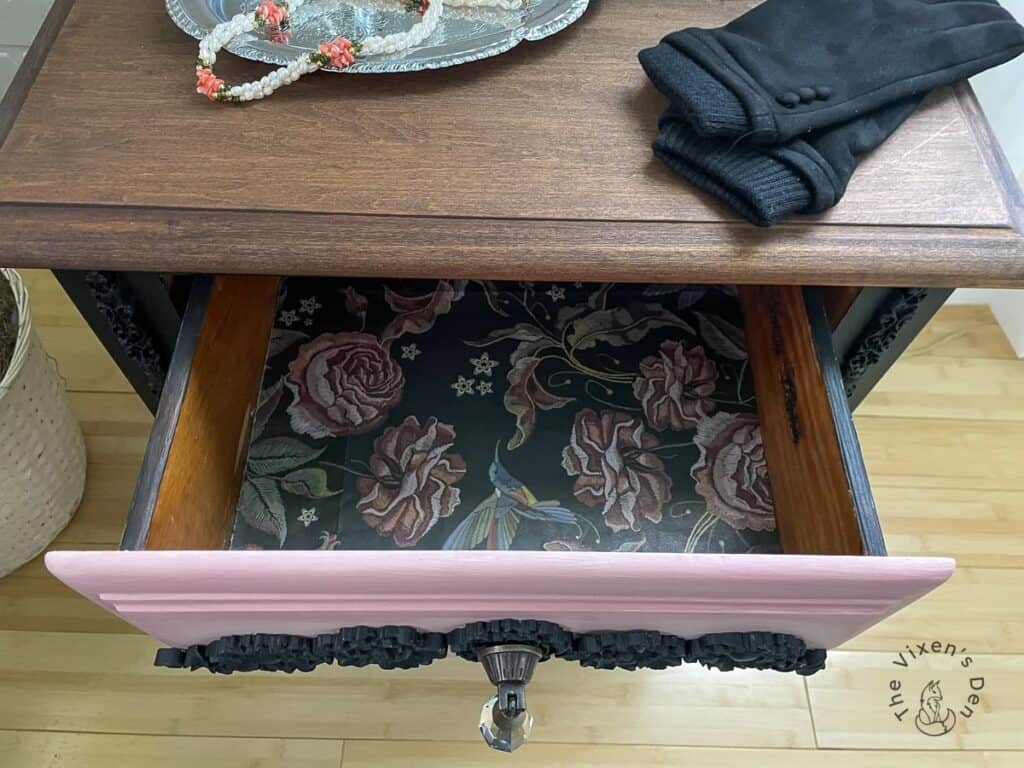
I mentioned that this project was inspired by the new Undead Furniture Co. products, one of which is this gorgeous paper called “Embroidered Wings.” It’s a stunning, moody, vintage paper that has a heavy weight to it.
I used this opportunity to try out two different application methods:
- The usual, where I painted Mod Podge onto the wood surface and immediately pressed the paper into the Mod Podge.
- A new technique that I recently learned about where I painted Mod Podge onto the wood, let it dry, and then ironed the paper onto the Mod Podge/wood.
After trying both techniques, I’m definitely a fan of the iron-on method! The paper is much smoother with no wrinkles and it lays perfectly against the wood! It also felt less messy. I call that a win-win!
Pro Tip: The key here is to lay a piece of parchment paper between the iron and the decoupage paper so that it doesn’t scorch the decoupage paper.
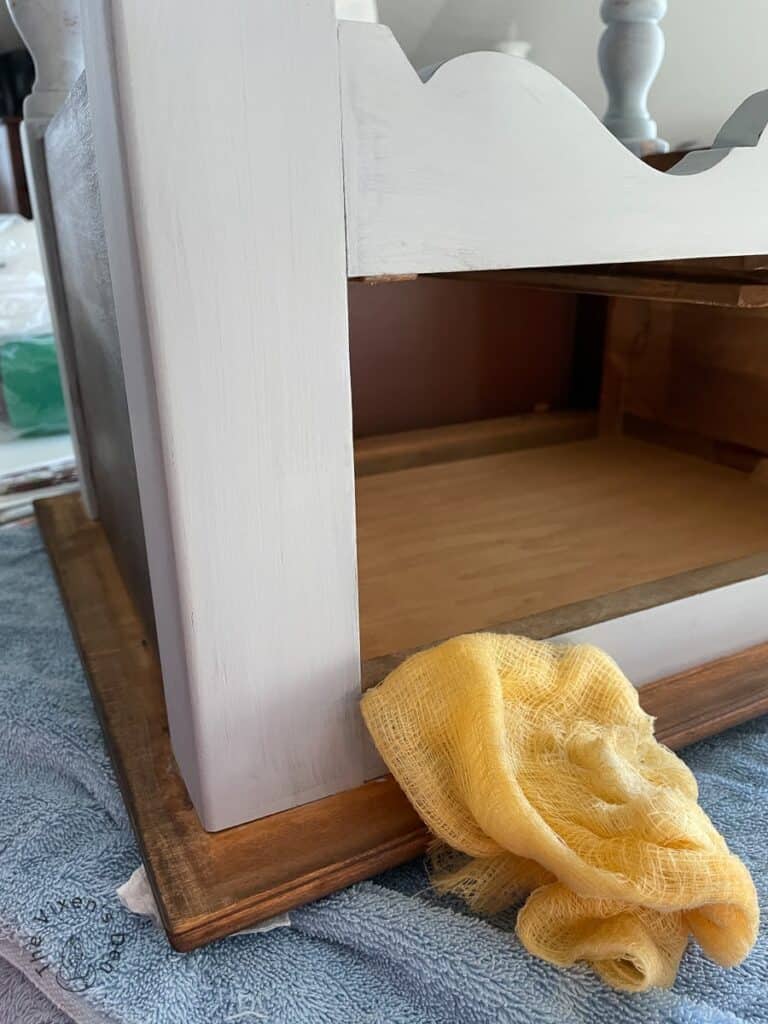
This gorgeous paper was the perfect addition to add a beautiful moody vintage vibe to the sides and inside of the drawer on this little end table!
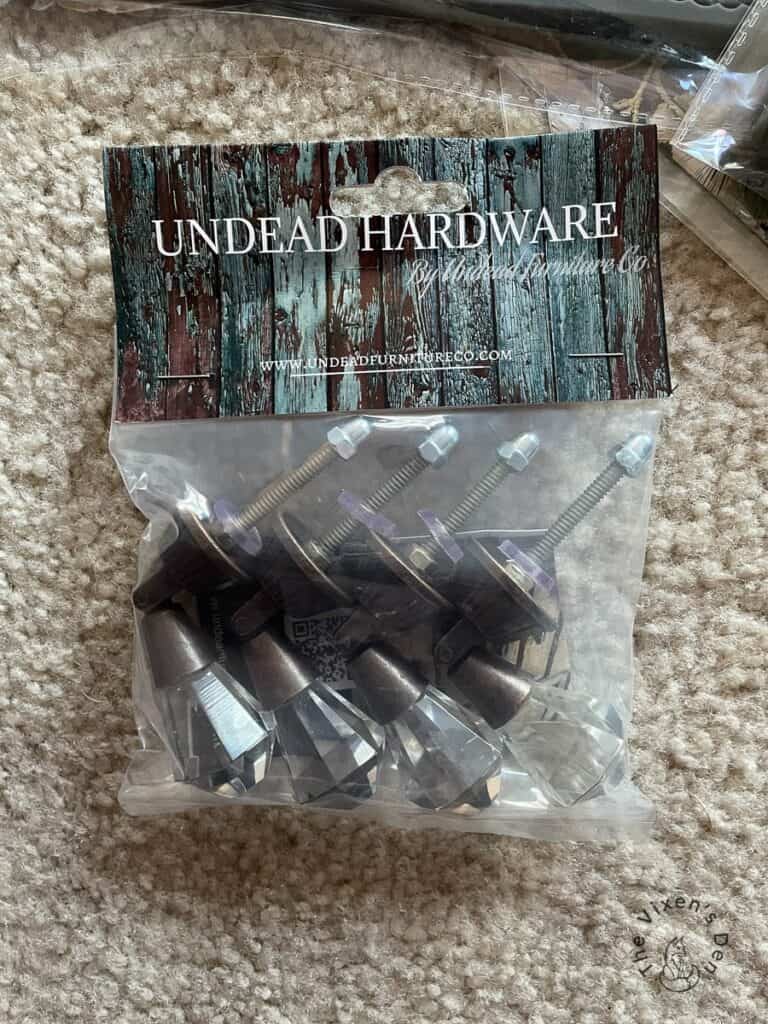
Undead Furniture Company Hardware
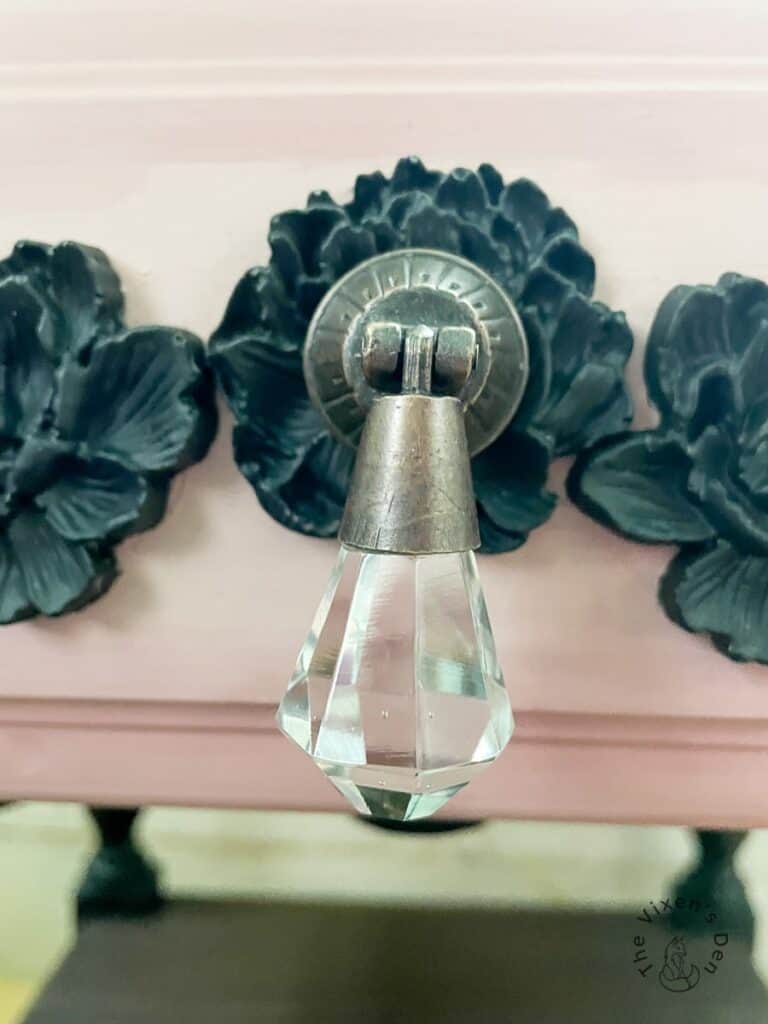
The icing on the cake for this piece was the opportunity to add this stunning Glass Drop hardware from Undead Furniture Co. Not only is it beautiful in the way it catches the light and the details in the metal clasps of the hardware itself, but it has a nice solid weight to it. This hardware comes in so many beautiful colors that you’re sure to find something you’ll love!
Installing this hardware required filling in the old holes with a 1/4″ wood dowel and some Titebond Wood Glue, followed by a bit of wood filler to level off the gaps.

After the wood filler dried, I sanded the surface smooth. Then I layered those beautiful pansy appliques on the face of the drawer and glued them on with E6000 Glue. Finally, I drilled a hole through the center of the drawer and installed the new hardware!
Even with the beautiful appliques and hardware, the drawer front still felt a little… unfinished. So, I grabbed some Dixie Belle Chalk Paint in Muscadine Wine and blended just a hair around the edges.
Clear Coat
There was no question in my mind that Dixie Belle Clear Coat in Flat was the final finish that I wanted to use. It has a much more vintage feel and really allows all of these gorgeous details to shine. Dixie Belle clear coats are self-leveling and apply beautifully with a synthetic brush like the Dixie Belle Mini-Angle brush.
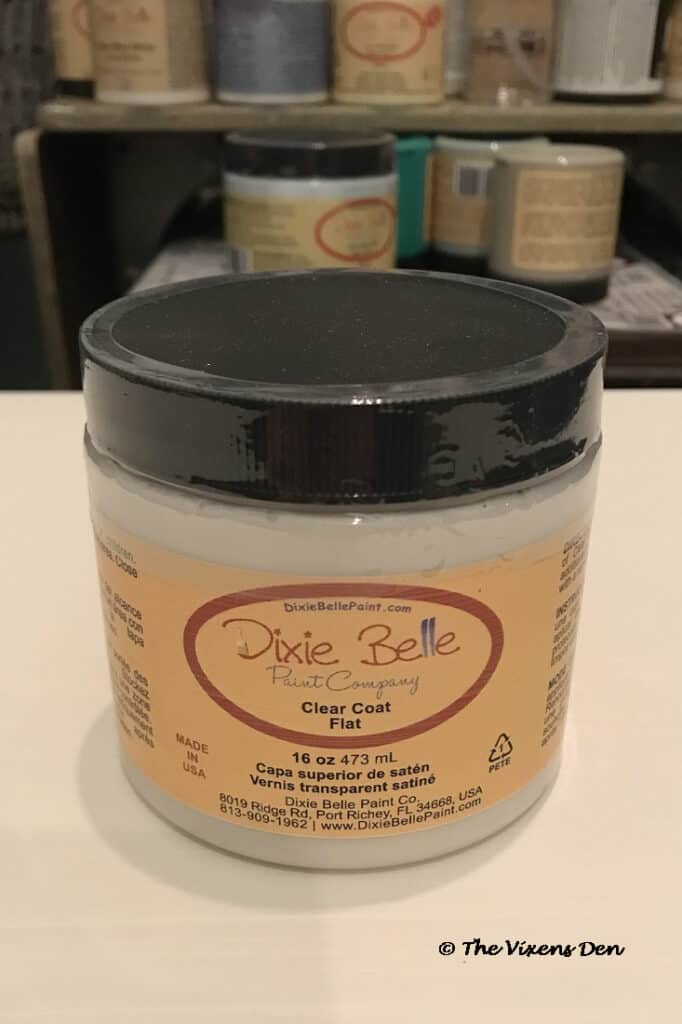
I applied two coats to everything, the stained tabletop and shelf, appliques, decoupage paper, and chalk paint. I know that the surfaces are all protected and ready for their grand debut!
Final Reveal
Are you ready for it? This water-ringed factory-finished table is now a showstopper with all of her gorgeous details and beautiful bling!
Can you believe the difference? Here are some more of those beautiful new details…

I think this one definitely counts as a Cinderella makeover! I’m so happy to have been her very own fairy godmother!
Thank you so much for stopping by! Check out the other amazing projects at the link parties below. I know the hostesses will appreciate your visit and comments.
Until next time, have a beautiful and blessed day!


Linked up to these lovely link party hostesses at:
Don’t forget to sign up so you hear all about the next misadventure! Until then, you may also like this Magazine Rack makeover or this Dresser upcycle.


Hi Becky! i just found your blog from The Cottage Market and I’m so excited to get more inspiration and knowledge from you. You definitely hit the nail on the head with you inspiration piece. Great job!
PS. I also use Dixie Belle products.
Particularly love the decoupage paper you chose. I do the iron-on method too. Great update.
Wow! Such an amazing transformation!!
Gorgeous job!
Thank you so much, Cindy!
Becky! I am just speechless and that is pretty hard for me to be!! LOL! This is absolutely stunning!! It took my breath away!! I LOVE it and adore the color combo!! I have pink and black in my Powder Room… The lace is just darling!! Thanks for sharing and thanks for stopping by and for your kind words!!! I hope you are having a great week!!
Hugs,
Deb
Thank you so much for your kind words! Pink and black are so classy together, aren’t they? The lace mold was my favorite! I have so many fun projects planned for it. Thank you again for visiting!