DIY Faux Hobnail Milk Glass Chalk Painted Pumpkin
I love the look of hobnail milk glass. Every time I see a piece it reminds me of my grandmother. She had this beautiful white hobnail milk glass lamp with a ruffled edge at the top of the glass shade. Milk glass, and especially hobnail milk glass, is a delightful vintage addition to so many decorating styles.
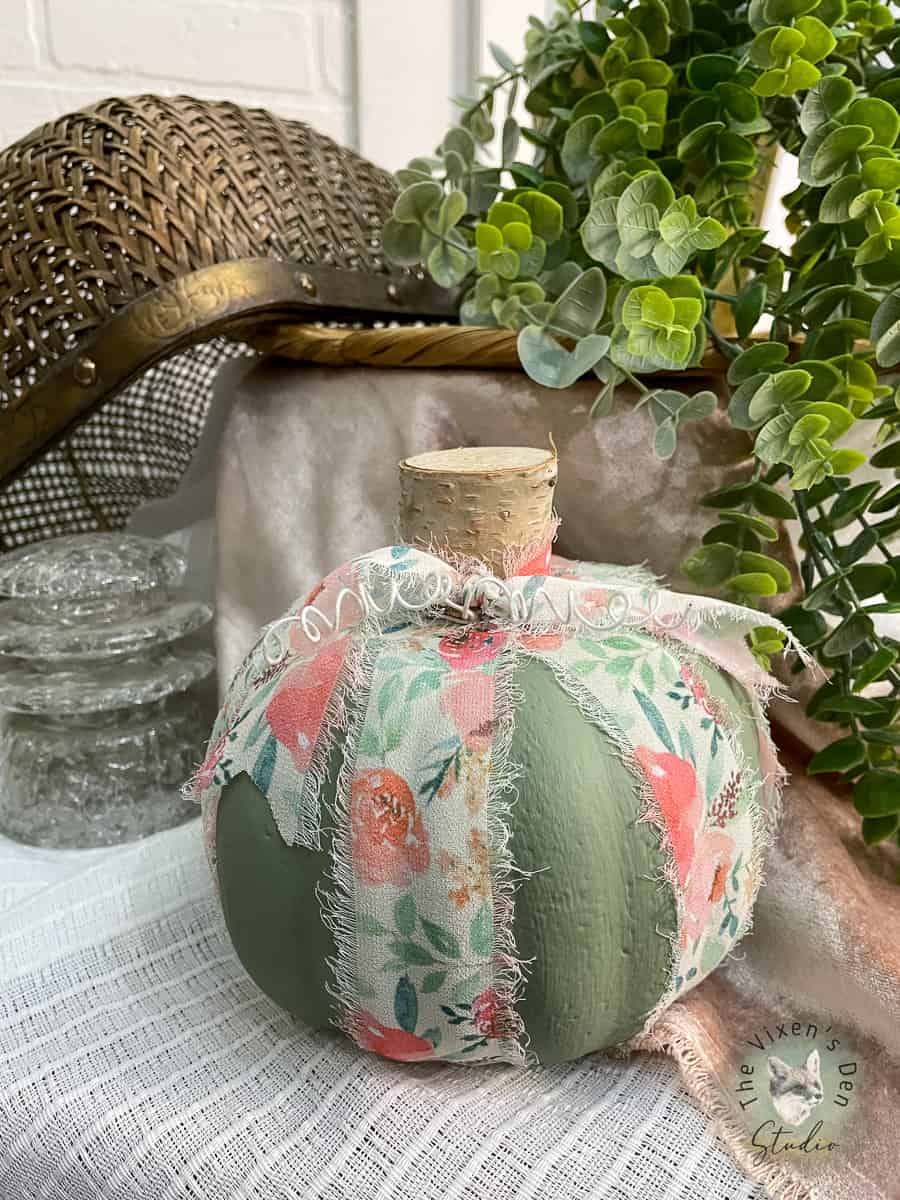
Let’s bring some of that vintage charm to fall with a DIY faux hobnail milk glass pumpkin! I love how easy it is to use Dixie Belle Chalk Paint for interesting projects like this, so I chose one of the colors from their Cottage Core line. Isn’t just beautiful?
Before we get started on the tutorial, here’s some obligatory legalese for you:
This post is sponsored by Dixie Belle Paint Company. While they provided some of the products for this project, all of the opinions are my own. Follow this affiliate link to see all of their amazing products!
AS AN AMAZON ASSOCIATE I EARN FROM QUALIFYING PURCHASES AT NO COST TO YOU.
YOU CAN SEE MY FULL DISCLOSURE HERE.
Now let’s take a look at what I used to create that beautiful hobnail milk glass look!
Tools and Materials
Tools
- Synthetic paintbrush
- Paint pyramids
- Glue gun
Materials
- White Lightning
- Faux adhesive pearls
- Boss
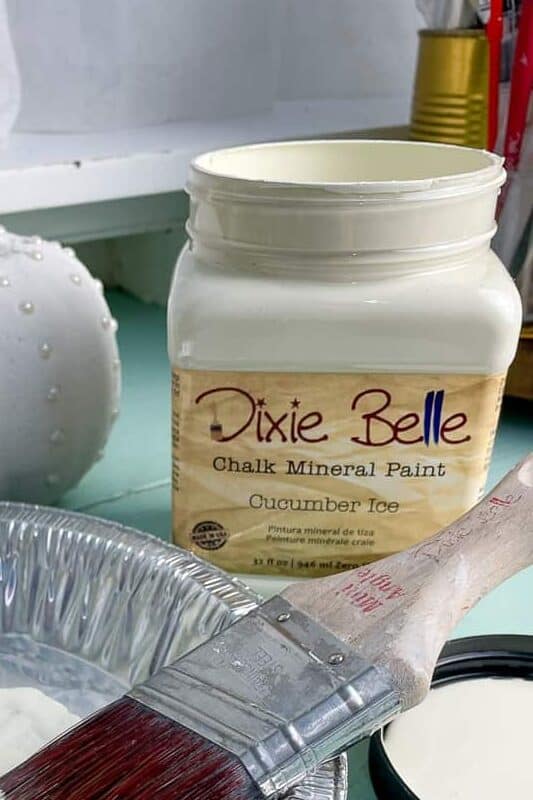
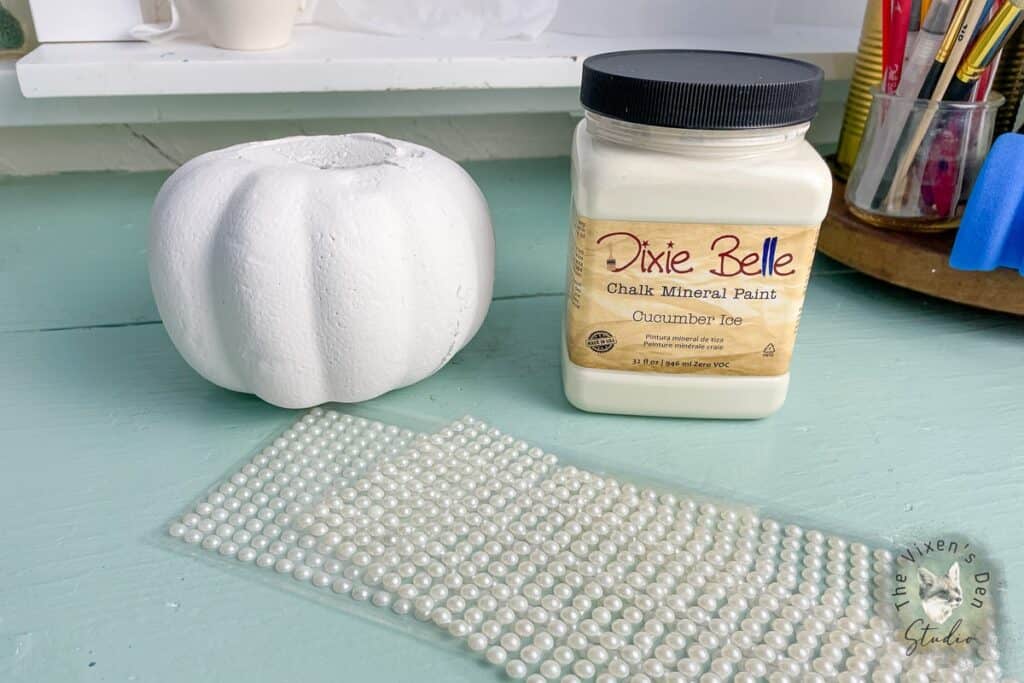
- Dixie Belle Chalk Paint in Cucumber Ice
- Clear Coat in Gloss
- Burlap ribbon
- Glue sticks
Cleaning & Prepping
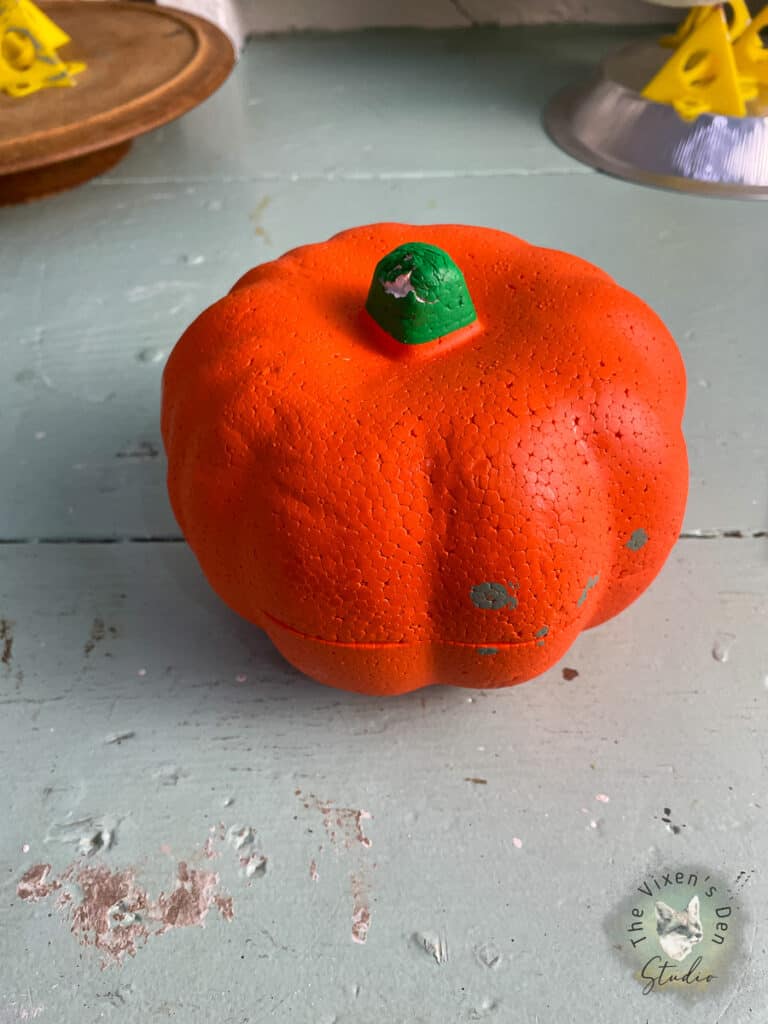
This pumpkin was a lovely thrift store find, so I gave it a good cleaning with a mixture of White Lightning to remove any crud and degloss the surface of the factory-applied paint. Then, I applied two coats of Dixie Belle Boss to prevent bleed-through of any paints or chemicals that might be lurking under the surface.
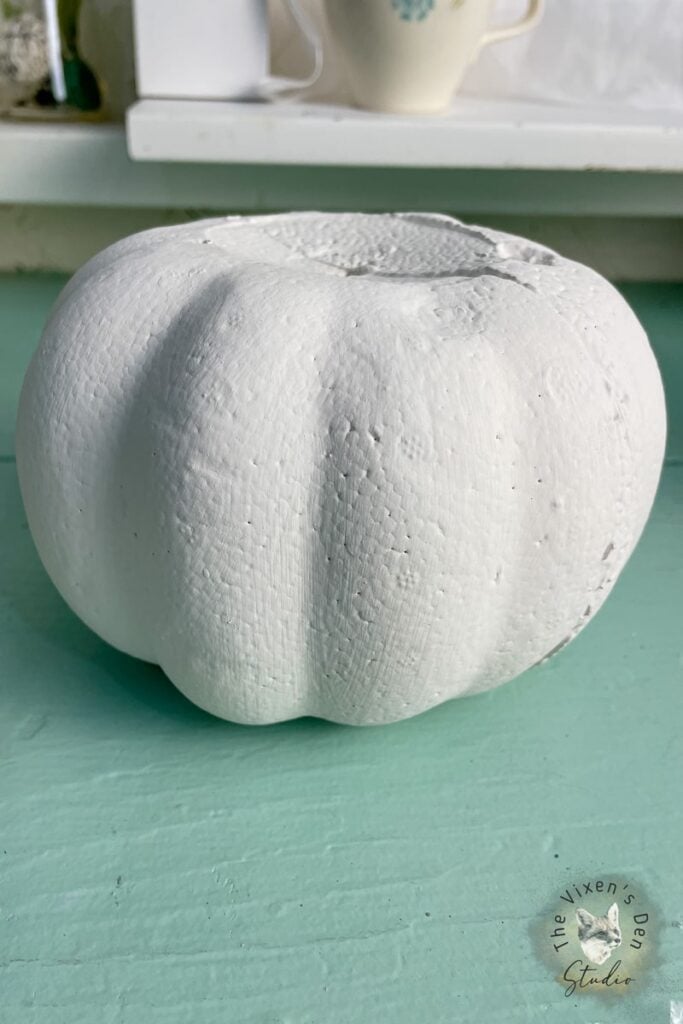
This might seem like overkill, but the end product is only as good as the prepwork. I don’t know what they use to make these pumpkins glow orange, but I’m betting it’s a bleeder and I only need one experience with that to vow “never again.” Yes, even on something as simple as a pumpkin.
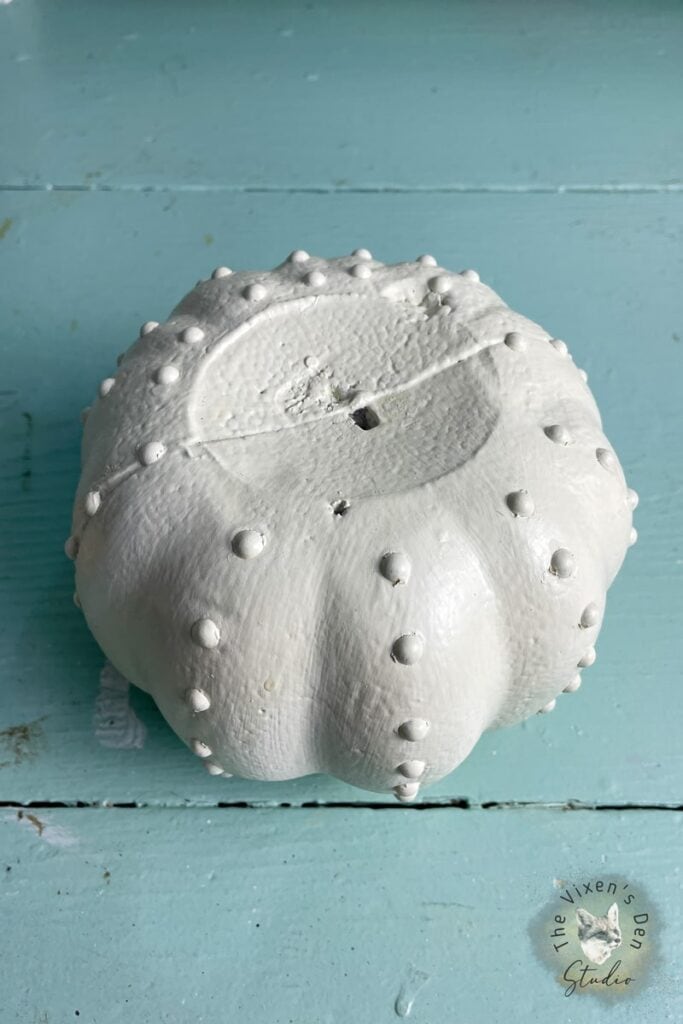
Applying the Faux Hobnail
These adorable faux adhesive pearls were the perfect solution to create the faux hobnail look! They come on a large sheet with an adhesive backing and in multiple sizes. There are so many that I have a ton left over for future projects. (Hmmmm…what else can I transform into hobnail?)
Applying the pearls to the surface of the pumpkin was super easy. It was literally just peel and stick. The hardest part was lining them all up, but I tend to eyeball those kinds of things, so there’s that. I found that it was easiest if I spaced the pearls around the top and bottom first, and then lined up the pearls that ran between.
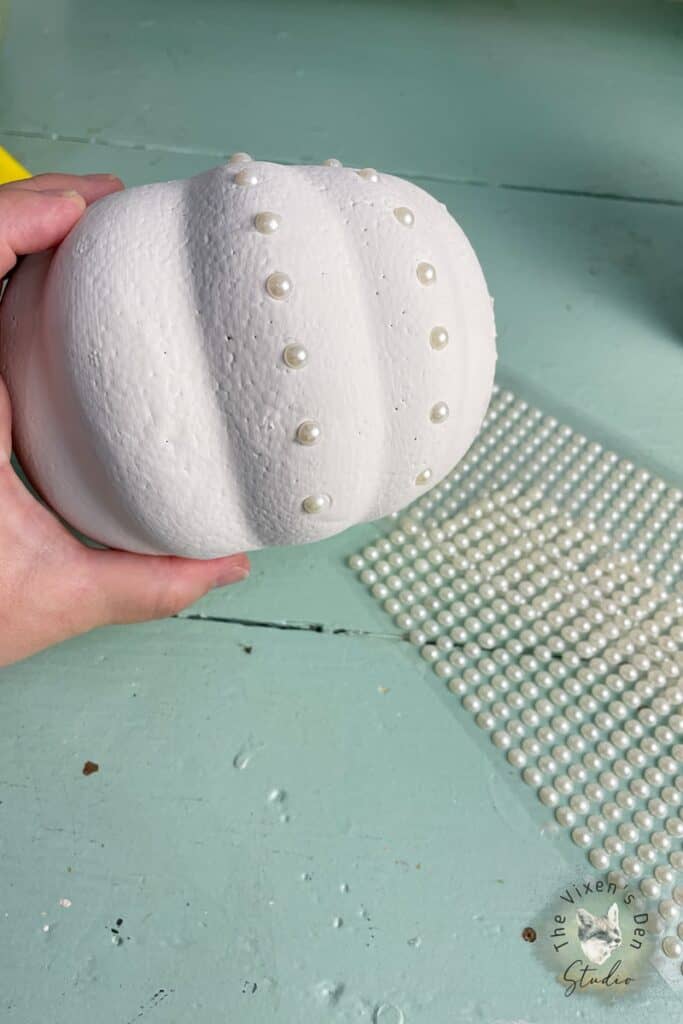
Once the pearls were in place, it was time to paint!
Painting with Dixie Belle Chalk Paint
Dixie Belle Chalk Paint is a great product! It blends beautifully, applies smoothly and it doesn’t require much paint to achieve full coverage. The trick is to make sure that you add enough water, which is why I always have a spray mister on hand. As I painted the pumpkin, I made sure to dampen the brush before and the surface of the pumpkin during painting.
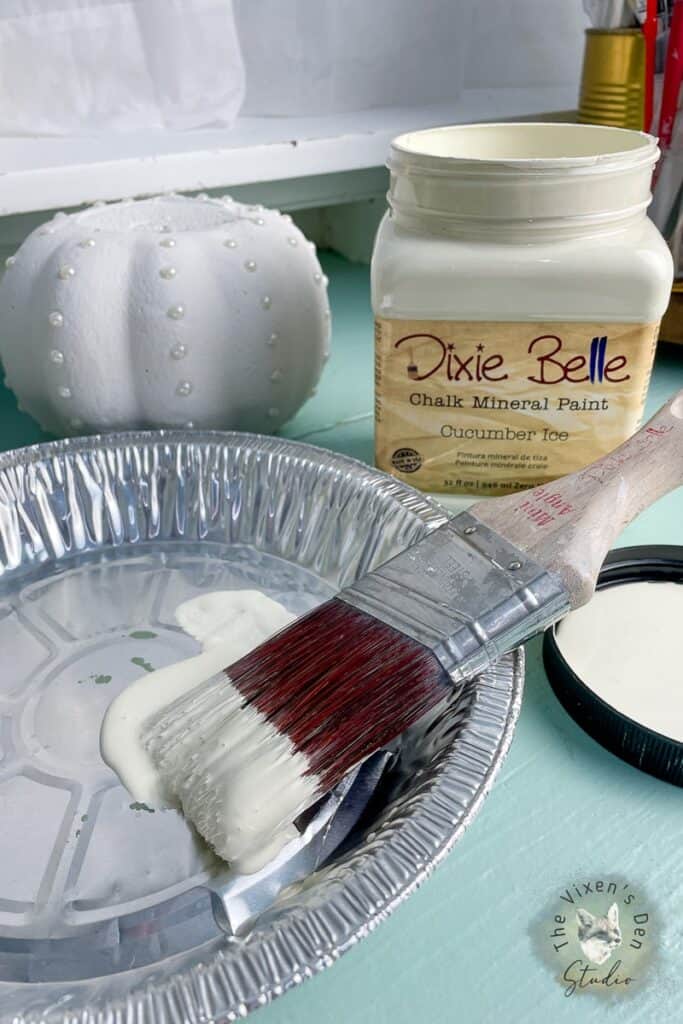
Dixie Belle Paint has a gorgeous array of colors ranging from fiery, rich reds, to blissful blues and wispy greens. And if you’re looking for a slightly different tone, then it’s a snap to combine paints to create your own custom color! If you have a color that you want to match, then you can use their amazing Color Lab!
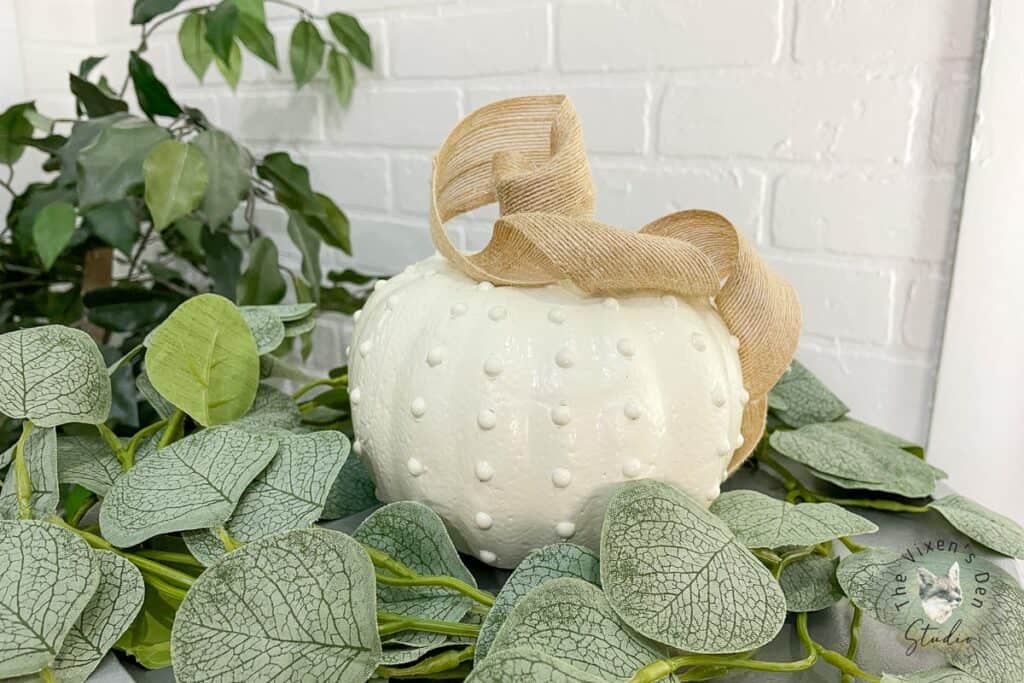
I just love the soft hints of green in this Cucumber Ice Chalk Paint. With the paint dry, it was time to seal in all that vintage goodness!
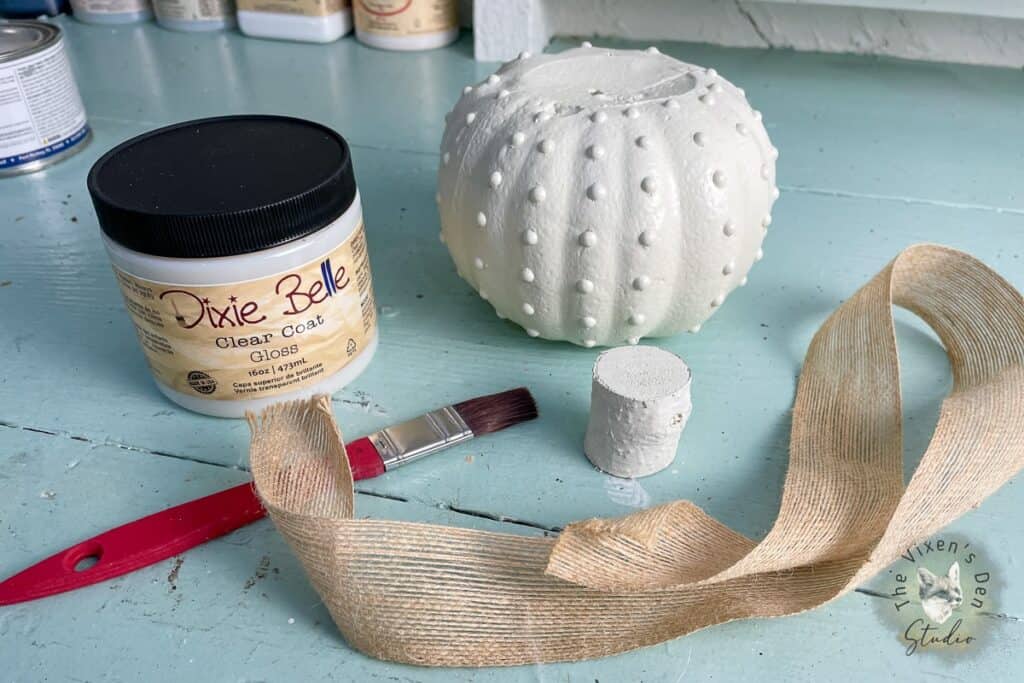
Sealing with Clear Coat
Dixie Belle Clear Coat is just as easy to use as the paint. Again, the key is to apply thin, wet layers. A good rule of thumb is to apply at least three. For this project, I chose to use the Clear Coat in Gloss. Typically, I prefer a matte or semi-gloss look, but I wanted the high shine to make the pumpkin truly look like glass.
After three coats of clear coat and a day of drying time, the pumpkin was ready for some final touches!
Adding a Pumpkin Stem and Tendrils
Have you ever seen a glass blower pull the glass to make flowing vines and waves? It’s pretty impressive! I wanted to create that look without the heat. This piece of burlap ribbon has the right amount of texture and reminded me of one of my inspiration pieces!
To start creating the stem, I grabbed my trusty hot glue gun and hot glued one end of the ribbon around a birch stem.
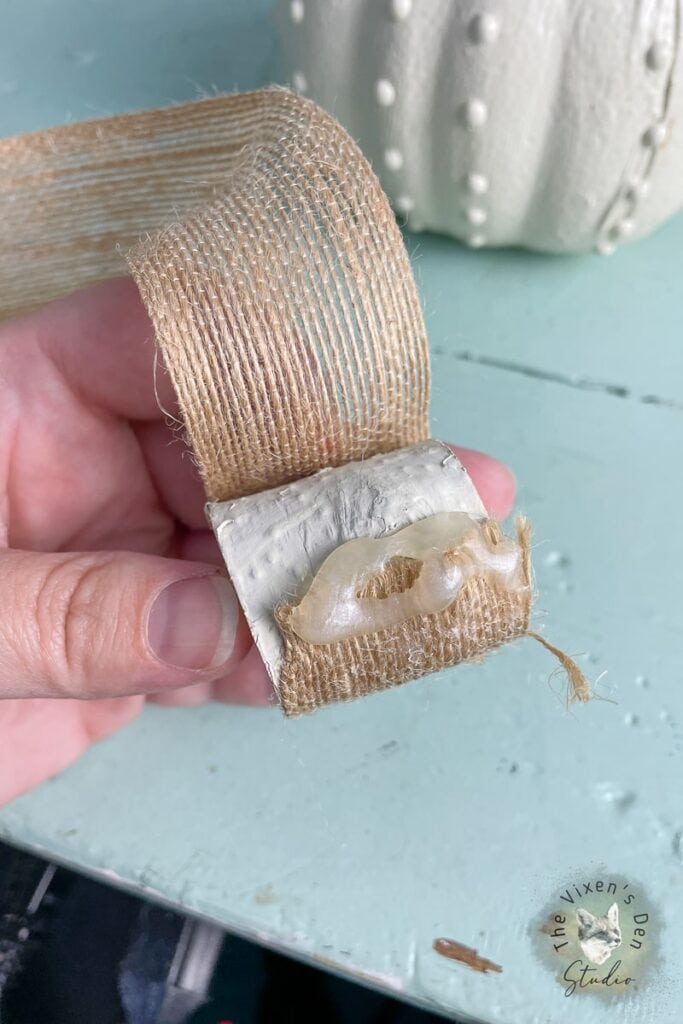
I wrapped the stem until it was completely hidden by the ribbon and then I hot glued the entire stem to the top of the pumpkin.
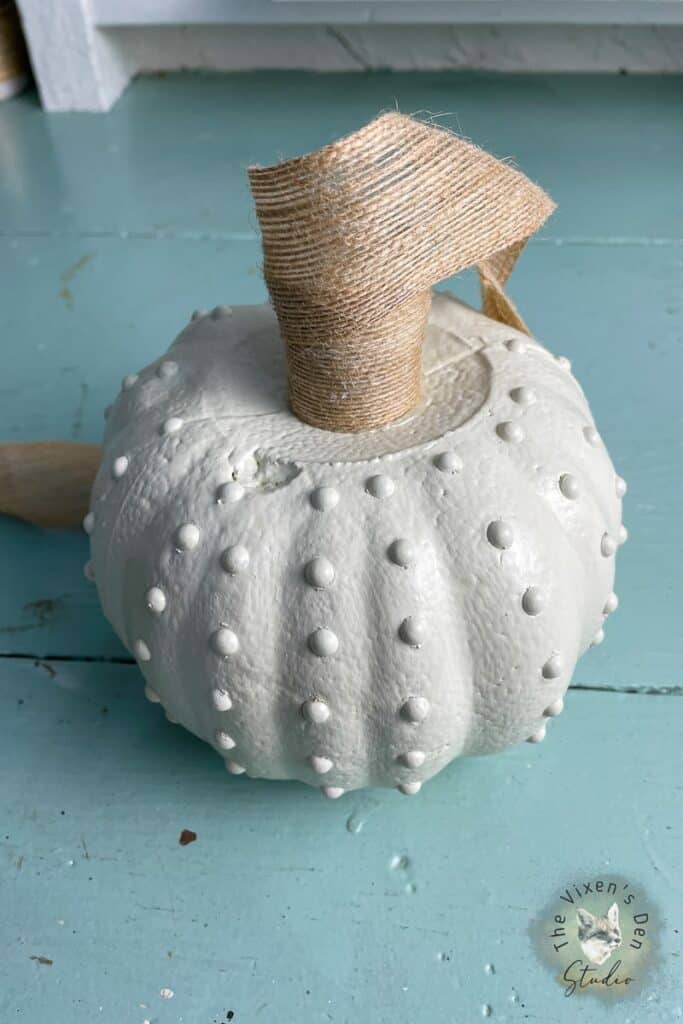
As you can see, this thrift store pumpkin had quite a few bumps and bruises from its previous life, so a flowing tendril was exactly what it needed! I wrapped and curled the ribbon, gluing it down to the surface of the pumpkin here and there. The end of the ribbon was glued to the underside of the pumpkin.
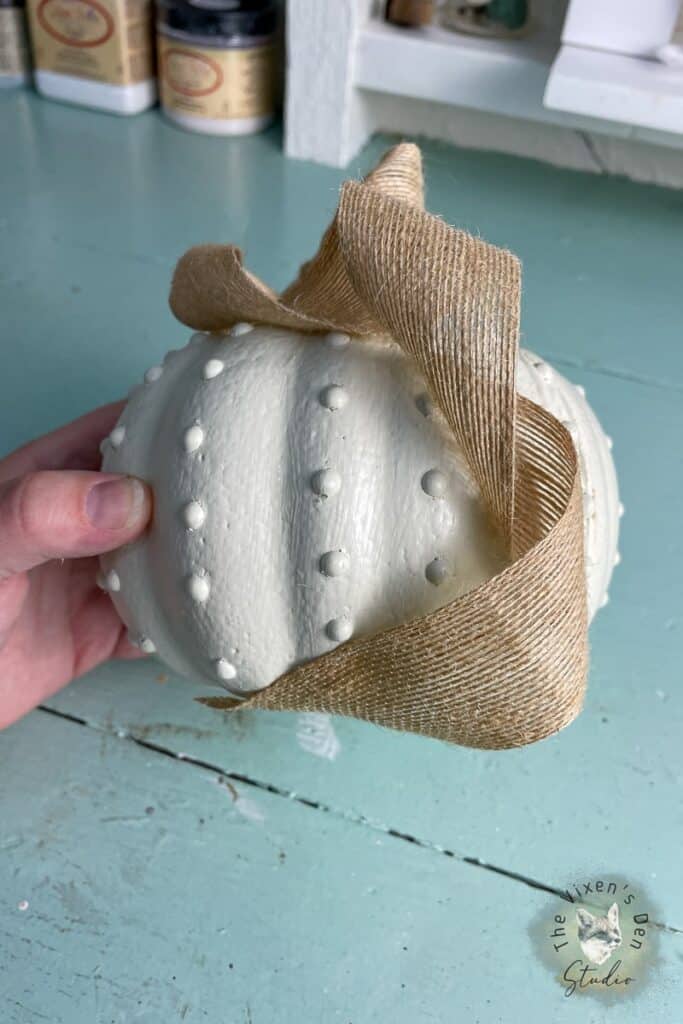
Doesn’t it have such a fun flowy look?
Are you ready to see the before and after?
Final Reveal
What a difference a little paint makes!
So, are you Team Traditional or Team Vintage fall decor? Let me know in the comments below if you like to go a little rogue for the holidays and what is your favorite piece of decor. I love hearing from you!
If you need me, I’ll be in the studio…randomly applying faux adhesive pearls to anything that doesn’t move!
Thank you so much for stopping by! Check out the other amazing projects at the link parties below. I know the hostesses will appreciate your visit and comments.
Until next time, have a beautiful and blessed day!


Linked up to these lovely link party hostesses at:
Don’t forget to sign up so you hear all about the next misadventure! Until then, you may also like this Magazine Rack makeover or this Dresser upcycle.
Such a FUN project, Becky! I love all the DIYs with Dollar Tree foam pumpkins!
Don’t forget to join us over at the Creatively Crafty Linky Party every Wednesday through Sunday
https://creativelybeth.com/creative-crafts-linky-party/
Followed and Pinned!
Creatively, Beth