DIY Woodburned Name Banner with Torch Paste and Silkscreen Stencils
Do you enjoy woodburned designs, but worry that creating them is too complicated or dangerous? Torch Paste woodburning paste is a fun way to achieve an intricate woodburned look quickly. With one simple tool, a stencil, and a jar of paste, you can easily create a customized name sign for any occasion!

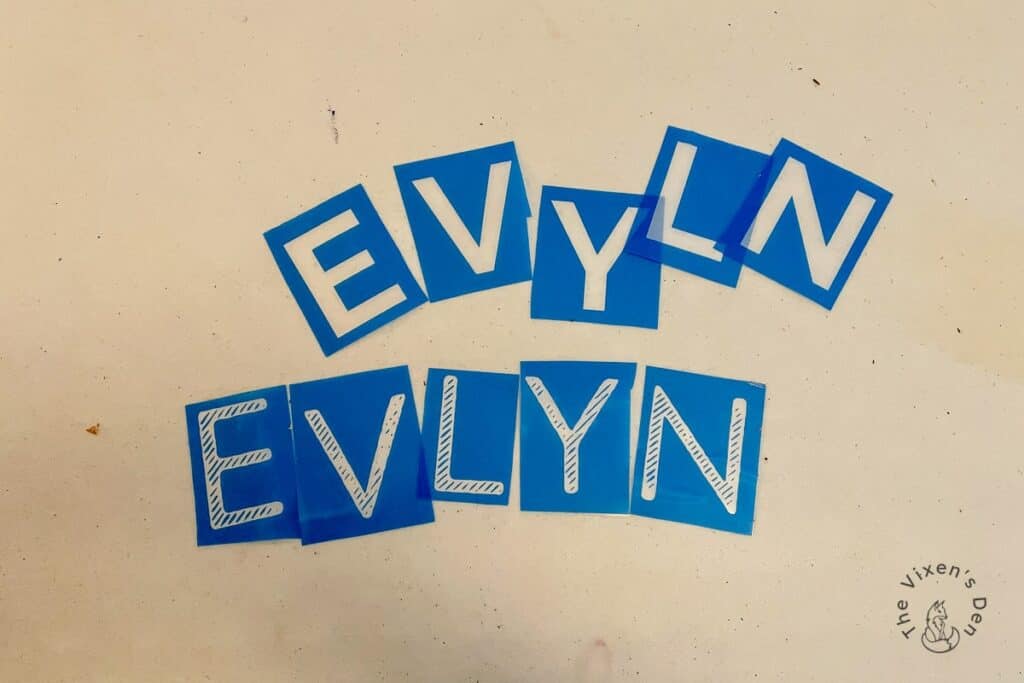
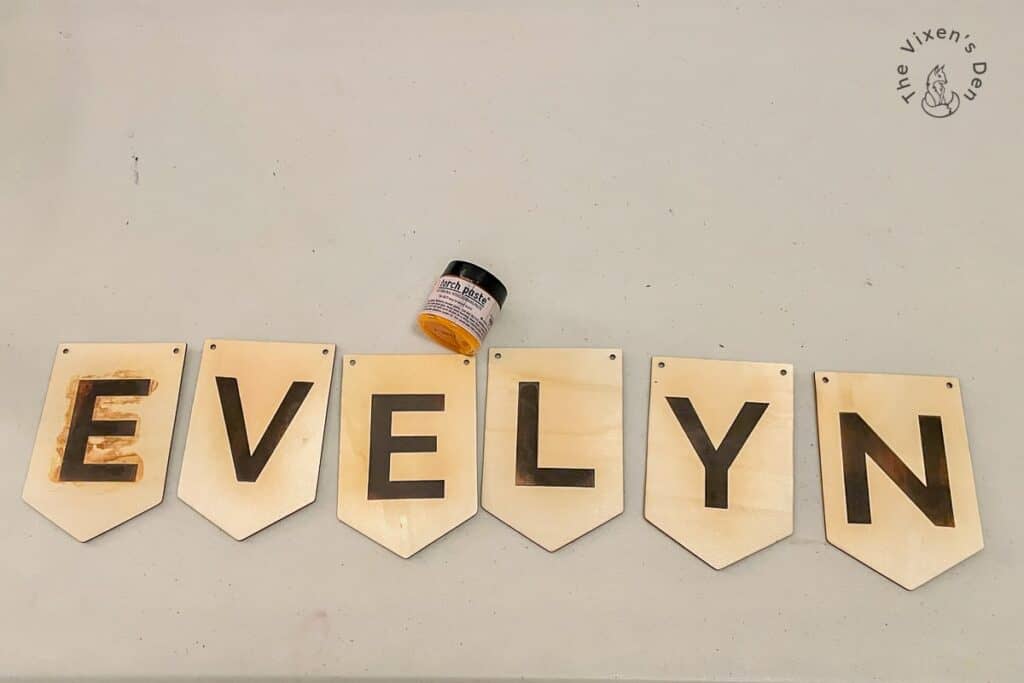
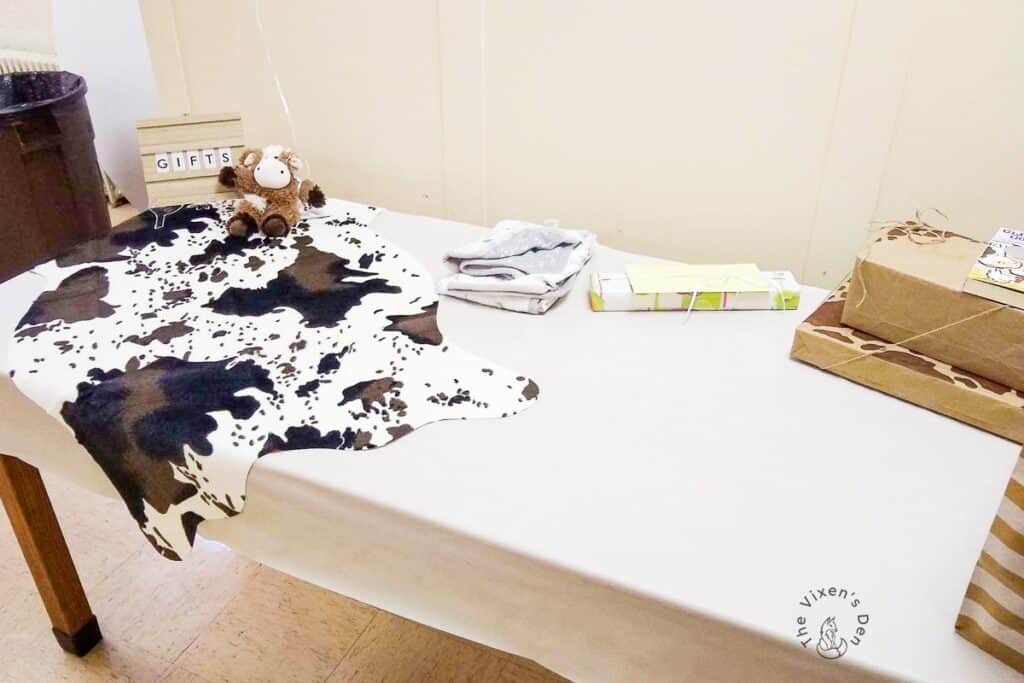
This particular sign was used as a baby shower banner, and will then be used to grace baby Evelyn’s nursery!
Are you ready to play with fire and create your customized name sign? I can’t wait to show you how easy this is! But first, some legalese…
THIS POST CONTAINS AFFILIATE LINKS TO PRODUCTS. IF YOU PURCHASE PRODUCTS THROUGH THESE LINKS, THEN I MAY RECEIVE A SMALL COMMISSION AT NO COST TO YOU.
I ONLY RECOMMEND PRODUCTS THAT I USE AND/OR HAVE RESEARCHED AND WOULD USE.
Now, let’s see what supplies you’ll need to create the banner in this post and then we’ll walk through the step-by-step instructions for the process with a few misadventures along the way!
Tools and Materials
Tools
- Artist Paintbrush
- Silkscreen Letter Stencils
- Craft Squeegee
- Heat Gun
- Rag
Materials
- Wood Sign Blanks
- Sanding sponge
- Torch Paste Woodburning Paste
- Sandpaper
- Tack cloth
- No Pain Gel Stain
- Disposable Gloves
- Jute String
Cleaning & Prepping
These sign blanks were very smooth, dust-free, and ready for crafting! To give them a bit of polish, I ran a 220-grit sanding sponge along the edges and the surface. This took care of any hidden burrs or straggly wood fibers.
The instructions state that the wood should be bare, so I didn’t clear coat or stain the wood before burning it.
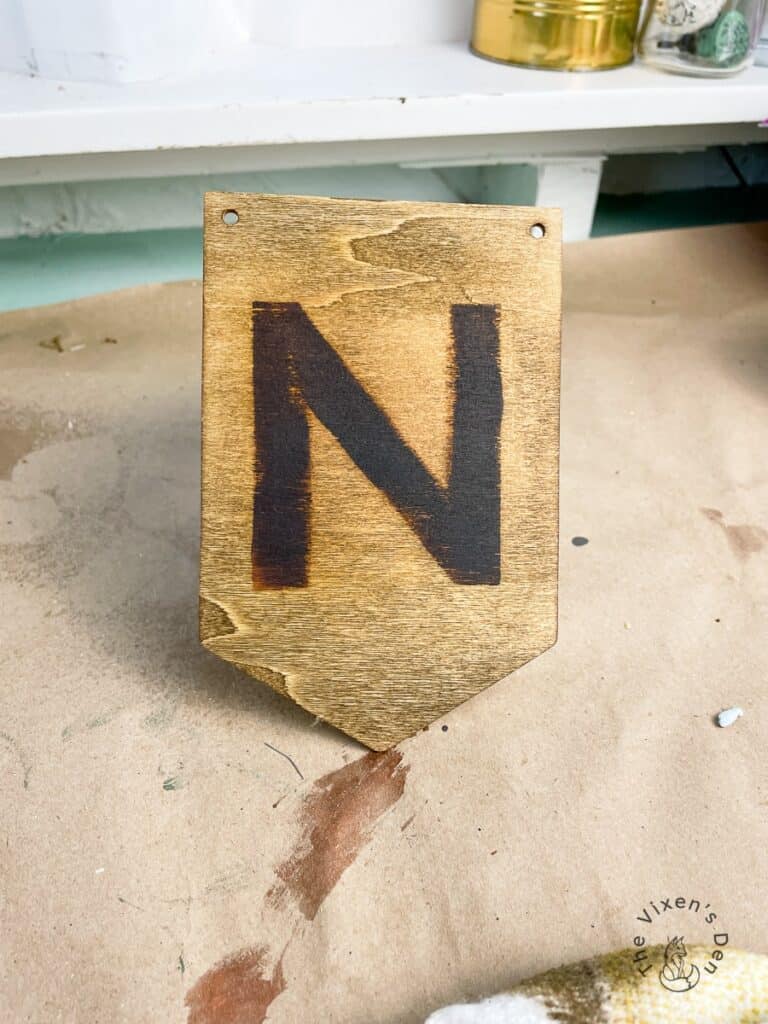
Applying Wood Burning Paste
I’ve tried both silkscreen and regular mylar stencils for wood burning. While both work, I have found that silkscreen stencils provide a more even final product. The problem I ran into with a mylar stencil was that it was challenging for me to distribute the paste evenly. The silkscreen surface creates a much better finish since the material is pressed into the fine mesh and then the surface is scraped clean.
First, I placed the silkscreen letter stencil on the raw wood surface of the sign blank. Then I applied woodburning paste using an artist paintbrush. My fingers also worked quite well for this! I made sure that the paste completely filled the silkscreen, and then I scraped it off with a small squeegee. An old store membership card also works quite well for this step. I returned the excess paste to the jar to use next time.
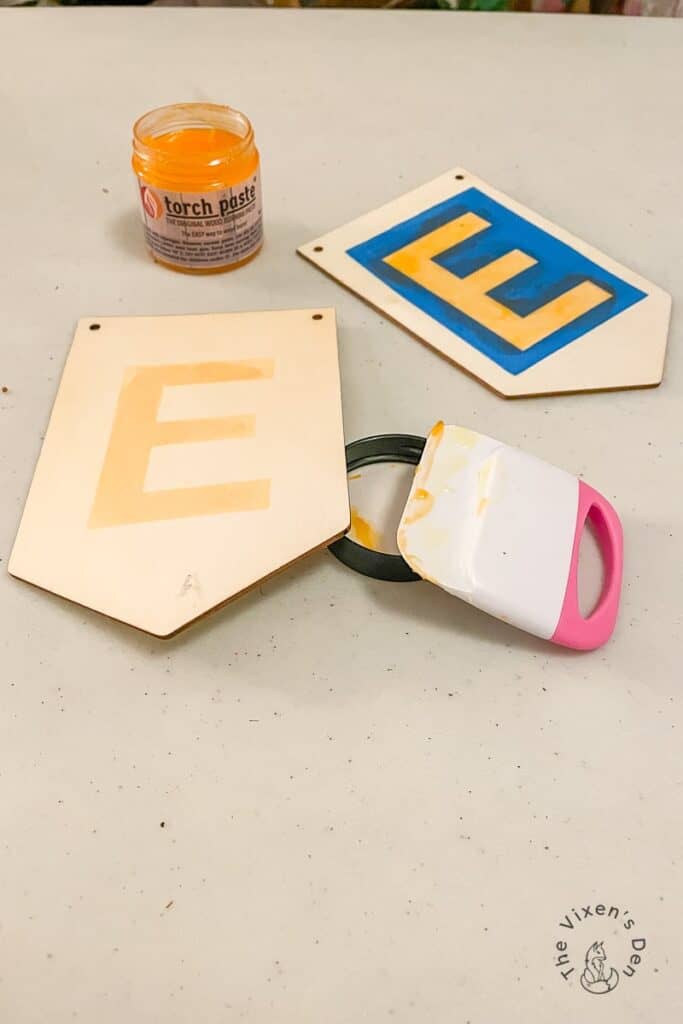
Following the instructions on the jar, I allowed the paste to dry. Once it was dry, I fired up my SeekOne Heat Gun and waved it over the surface of the paste from a distance of about 6 inches away from the wood.
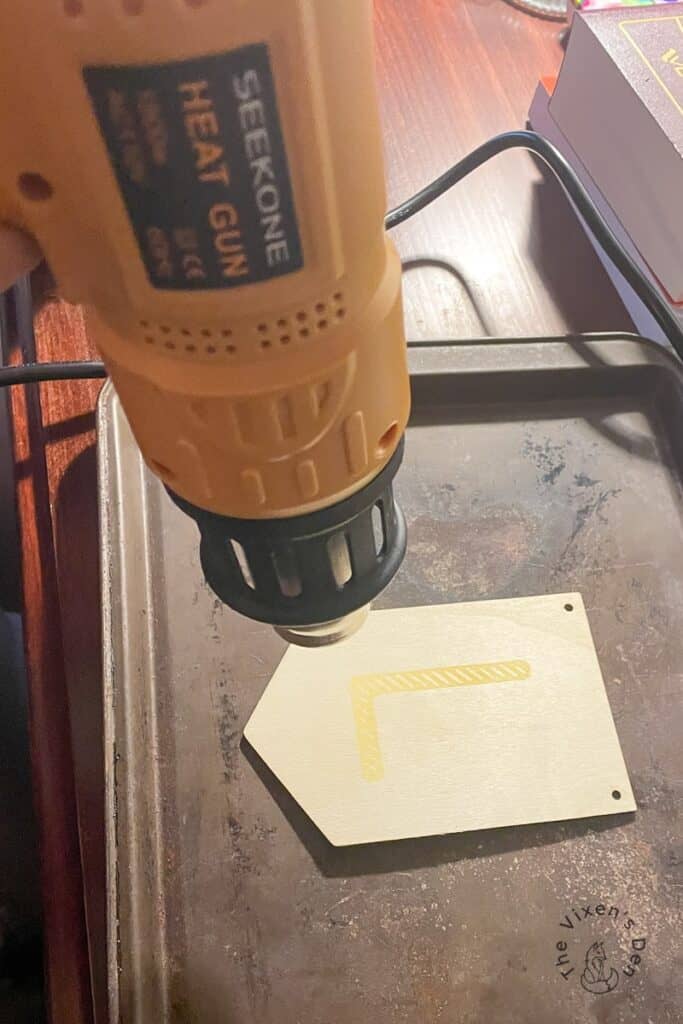
Hindsight is 20/20 tip: If I held the heat gun too close to the wood, it not only caused the paste to react, but it also singed the wood a bit. No worries, if this happens, because it can be fixed but it does require an extra step.
Hindsight is 20/20 tip: Be sure that your stencil is thoroughly cleaned and dry before using it again. In rushing to create the second “E” there was some paste left on the stencil after it was rinsed. The wet paste still reacted when heat was applied.
Woodburning paste burns in stages. If you don’t want a fully burnt look, then you can stop at any point for a singed look instead. However, the stages also progress quickly, so don’t hold the heat gun too closely, keep it moving, and be ready to turn it off as soon as the paste reaches the level of burn that you want.
Touching Up
Once you have the level of burn that you want, it’s time to touch up! I lightly sanded the surface of the burnt wood with 150-grit sandpaper. Sanding the entire surface caused some of the burnt material to rub off into the grain of the wood, so I recommend lightly sanding just the burnt surface. Don’t sand too hard, or you can actually sand through the burn and into the surface of the wood.
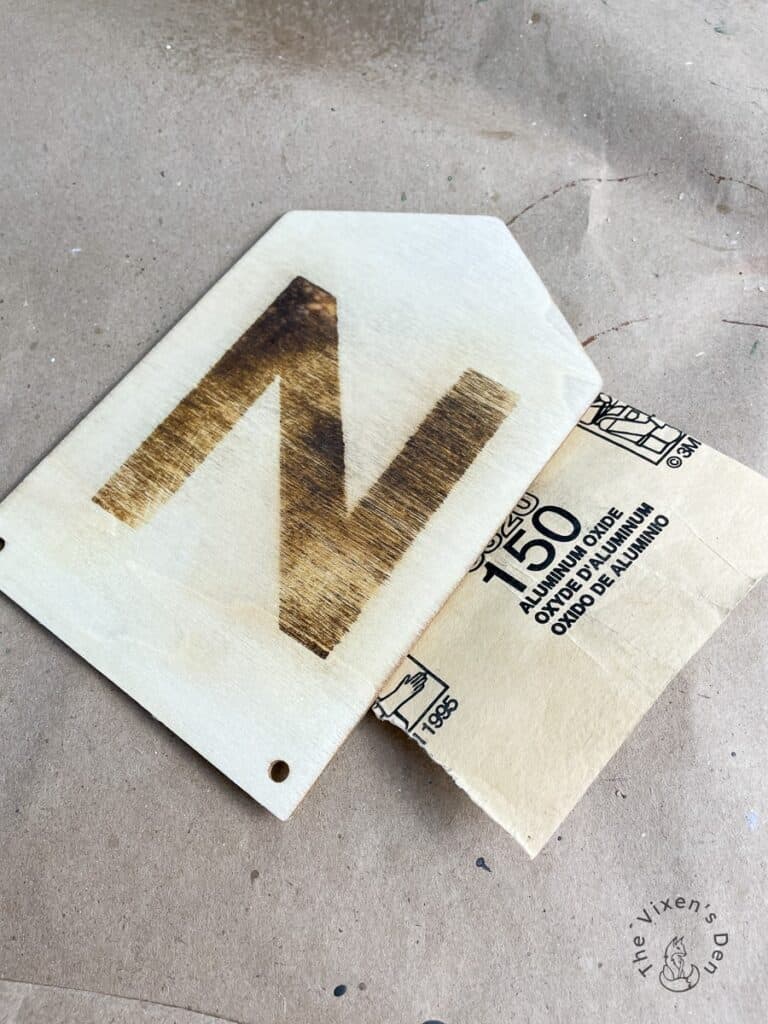
Hindsight is 20/20 tip: The first time that I sanded, I used my new oscillating sander with the idea that I would speed up the process. If I were going for a distressed look, that would have worked, but it wasn’t my plan for this project, so I ended up having to re-burn the wood and then sand it by hand.
Once the excess material was sanded off and the surface of the burn was smooth, I wiped away any burnt material dust with a tack cloth. Then I addressed the singed areas from holding the heat gun too close to the surface for a long period of time. Again, I lightly sanded to remove the darkened areas.
The singe marks were removed easily, but I did sometimes have to sand against the wood grain, which is typically not recommended. To correct this, once the singed parts were removed I just sanded the surface again in the direction of the wood grain.
With the wood surface smooth again, I wiped off any dust with a tack cloth and started staining!
Staining after Woodburning
Although the wood was beautiful, Evelyn’s nursery design called for a more rustic look. Dixie Belle No Pain Gel Stain in Golden Ash. I love this stain because it is so easy to apply.
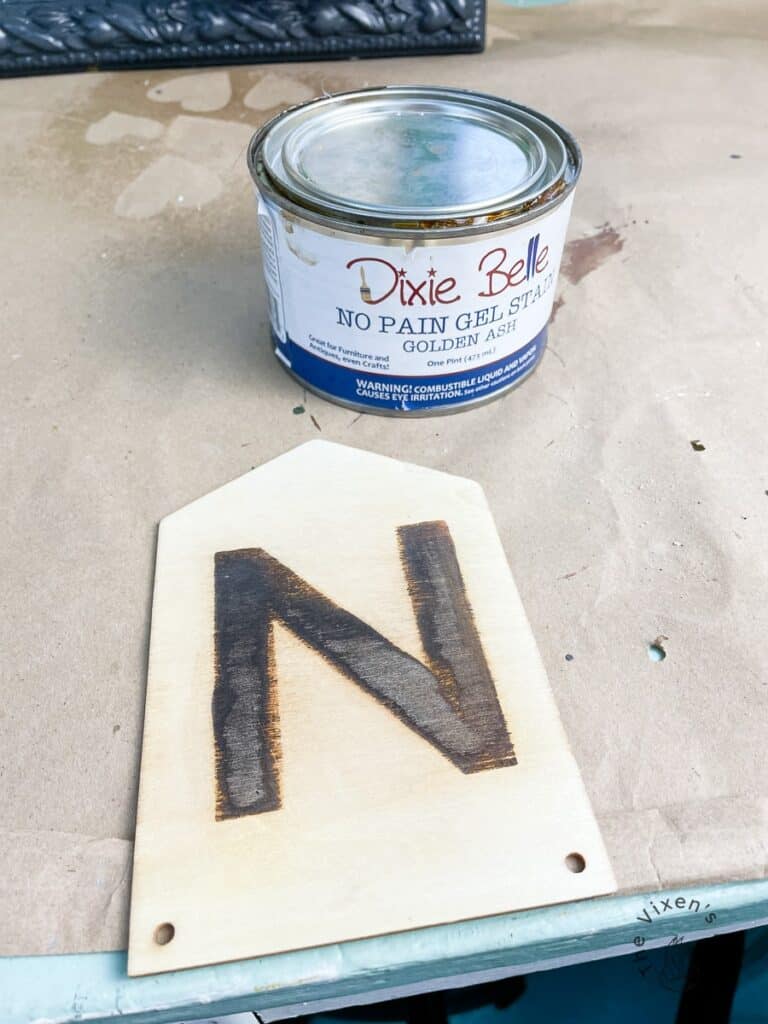
After a quick stir, I dipped a rag into the stain and rubbed it across the surface of the wood.
And that’s it! I didn’t seal these because they were needed quickly, but they could easily have been sealed either with Hemp Oil or with Clear Coat (after allowing the stain to cure.)
Stringing the Letters
After the stain dried, it was time to string the letters together. A spool of jute string was the perfect material for this rustic banner. To make it easier to thread the string through the holes, you can wrap the ends with tape. I also twisted the ends and pushed them through, but tape makes it much easier. Otherwise, the ends start to fray.
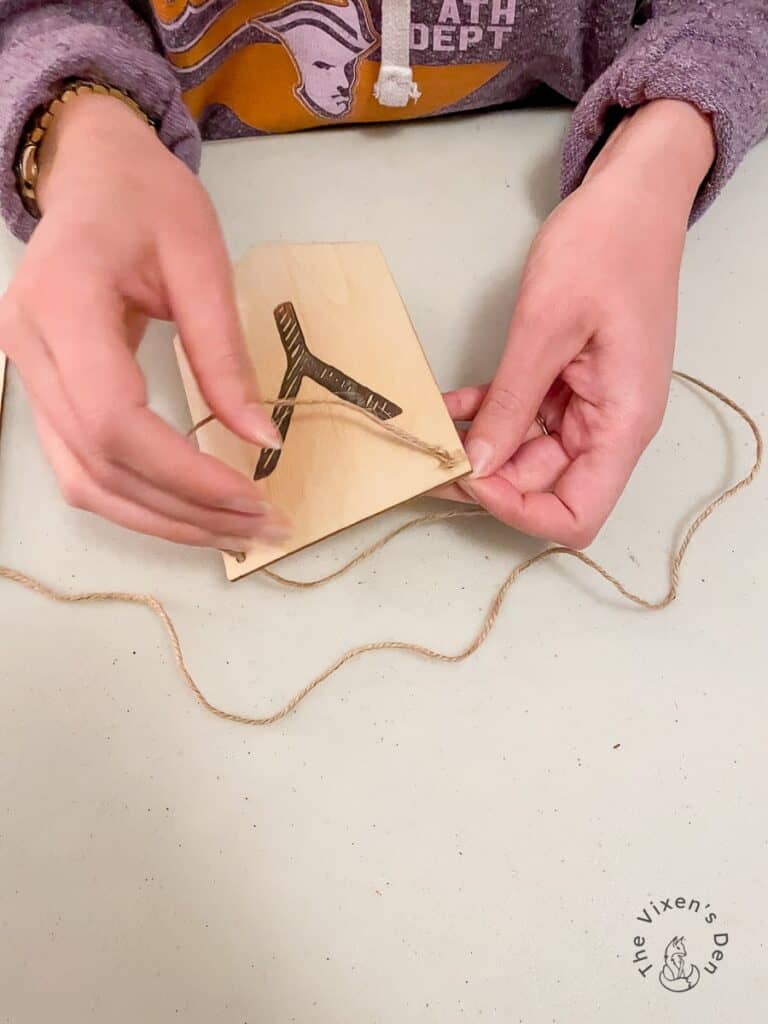
After spacing the letters the desired distance, I knotted the ends to create two loops and the banner was ready to hang!
Final Reveal
Isn’t this the sweetest banner?

It’s adorably rustic which is perfect for her cow-themed baby shower and nursery design!
Using Torch Paste woodburning paste made it so easy to create a custom name banner that can be used over and over again. It can also be customized further by gluing on additional wood elements or painting it as her style changes over the years.
Woodburned signs would be perfect for a rustic anniversary, birthday, graduation, or wedding decoration! What would you create with woodburning paste? Let me know in the comments below. I love hearing all of your creative ideas!
Thank you so much for stopping by! Check out the other amazing projects at the link parties below. I know the hostesses will appreciate your visit and comments.
Until next time, have a beautiful and blessed day!


Linked up to these lovely link party hostesses at:
Don’t forget to sign up so you hear all about the next misadventure! Until then, you may also like this Crib makeover or this Baby Mobile makeover.