Fabric Covered Bulletin Board Cabinet Doors
I am a firm believer that something can be both functional and beautiful. That’s the case for this fabric-covered bulletin board. A simple thrift store corkboard received a major upgrade and became the star of the show for my craft cabinet makeover.
Corkboards are fairly common finds at your local thrift stores. They’re great for keeping ideas and reminders readily at hand. But when it’s time to redecorate or move, they’re also one of the first items out the door. The fact is, they just aren’t a staple in the typical decorating plan. But with a little fairy dust, they could be.
Let’s see how this ugly duckling became a swan.
The Makeover Process
THIS POST CONTAINS AFFILIATE LINKS TO PRODUCTS THAT I HAVE OR WOULD USE.
AS AN AMAZON ASSOCIATE, I EARN FROM QUALIFYING PURCHASES AT NO COST TO YOU.
YOU CAN SEE MY FULL DISCLOSURE HERE.
Tools
- Flat-head screwdriver
- T Square
- Box cutter
Hand held saw Sanding block - Staple gun
- Measuring tape
- Hammer
- Nail gun
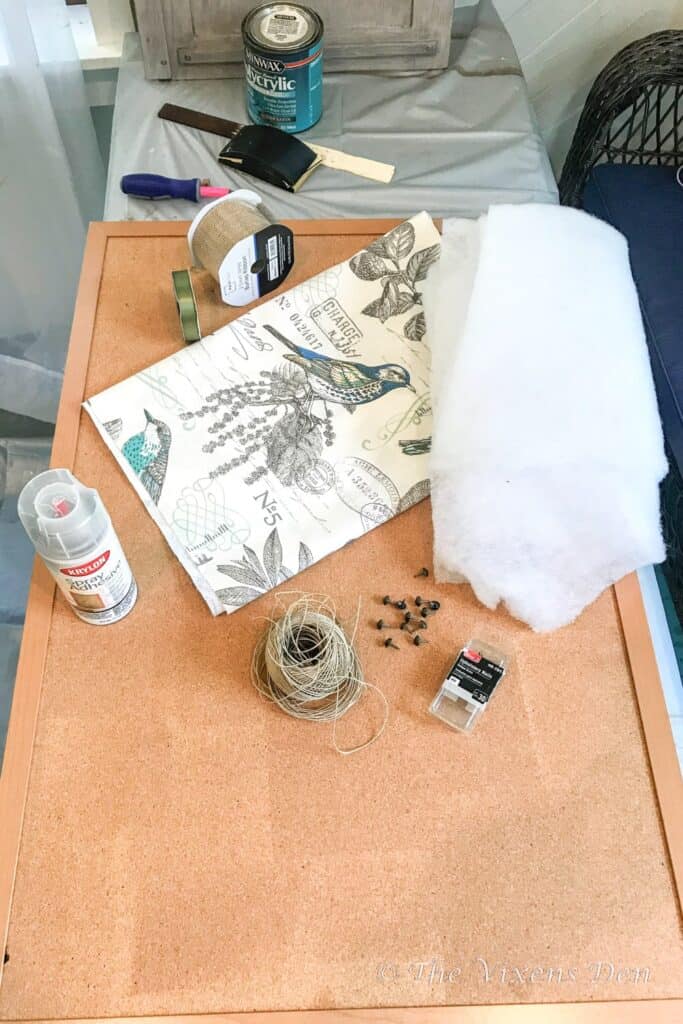
Materials
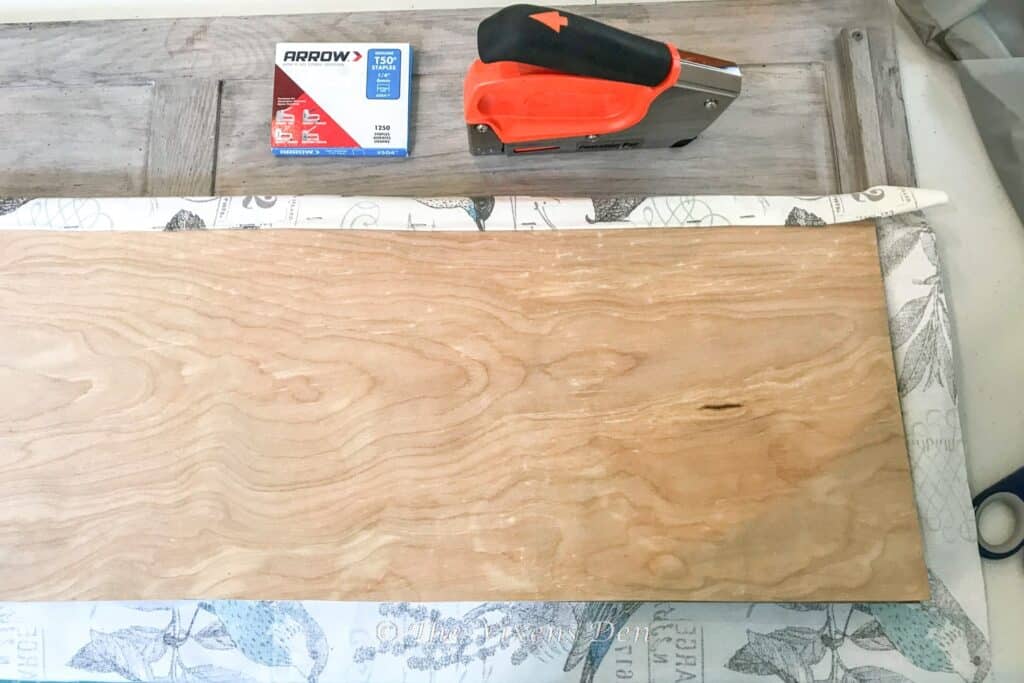
- Corkboard
- Craft plywood – the same size as the corkboard
- Sandpaper – 220 grit
- Quilt batting
- Fabric
- Spray adhesive
- Staples
- Upholstery tacks
- Hemp cord
- Brad nails – 1″
Prepping the Corkboard
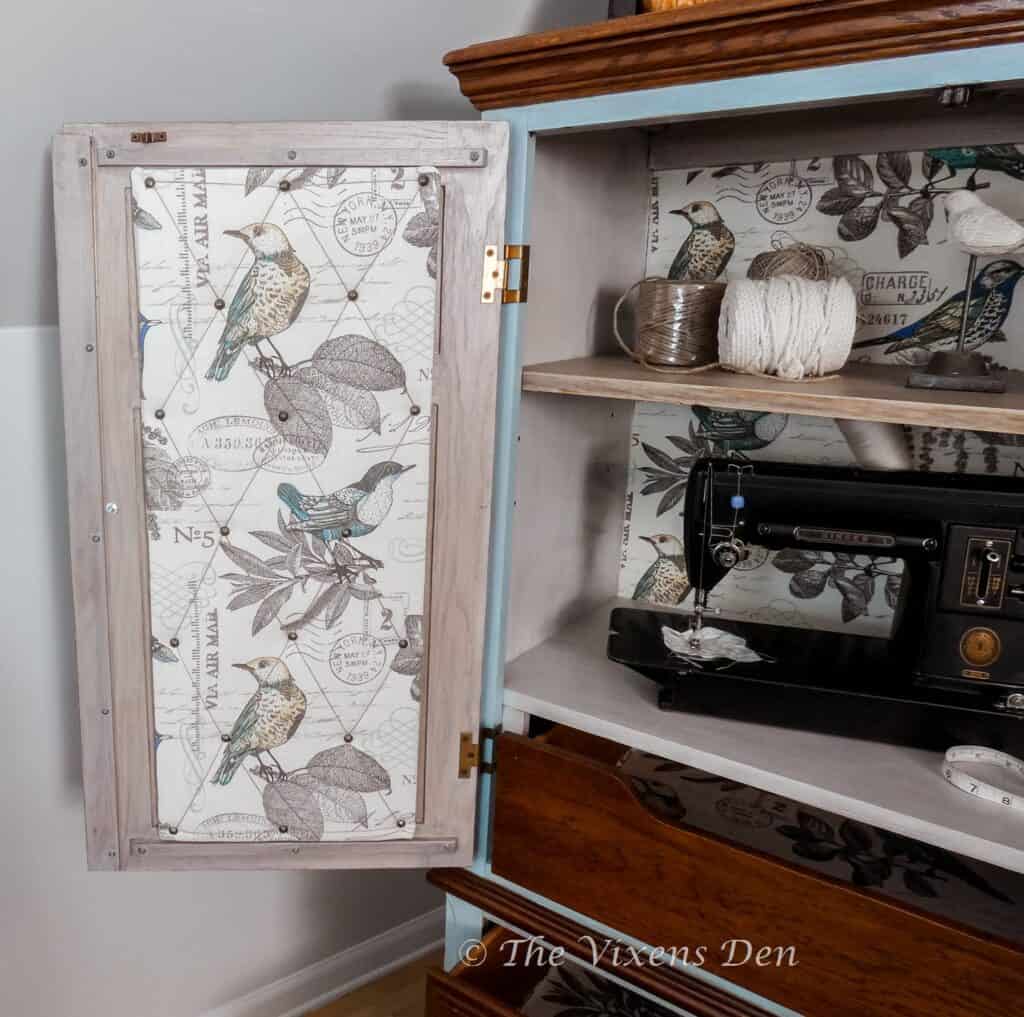
For this project, I wanted to add a corkboard or bulletin board to the inside of the craft cabinet doors. I found this corkboard at Goodwill for $1.99. That’s a great start to this project!
The first step was to remove the corkboard from the frame. If you plan to reuse the frame, then I recommend prying gently on the backing or corners with a flat-head screwdriver. I sort of took the bull-in-the-china-shop route and snapped the frame in two as I was pulling it apart. Whoops!
Once the board was free of the frame, I could see exactly what I was working with. This corkboard was a VERY thin layer of cork over two layers of cardboard. The cork was also a bit brittle and starting to crumble at the edges. Not ideal, but since I was covering it up anyway, it worked for my purposes.
After comparing the measurements of the doors to the board, I decided that I would rather have the board run lengthwise from top to bottom, and sacrifice a little on the sides. I measured the corkboard and struck a line to divide it in half lengthwise.
Then I clamped a T square tightly against the board with one hand, while I pressed a sharp box cutter into the cork and cardboard backing, and slowly pulled the knife down the board staying tight against the straight edge.
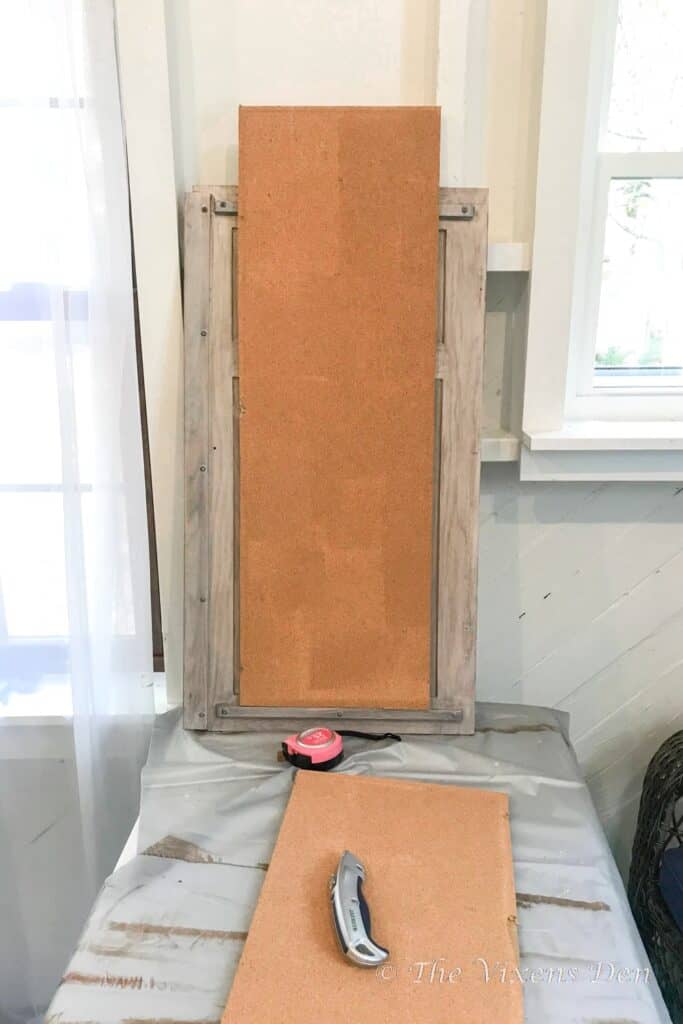
Once the corkboard and backings were divided in half, I measured the space between the wood braces on the doors and followed the same procedure to cut the two halves to length.
Prepping the Backing
Since the corkboard was thin and brittle, and I planned to mount the boards to the cabinet doors, I needed a backing that could support the corkboard and the staples for the fabric covering.
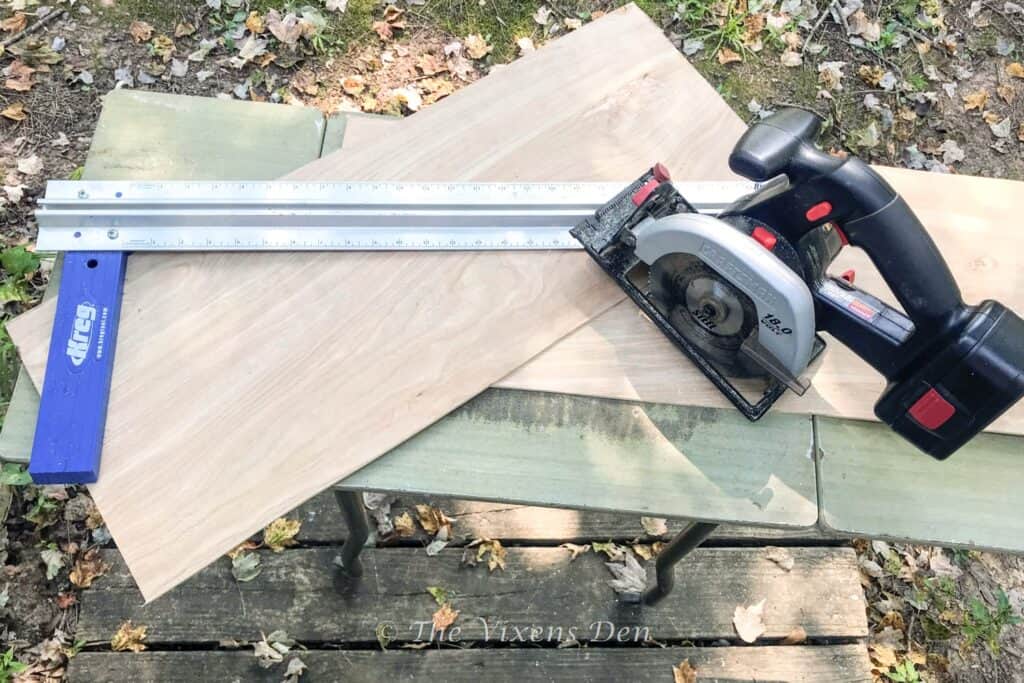
I had a scrap piece of 1/4 inch craft plywood on hand. This material is sometimes used on the back of dressers and shelving units, as well as in a variety of craft projects. It’s a dense, sturdy material and great for this type of application.
I measured the plywood to the same size as the two pieces of corkboard and cut it to size using my
After cutting the plywood, I used a piece of 220 grit sandpaper to smooth the edges so that they wouldn’t snag the fabric. I wiped both sides of both pieces with a tack cloth to remove any dust.
Putting the Pieces Together
Next, I sprayed one of the plywood sides with adhesive spray. I immediately laid the corkboard with its cardboard backing onto the plywood and clamped it down. In my case, the “clamps” were buckets of paint and whatever else I had laying around. I let this dry for about 30 minutes to an hour and then removed the “clamps.”
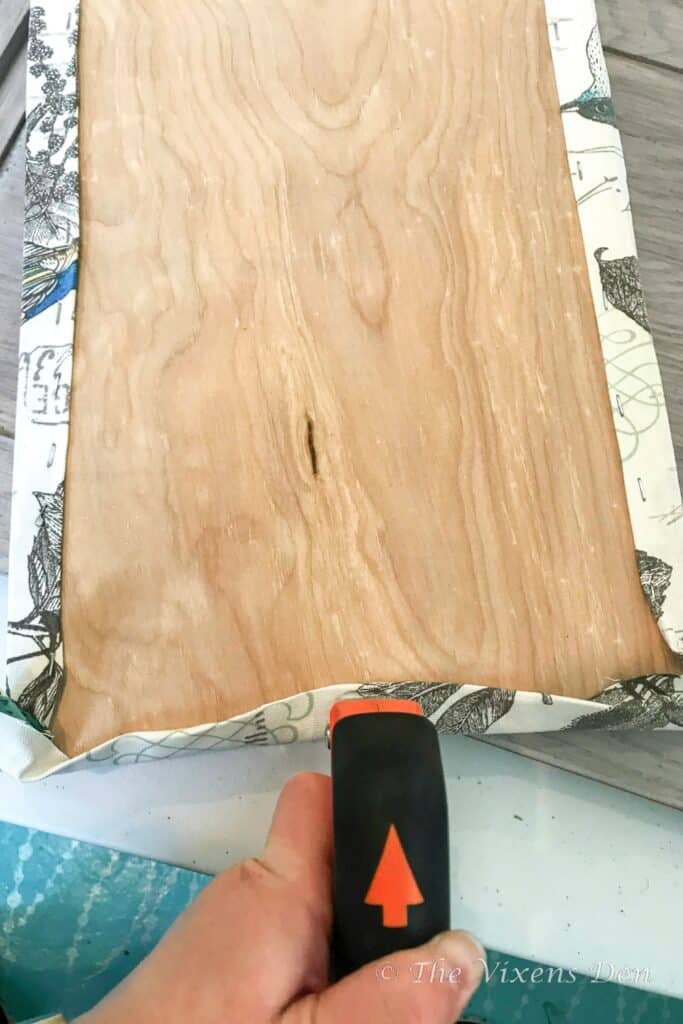
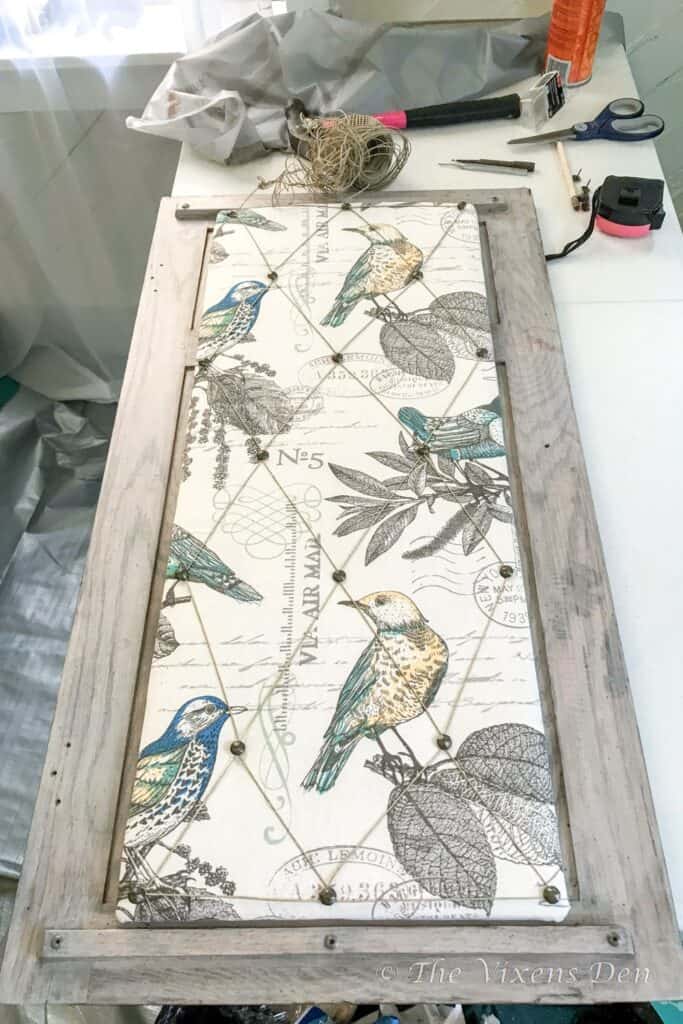
I measured and cut the quilt backing to cover the front of each panel all the way to the edges. This material is stretchy, so after spraying the corkboard with adhesive, I laid the batting onto the panel and used my hands to gently smooth the material from the center out to the edges. By the time I reached the edges, I had the tiniest bit of overlap.
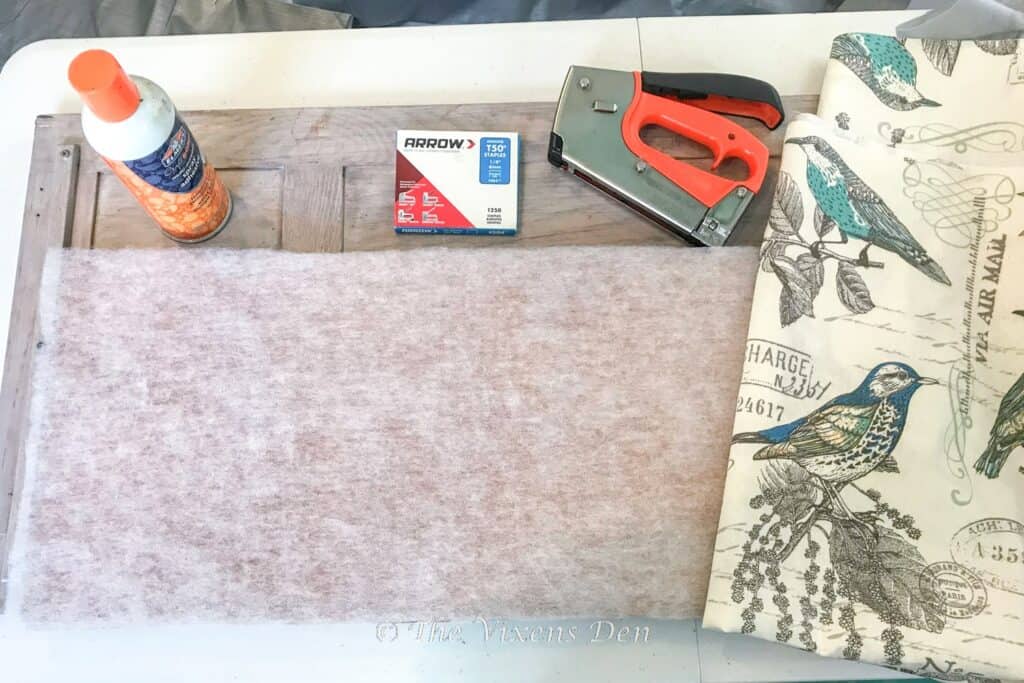
After the quilt batting was applied to the front of both panels, it was time to measure the material. I allowed an overlap of an inch and a half to two inches for either side. The fabric was laid face up on the cotton-batted corkboard, with the overlaps hanging evenly over the edges, and then the entire piece was flipped over so that the fabric was face down on my working surface.
Hindsight is 20/20 tip: always make certain that your work surface is clean and dry when working with fabric.
The one and a half to two inches of extra fabric gave me enough material to fold over twice before stapling the fabric to the plywood backer board. This is important so that you have a snug fit that won’t as easily fray and allow the fabric to pull free from the staples over time.
Starting along the long side, I began fastening the fabric to the board by folding the edge of the material twice, at about one-third inch increments. Then I stapled the folded fabric to the center of the edge of the board using a handheld staple gun and 1/4″ staples. I continued folding and stapling the fabric, working my way from the center to the edges.
I gently pulled the fabric from one stapled point to the next but didn’t pull the fabric too tightly from front to back, where the fabric was laying against the table. The goal was to have the fabric lay smoothly against the plywood backer board.
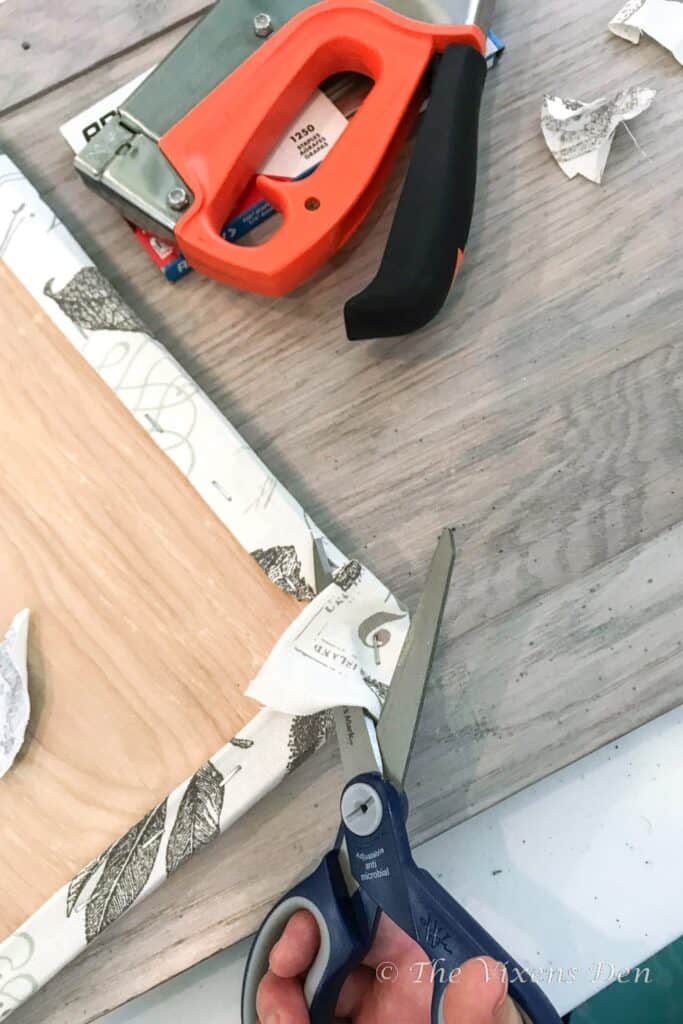
Once the first side was stapled, I began working on the opposite side. This time, before I began folding the edges, I pulled the material taut from underneath, where the fabric lay against the table. Then I folded the fabric at the center of the backer board and stapled it down. This step was repeated until the second side was firmly stapled to the plywood backer board.
I followed the same process for the ends. This time, when I got to the corners, I first folded the corner into a point and stapled it down, then trimmed off any excess fabric. Finally, I folded in the two corresponding sides and stapled them to the plywood backer board.
Adding Details
Once the fabric was securely fastened, I would like to say that I measured and then began adding in the upholstery tacks for the cord. However, I just eyeballed and spaced them out, only driving them in part of the way so that I could easily wrap the cord.
Then I remembered that I wanted the spaces to be even. So I pulled out the measuring tape and marked where I wanted the tacks to go with a pencil. The pencil mark is light and the tack heads covered it perfectly. I pried out any stray tacks with a flat-head screwdriver.
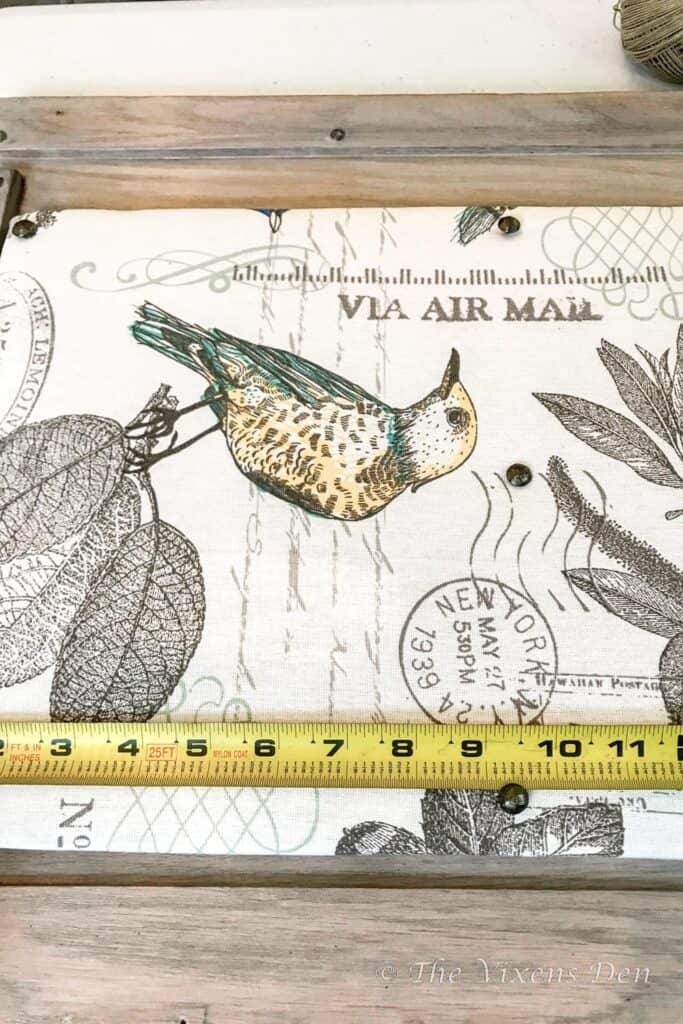
Once all of the tacks were properly set, and the ones that went a little sideways were replaced, I began wrapping the hemp cord. I started off by tying a loop knot at the end of the cord, pulling out the starter tack and sticking it through the loop, then hammering the tack back into place.
I then began zigzagging the cord around the left two columns of upholstery tacks, crisscrossing back and forth. I then moved to the next column and crisscrossed back and forth between the second and third column and back up to the top. This process was repeated, connecting each new column to the previous column until the board was filled.
(I struggled with getting this part started so that it would look the way I wanted. Luckily my much less mathematically challenged kiddo stopped by for a visit, so this project survived entirely thanks to her assistance!)
It’s important to pull the cord taut during this process, which resulted in some of the tacks popping loose. Luckily, hitting things with a hammer is right up my alley. I repositioned the deserters and hammered them back into place. When I got to the end, I wrapped the cord tightly around the last tack several times and then hammered it snugly against the fabric.
(Hindsight is 20/20 tip: The edges of these upholstery tacks can actually cut the hemp cord if you hammer it in too deeply. If this happens, just pop the tacks out of that section. Make a starter loop knot, just like in the first step above, and hammer that tack into place. Pull the cord taut, and then wrap around the second tack head several times. Hammer the tack snugly into place and trim off any excess cord.)
Attaching the Corkboard to the Cabinet Doors
This is the part where things went a little sideways because someone wasn’t paying attention to the angle of the nail gun. You can see all of the fun challenges from this little mishap here.
(Hindsight is 20/20 tip: ALWAYS pay attention to the angle at which you are holding your tool. Do a practice nail/screw/cut and envision how the process will go. Then check the back of the material to make sure that you’re in the right spot.)
Patience is not one of my virtues, so I set aside the damaged door and worked on the second one. This time, I paid attention to the angle of the nail gun and the depth of the material on the other side.
I shot 3/16″ nails thru the corkboard and into the craft armoire door on the top, bottom, and middleish sections of the door frame. Because the corkboard doesn’t run all the way to the right and left of the door frame, those were my only options for a secure fastening. I used three nails in each section and the corkboard is VERY snug.
The nailheads for brad nails are so small that they pulled right through the fabric and are completely hidden from view.
Once the stray nails were removed and the first door panel was repaired (ugh!), the doors and their fancy new corkboards were ready to reinstall on the craft cabinet!
The Makeover Reveal
Can you believe how beautifully that came out? It’s absolutely perfect!
Here’s a closer peek look…
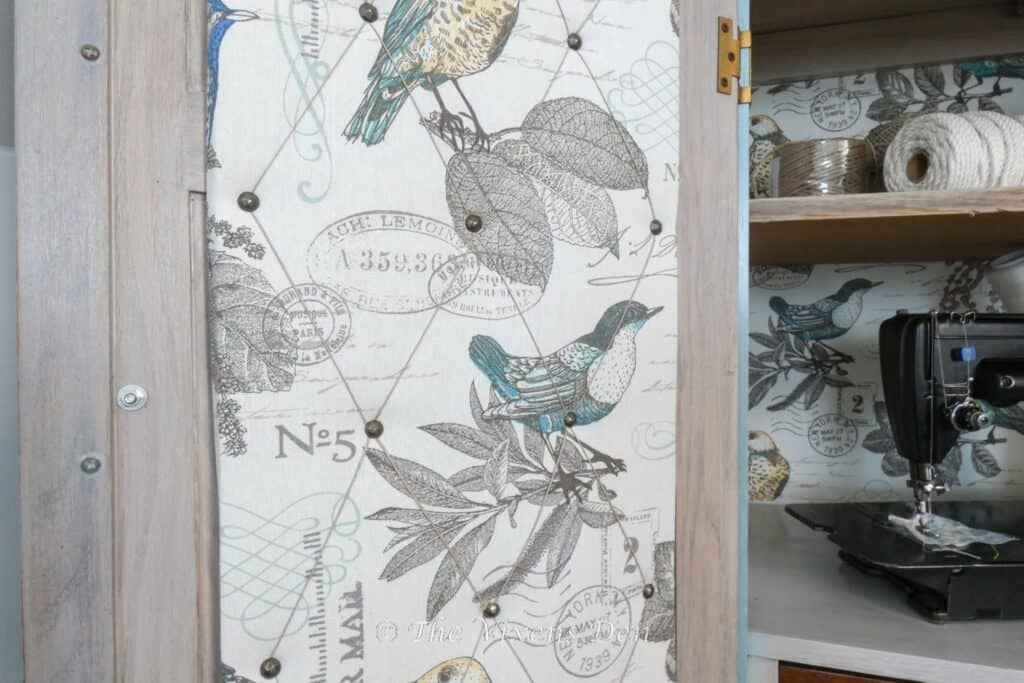
This simple little corkboard has a brand new lease on life. I smile every time I open the craft cabinet. These bulletin boards are the perfect place to tuck ideas, pictures, paint swatches, etc. It’s also a great place to stash pins when I’m sewing.
With such a beautiful and inspirational spot to work, I can’t wait to get started on the next project!
Here’s a final before and after. See you again soon!

Linked up to these lovely link party hostesses at:
If you enjoy seeing DIY makeovers like this one, be sure to subscribe so that you receive an email when new misadventures are posted. If you like this fabric corkboard makeover, then you will love seeing the full paint-washed craft cabinet makeover. Enjoy!

Another project well done Becky! I would love to have your sewing machine, now if only I could sew! Ha! It’s on my ever growing bucket list of things I want to learn or do. Thank you for sharing with us.
Absolute wonderful! I’m going to copy your idea!!! Love it❣️
Thank you so much, Paulette! I hope you’ll come back and share your finished project!