How to Make a Custom Acrylic Dinosaur Cake Topper – xTool P2
As I mentioned in the first post about setting up the P2 laser, being able to create custom art quickly is what this machine is all about! After wrestling with the Air Pump Current error, and uneven cutting and engraving, it was a huge relief to create a finished product!
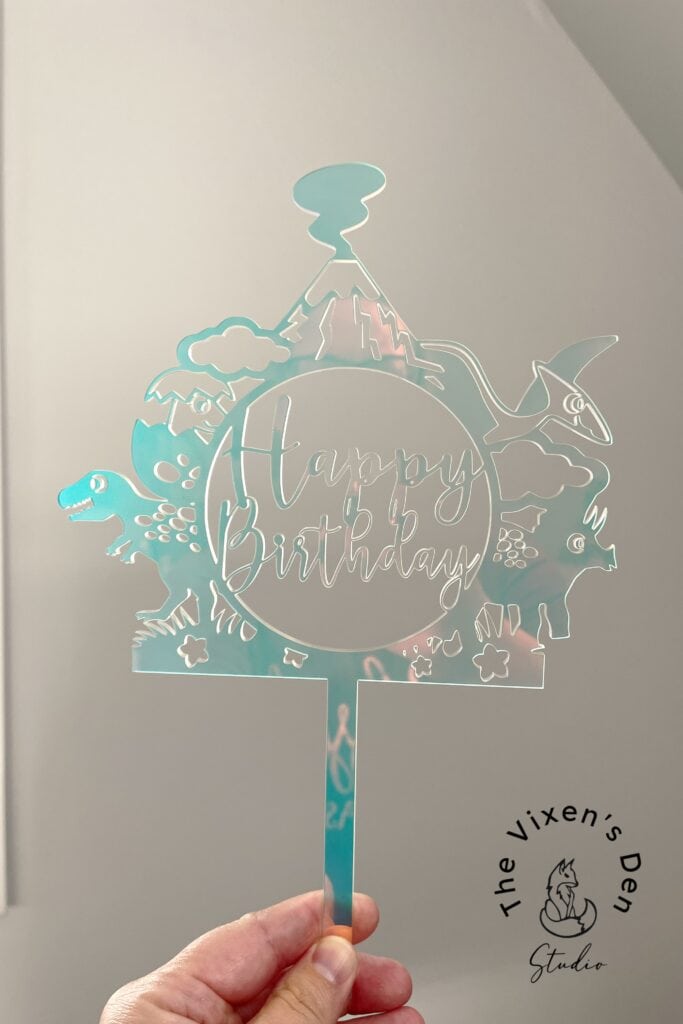
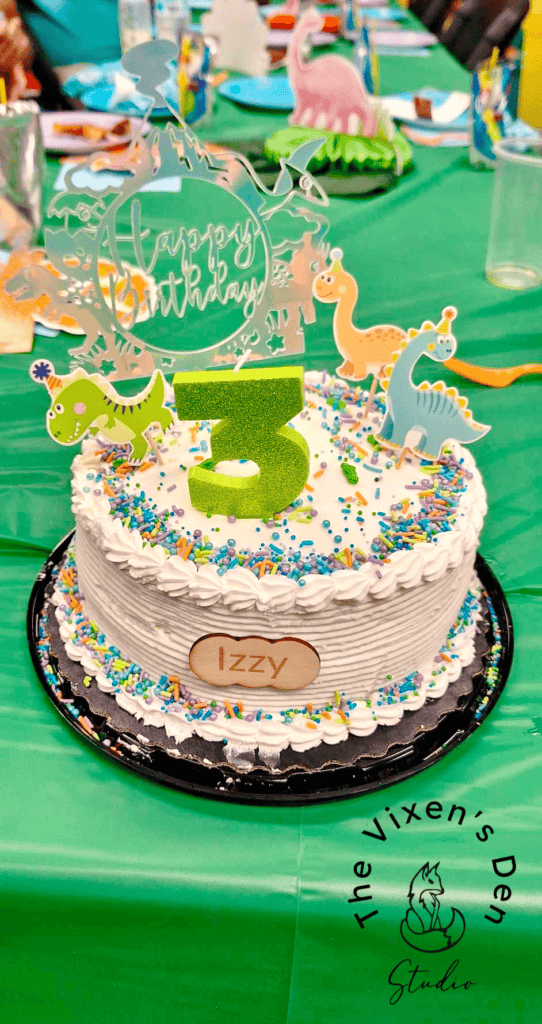
When your grandbaby turns three and loves dinosaurs, you make her a personalized dinosaur cake topper! This cute cake topper was a breeze to make…after I figured out the right settings, that is.
Grab a cup of tea and let’s chat about this cute little cake topper, how I made it, and what I learned. But first, some obligatory legalese for your reading pleasure:
This post is sponsored by xTool. While they provided the machine for this project, all opinions are my own.
Follow this affiliate link to see all of their amazing laser engraving and cutting machines and materials!
AS AN AMAZON ASSOCIATE I EARN FROM QUALIFYING PURCHASES AT NO COST TO YOU.
YOU CAN SEE MY FULL DISCLOSURE HERE.
Tools and Materials
Tools
- P2 Laser Machine
- Creative Fabrica
Materials
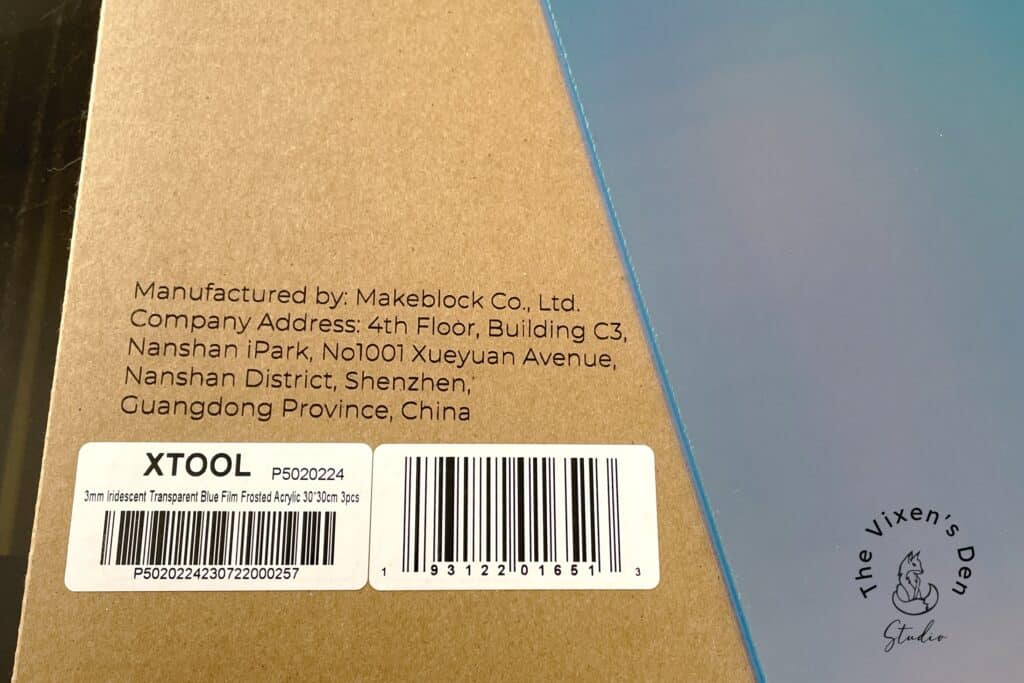
- 3mm Blue Iridescent Acrylic
- Vinyl Ease Transfer Tape (optional)
- 3mm Basswood
- Adhesive
Choose the Design
I admit it! I am a Creative Fabrica junkie! I love their designs so much that I invested in the annual subscription. (Yes, this is an affiliate link) While I could certainly go to Etsy and find some gorgeous designs, I have enjoyed being able to hop onto Creative Fabrica and download a new file, or bundle of files, whenever I want.
Seriously, Creative Fabrica is so affordable with the cutest designs ever! It’s a rabbit hole, consider yourself forewarned!
When searching for files, I like to make sure that the designer includes an SVG file, which translates nicely into a file that XCS can read. You can also search specifically for “laser” files or “cut” files.
The designer of the Dinosaur Birthday Cake Topper that I chose for this project included every imaginable type of file that you could ever need!
Pro Tip: I like to check the reviews to see if anyone has posted that they have had problems with the files. Those are rare, but since I’m not a graphic designer by trade, I prefer clean files that are easy to use.
Once I’ve pulled myself out of the rabbit hole and discovered that I’ve downloaded a hundred new designs to my file (I wish I were kidding!) the next step is to unzip the file. Then I copy and paste the SVG file into a folder that I’ve created just for xTool.
Pro Tip: I do this because sometimes a download includes a group of designs and I may not like all of them. So I drop my favorites into the xTool folder so that I can find them quickly.
With the file successfully downloaded, the next step is to choose the material and get it prepped!
Prepare the Acrylic
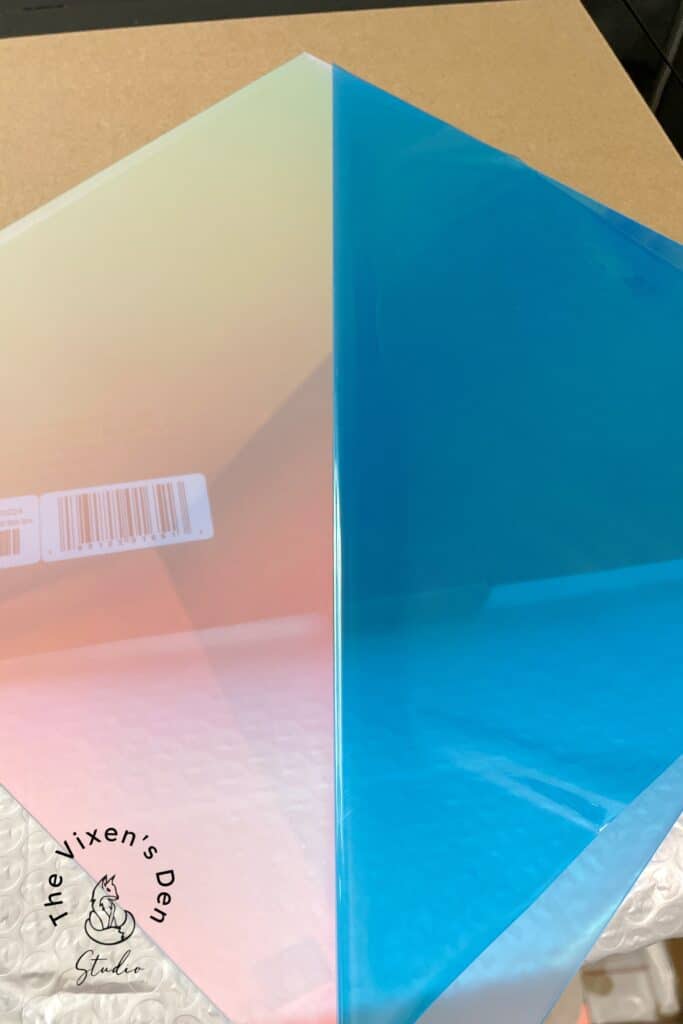
My daughter loved the blue iridescent acrylic from xTool (like her momma, she loves shiny things too! lol). Since I had already run a test grid on the clear acrylic, I felt confident with jumping straight into cutting out the design.
I removed one of the layers of protective film. I left one layer on to protect the back of the acrylic from becoming scratched by the slats during processing.
To ensure minimal “ghosting” around the edges of the design, I applied a sheet of 12″ wide transfer tape. I’ve read that air bubbles can cause some burning, so I used a craft squeegee to scrape out any wrinkles or air pockets.
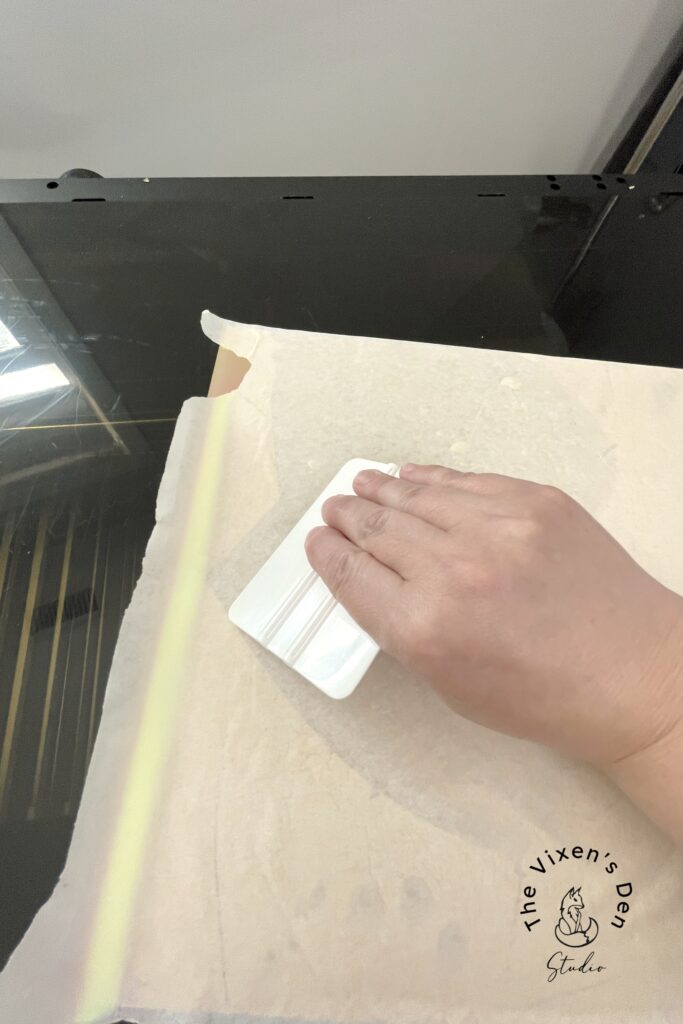
(Some creatives use dish soap instead of tape. I plan to experiment with that on my next project!)
Once the surface was prepped, I used the included spring clamps to clamp the acrylic sheet to the center of the laser bed.
Process the Job
With the computer connected to the P2 using the USB cable, I opened XCS. Then I clicked on the folder icon and chose “Import Image”. I selected the file that I had downloaded from Creative Fabrica.
When the file imported I received a pop up message asking if I wanted to scale the project to the laser bed. I chose “yes”, but even then the image was too large. So I grabbed one of the points and pulled the image in on itself to scale it down to size.
Pro Tip: This is where the cameras really come in handy! By knowing the size of your material or having a jig set up you can easily resize the image so that it fits perfectly within the dimensions that you have laid out in the laser bed.
I also used the cameras to zoom in on the edges of the acrylic, to make sure that the cuts weren’t going to land outside of the material.
Once the design was perfectly aligned, I selected all of the design and clicked “combine” to unify all the cutouts into one cut. This helps the processing to go a bit faster.
The design did not import with cut settings, so the next step was to define the material, power, and speed to cut the acrylic. This is where things started to go a little wonky.
I clicked the start button in XCS, and then the start button on the machine. Everything worked beautifully! Except…
The settings weren’t quite right so not all of the pieces cut out. In an attempt to fix it, I used the cameras to help me line the partially cut project with the design in XCS. I processed the project again.
The final results were better except for the fact that lines weren’t quite matching, so there was more material lost than before.
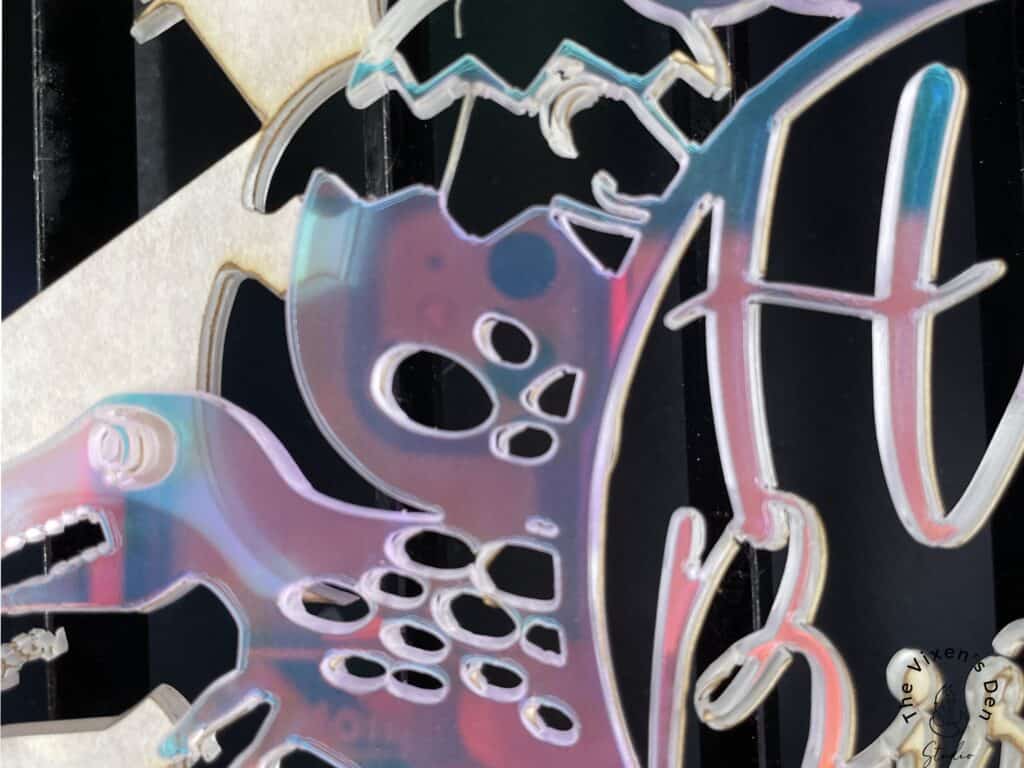
(The poor tyranosaurus rex barely has any teeth!)
As I was weeding out the excess material, some of the primary pieces, such as the pterodactyl, fell off!
There was no way that I was giving that to my granddaughter!
I assumed there must be something slightly different with the blue acrylic, so I tweaked the settings and set up another cut. Unfortunately, I experienced the same results!!
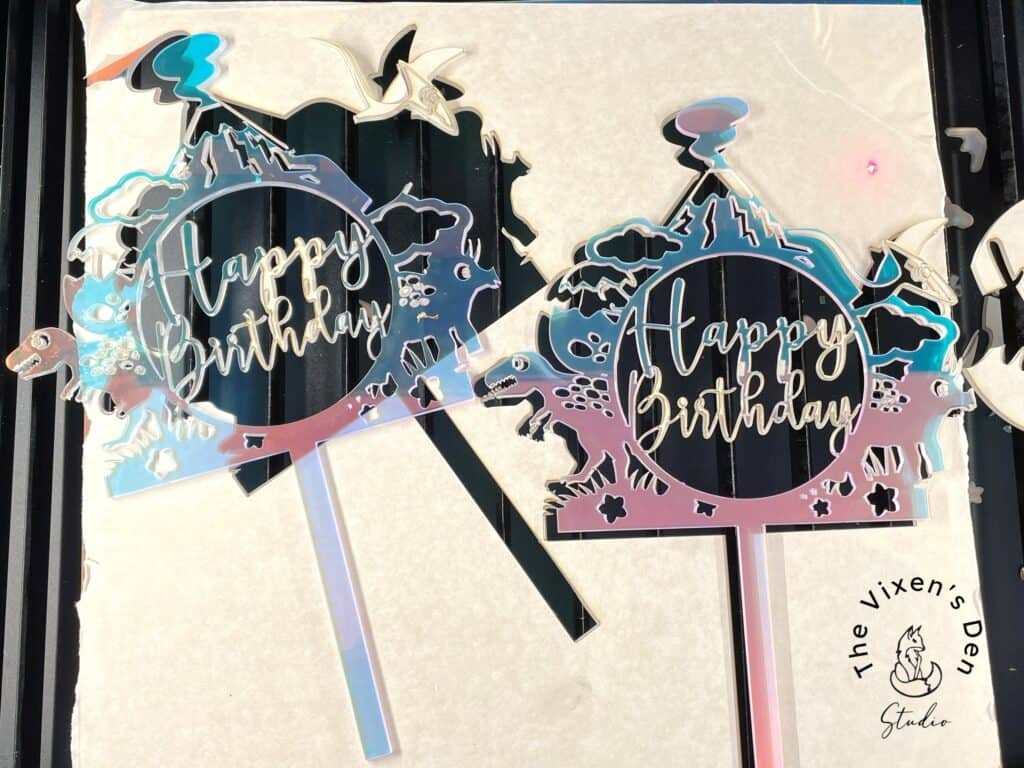
Beyond frustrated, I took a closer look at the acrylic test grid. That’s when I discovered that I had misread the speed setting due to the very tiny size of the grid and the corresponding numbers! I needed to decrease it from 20 to 10!
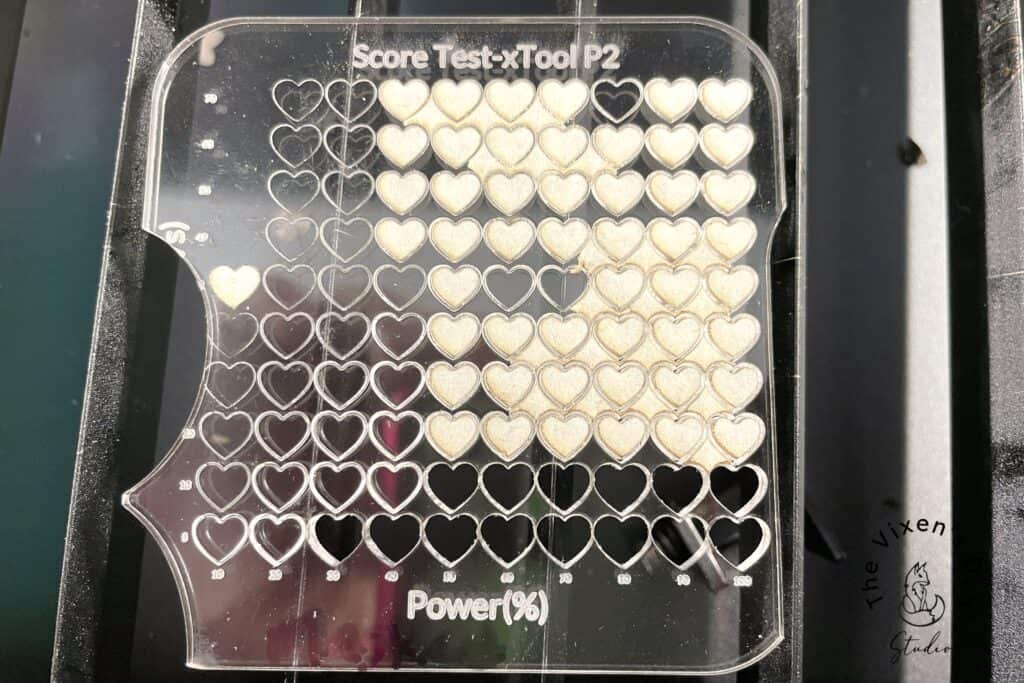
(I should have used my magnifying glass!)
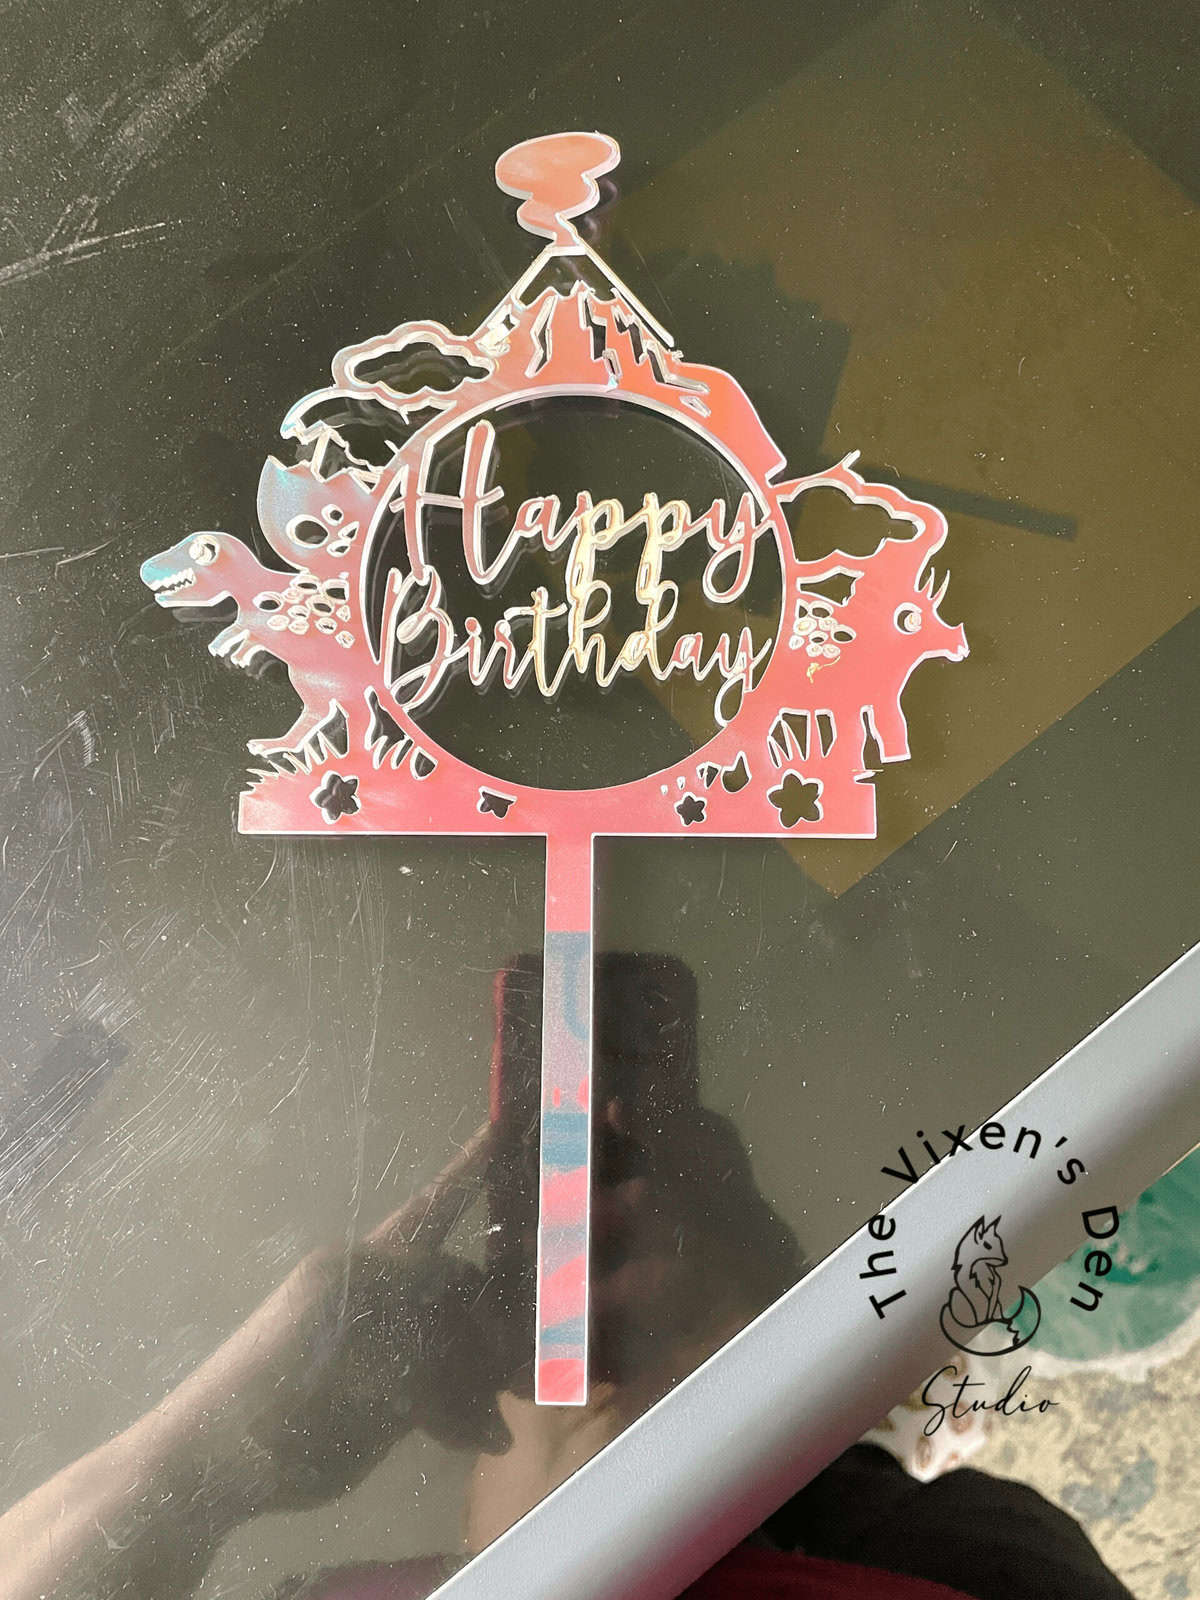
After I adjusted the settings, the third attempt came out beautifully!
Pro Tip: Make sure that you can actually read the settings on your test grid!
Customize
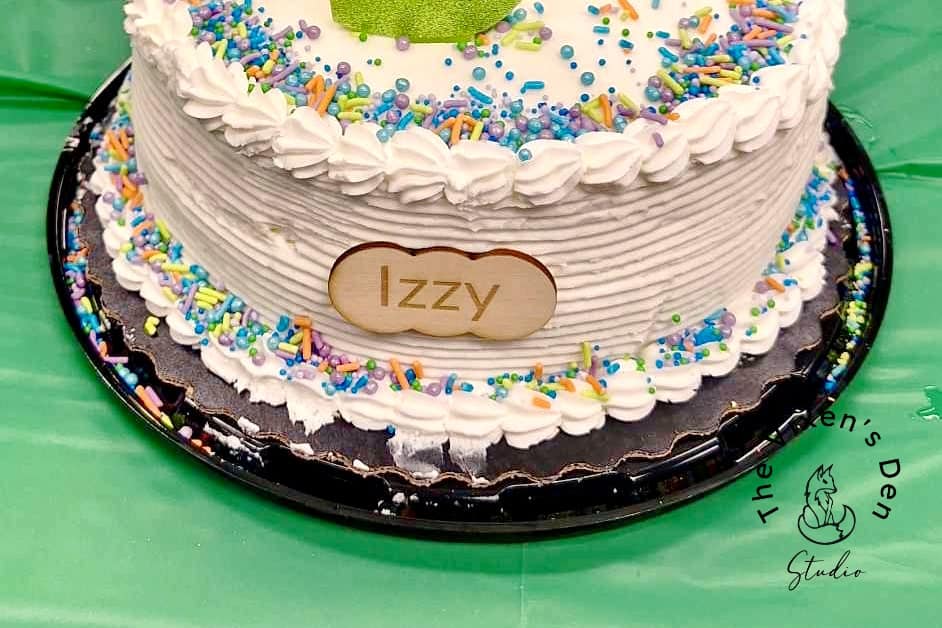
Now that I had created a successful “thing” I was ready to take it up a notch! Using some simple shapes and the included text fonts in XCS, I created a custom name tag from the xTool-supplied Basswood.
The process was super simple!
- Lay the cake topper on the laser bed as a frame of reference.
- Select a circle image from the “Shape” tool
- Duplicate the first circle twice
- Grab the circles with your mouse and move them so there is a circle in the center with a circle on either side (almost a cloud shape)
- Select the three circles and click “Unite” to combine them into one shape.
- Using the closeup camera, zoom over the location where you would like to add the custom name tag.
- Grab a point on the shape and pull it in or out to adjust the shape to fit the cake topper.
- Remove the cake topper and clamp a sheet of Basswood to the laser bed.
- Align the cloud shape with the corner of the material so that waste is minimized.
- Click on the “Text” tool.
- Select a font and type in the name or words.
- Resize the font until the name fits inside the cloud shape.
- Select “Weld” to unite the letters into one word.
- Set the cloud to cut and the font to engrave at the factory 3mm Basswood settings.
- Press start and watch the magic happen!
(Overwhelmed by all of the steps? I’ve got you. Step by step video coming soon!)
Pro Tip: Combining design elements right before processing is an important step. It helps to speed up process time which can be significant if you have a large project or one with an intricate design!
While my plan was to glue the name tag to the cake topper (hence the adhesive in the materials list), my daughter had a different idea and it turned out so cute!
Final Thoughts
This turned out to be a super cute cake topper, that was quick and easy to make…once I had the settings correct. I learned some valuable lessons. I also really enjoyed creating the custom name plate to make the whole design unique for my special little person!
While XCS has limited fonts, I found the basic design process fairly easy. What would you like to see me create with the P2? Let me know in the comments below!
Ready to dive into the creative world of xTool laser engraving and cutting? Click below to start your xTool journey. At checkout, enter code AFFMTRS15 to receive 15% off select materials!


Thank you so much for stopping by! Until next time, have a beautiful and blessed day!

Don’t forget to sign up so you hear all about the next misadventure! Until then, you may also like this Beginner’s Guide to Setting up the P2 Laser or this post about Finding the Right Power and Speed Settings.