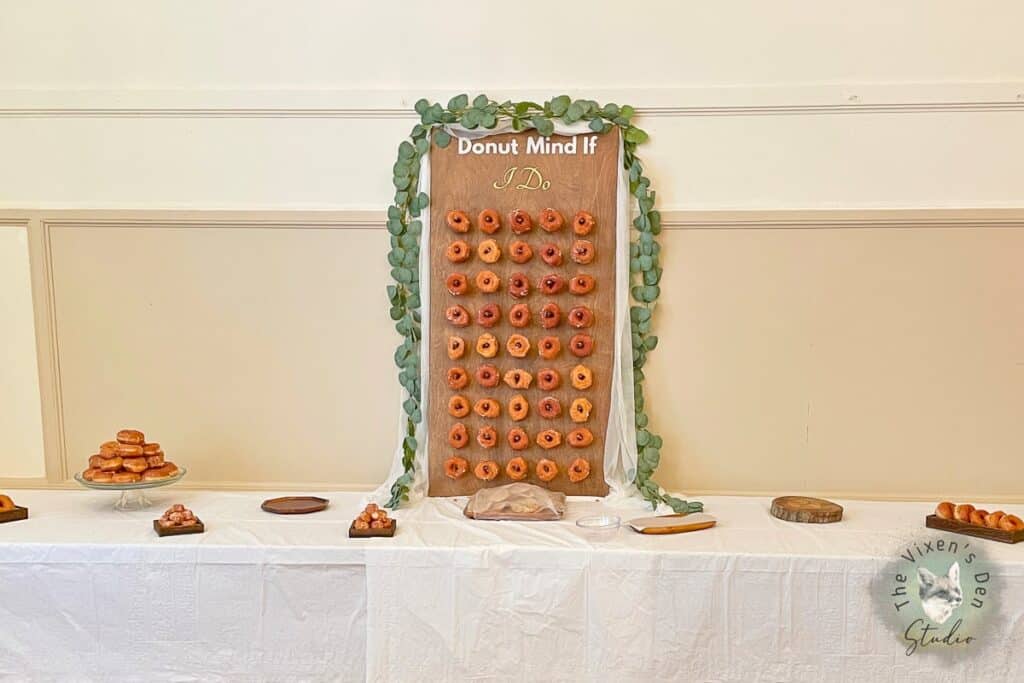
How to Make a Donut Wall with a Food-Safe Finish
Donut walls have been circulating around Pinterest and gracing the pages of Etsy for a while now. When my daughter decided she wanted something a little different for her wedding the donut wall immediately came to mind!
The only question was, how could we create a beautiful donut wall that was also safe to place the donuts on it, without having to protect them with waxed paper? With a few simple materials and some wonderful products from Dixie Belle, this beautiful and food-safe donut wall was born!
Before we get started on all the tools and steps, here are some mandatory legalese disclosures:
This post is sponsored by Dixie Belle Paint Company. While they provided some of the products for this project, all of the opinions are my own. Follow this affiliate link to see all of their amazing products!
AS AN AMAZON ASSOCIATE I EARN FROM QUALIFYING PURCHASES AT NO COST TO YOU.
YOU CAN SEE MY FULL DISCLOSURE HERE.
Now, on to the good stuff!
Tools and Materials
Tools
- Clothing iron
- Battery drill
- Chop saw or hand saw (optional depending on the length of your dowels)
- Glue gun
- Rubber mallet
Materials
- 3/4″ Plywood project board
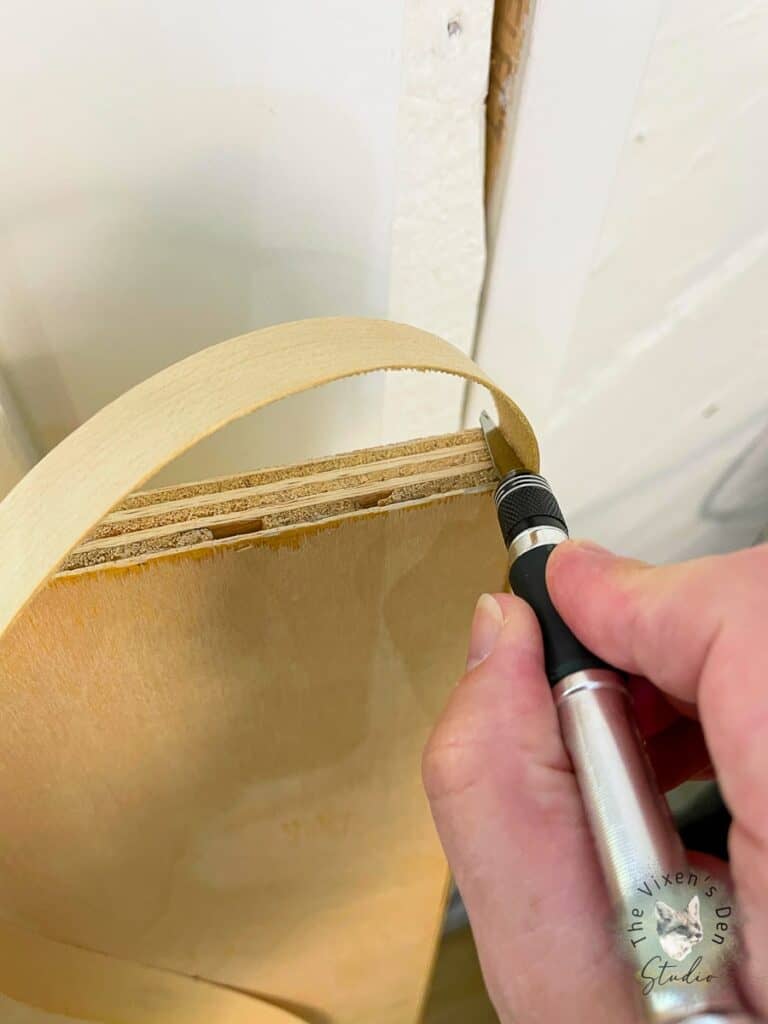
- 3/4 inch birch veneer banding
- 3/8 inch birch wood dowel
- Parchment paper
- Craft knife
- Sandpaper
- Tack cloth
- Dish or pie pan
- Applicator Pad
- Voodoo Gel Stain
- Stencil (custom)
- Artist Brush
- Dixie Belle Chalk Mineral Paint (Fluff)
- Stick With Me
- Dixie Shine
- Howdy-Do Hemp Oil
Cleaning & Prepping
The foundation for our donut board was an off-the-shelf prefinished project board.
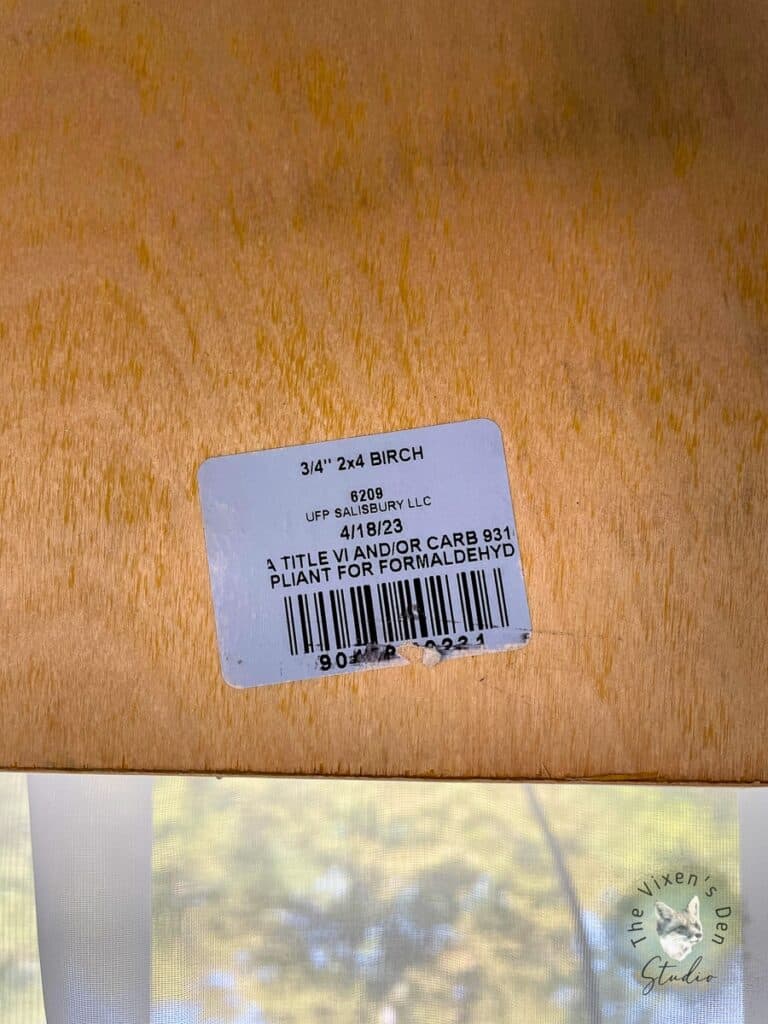
The only cleaning and prepping that was needed was rubbing the surface and edges down with a sanding pad to make sure there weren’t any rough spots. This also helped to open up the pores of the wood and prepare it to accept the stain.
Pro tip: Project boards are so smoothly finished that skipping this step can mean that it takes longer for the stain to absorb and it may appear blotchy.
Applying Veneer Banding
To give the board a finished look, I used a birch veneer banding to cover the edges of the board. This product is super easy to use. The only tools that you need are a clothing iron to heat up the glue and press the veneer into place, and a pair of scissors or a craft knife to cut it!

I heated the clothing iron up to the cotton setting. Once it reached the necessary temperature, I lined up the veneer against the corner and edge and pressed the iron firmly against the veneer. Then I slowly moved the iron along the veneer, pressing and gluing it into place.

Once one side was finished, I trimmed the end and started the next side. After all sides were complete, I trimmed any overhanging edges with the craft knife, and the board was all set for the next step!
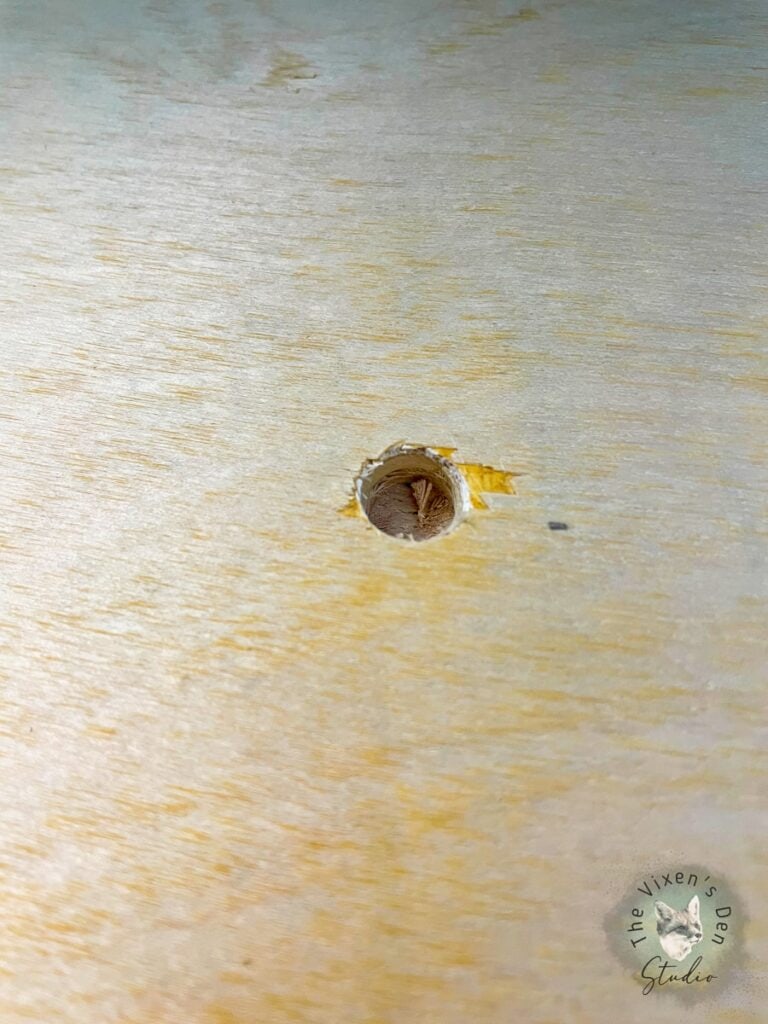
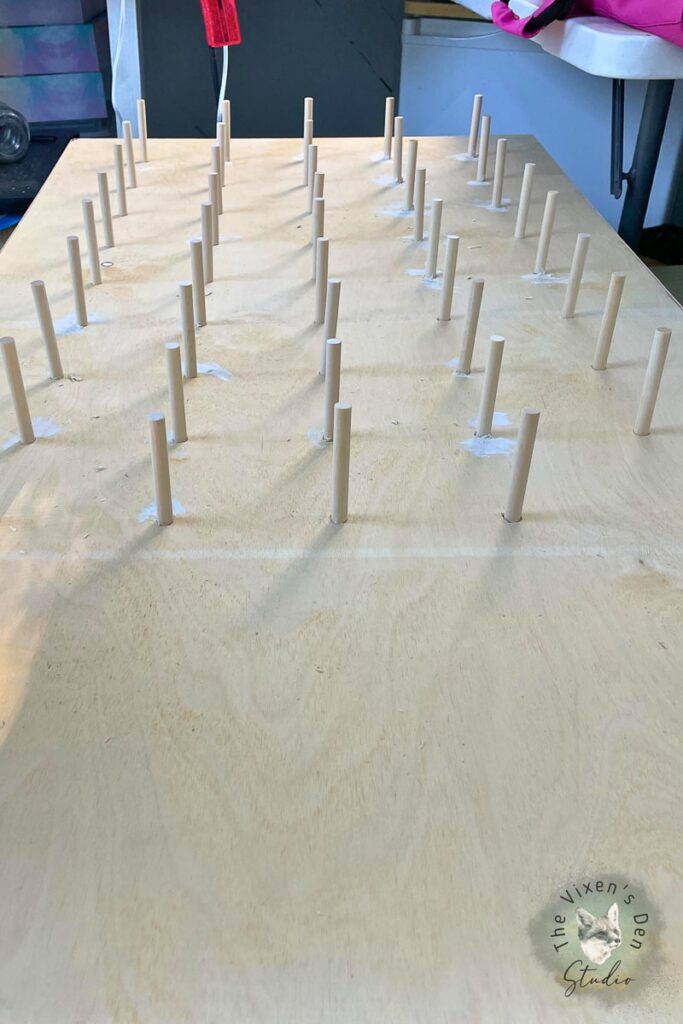
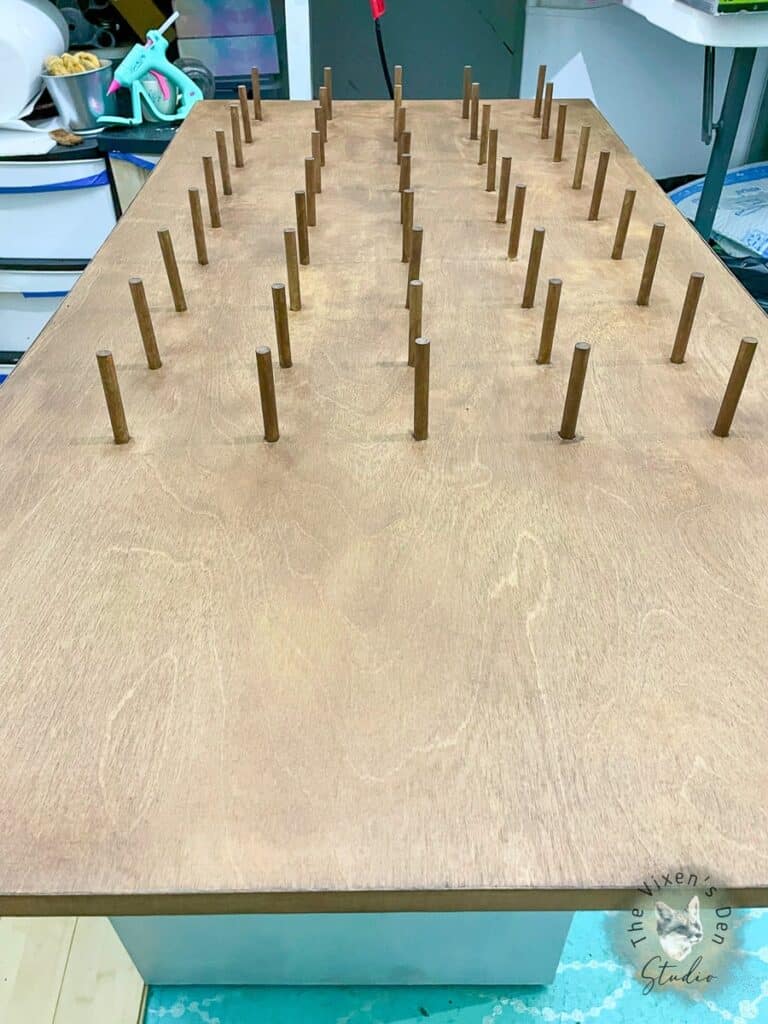
Installing Dowels
A 3/8″ dowel is a great size for a donut wall. It’s sturdy enough to hang multiple donuts and not look too small. After measuring the width of a standard donut, and deciding on a spacing of six inches per donut, I measured and marked the board with dots for each dowel.
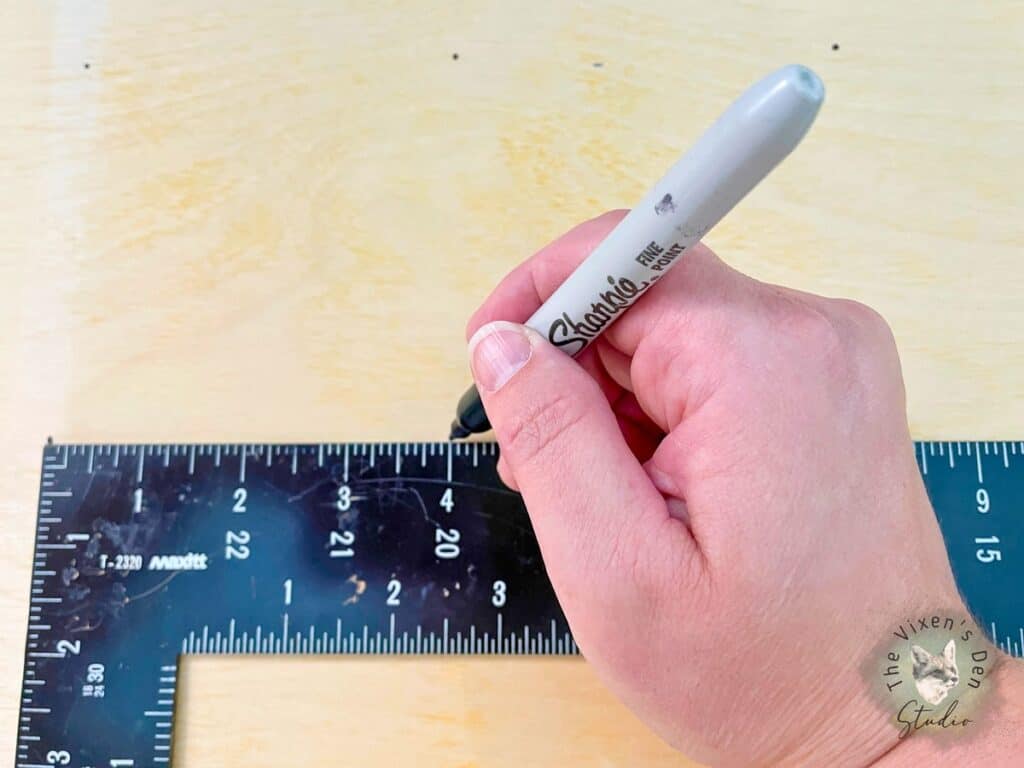
I then installed a 3/8″ drill bit in my electric drill and wrapped a piece of tape around the bit at 1/2″ depth from the tip of the bit. This showed me where to stop the drill and helped me drill each hole at a consistent depth.
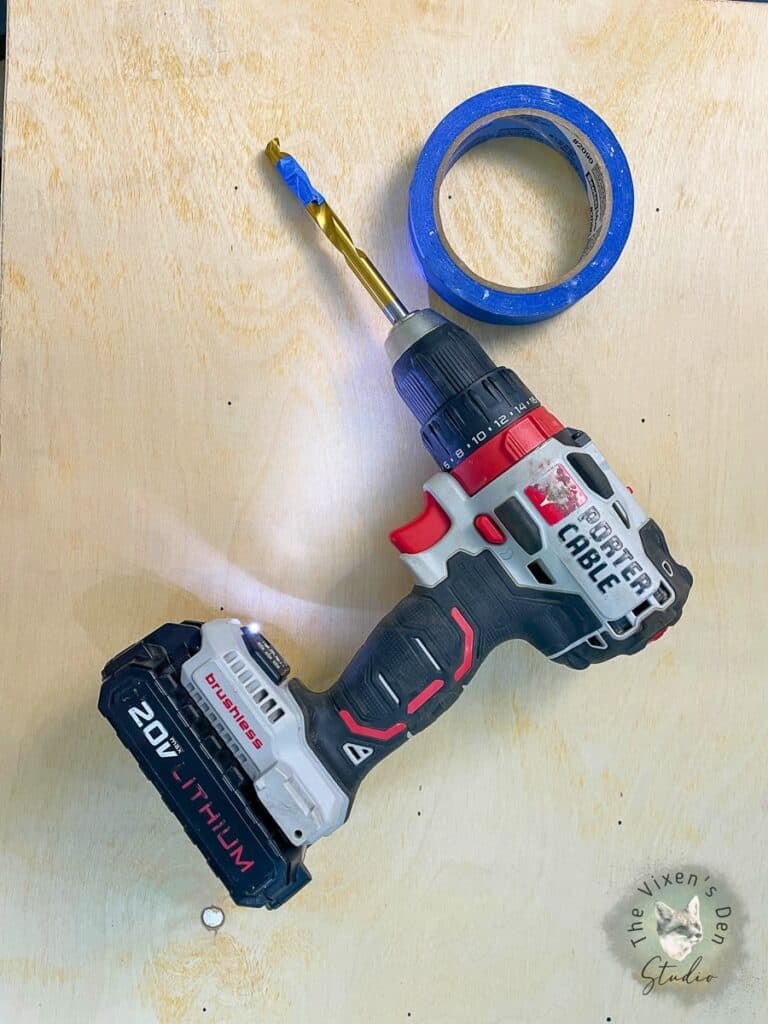
As I drilled each hole, I tried to make certain that I was drilling as straight up and down to the board as possible.
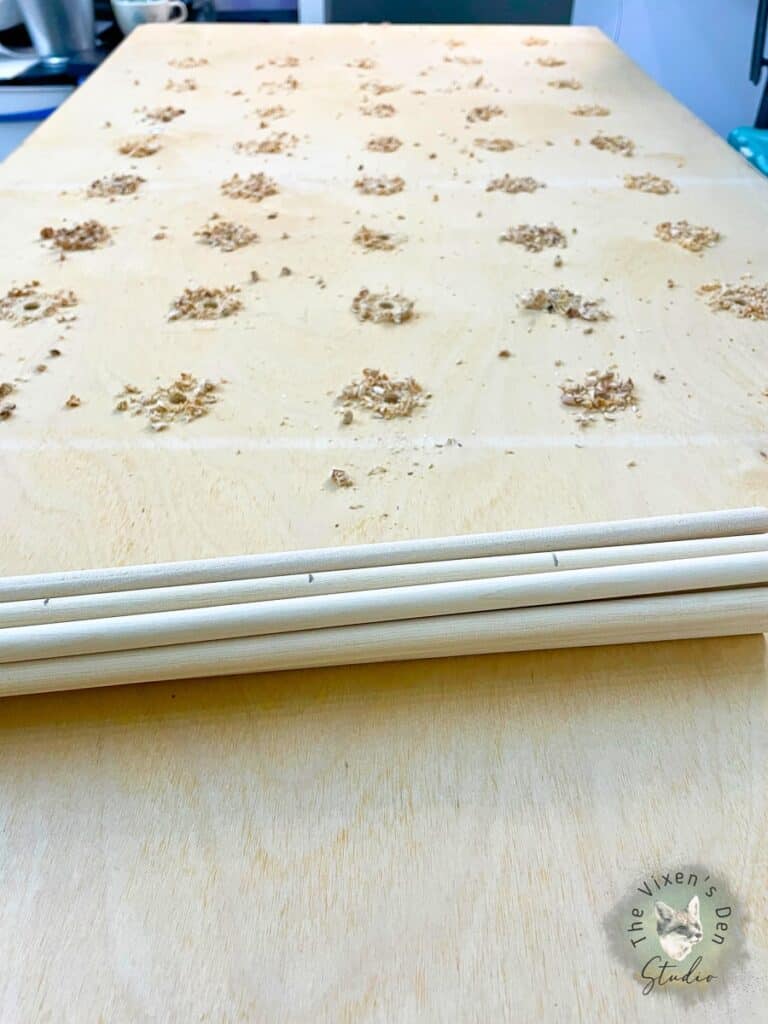
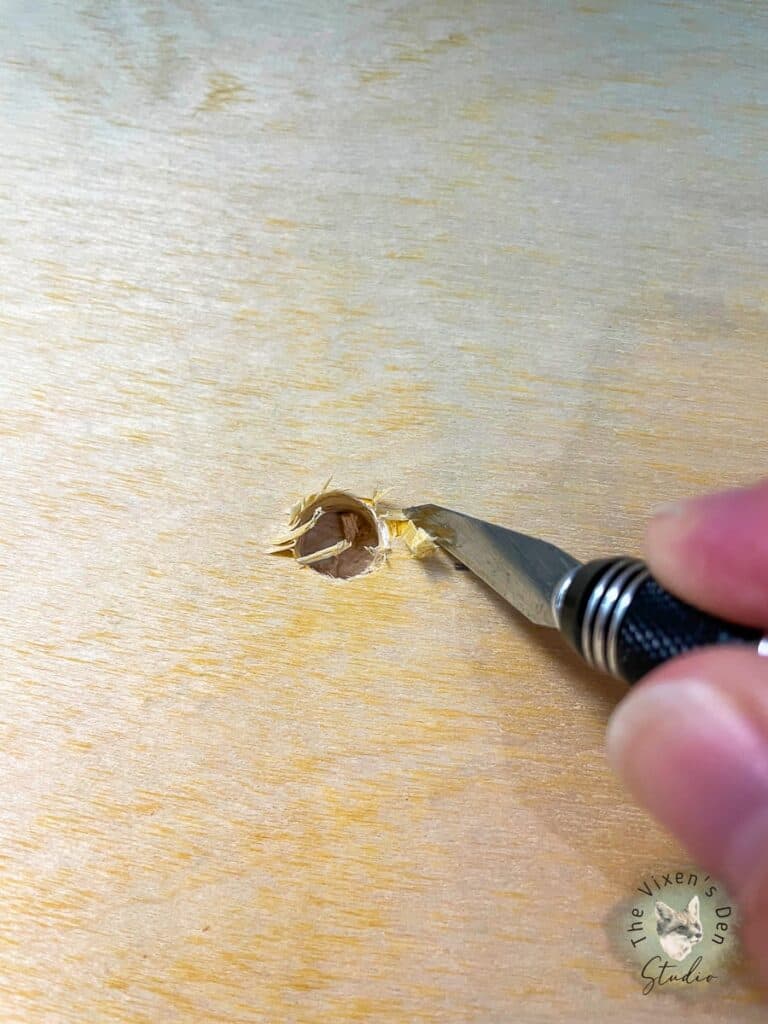
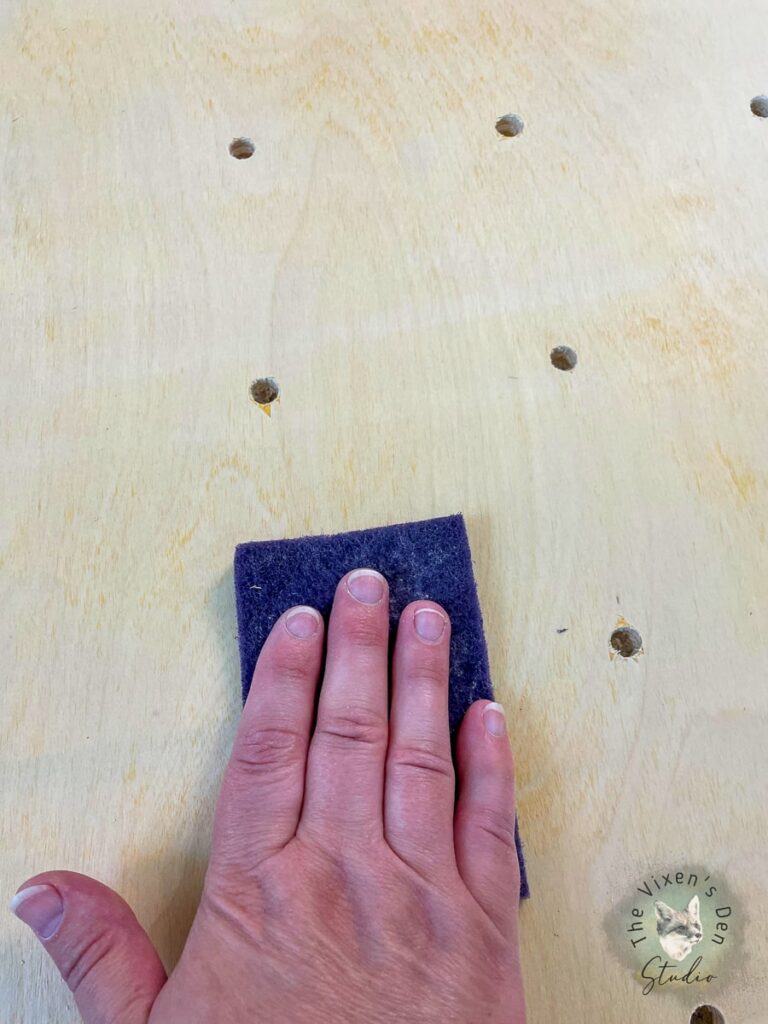
After all of the holes were drilled, I vacuumed out the dust from each hole.

Then I cleaned up splinters with a craft knife and sanded down the edges with 120 grit sandpaper.
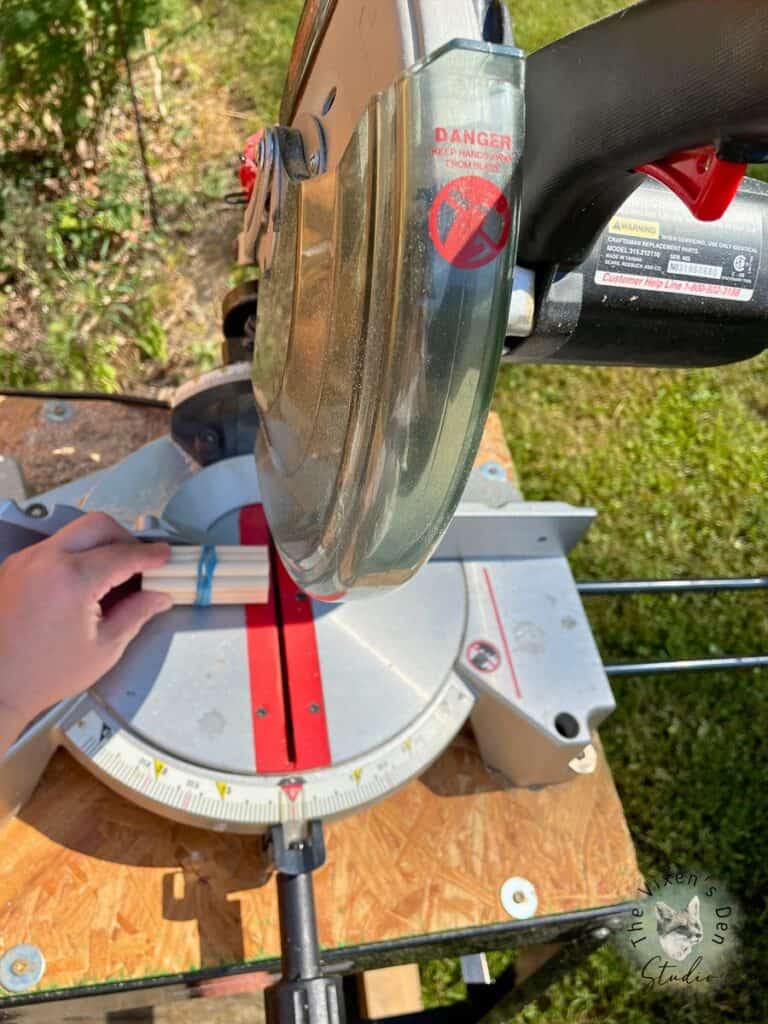
I happened to have 12″ dowels on hand, so I lined them up and clamped them together with a rubber band.
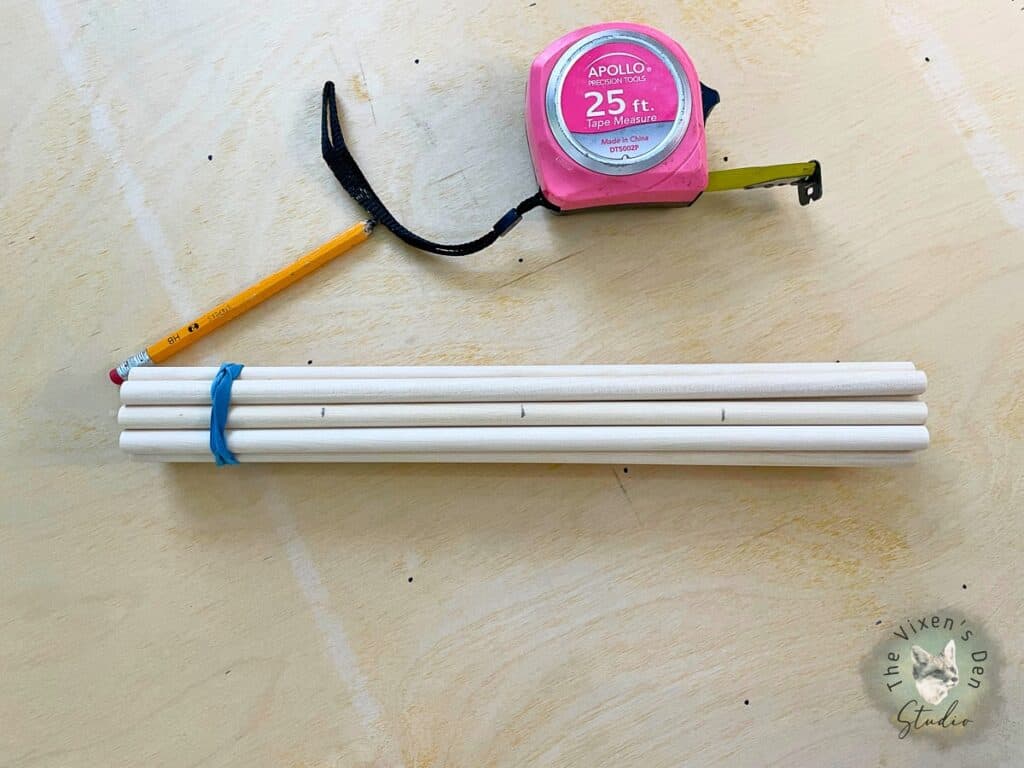
Then I cut them down to size using a chop saw. (If you don’t have a chop saw then you could always use a hand saw instead.)
I dry-fit the dowels to make sure that they would all fit properly, tapping them into place with a rubber mallet if they were a bit snug.
To permanently install the dowels, I used my high-temperature precision-tipped SureBonder glue gun.
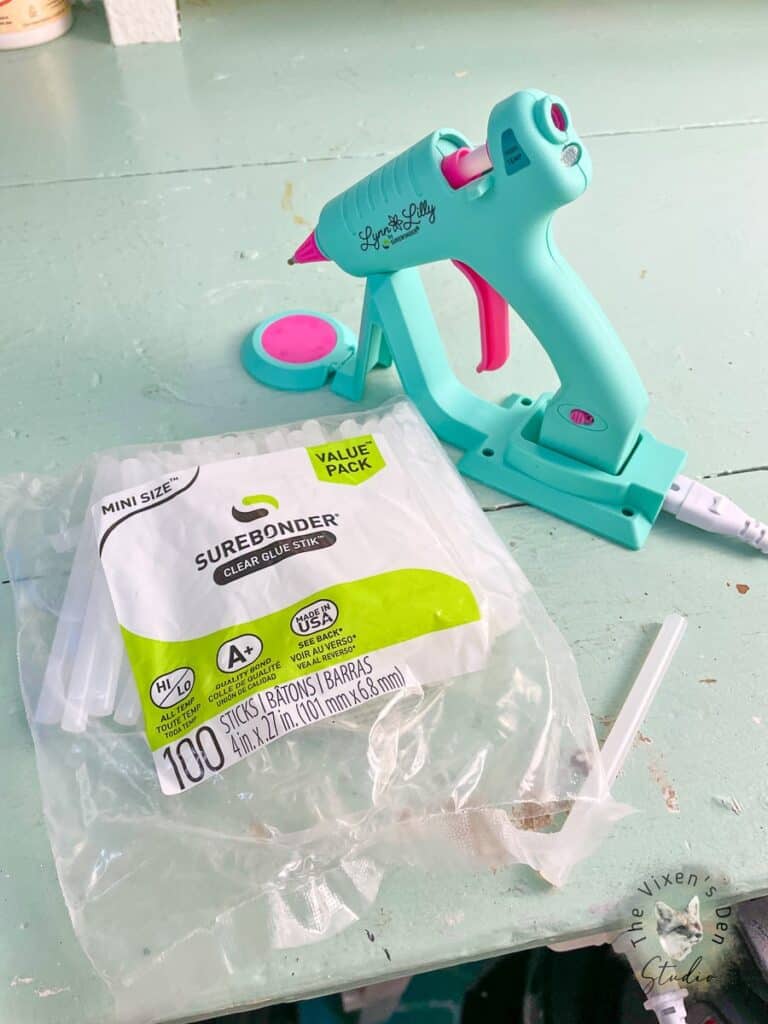
I removed the dry-fit dowels and squeezed hot glue into the hole. Then I immediately tapped the dowels into place and straightened them.
Once the glue was set, a craft knife was used to clean up any overflow, and wood putty was used to fill in any chips and gaps. After a final quick sanding to the board and dowels, it was time to stain!
Staining
My daughter chose Dixie Belle’s Voodoo Gel Stain in Tobacco Road for the stain. Voodoo Gel Stains are water-based with low to no odor and easy to apply, using a sponge applicator. There are many beautiful colors to choose from, including the rich brown of Tobacco Road.
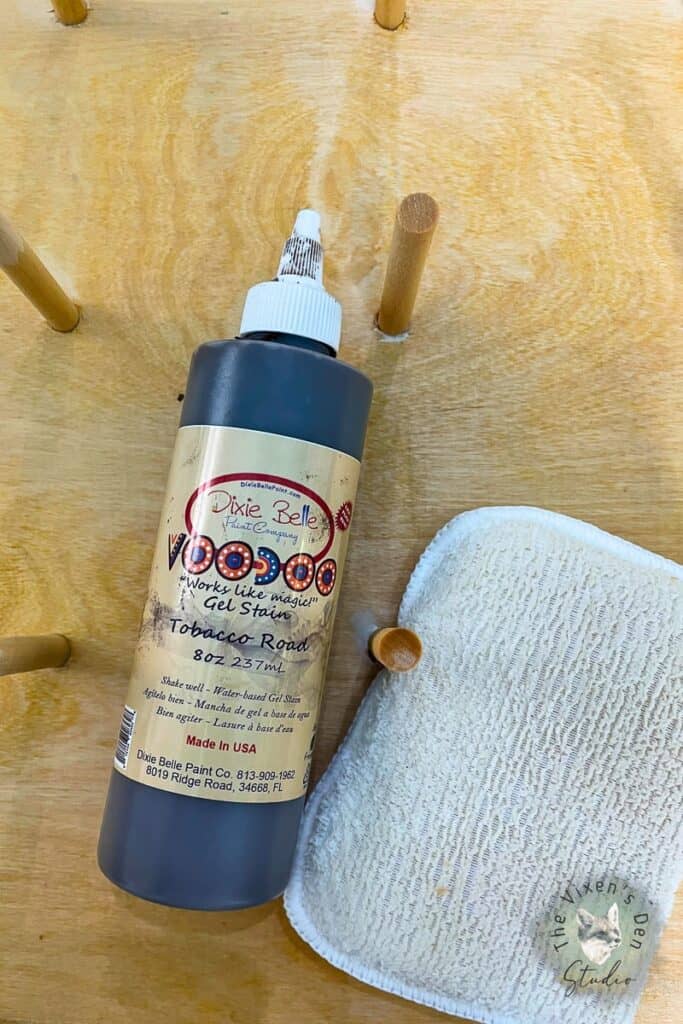
I prepped the board for water-based stain by wiping it down with an applicator soaked in distilled water. This helps to “condition” the wood so that the stain will apply evenly.
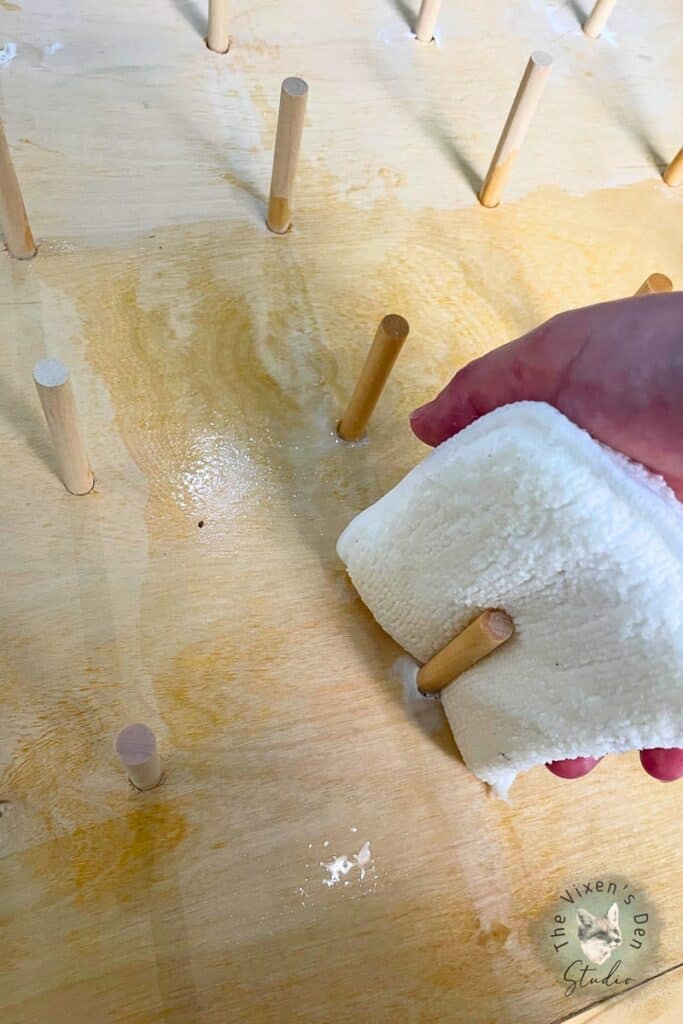
Once the water was absorbed, I wiped away any excess and thoroughly squeezed any remaining water from the applicator. About a tablespoon of Tobacco Road was then squeezed from the bottle onto the damp applicator and wiped across the surface of the board and dowels.
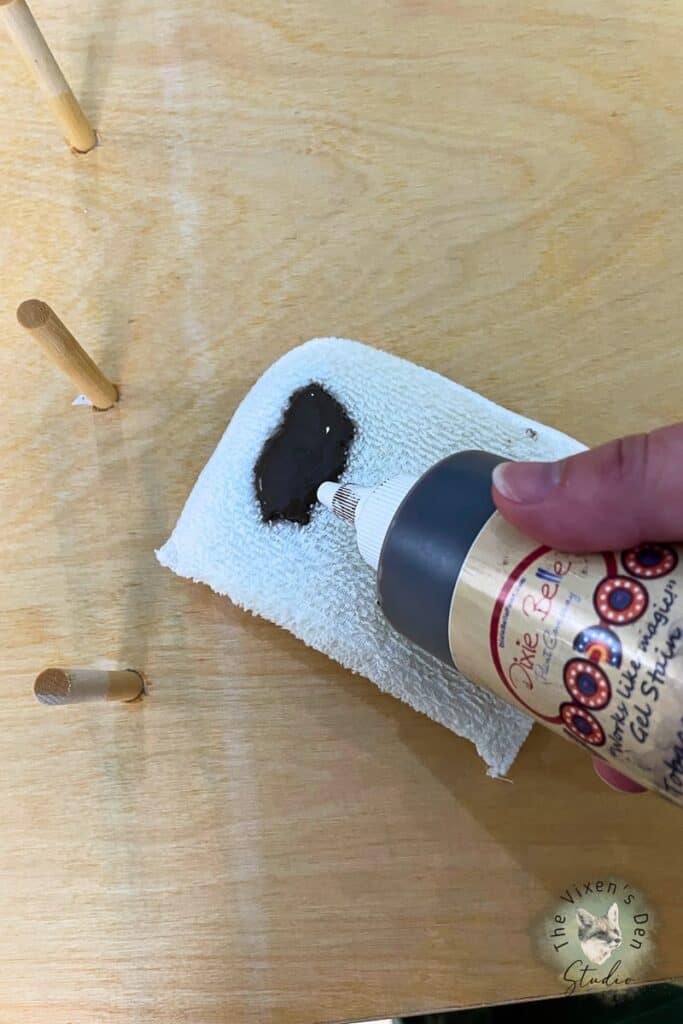
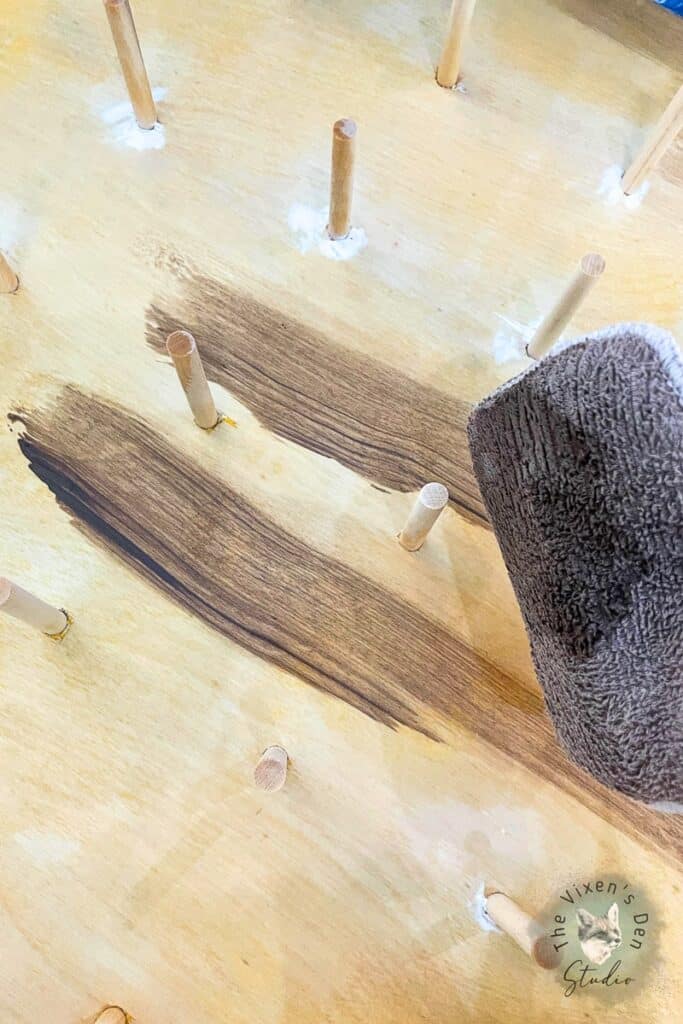
For any areas that weren’t absorbing the stain as easily, such as where the wood filler was applied, I used an artist brush to paint the stain onto the surface.
Several hours later, I applied a second coat of stain to the entire surface.
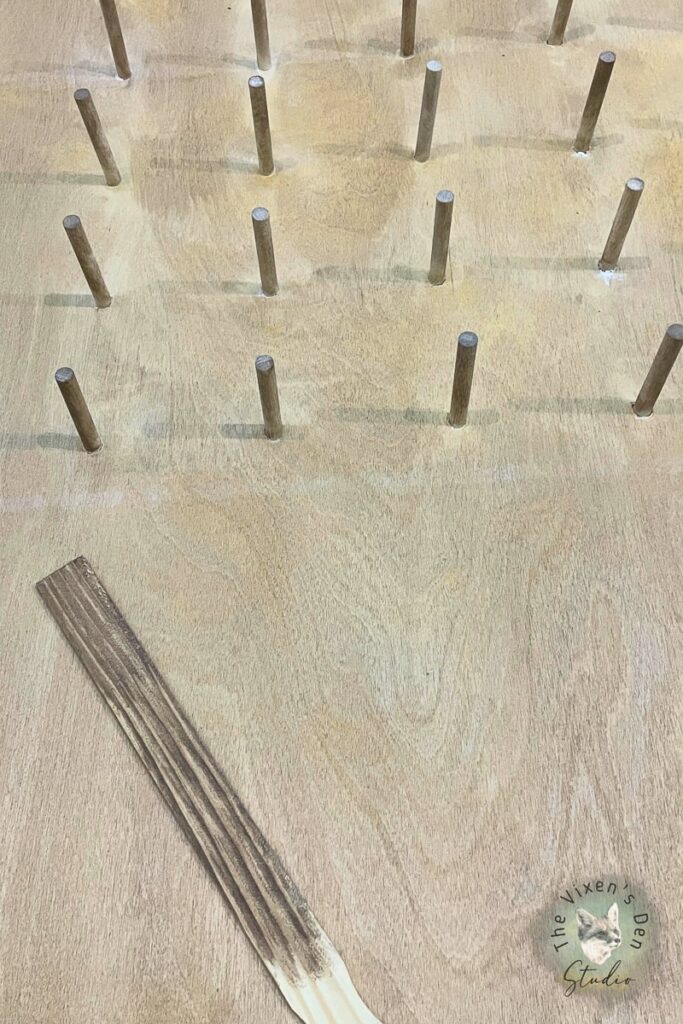
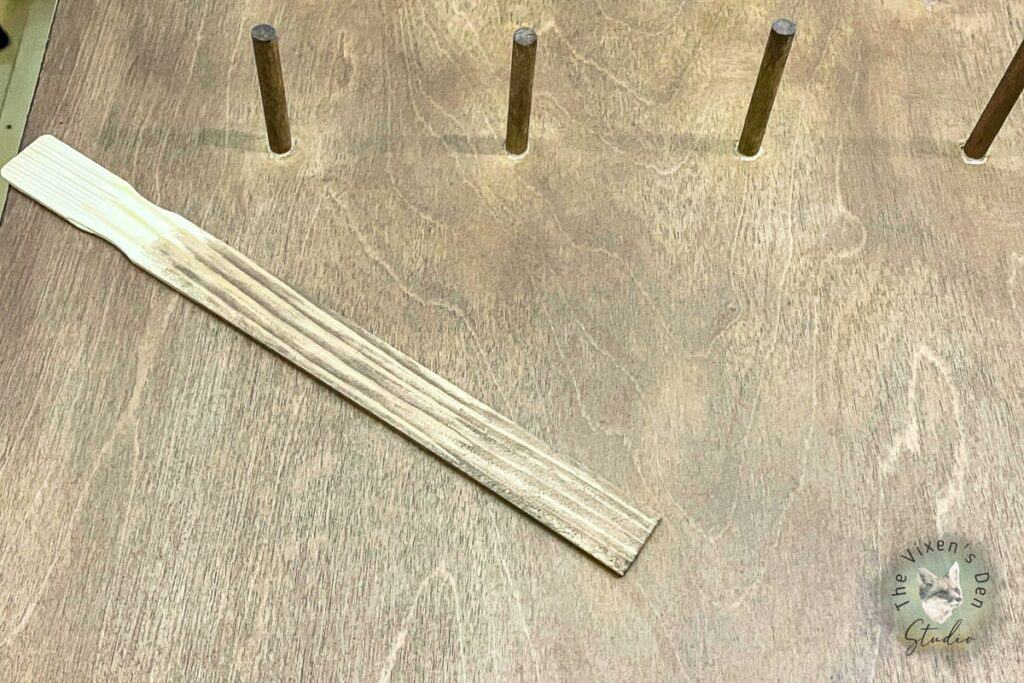
The second coat was the winner! It deepened the color and matched the sample that my daughter had chosen.
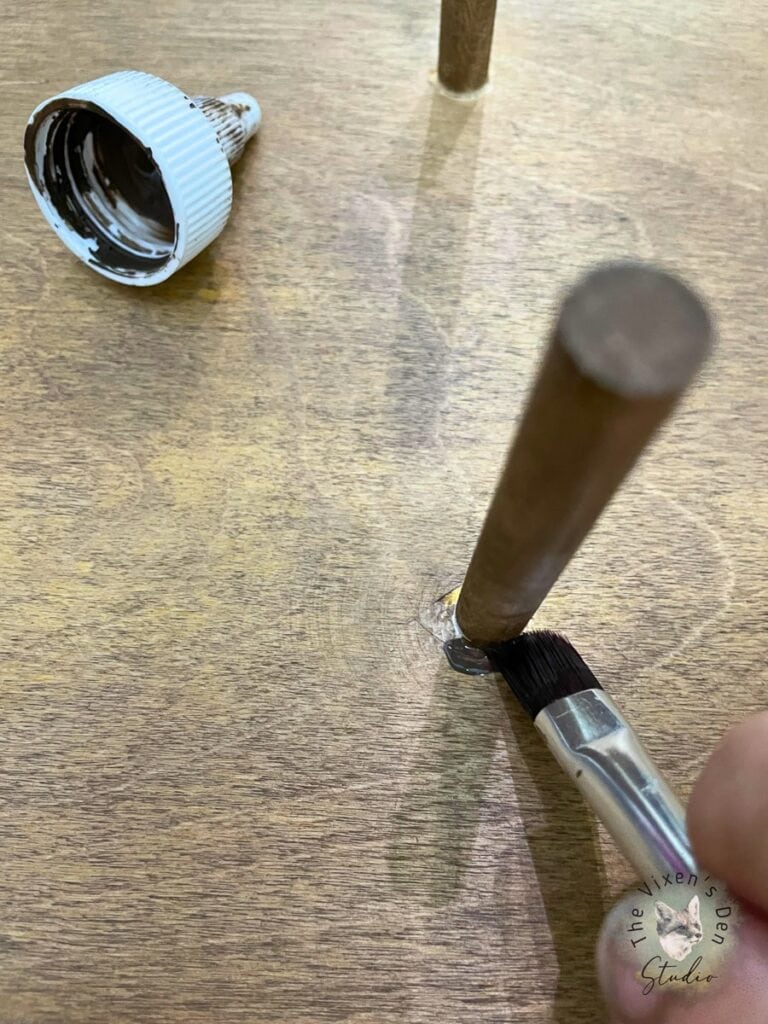
Adding Custom Details
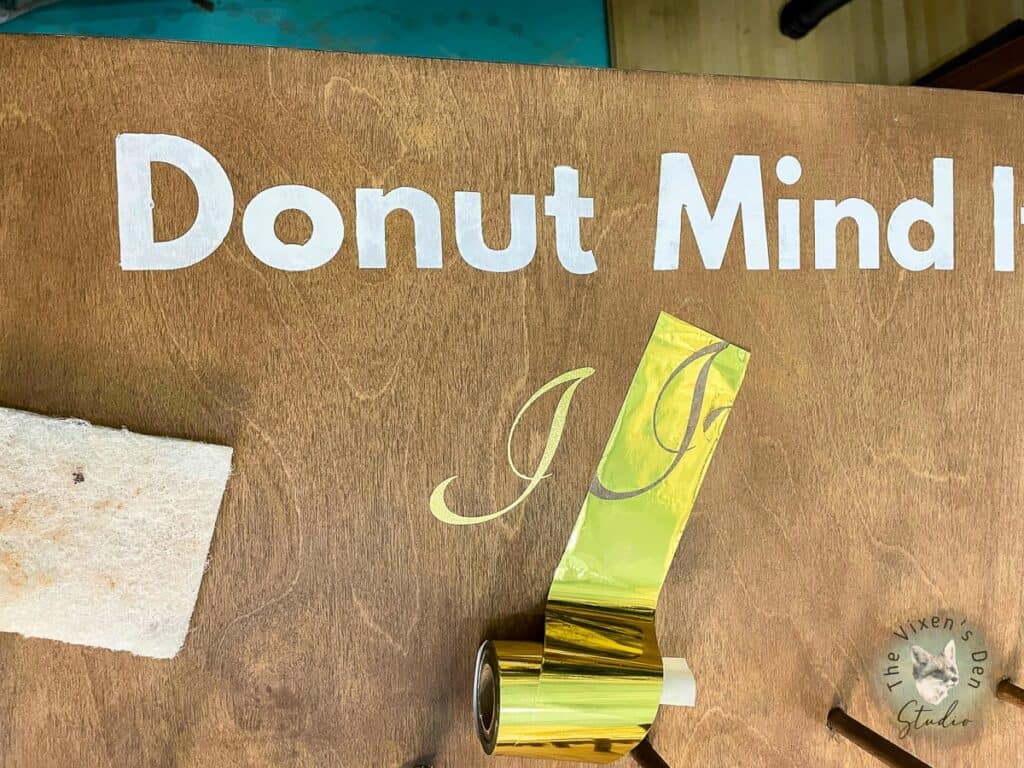
Since this donut board was an extra special piece of decor for an extra special day, it needed a few extra special details. After the bride and groom selected their favorite donut-themed phrase, I created a custom silkscreen stencil for them.
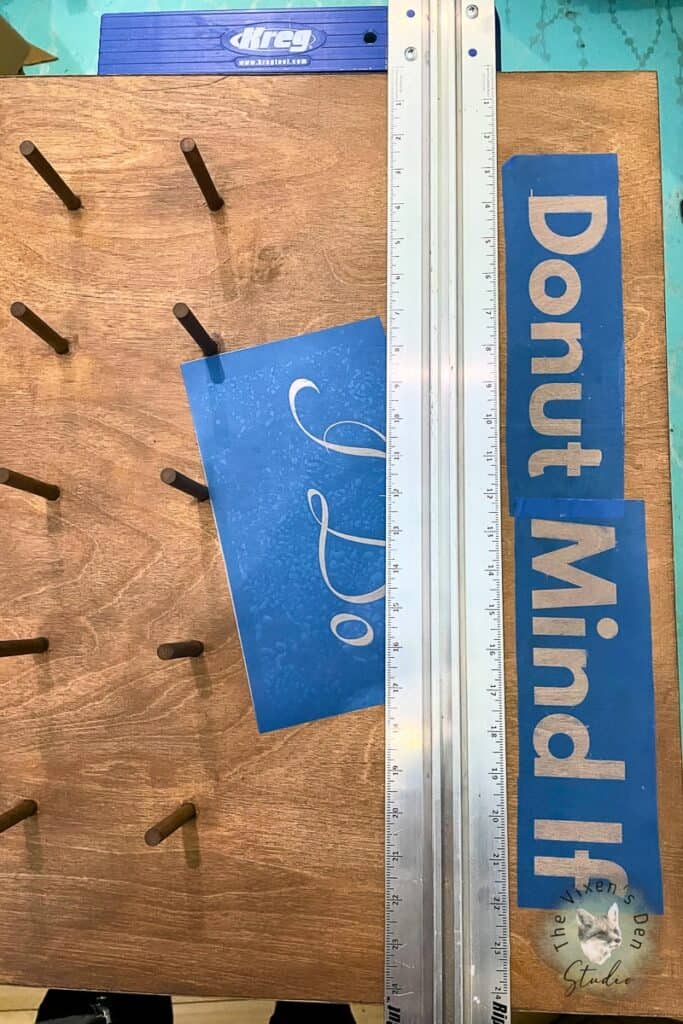
I started with the second part of the stencil, lining it up and applying a coat of Belles and Whistles Stick With Me using an artist brush.
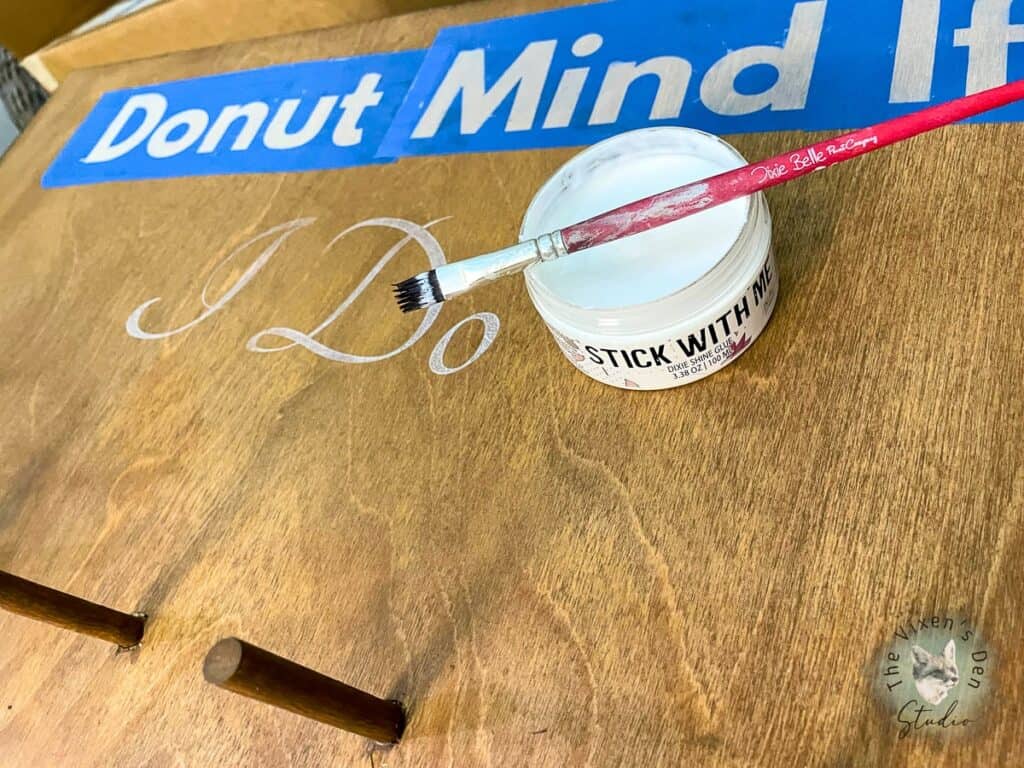
While the Stick With Me dried, painted the first part of the stencil. I used an artist brush to apply a thick coat of Dixie Belle Chalk Mineral Paint in Fluff.
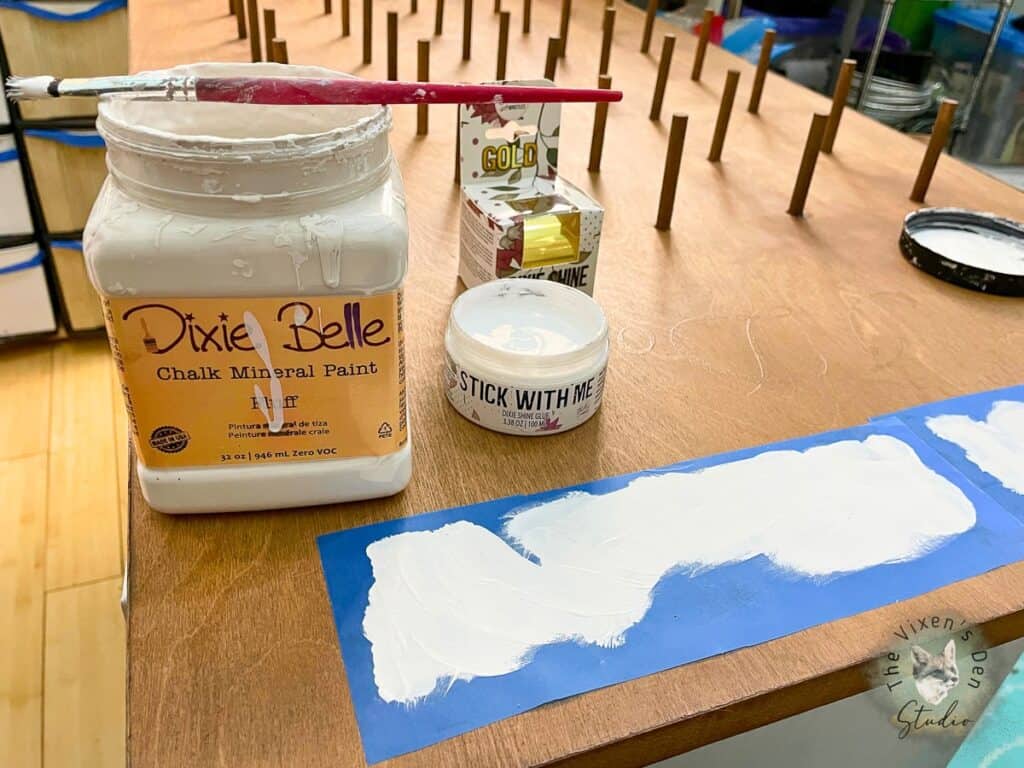
Pro Tip: Typically when working with stencils it’s recommended to use paint sparingly so that the stencil doesn’t bleed. When using the adhesive silkscreen stencils and chalk paint, I find that the opposite is true. I found that the stencil was much clearer when I used a lot of paint and rubbed it into the stencil thoroughly.
Once the Stick With Me had dried and turned transparent, I lay a piece of gold Dixie Shine against the Stick With Me and burnished it using an applicator pad.
The results were exactly what I had hoped for! The finished product was rustically elegant and ready for a wedding! Well, almost…
Sealing with a Food-Safe Finish
The final step was to seal in all of that beautiful rustic elegance with a finish that could hold up to being cleaned, and not leave any harmful chemicals in the donuts. Howdy Do Hemp Seed Oil was the perfect solution!
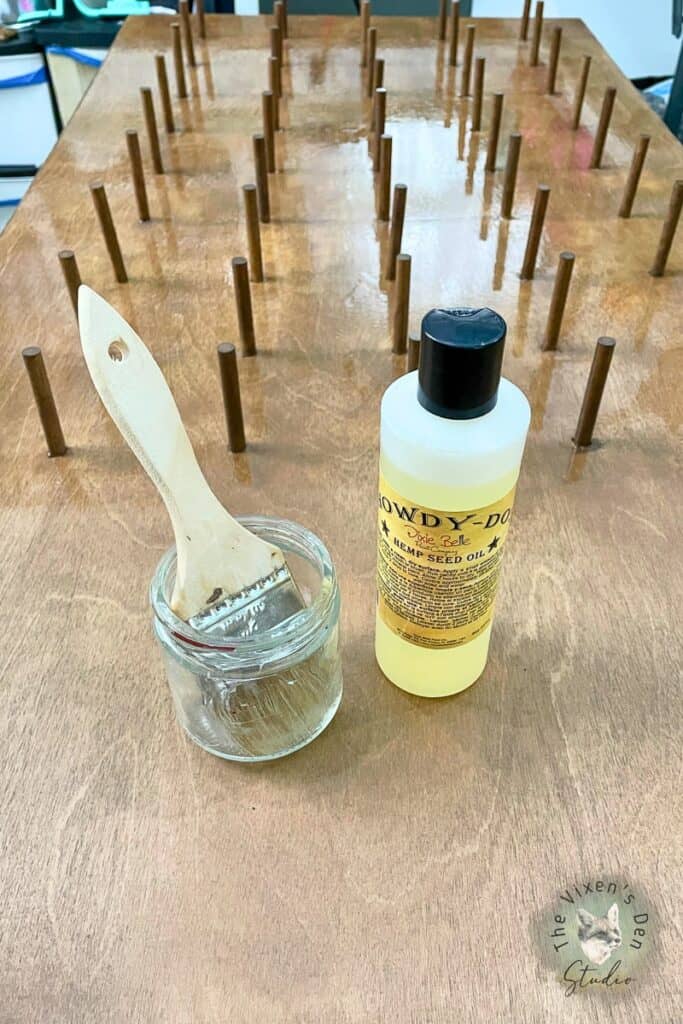
This non-toxic food-safe finish was applied using a chip brush. The oil was left for several hours to penetrate the surface of the wood. Then I wiped away any excess and allowed it to dry completely. I applied a second coat following the same process.
After two days, the project was completely cured and ready to display all those yummy donuts!
Final Reveal
We added a few decorations, hung the donuts and this beautiful donut board was ready to shine!
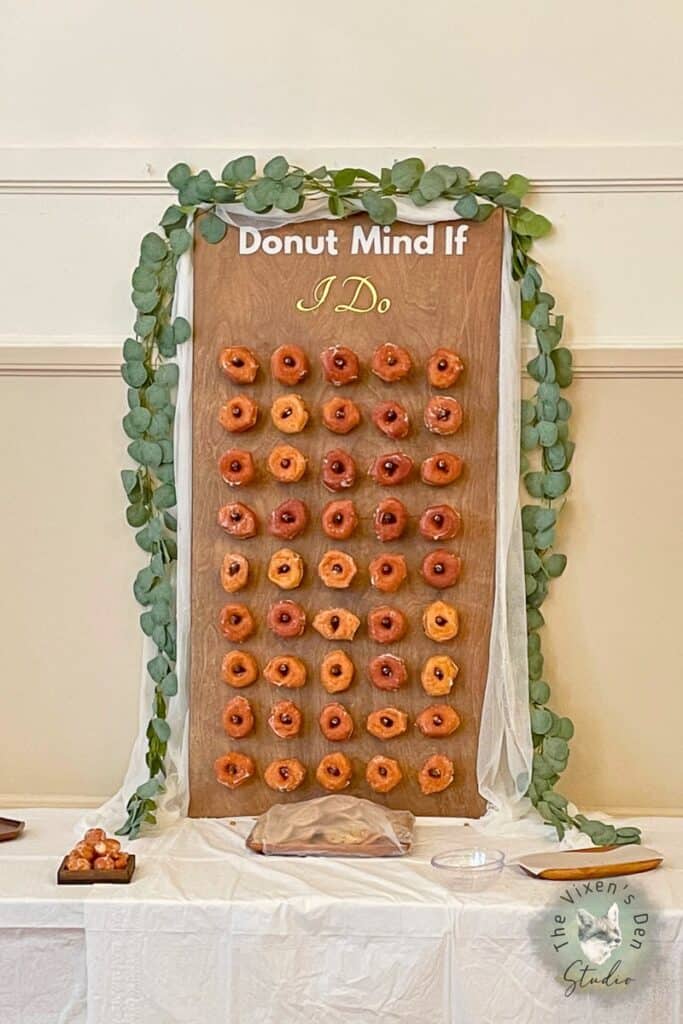
I love the beautiful details that stenciling with Dixie Belle Fluff and Dixie Shine added! But my favorite part is knowing that the donuts are safe and protected thanks to Howdy Do Hemp Seed Oil. It made every bite taste even more yummy!
Donut boards are a hit for all kinds of occasions: weddings, showers, birthdays, and anniversary parties. Are you planning to make a donut board for your next special event? Here are a few tips to make your project and event go smoothly:
What type of wood should I use for the dowels?
I recommend matching the wood for the dowels as closely as possible to the wood used in the project board. Our project board, veneer banding, and dowels were made of birch wood and they accepted stain quite easily and consistently.
Won’t the donuts get stale?
Donuts do go stale quickly, so I recommend not putting them on the board until right before your event.
How do I clean the Donut Board?
Cleaning the donut board is super easy! Just wipe it down with a warm soapy rag and then follow up with a clean damp rag.
I can’t see the finish on the wood. How do I know it’s protected?
Hemp seed oil is a drying oil that penetrates the material and dries to a matte finish. You may not see it, but the protection is there! If you would like extra protection, just apply a few more coats.
Do you have more questions that aren’t listed above? Just drop them in the comments below!
Thank you so much for stopping by! Check out the other amazing projects at the link parties below. I know the hostesses will appreciate your visit and comments.
Until next time, have a beautiful and blessed day!


Linked up to these lovely link party hostesses at:
Don’t forget to sign up so you hear all about the next misadventure!
Hi, just saw this post, my daughter is having a Gothic style wedding and she wants donut coffin lids ( I know). because of my likited ability to craft would this work well with 2″ thick foam board? Thanks.
Hi Margaret! You’re an amazing mom and your daughter is going to love what you create for her!
I think a 2″ foam board could work. My only concern would be that the weight of the donut on the dowel might pull down on the foam. I think you could provide extra support by cutting the shape of the foam board out on poster board, cutting out the holes for the dowels, and then gluing the poster board to the front of the foam board. That will create a nice smooth finish for painting the front of the donut board too.
I would really love to see how your project turns out. Happy wedding planning and dream making! ~ Becky
Congratulations to Kayla & hubby! I just found out the other day from Greg that she got married! I had never heard of a donut wall, but it’s a fun idea! AND Donuts are just……delish! You did a beautiful job, Becky! I love the wording they chose, also.
How blessed your daughter is to have such a talented & invested mom!
Thank you so much, dear! It was so much fun and the wedding turned out spectacular! So blessed to have wonderful kiddos who let me practice on them! lol