Natural Hemp Oil and Faux Rattan Restore an Old Wood Chair
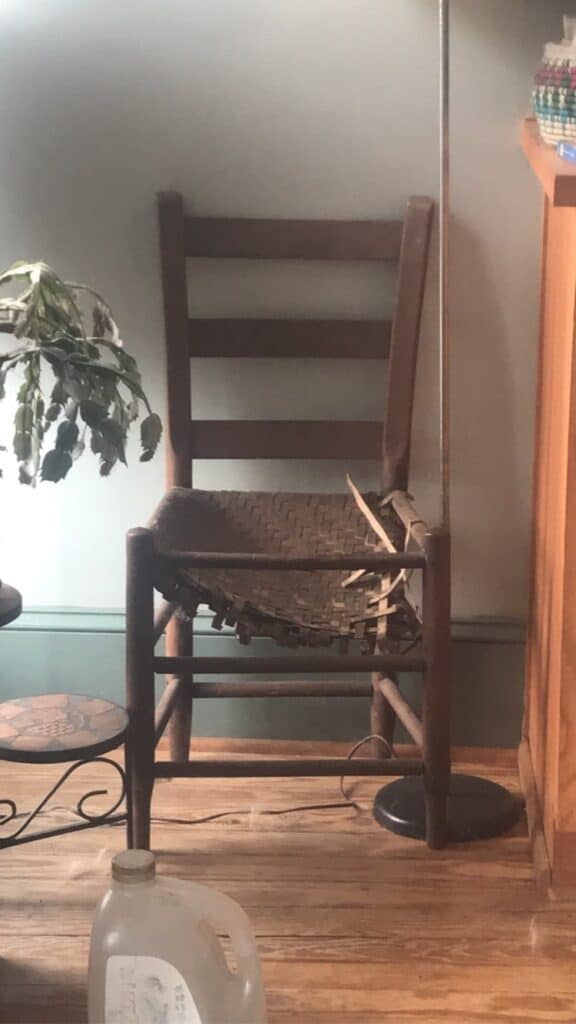
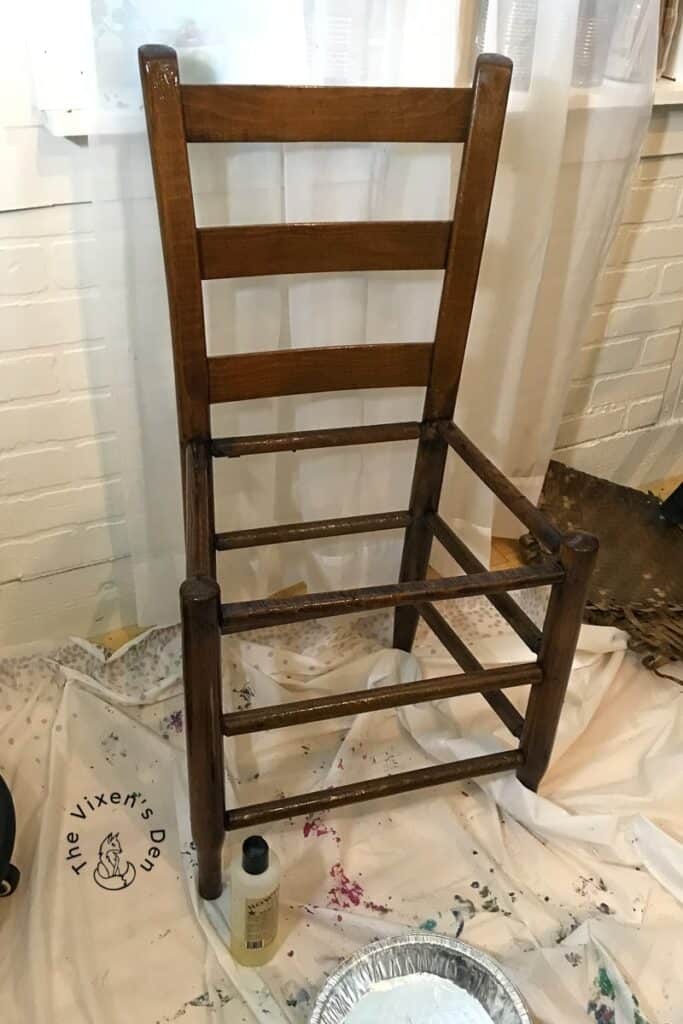
This sad chair lived many years sitting all alone in a dusty corner. No one could sit in it, because its seat had caved in. Then one day it was pulled out of its corner, placed in the backseat of a car, and transported to my studio. And there is where its old life ended, and a new life began.
This was a relatively simple project. The owner of this chair wanted to keep all of the rich patina that this chair had earned throughout the years. A little prep work and sealing was all that this beautiful old wood needed.
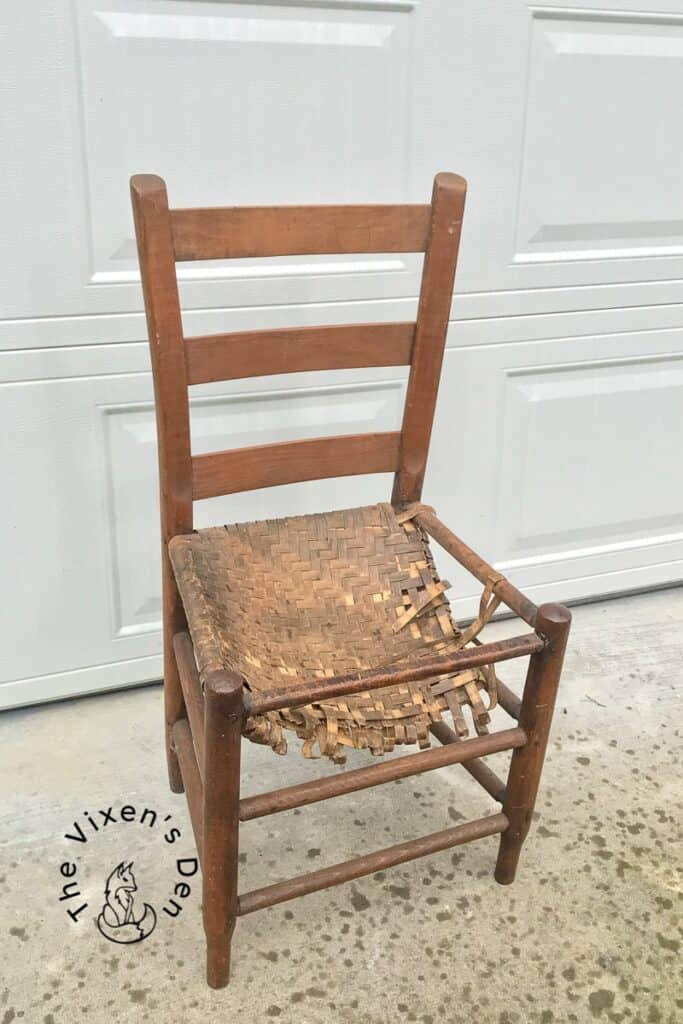
The owner did like the idea of updating the seat to the faux rattan material that I have been using. I love how easy it is to work with and maintain. She liked the original seat pattern, so the goal was to retain that. However, it wouldn’t be a visit to the Vixen’s Den without a little misadventure.
Let’s see what happened. But first, the obligatory legalese:
This post is sponsored by Dixie Belle Paint Company. While they provided some of the products for this project, all of the opinions are my own. Follow this affiliate link to see all of their amazing products!
THIS POST CONTAINS AFFILIATE LINKS TO PRODUCTS. IF YOU PURCHASE PRODUCTS THROUGH THESE LINKS, THEN I MAY RECEIVE A SMALL COMMISSION AT NO COST TO YOU.
I ONLY RECOMMEND PRODUCTS THAT I USE AND/OR HAVE RESEARCHED AND WOULD USE.
Tools and Materials
Materials
- Steel Wool – Extra Fine 000
Howdy Do Hemp Oil - Furniture Foam
- Spray Paint
- Faux Rattan
- Jewelry Wire
- Sharpie
- Furniture Markers
Cleaning & Prepping
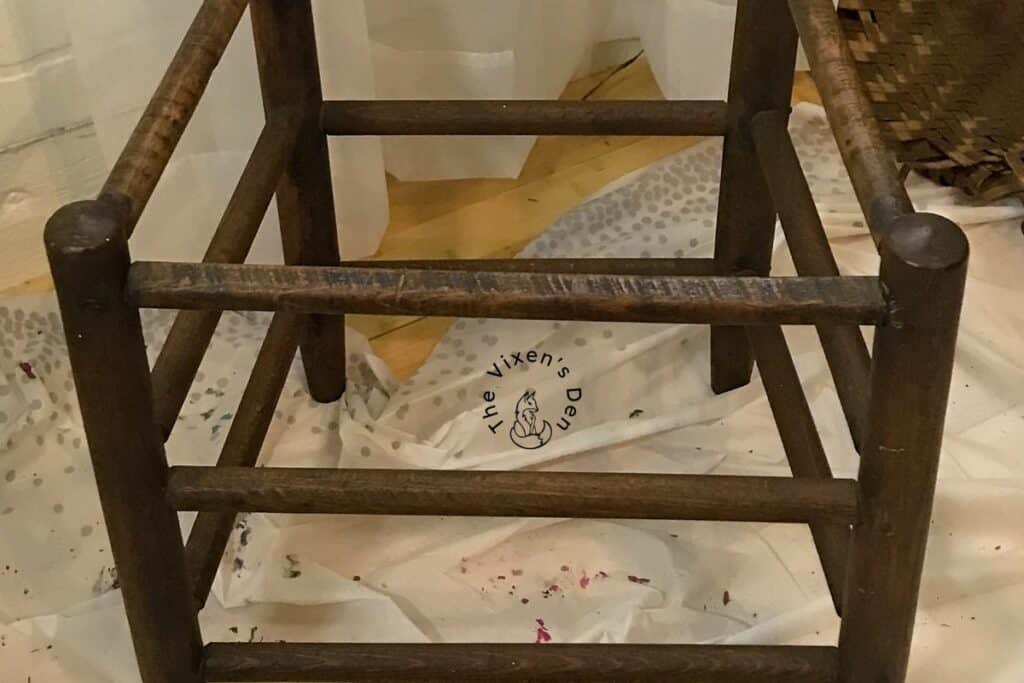
Before I could assess the condition of the piece, I had to remove the seat. I snipped the damaged splint off with a pair of scissors. That’s when I got an idea of just how old this piece is. Look at the beautiful saw marks in that old rung!
These saw marks on the stretchers (or rungs) are a good indicator that I was working with an actual antique and not just a reproduction. If you’d like more tips on determining the difference between the two, then check out my guide to deciding whether or not to refinish your furniture!
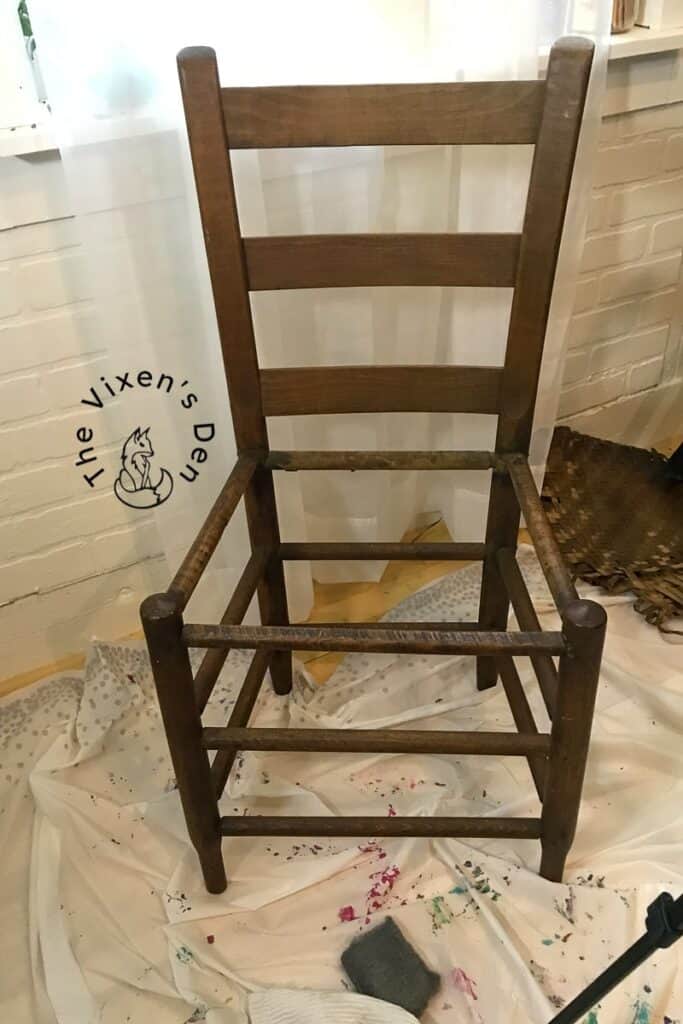
The rungs on the chair were nice and tight, with minimal repairs. I left the few original repair nails in place but removed any tacks that were used to keep the original seat material in place. I also used a nail set to slightly recess any nails from old repairs that might snag on someone’s skin or clothing.
In order to keep the original patina, the chair just needed a light sanding with some extra fine 000-grade steel wool. This pulled off any exterior dirt and some stray paint splatters but retained the natural finish.
Seal and Nourish Wood
The wood was dry from age, not brittle but definitely in need of some rejuvenation. To bring it back to life, but also protect it from future wear and tear, I brushed on a coat of Dixie Belle’s Howdy Do Hemp Oil using a chip brush. I love Hemp Oil because it’s a completely natural and food-safe product that penetrates into the wood and then dries to create an invisible protective barrier.
I poured some Hemp Oil into a pie pan and applied it with a chip brush then left it overnight to soak in. The next day (or three days later, lol) I came back to wipe off any excess. There were still some dry areas, so I applied a second coat and let it sit overnight again. This gave the wood time to soak up as much oil as it needed.
Pro Tip: In general, you don’t want to leave the oil on for longer than 12 to 24 hours, because it will start to get tacky. This wood soaked in all of the oil because it was so dry, so the extra drying time worked for this piece.
Once the wood was no longer soaking up the hemp oil, it was thoroughly nourished. I wiped away any excess and left it overnight again to finish drying. Hemp oil showcases the natural woodgrain beautifully while drying to a completely matte sheen. When you run your hand across the surface of the wood, you don’t feel the hemp oil the way you would if it were coated with a modern clear coat.
Hemp Oil is a natural plant-based oil that contains minimal and natural VOCs and is considered food safe. It is also water, scratch, and fade resistant, so Hemp Oil can be used to protect high-traffic furniture such as dining tables while still retaining the look of raw wood.
Because it soaks into the wood instead of laying on the surface, Hemp Oil doesn’t seal in lint or debris. After the oil has dried, you can literally brush away stray hairs or bristles that were shed while you were applying the oil. It’s a beautiful and versatile finish that will last for years!
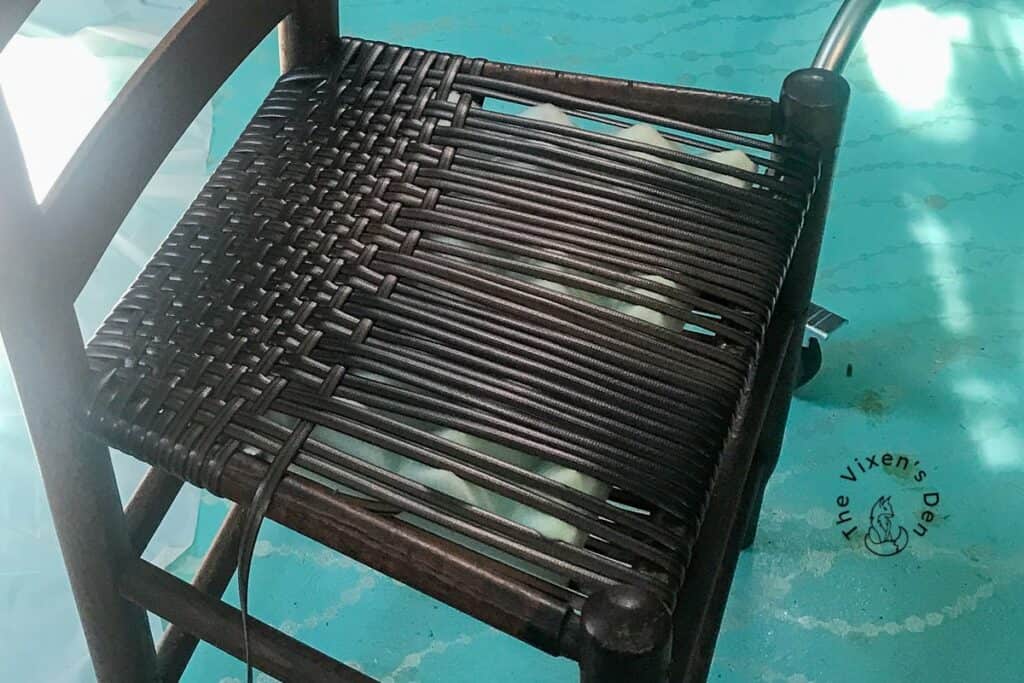
Wrap the Warp
For this project, I used a faux rattan or “binding cane” material. This is essentially a plastic form of “porch cane” that isn’t as wide as the “splints” or “split” material that was originally used. I offered this as an option because it holds up well and it doesn’t require dampening it to wrap it nor sealing once the seat is woven. It’s the same type of material that I used in this Ladderback Chair makeover.
Replacing the seat began with the process of “wrapping the warp.” I wrapped the first row of faux rattan and clamped the loose end to the bottom of the underside row with a piece of wire. Then I continued wrapping from front to back, trying to keep a consistent loosely snug tension.
Pro Tip: I know that’s an oxymoron, but it’s key to the next step. If the warp is wrapped too tightly, then the next step in the process will be unbearable, but you also don’t want it too loose. It’s kind of like when you’re tightening your shoelaces. You want the Goldilocks effect: not too tight, not too loose, but just right!

To keep the faux rattan from twisting and overlapping, I clamped it to the rail as I wrapped the warp. It helps, but sometimes I still had a twisted or out-of-place row. I’ve learned to just move those oopsies to the underside of the seat and keep weaving. Once I reached the end and had a completely flat row of rattan along the back seat rail, I cut the faux rattan and clamped off the trailing end with another piece of wire.
You can see more of this process with detailed pictures in this post.
Prep Foam Stuffing
Before beginning the next step in weaving the seat, it was time to stuff it. So why do you stuff a chair seat? That’s an excellent question!
Some chair seats were not stuffed, as the spaces in the woven material allowed for airflow on hot summer days. Other styles of seats, such as those where you use paper rush (twisted paper strands) were stuffed with newspaper or cardboard to protect the paper from being cut by rubbing against the wood frame. The simple act of sitting in the chair could damage it!
I like to stuff a seat with foam because it is a material that doesn’t hold moisture, while creating a more comfortable seat to sit on. The seat doesn’t sink down quite as much and the foam creates a springier cushiony feel. It isn’t a necessary step for this style of seat, and you can definitely skip it for your project.
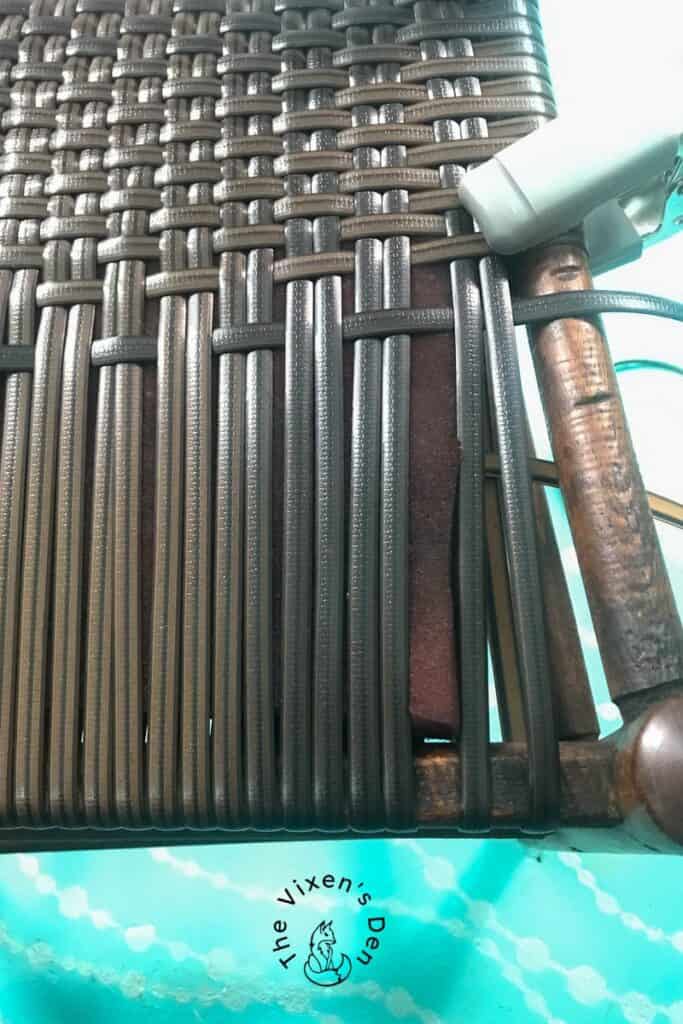
I cut the foam to fit inside the frame with about two to three inches of clearance all the way around. (This was a completely eyeballed process with some extra trimming here and there.)
The original foam is a nice bright green, so I sprayed it with a nice bronze-colored spray paint to make it a little less noticeable. Once the seat is completely woven, it wouldn’t be easy to see, but I wanted it completely invisible.
Weave the Chair Seat
With the warp wrapped and stuffed, it was time to weave the seat. I started by weaving in the loose end on the underside and clamping it to the warp. I left the clamps on the front seat rail to help prevent the warp from overlapping and twisting as I wove.
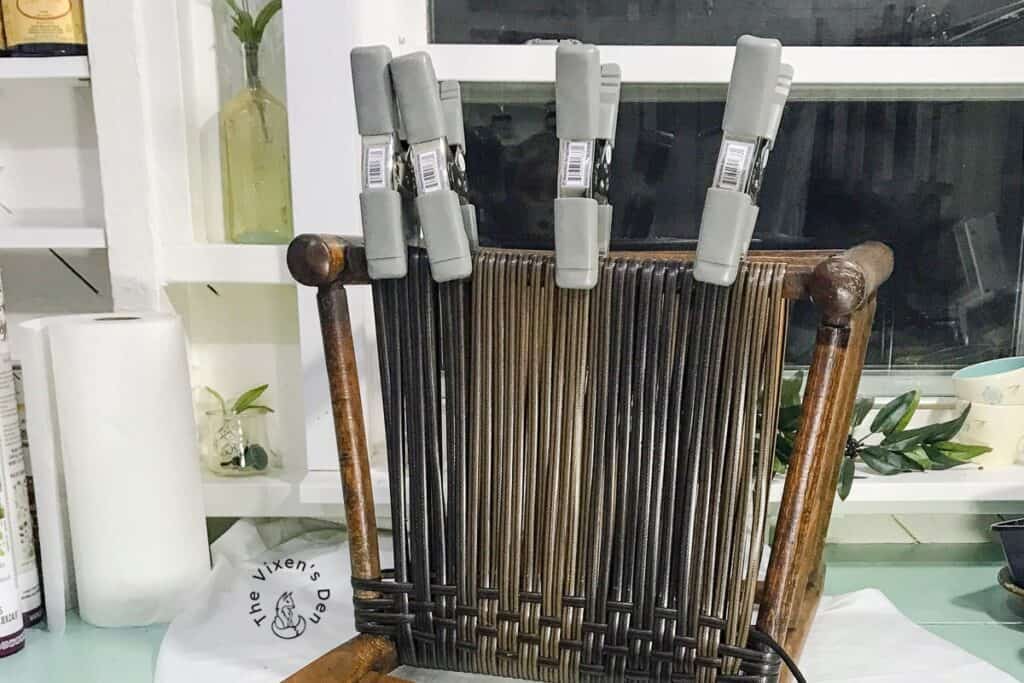
I weave with one long piece, which can be challenging. I have to untangle the material every once in a while and then pull the entire clump through one section at a time. It’s an arm workout, but it makes a very sturdy seat with fewer points of failure. I prefer this method over cutting sections and then having to weave them into the underside.
After each pulling each run of weave through, I gave the rattan an extra tug to snug it up against the rail. Then I pushed each run towards the back of the seat. This kept the weave smooth and prevented waves from developing in the design as I wove toward the front rail.
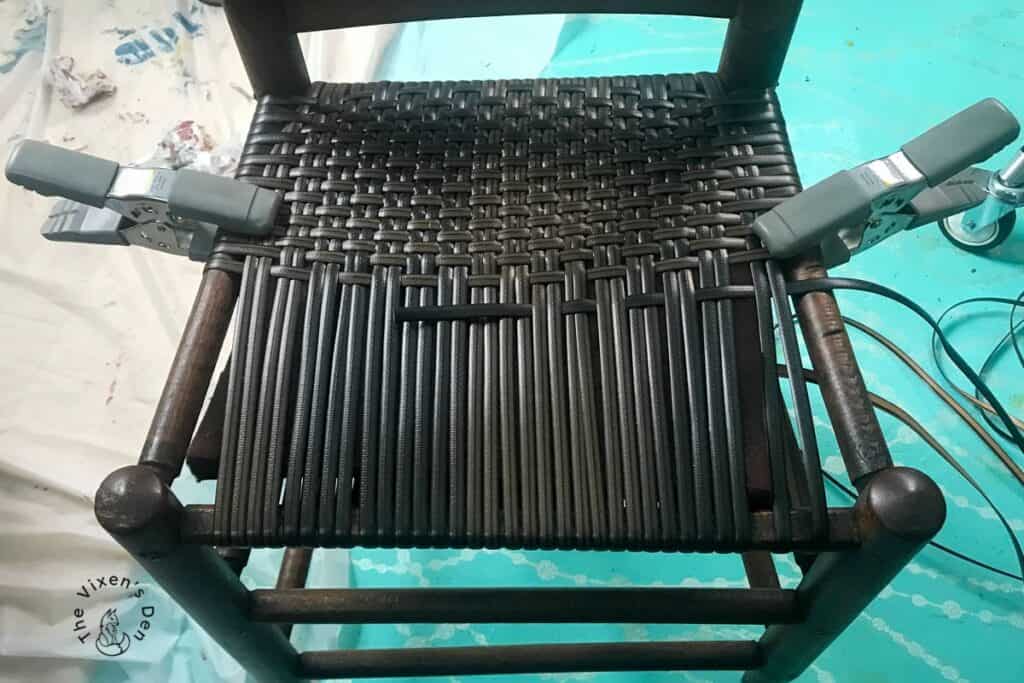
As I got to the last couple of rows along the front rail, I measured and trimmed off the amount of material needed to finish weaving the seat. Once I finished off the last run, I tucked the trailing end under two rows of warp, trimming a little bit off of the ends as needed. Then I used pliers to remove all of my wire clamps.
Correct Scratches
One of the downsides of pulling the material through in one long strand is that it places more stress on the warp strands.

Because I used faux rattan, however, it was easy to repair the damage with some easy tools that I always keep on hand: furniture stain markers and a permanent black ink pen!
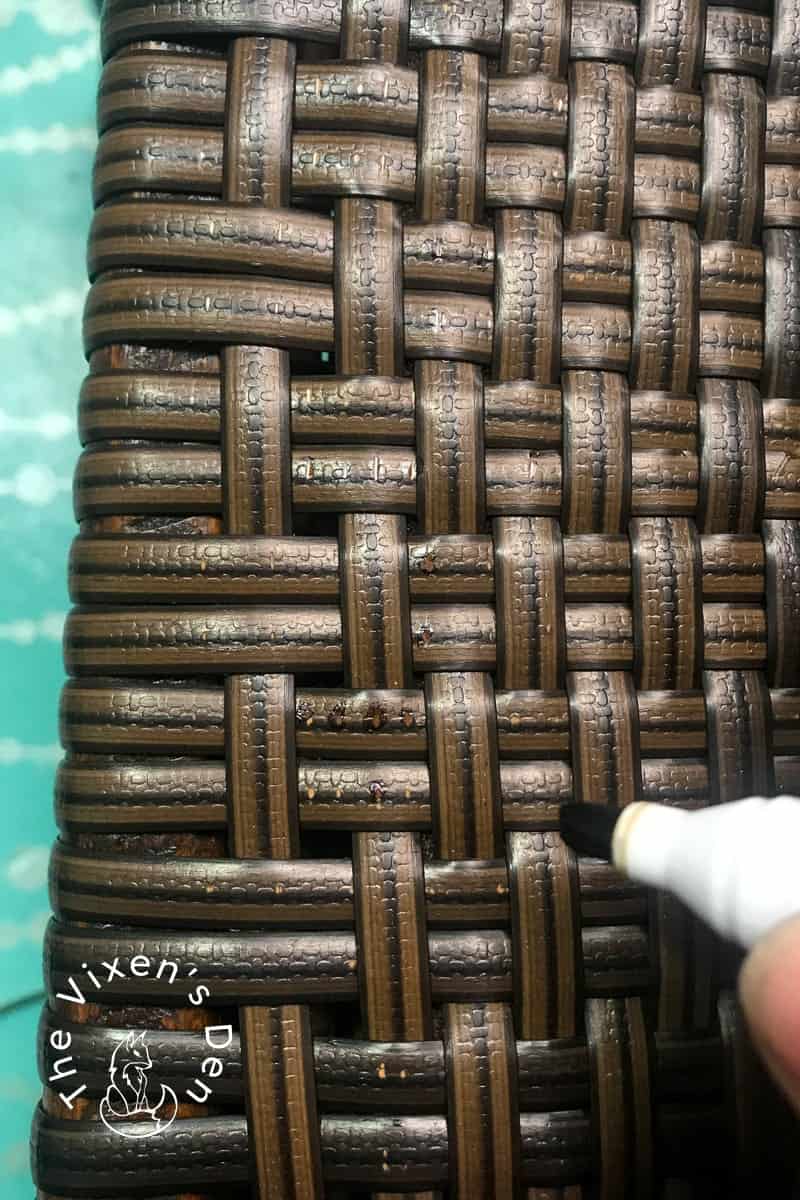
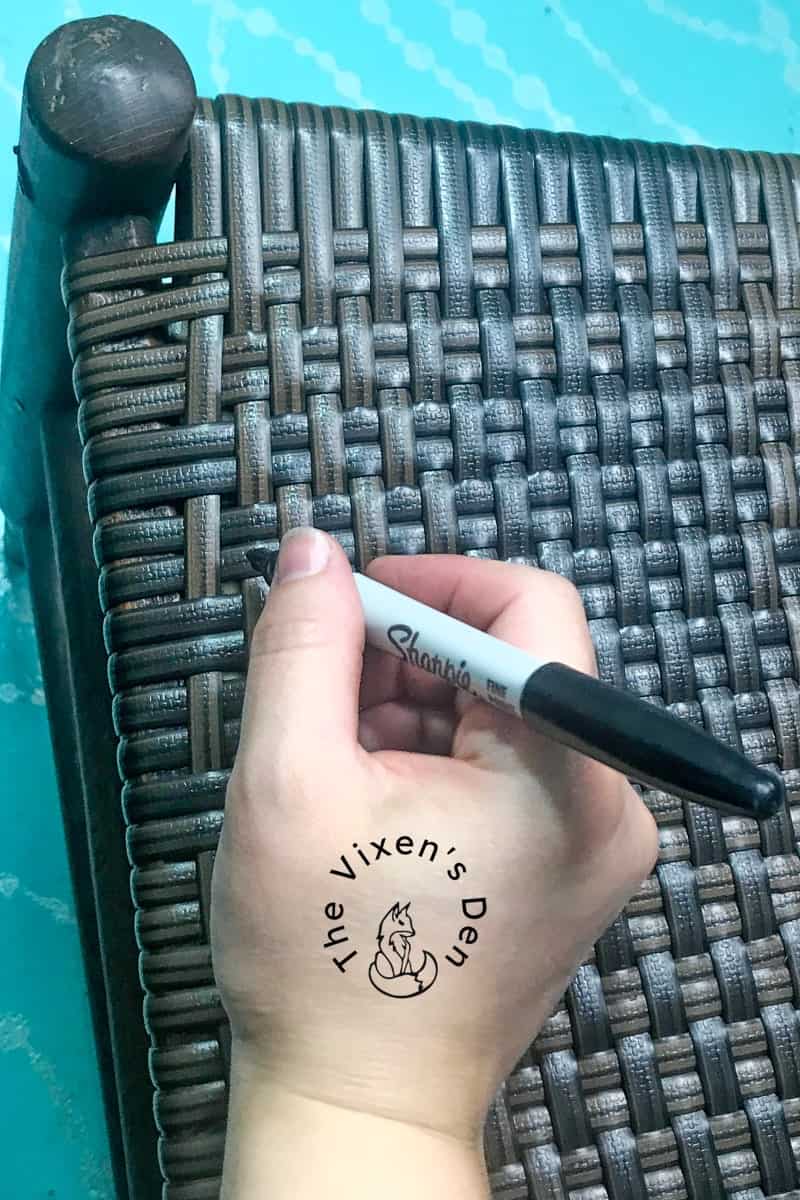
According to the experts, a repair is a success if you can’t see it from six feet away. I don’t think you’ll spot these from six feet away!
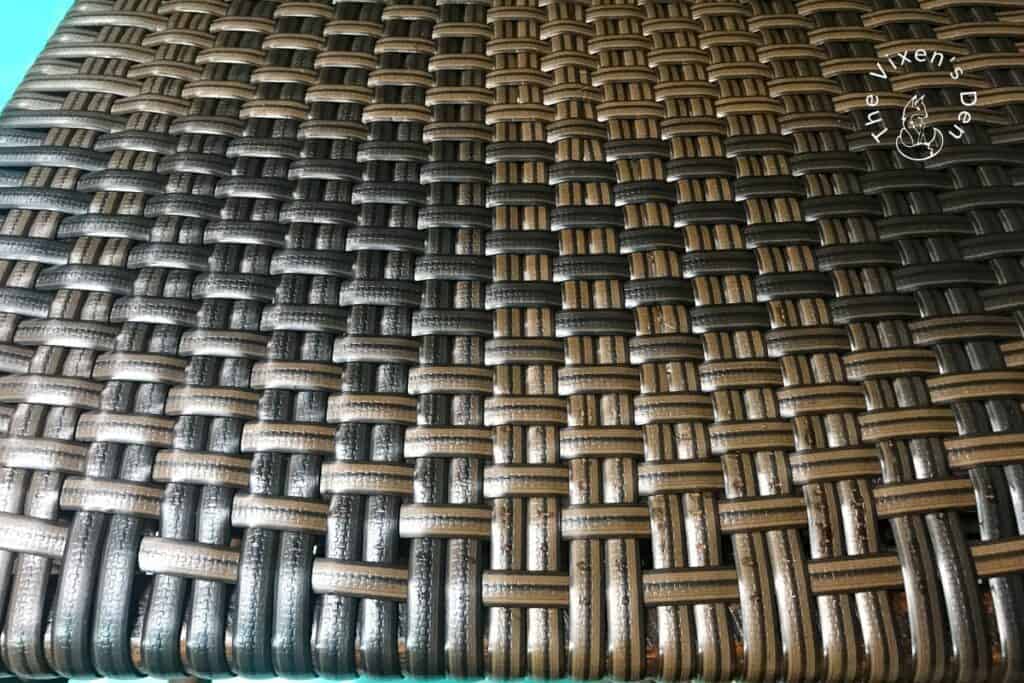
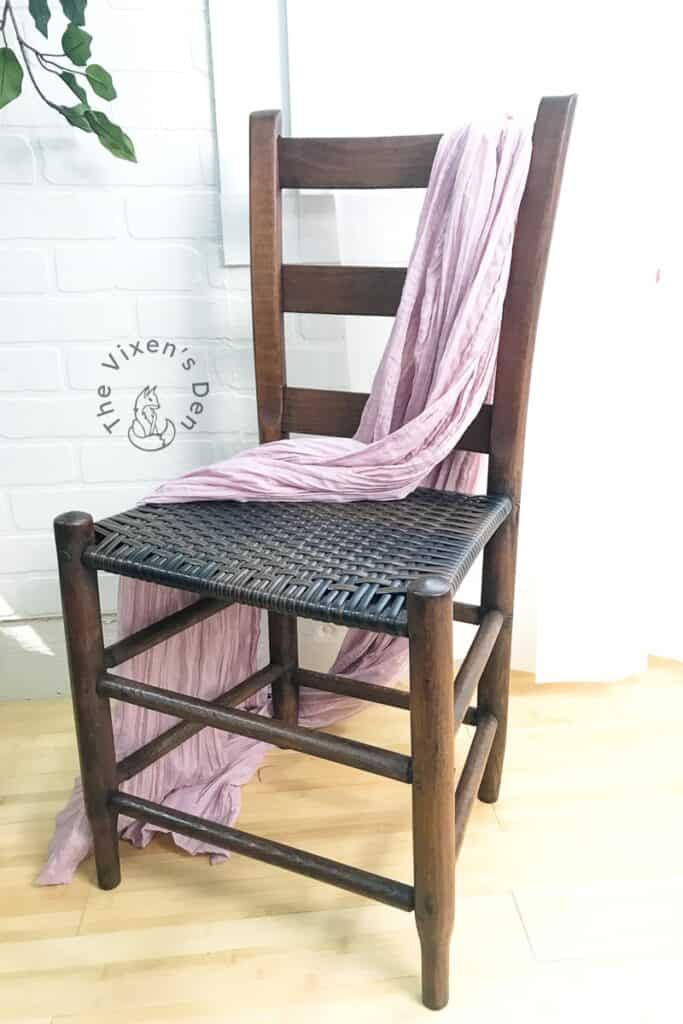
Final Reveal
What a difference! This lovely lady won’t be stuck in the corner again. She’s ready to shine and become a fully functional part of the home once more.

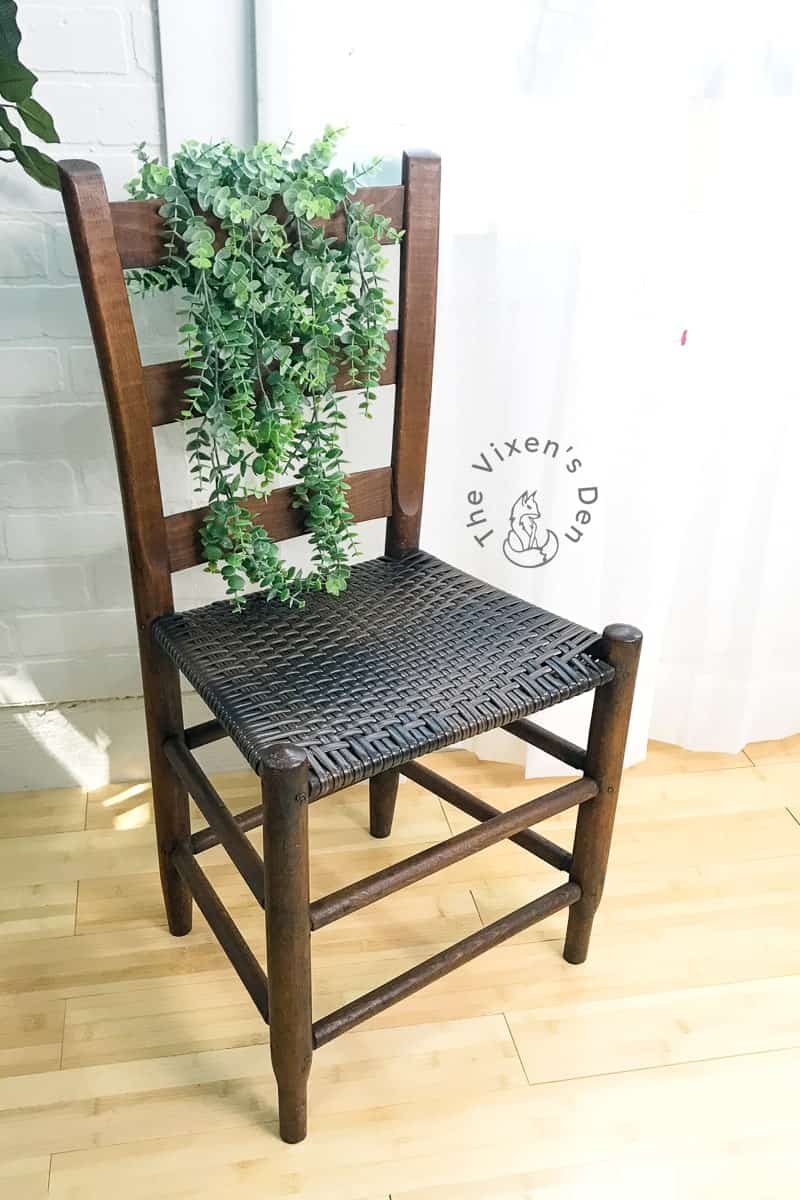
What a difference for this beautiful old chair. Having an opportunity to bring an antique back to life is a privilege that comes with a certain amount of responsibility. I think it’s important to respect the history of the piece while restoring its full functionality.
Thank you so much for stopping by! I’d love to hear about your favorite finish for rejuvenating antique furniture. Do you like the idea of combining classic and modern methods or do you stick to traditional techniques? Or, are you team “paint it!”? Let me know in the comments below. Then, check out the other amazing projects at the link parties below. I know the hostesses will appreciate your visit and comments.
Until next time, have a beautiful and blessed day!


Linked up to these lovely link party hostesses at:
Don’t forget to sign up below so you hear all about the next misadventure! Until then, you may also like this End Table makeover or this Dresser upcycle.

I dont think I understand what the foam is sitting on. The chair turned out great!
Hi Cheryl! The foam is stuffed between the top weave and the bottom weave. Once upon a time, they used to stuff the space with newspaper. Foam is much more comfortable! Thank you so much for stopping by!
GORGEOUS upcycle!! I’d love for you to join us over at the Creative Crafts Linky Party every Wednesday through Sunday
https://creativelybeth.com/team-creative-crafts-linky-party/
Followed and Pinned!
Creatively, Beth